
The Basics:
Pattern: Simplicity 1606 bodice and Sewaholic Cambie skirt, view A
Fabric: 1.5 yds of blue cotton sateen (stash), 1/2 yd red cotton sateen, 1/2 yd gold charmeuse (stash), 1 yd of cotton muslin
Alterations: HAHAHAHAHAHAHA. Lots.
Notions: Zipper. Cording for piping, harvested from pre-purchased piping in my stash (because I hate myself).
Make it again?: Not likely. I love it and will definitely make more character-themed dresses, but not this one. Likely. I don’t know. Who wants one?
Favorite parts: All of it. The bodice came out exactly like I hoped it would, which makes me super, super happy.
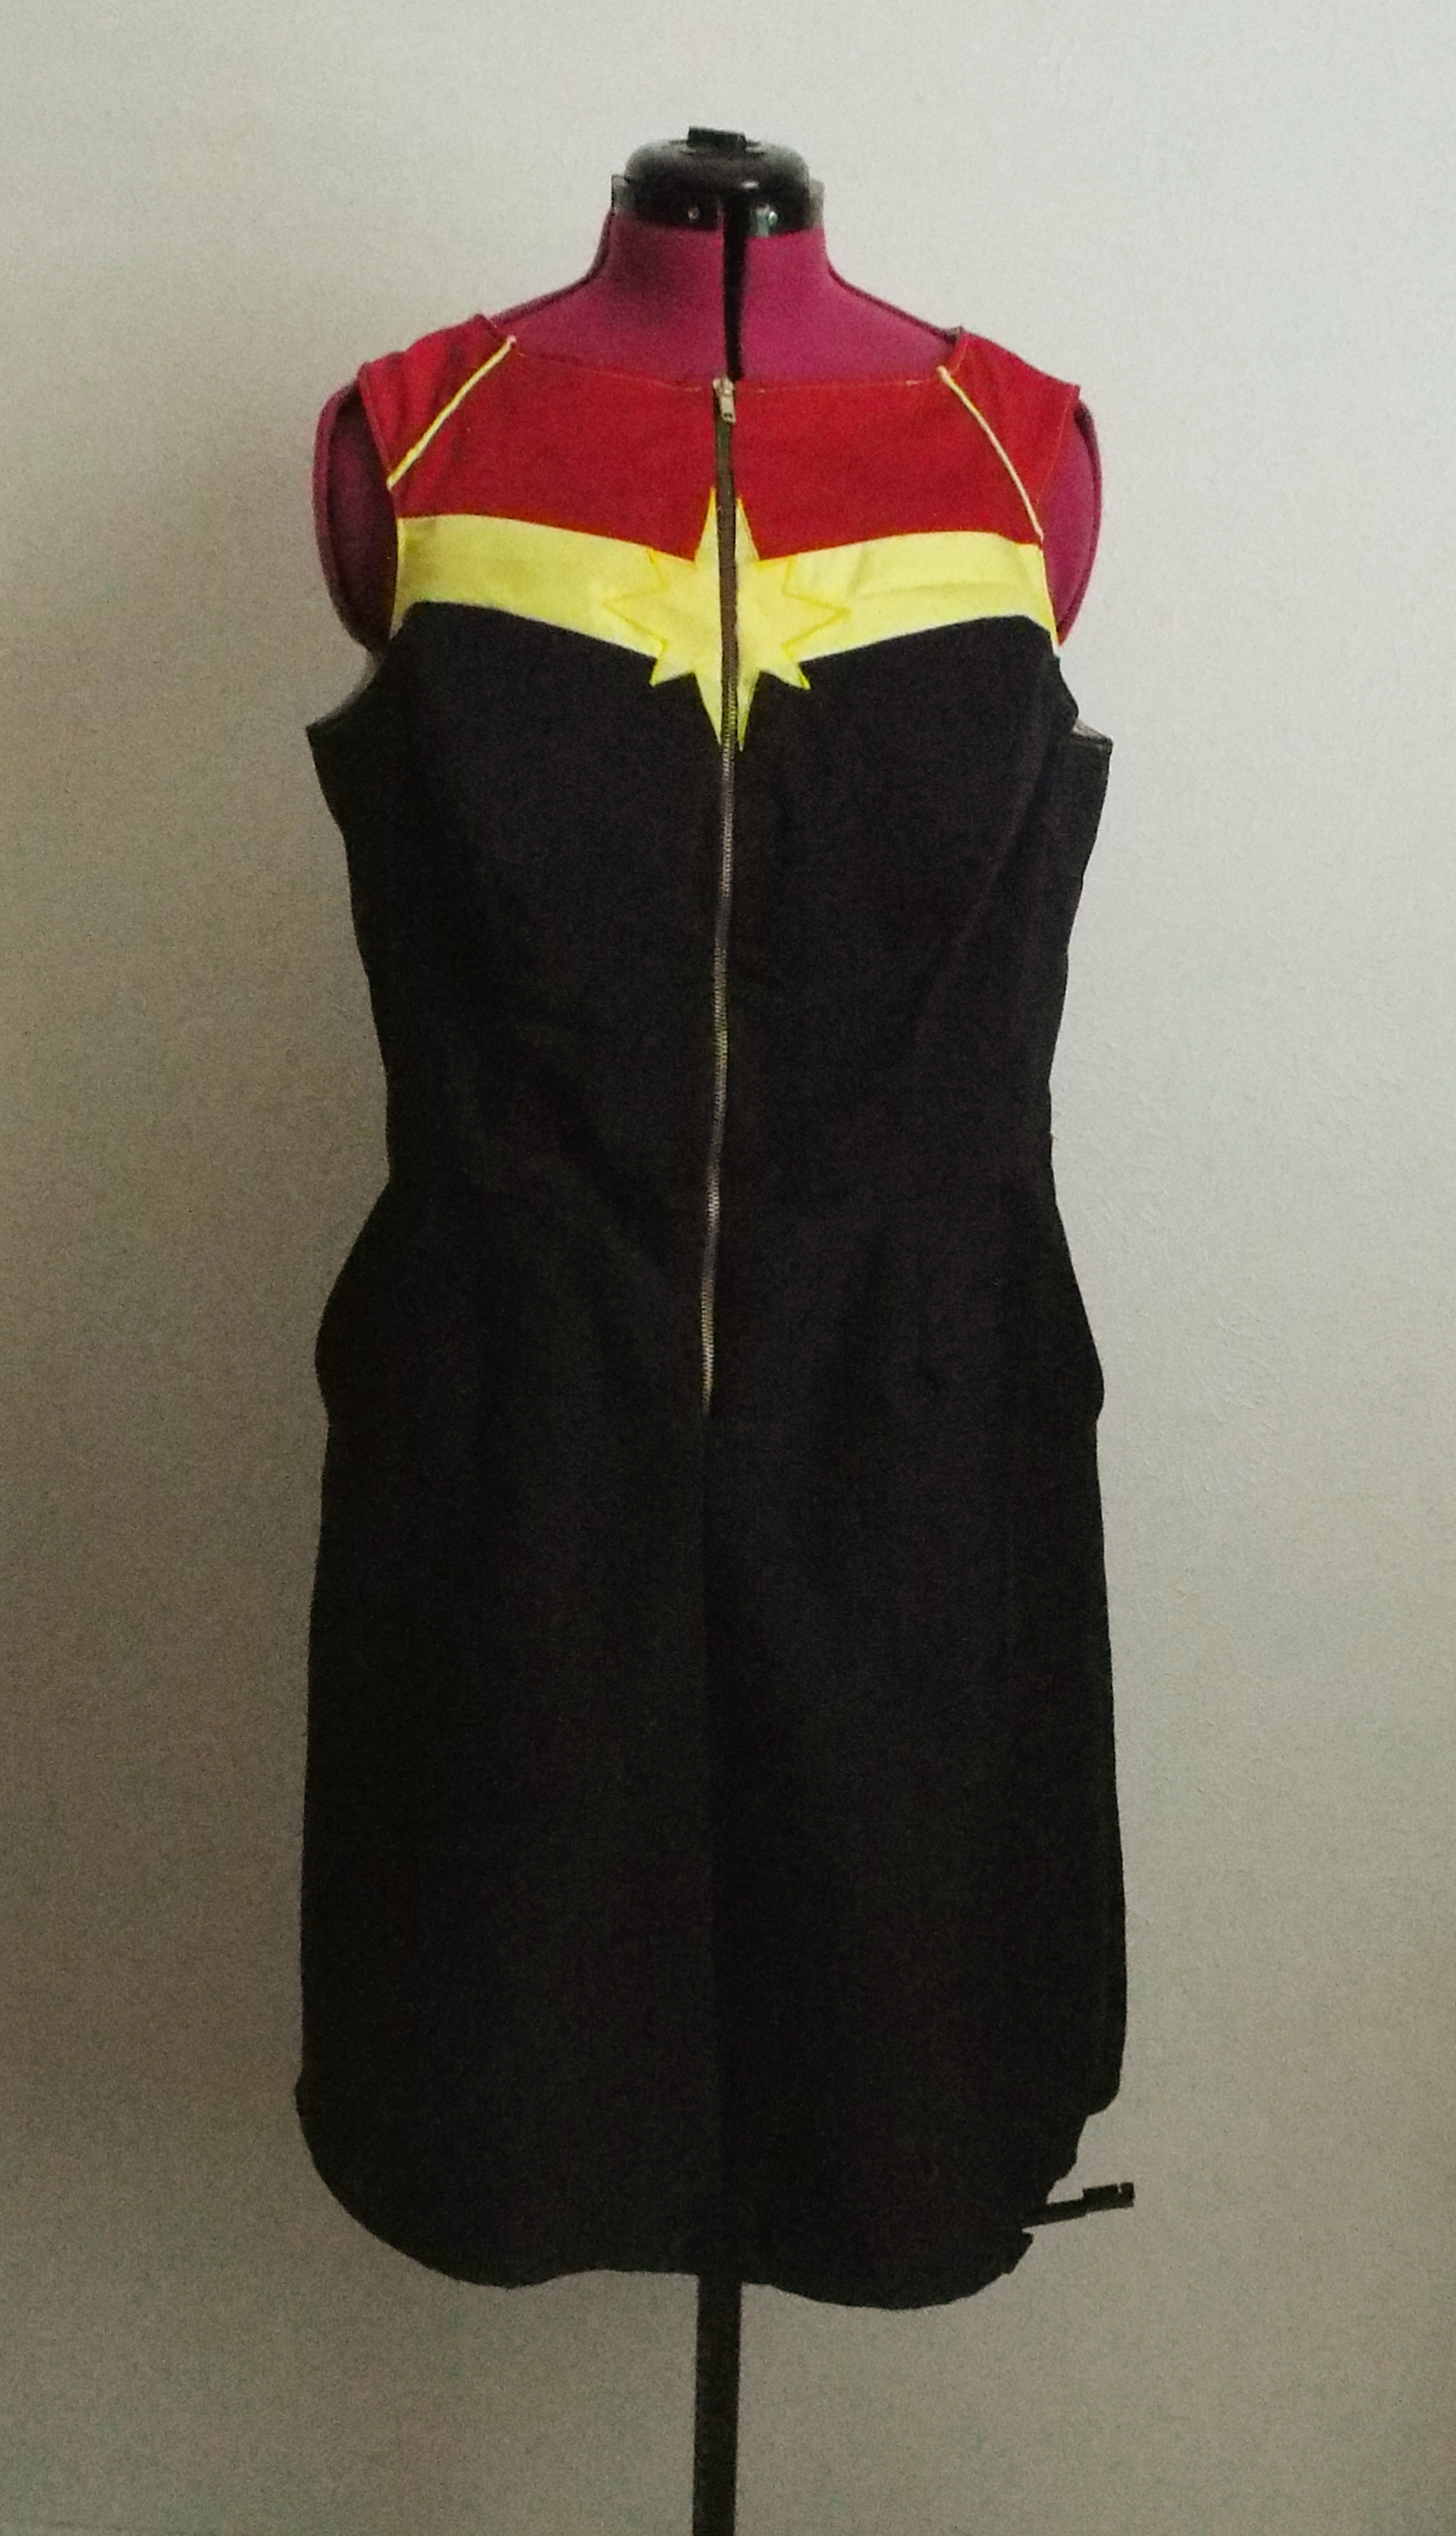
Process: This dress is totally inspired by Contagious Costuming’s beautiful Captain Marvel dress. As soon as I saw it, I wanted it. I thought it was a perfect “frosting” project for this month’s theme, since I’ll probably only wear it out to geeky events. Fortunately, I had a fair amount of fabric in my stash that was perfect for the project.

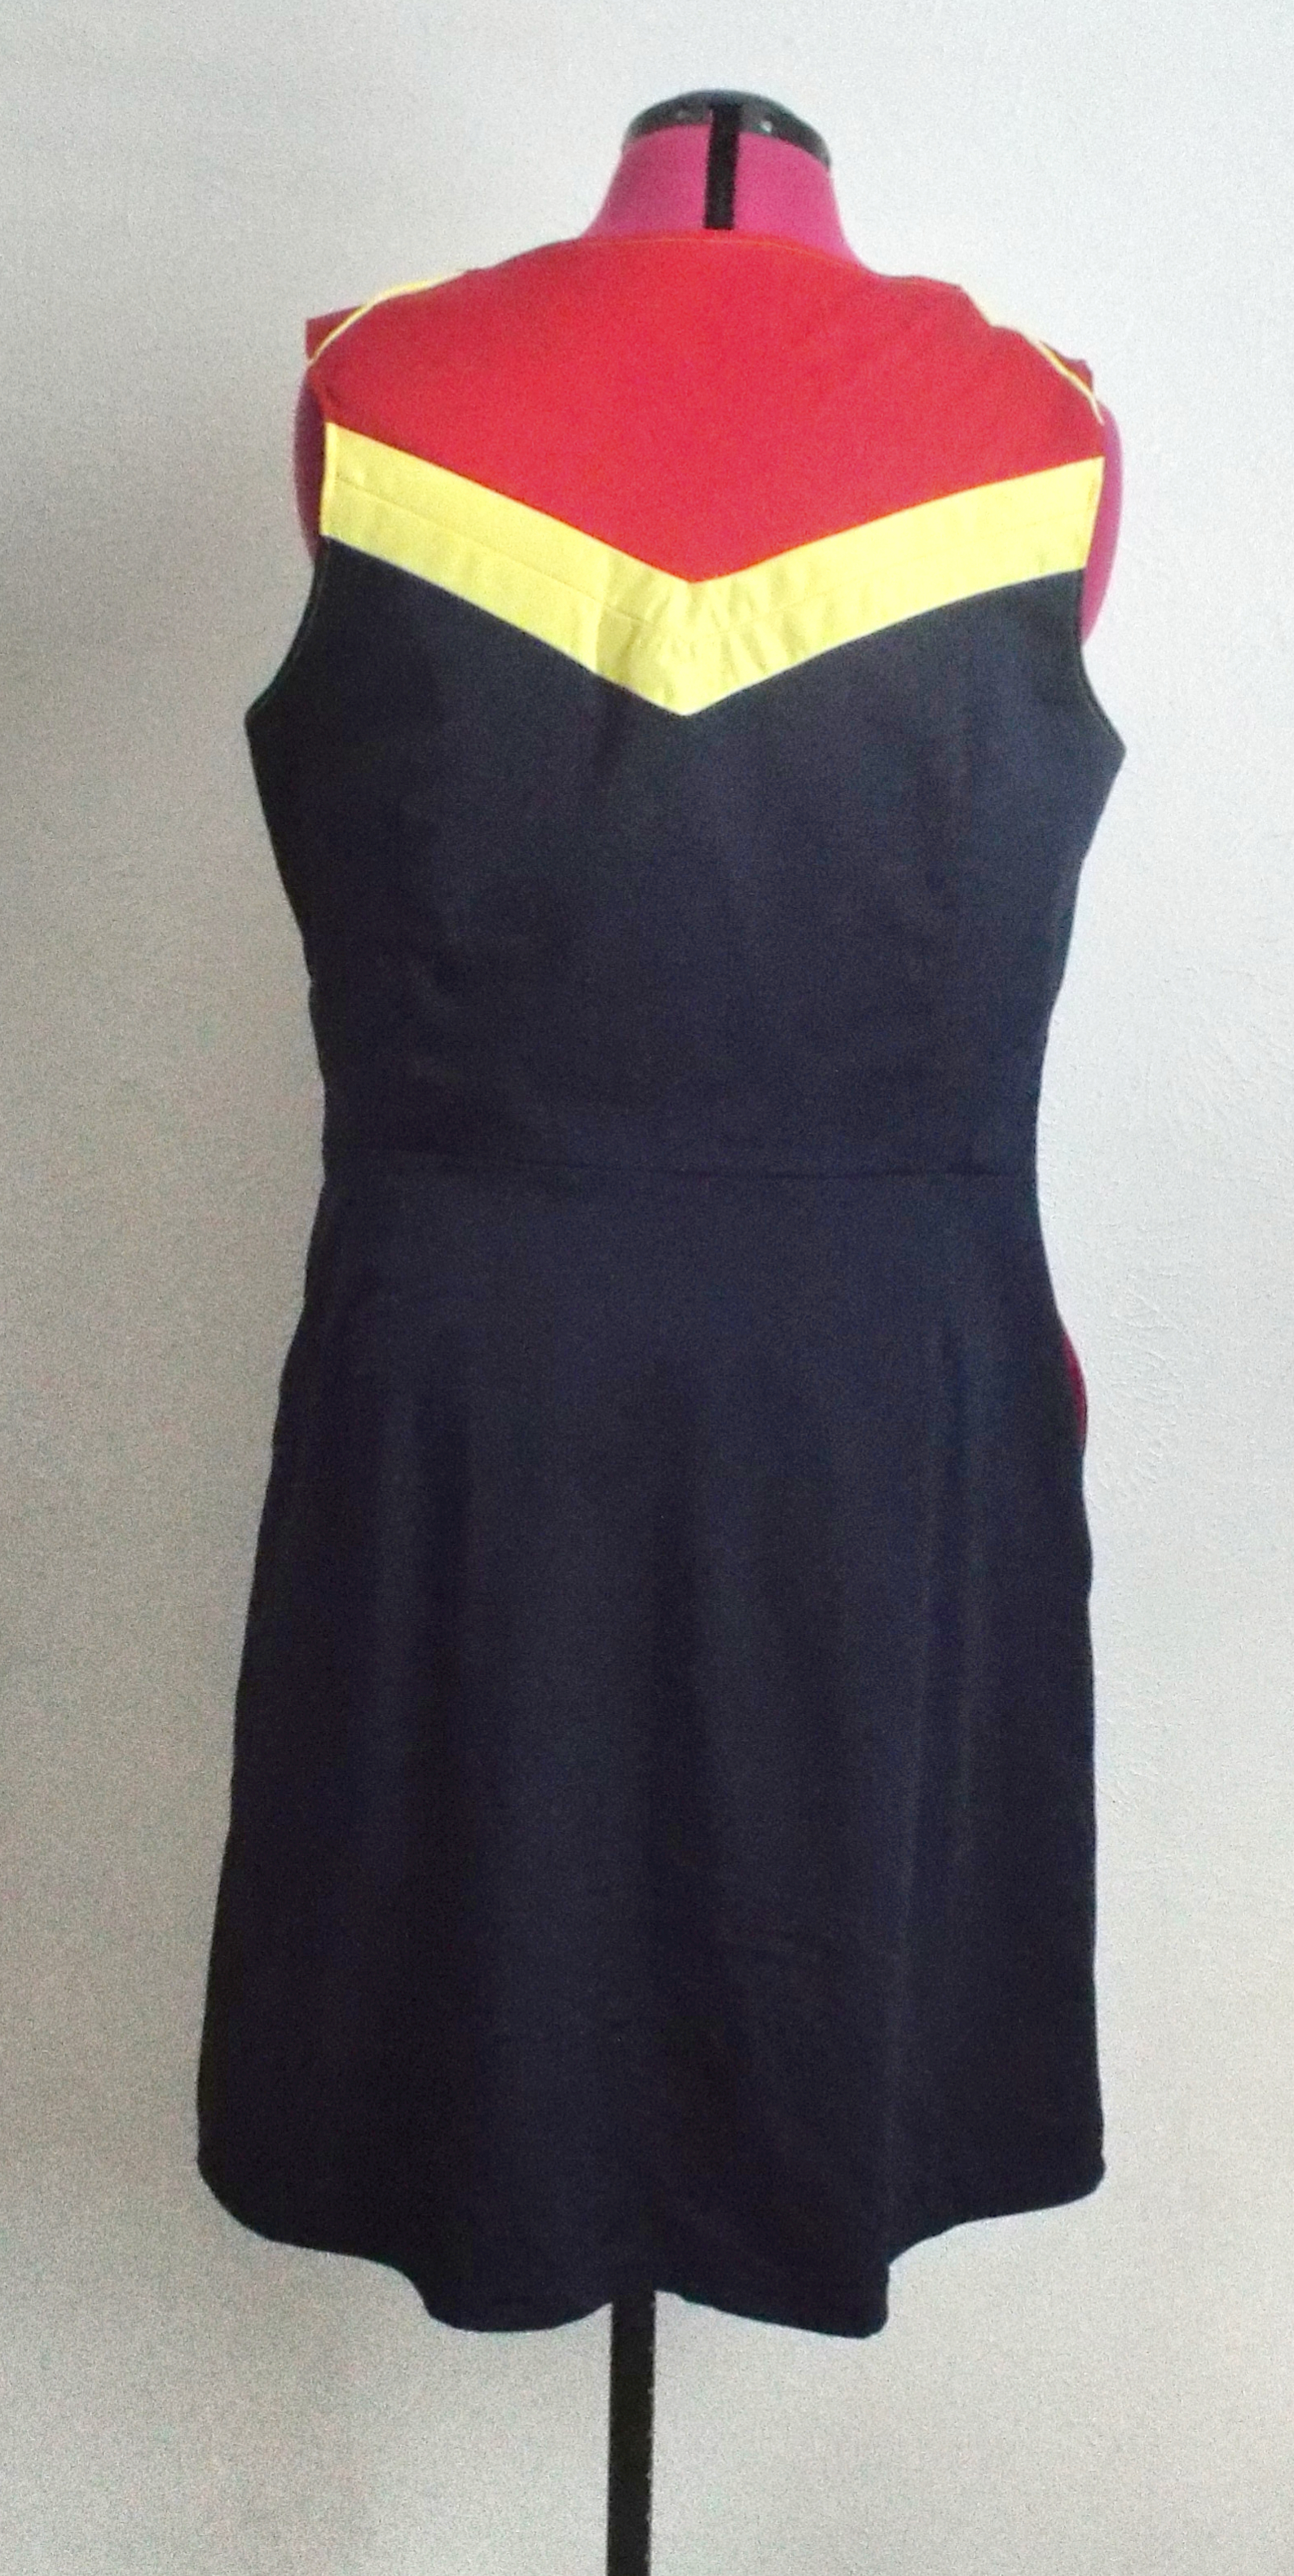
I knew off the bat that I wanted the Cambie skirt. It’s flattering and has pockets! What’s not to love? Figuring out which bodice I wanted was a little more difficult. My initial inclination was to go with Simplicity 1699, and in hindsight, that may have been a better option since the neckline is drafted higher. I opted to go with Simplicity 1606 instead since I had it in my stash and I wanted a little hand holding to perfect the fit of the bodice. For my first muslin (yes, first), I made size 22 since it corresponded to my full bust, but I was swimming in it. Then I went back and made size 16, which corresponds to my high bust. Much better fit, though I still had to adjust for pooling under the bust. This tutorial was a great help in that department.
Once I had the fit figured out, I drew out the design and used my muslin as a pattern. I didn’t want to destroy my good fabric, so I made up a third muslin to test the fit. I went back and forth on adding the faux raglan sleeves, and ultimately decided to include them. I’m very glad I did, because I really like the look of them.
After getting muslin #3 made up, I was ready to make the real deal. It honestly came together pretty quickly and easily since I’d already “made” it so many times. I did underestimate how much blue I needed, so I had to cut the length short by 2 inches. I also had to do some clever folding to get the skirt to work out. Oops.
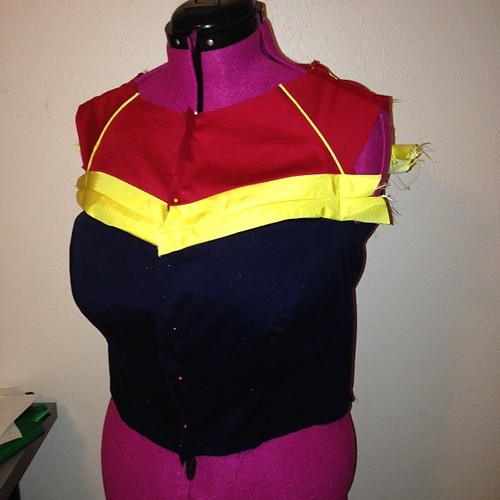
I assembled everything a little counter-intuitively. In a typical dress, you’d make the bodice, make the skirt, then attach the two. I took Contagious Costuming’s advice and assembled the full front then the full back. This made satin stitching the star and installing the zipper much easier than if I went the standard way.
I opted to reuse my first muslin for the lining. I just lined the bodice since I wanted this to be comfy for summer cons. Yay cotton. I attached the lining to the zipper and then finished off the sleeves using this snazzy technique from Colette.
At this point, I thought that I’d just be able to add the collar and be done. HA. No. After drafting and creating a collar that I was oh-so-proud-of, I basted it in place… and felt like my head was swimming in it. Despite being large in stature, I have a tiny head. Much sadness (especially after making my own bias tape and piping. Grrr). So I decided to sacrifice the collar (though my lovely fellow Monthly Stitchers suggested making a jacket, so that’s happening). Still, that left me with the issue of how to finish the neck without seam ripping. I opted to press my seam allowances under and top stitch it down. I also top stitched the edges of the arm holes for matchiness.

Other thoughts: Even with all that work, I’m super proud of this dress. It’s hella comfy and I absolutely love how it turned out. I didn’t get finished with it in time for Fan Appreciation Day (I actually bailed since didn’t want the temptation to spend money), but I did wear it to Friday of A-fest and styled my hair after Captain Marvel’s fabulous faux-hawk from the 2012 run. I also nearly died when Kelly Sue complimented my dress.

And now for some obligatory dress form pictures.

I’d really love to make more geeky character-themed dresses in the future. I always forget how comfortable they are, and they’re just as much fun as cosplay. Rogue and Wonder Woman dresses are definitely in my future!

I love this dress so much. I can see this design working well for a Hawkeye themed dress, even just switching out colors. Awesome job as always!
Thanks! Oooh, I love the idea of Hawkeye dress. [adds to list]
This is just freaking awesome. And as a bonus looks super comfy. *runs off to plan designing something similar, despite having no time for that*
Thanks! It’s super comfortable. I think I’m going to start incorporating more of these dresses into my con rotation. They’d be great for Sundays/I-can’t-stand-to-wear-a-wig-again times!
Such a lovely dress. The details really make the differance.
Thanks, Kara! 🙂
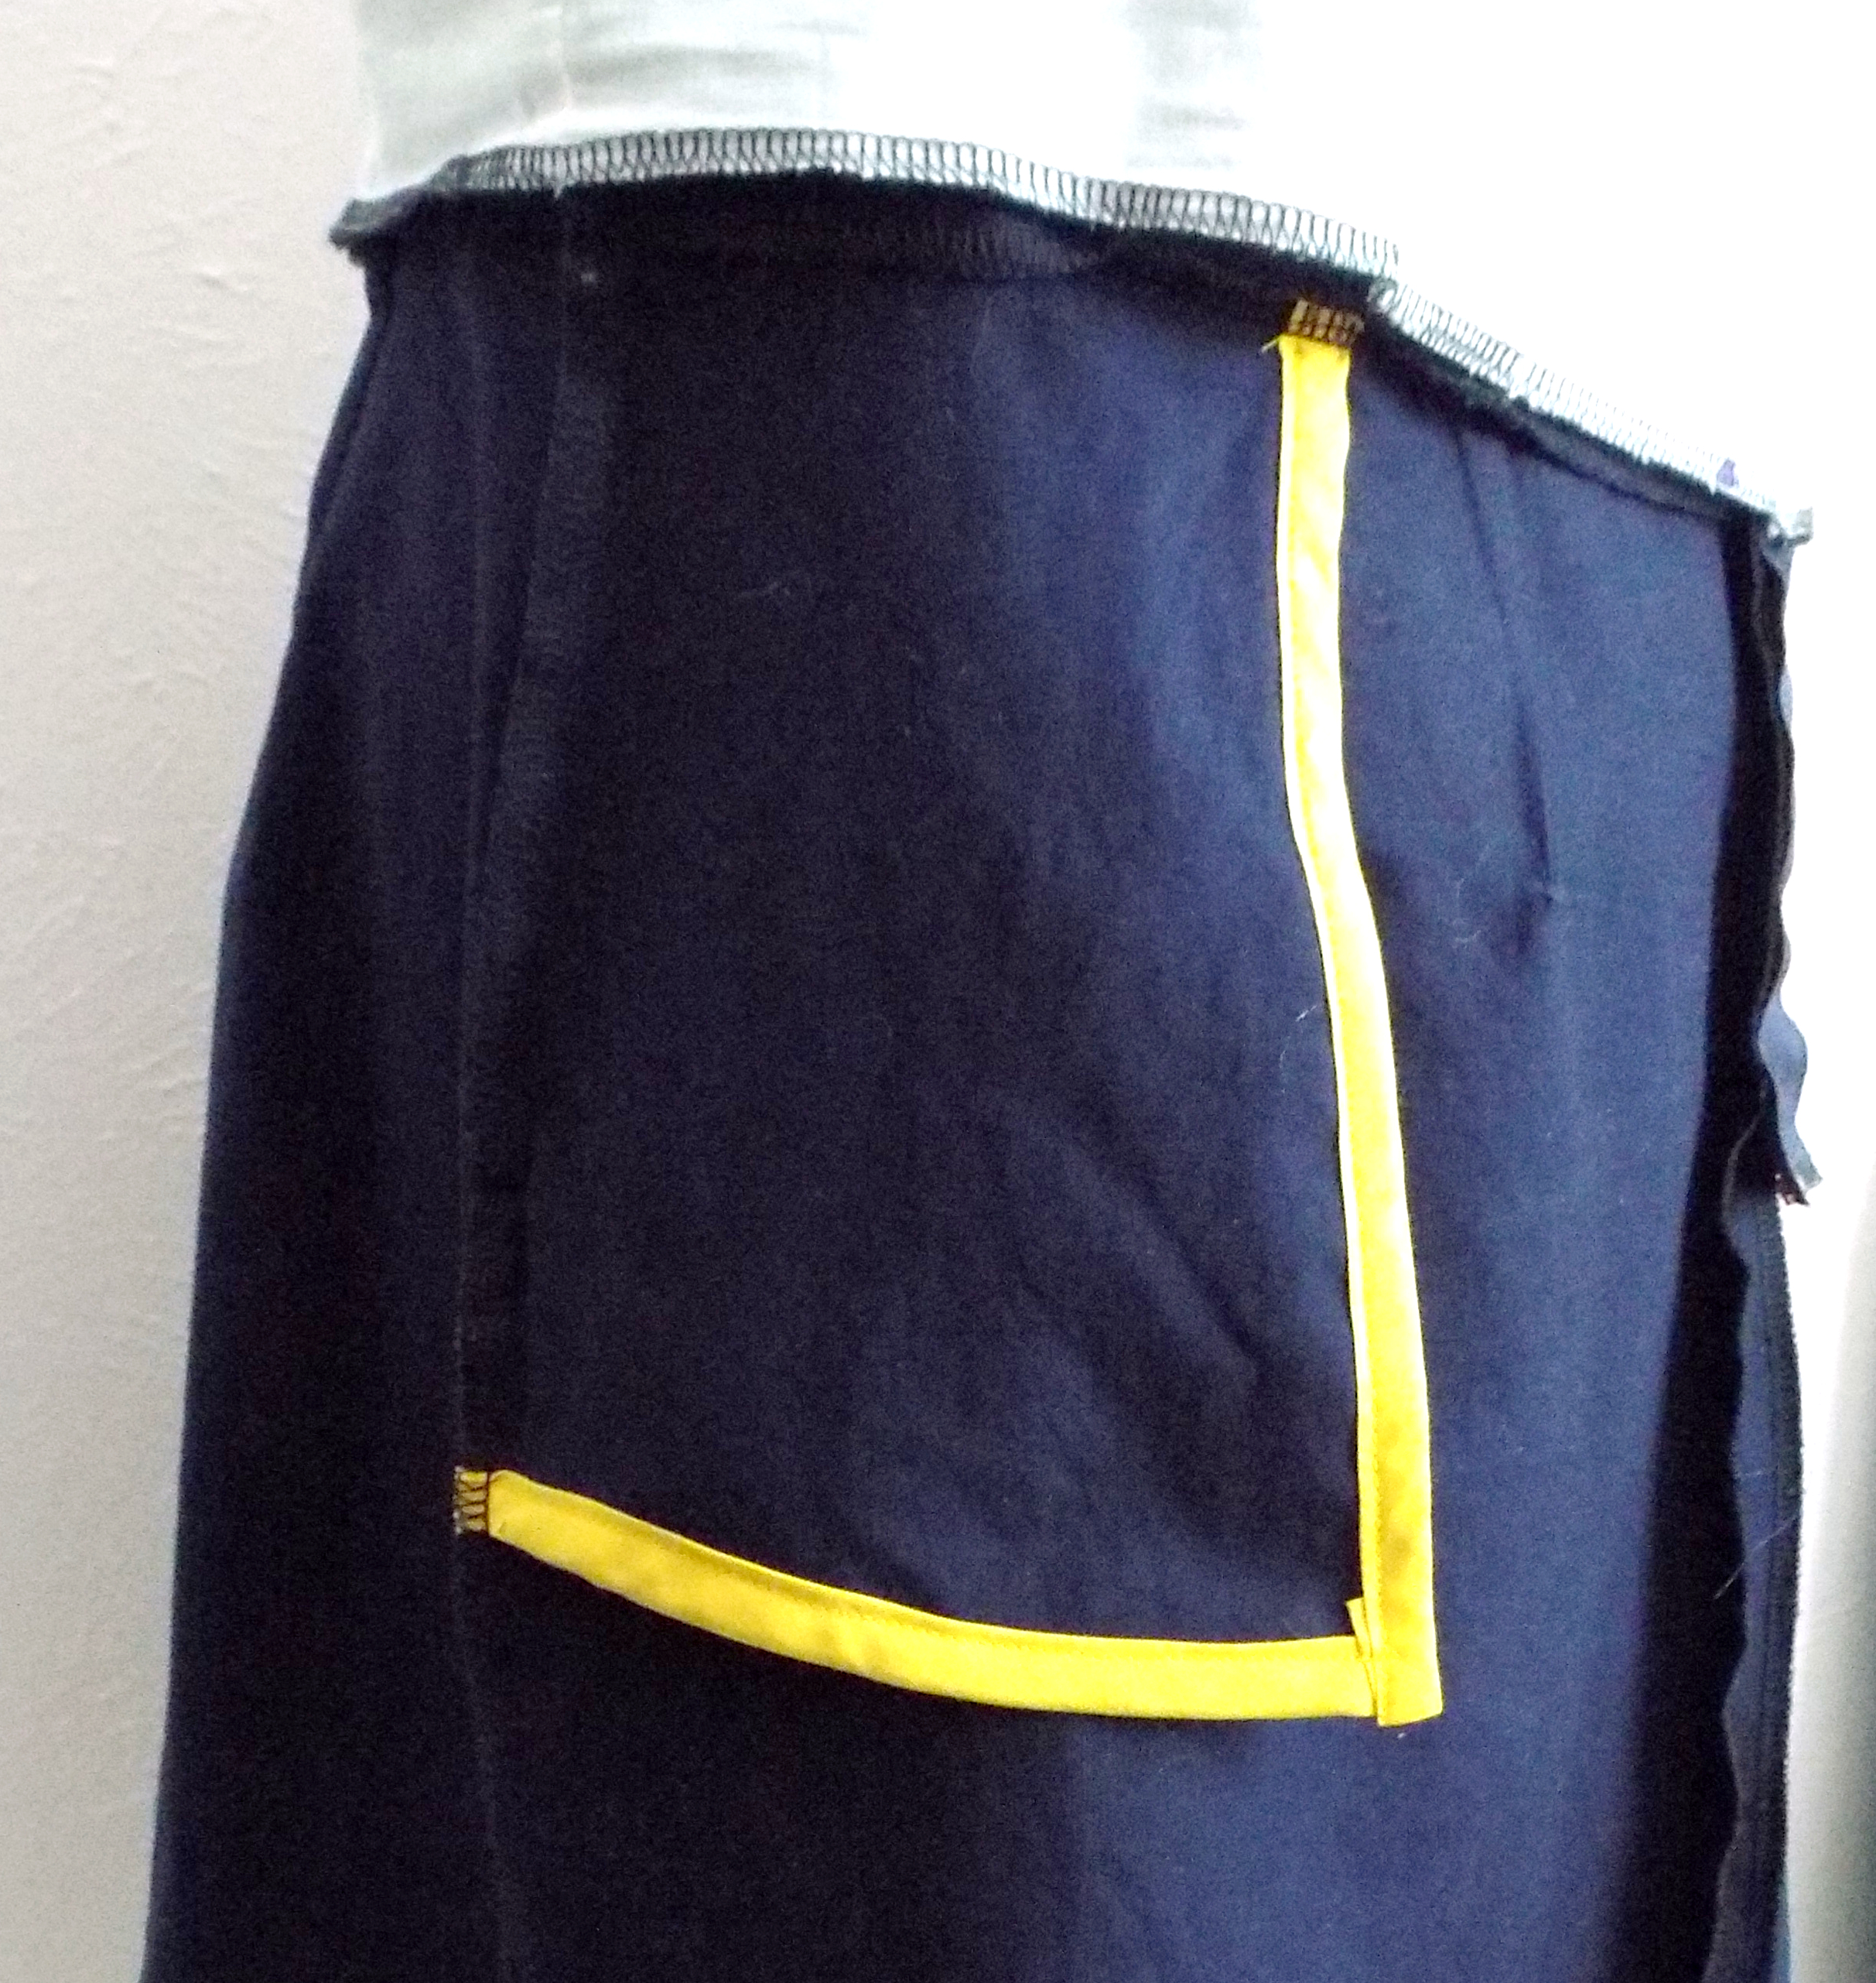
Love this dress especially the red inside pocket! Glad it’s comfy, it sure looks very comfortable 🙂 can’t wait to see more dresses!!
Jessica
the.pyreflies.org
Thanks, Jessica! The red part of the pocket was actually thanks to a mistake. I didn’t quite have enough fabric to eek out the whole thing in blue, so the red made up the difference. I rather like it, though!
Oh my goodness. Beautiful work!! I would love to know how much you would charge for this?? I want it so badly!
Thank you! I’d have to do some pricing to give you an accurate estimate, since most of this was already in my fabric stash. I’m closed on commissions right now, but I hope to open up again sometime closer to the end of the year. Feel free to PM (contact form is on the About page) and we can chat details 🙂
I absolutely love that dress! I wish I had the skill to make one of my own!