
Completed: April 2023
Debuted: Anime Detour 2023
Photographers: WildMomo Photography, Auden Photography
Why This Costume:
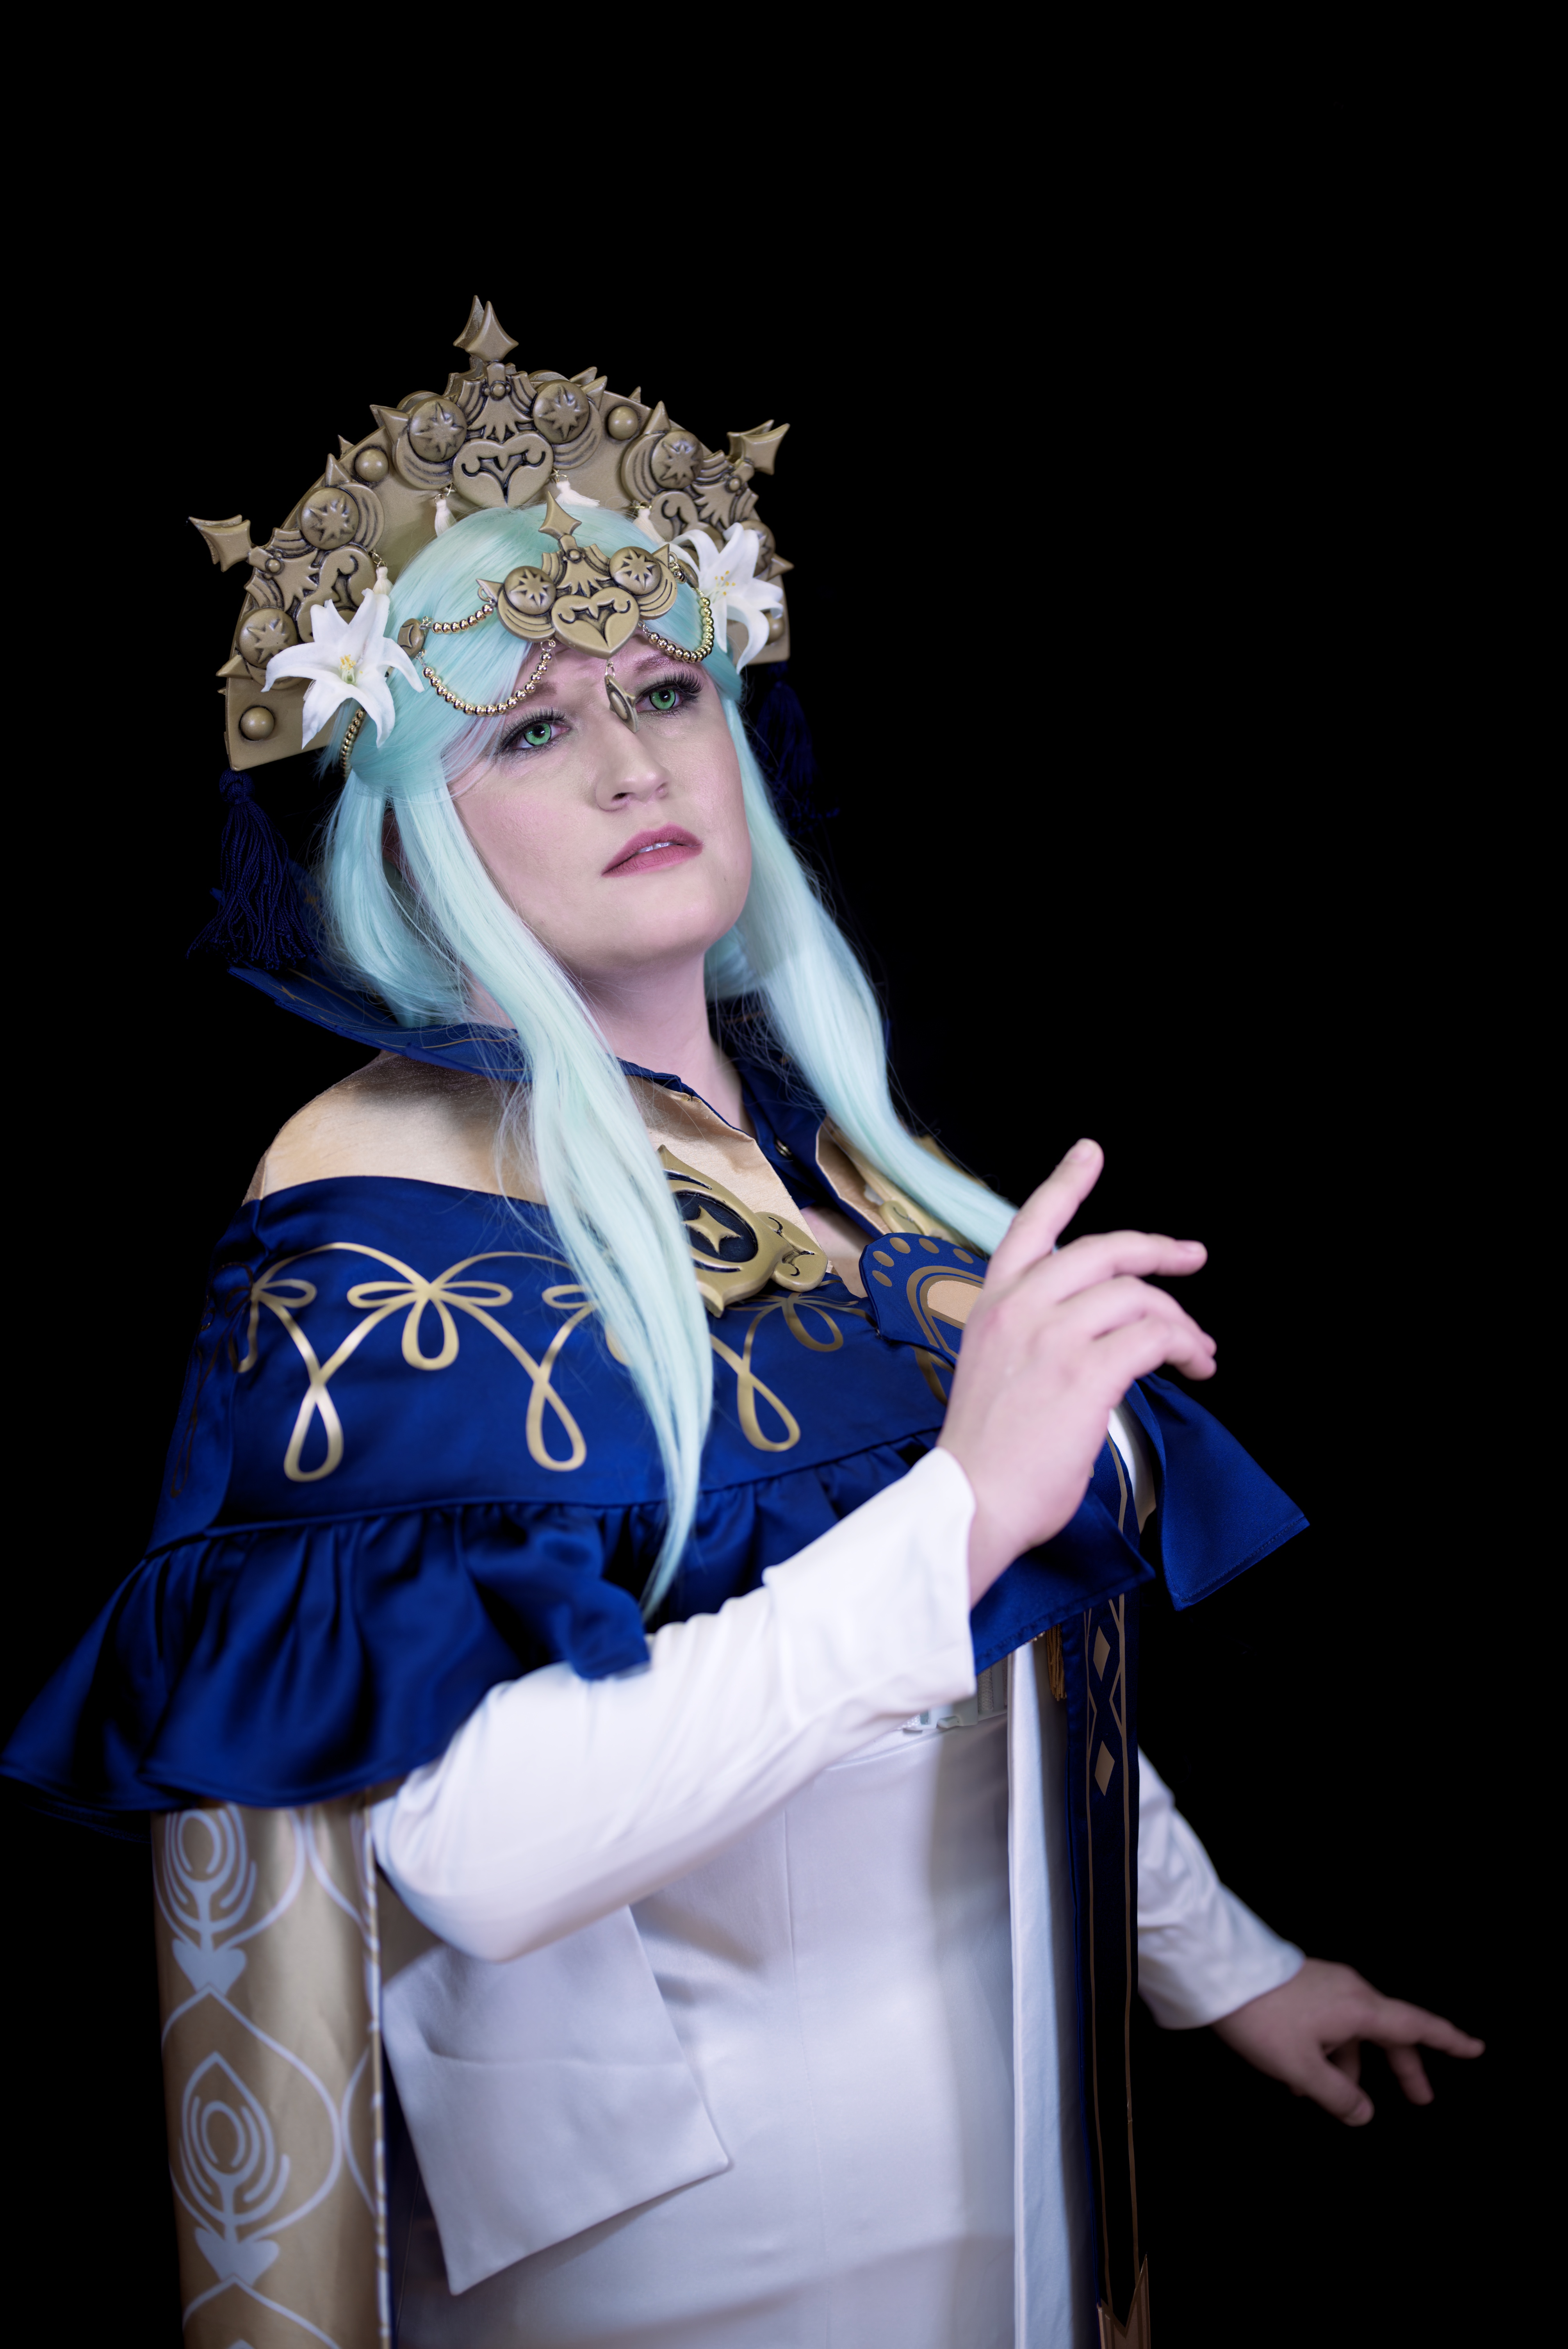
As I mentioned over on Rhea’s portfolio entry, this hot dragon pope’s design always appealed to me. What prompted me to go for it was inheriting several of her pieces from Lutavia Cosplay. Lutavia had The Dangerous Ladies resin pieces for a different iteration of Rhea, and when they decided to table the project, they offered the pieces to me. I need remarkably little incentive to pick up a new project, especially if it’s Fire Emblem. So with her super fiddly bits started, I set out to make the rest of the costume!
Purchased Pieces:
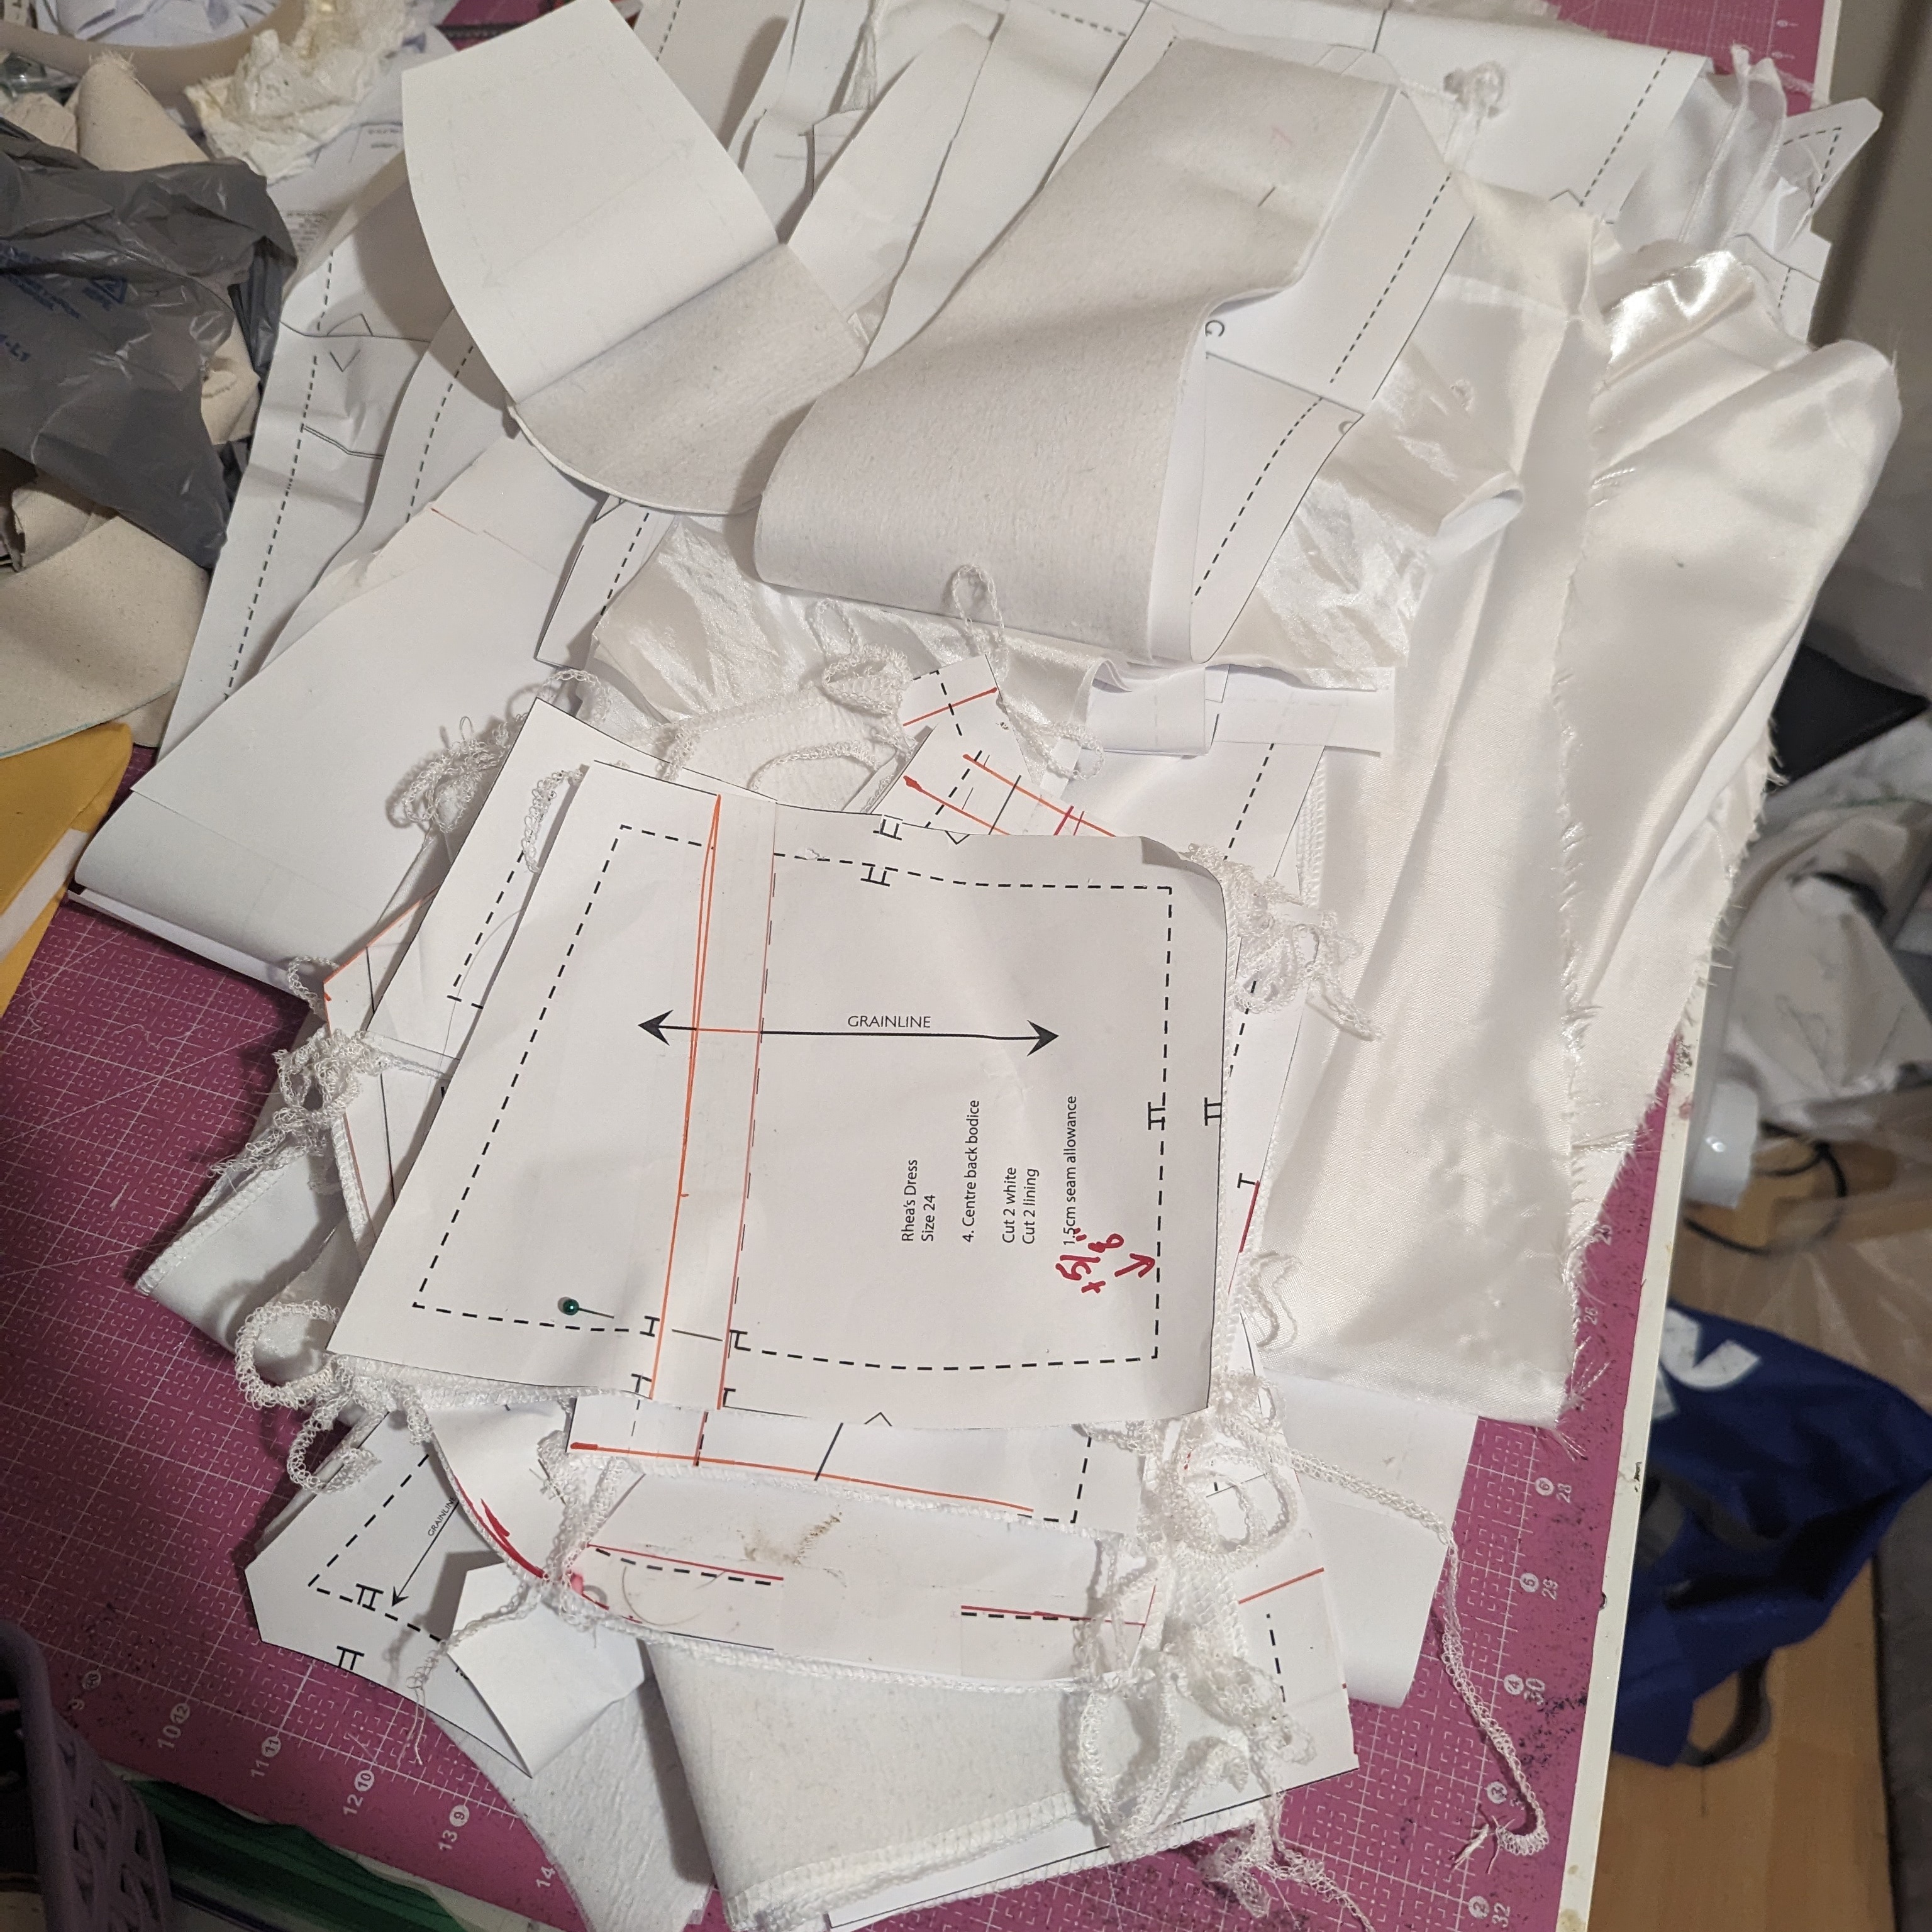
Patterns Used:
Tutorials and Related Links:
- Full Bust Adjustment on a Strapless Bodice
- Dangerous Ladies Quick Finishing Guide
- Rhea Twitter Build Thread
How I Made it:
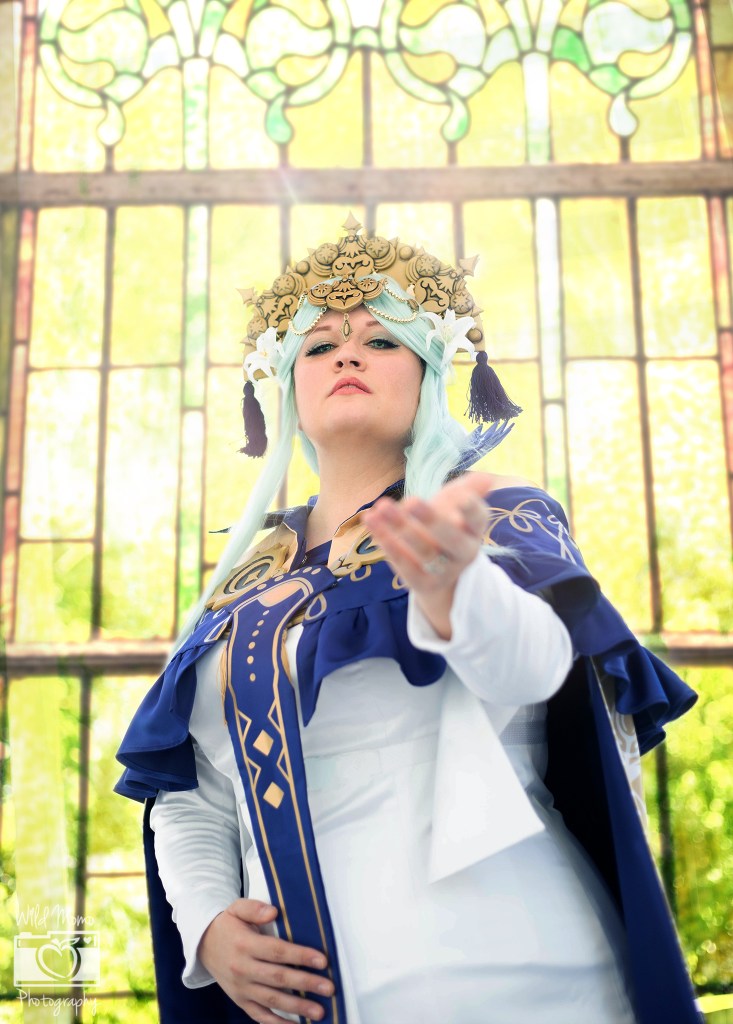
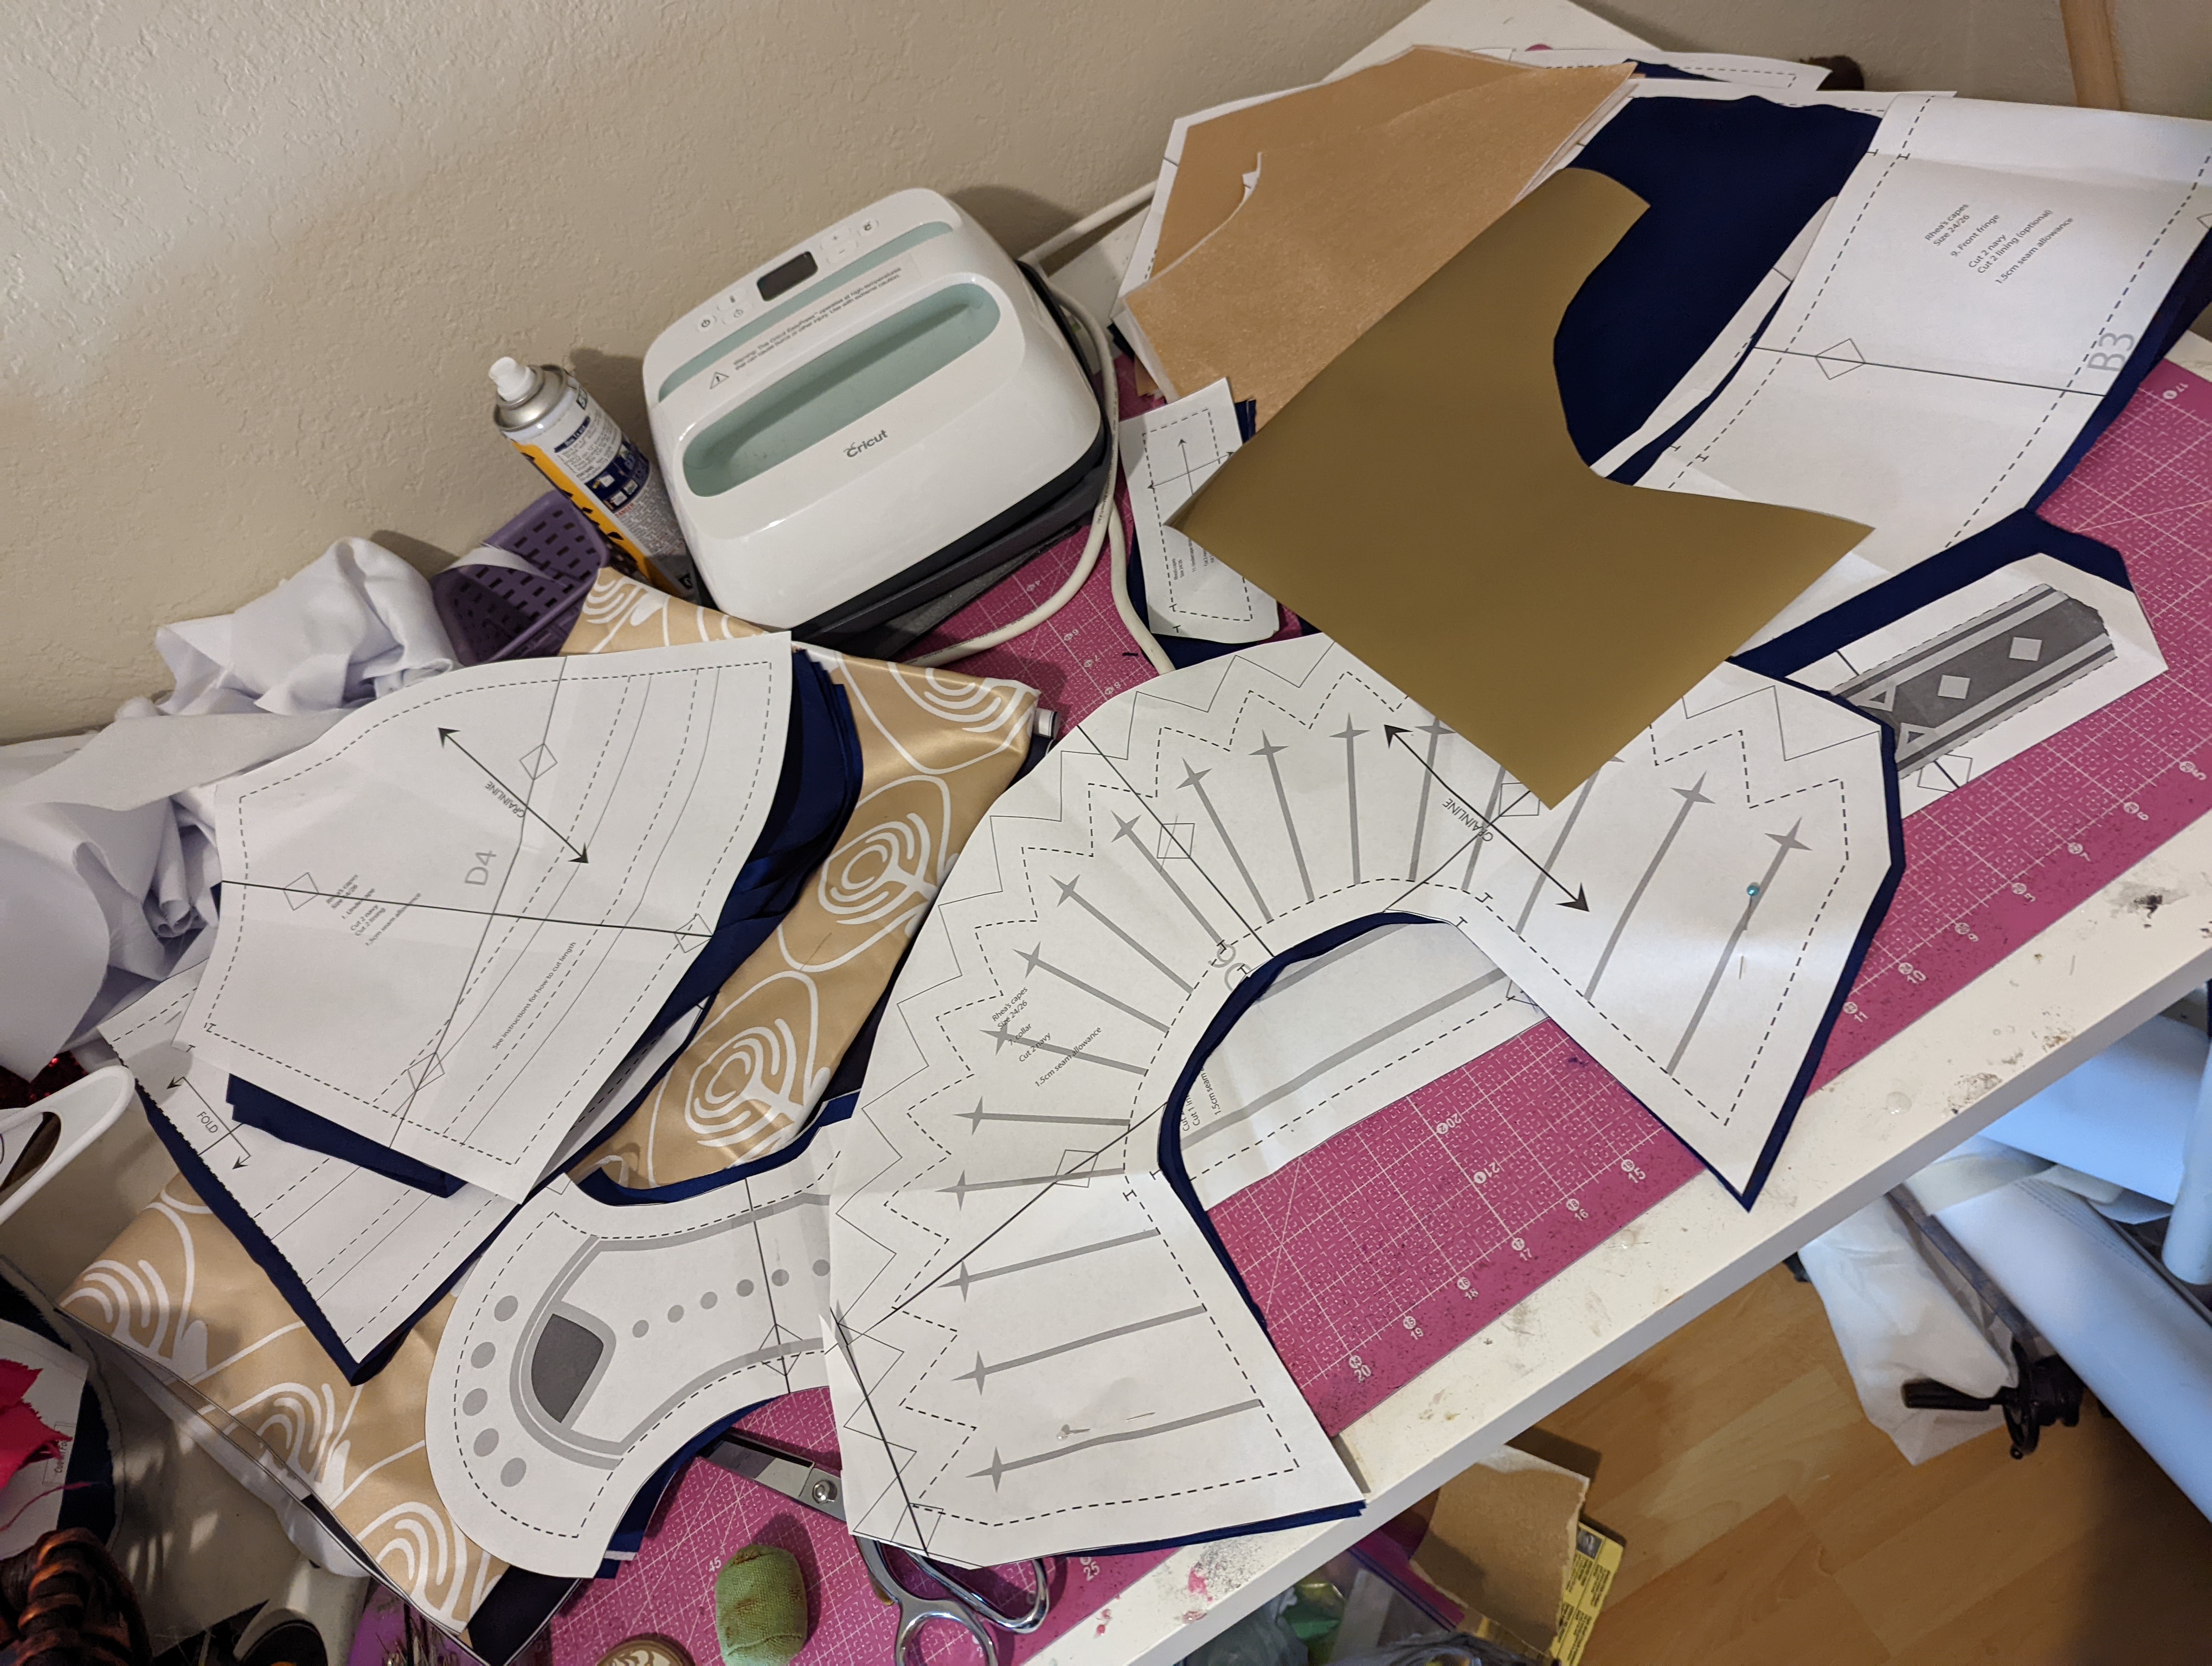
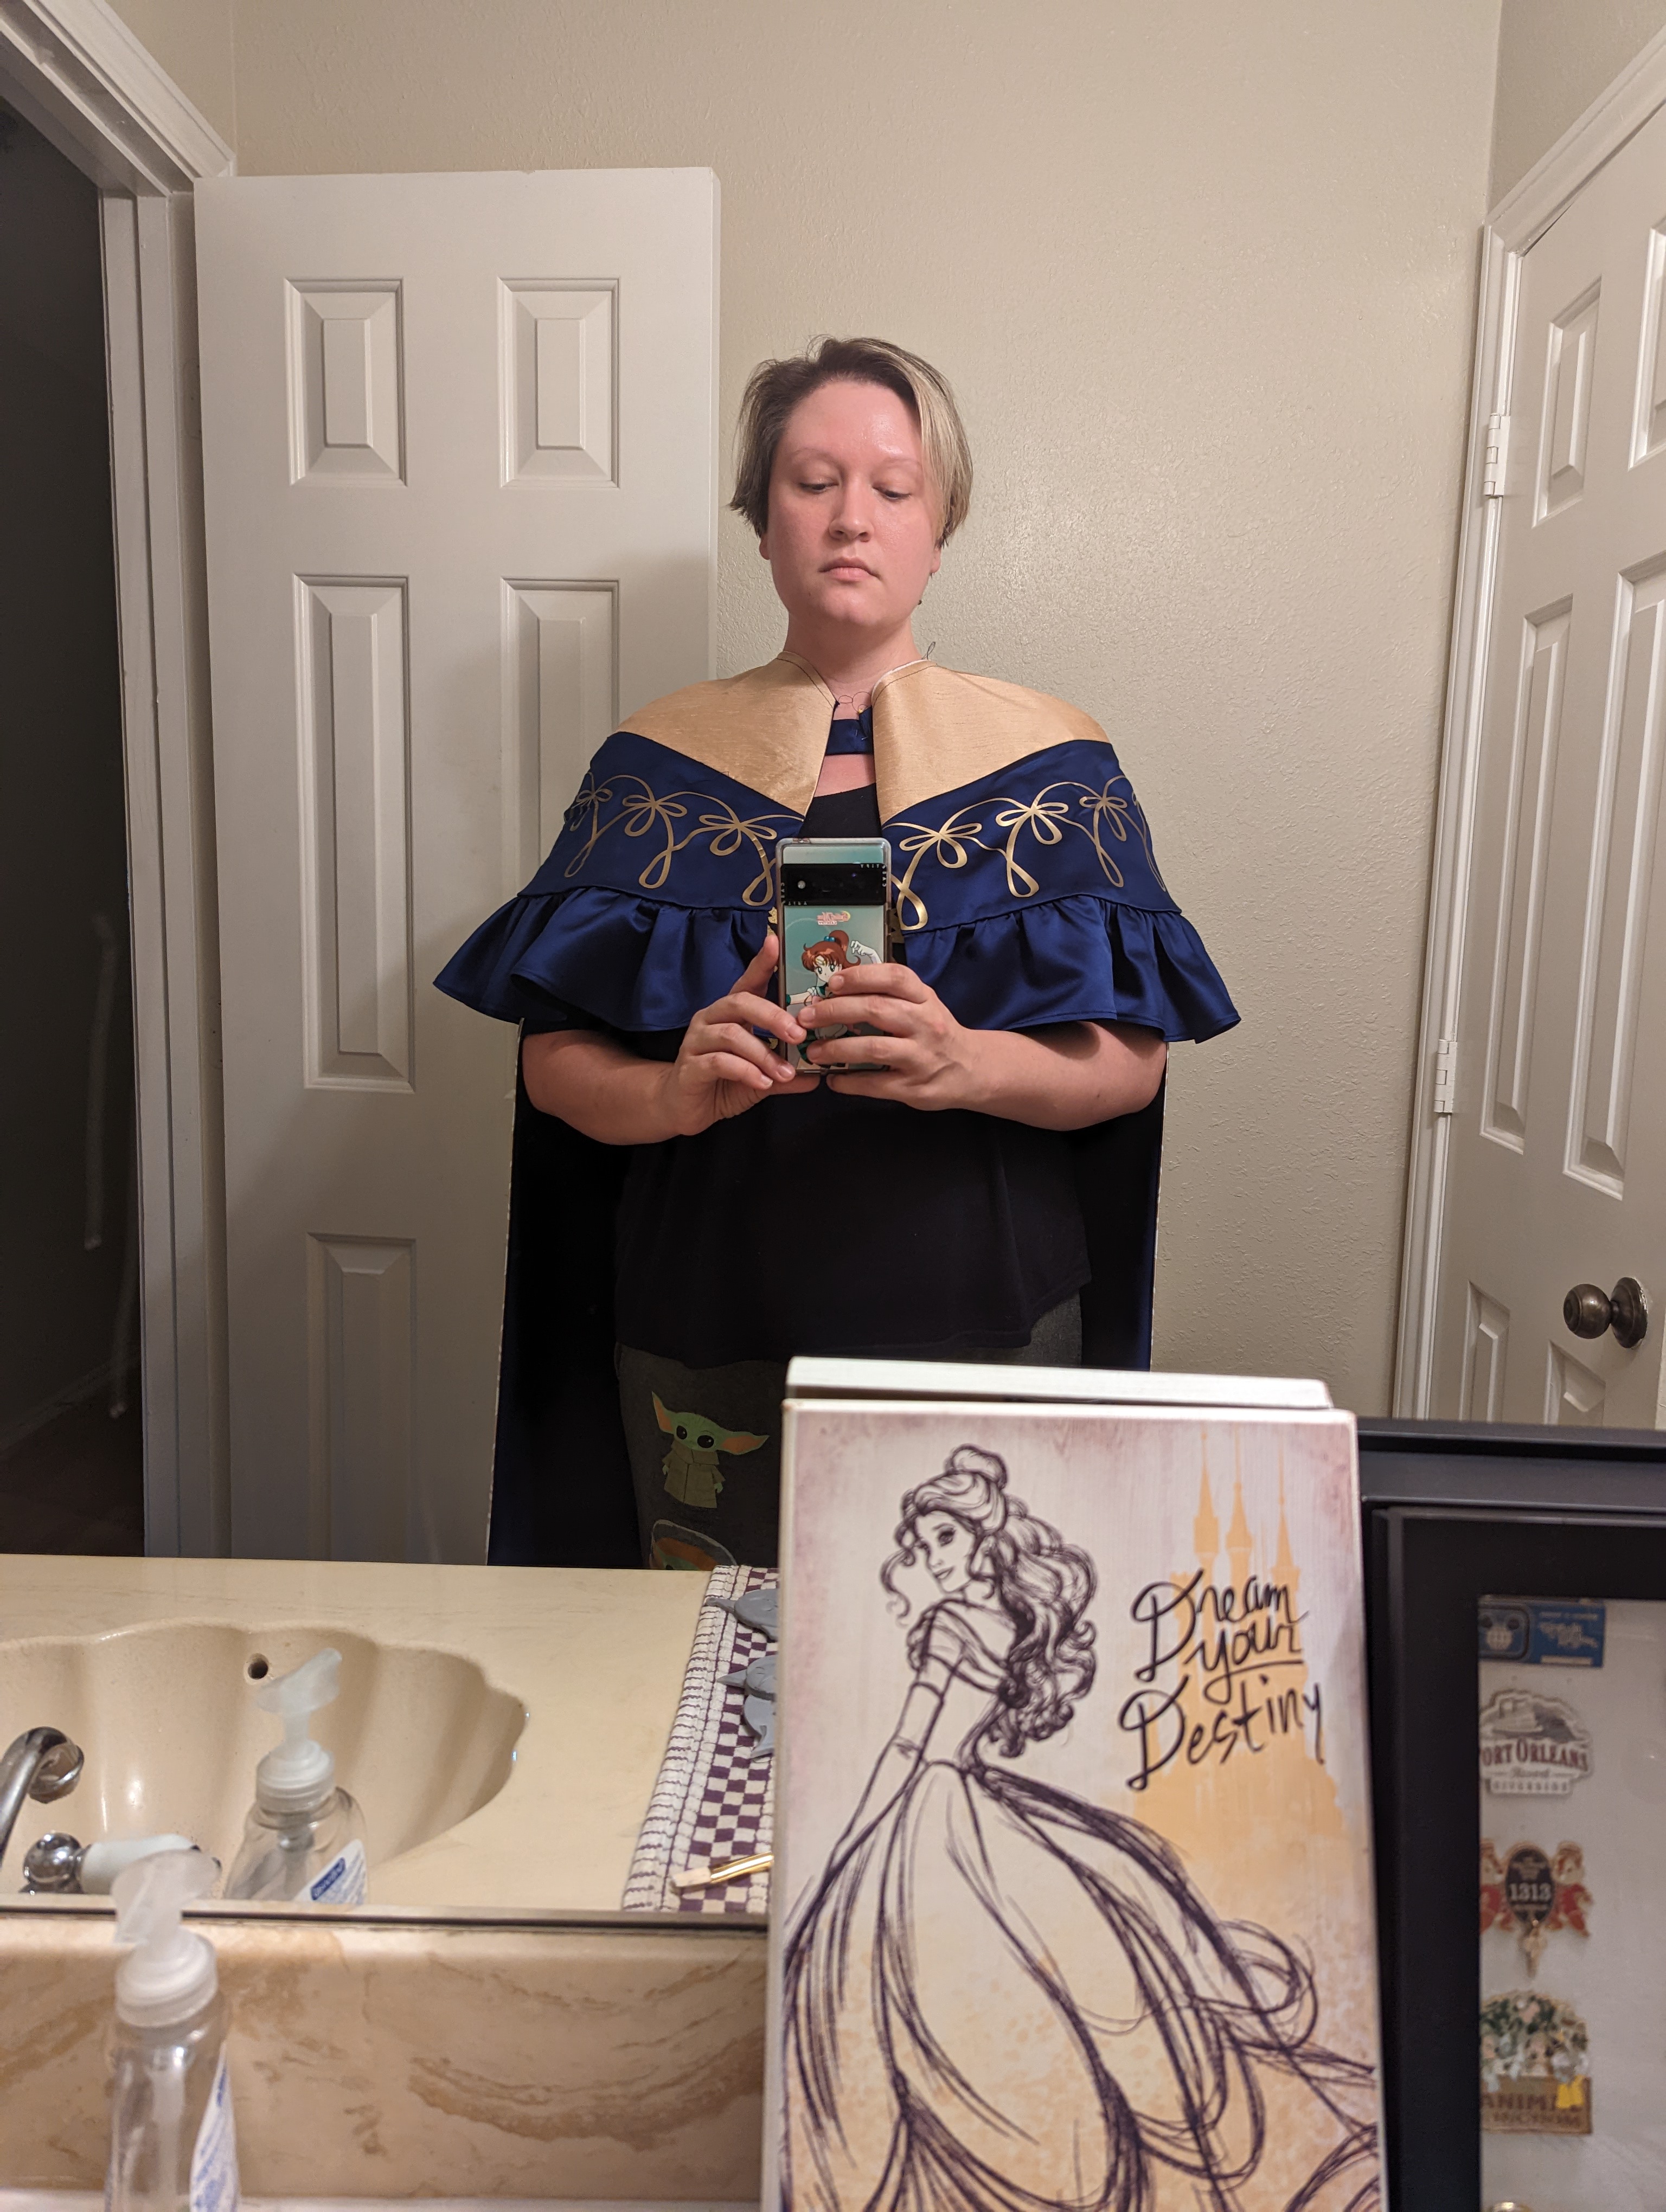
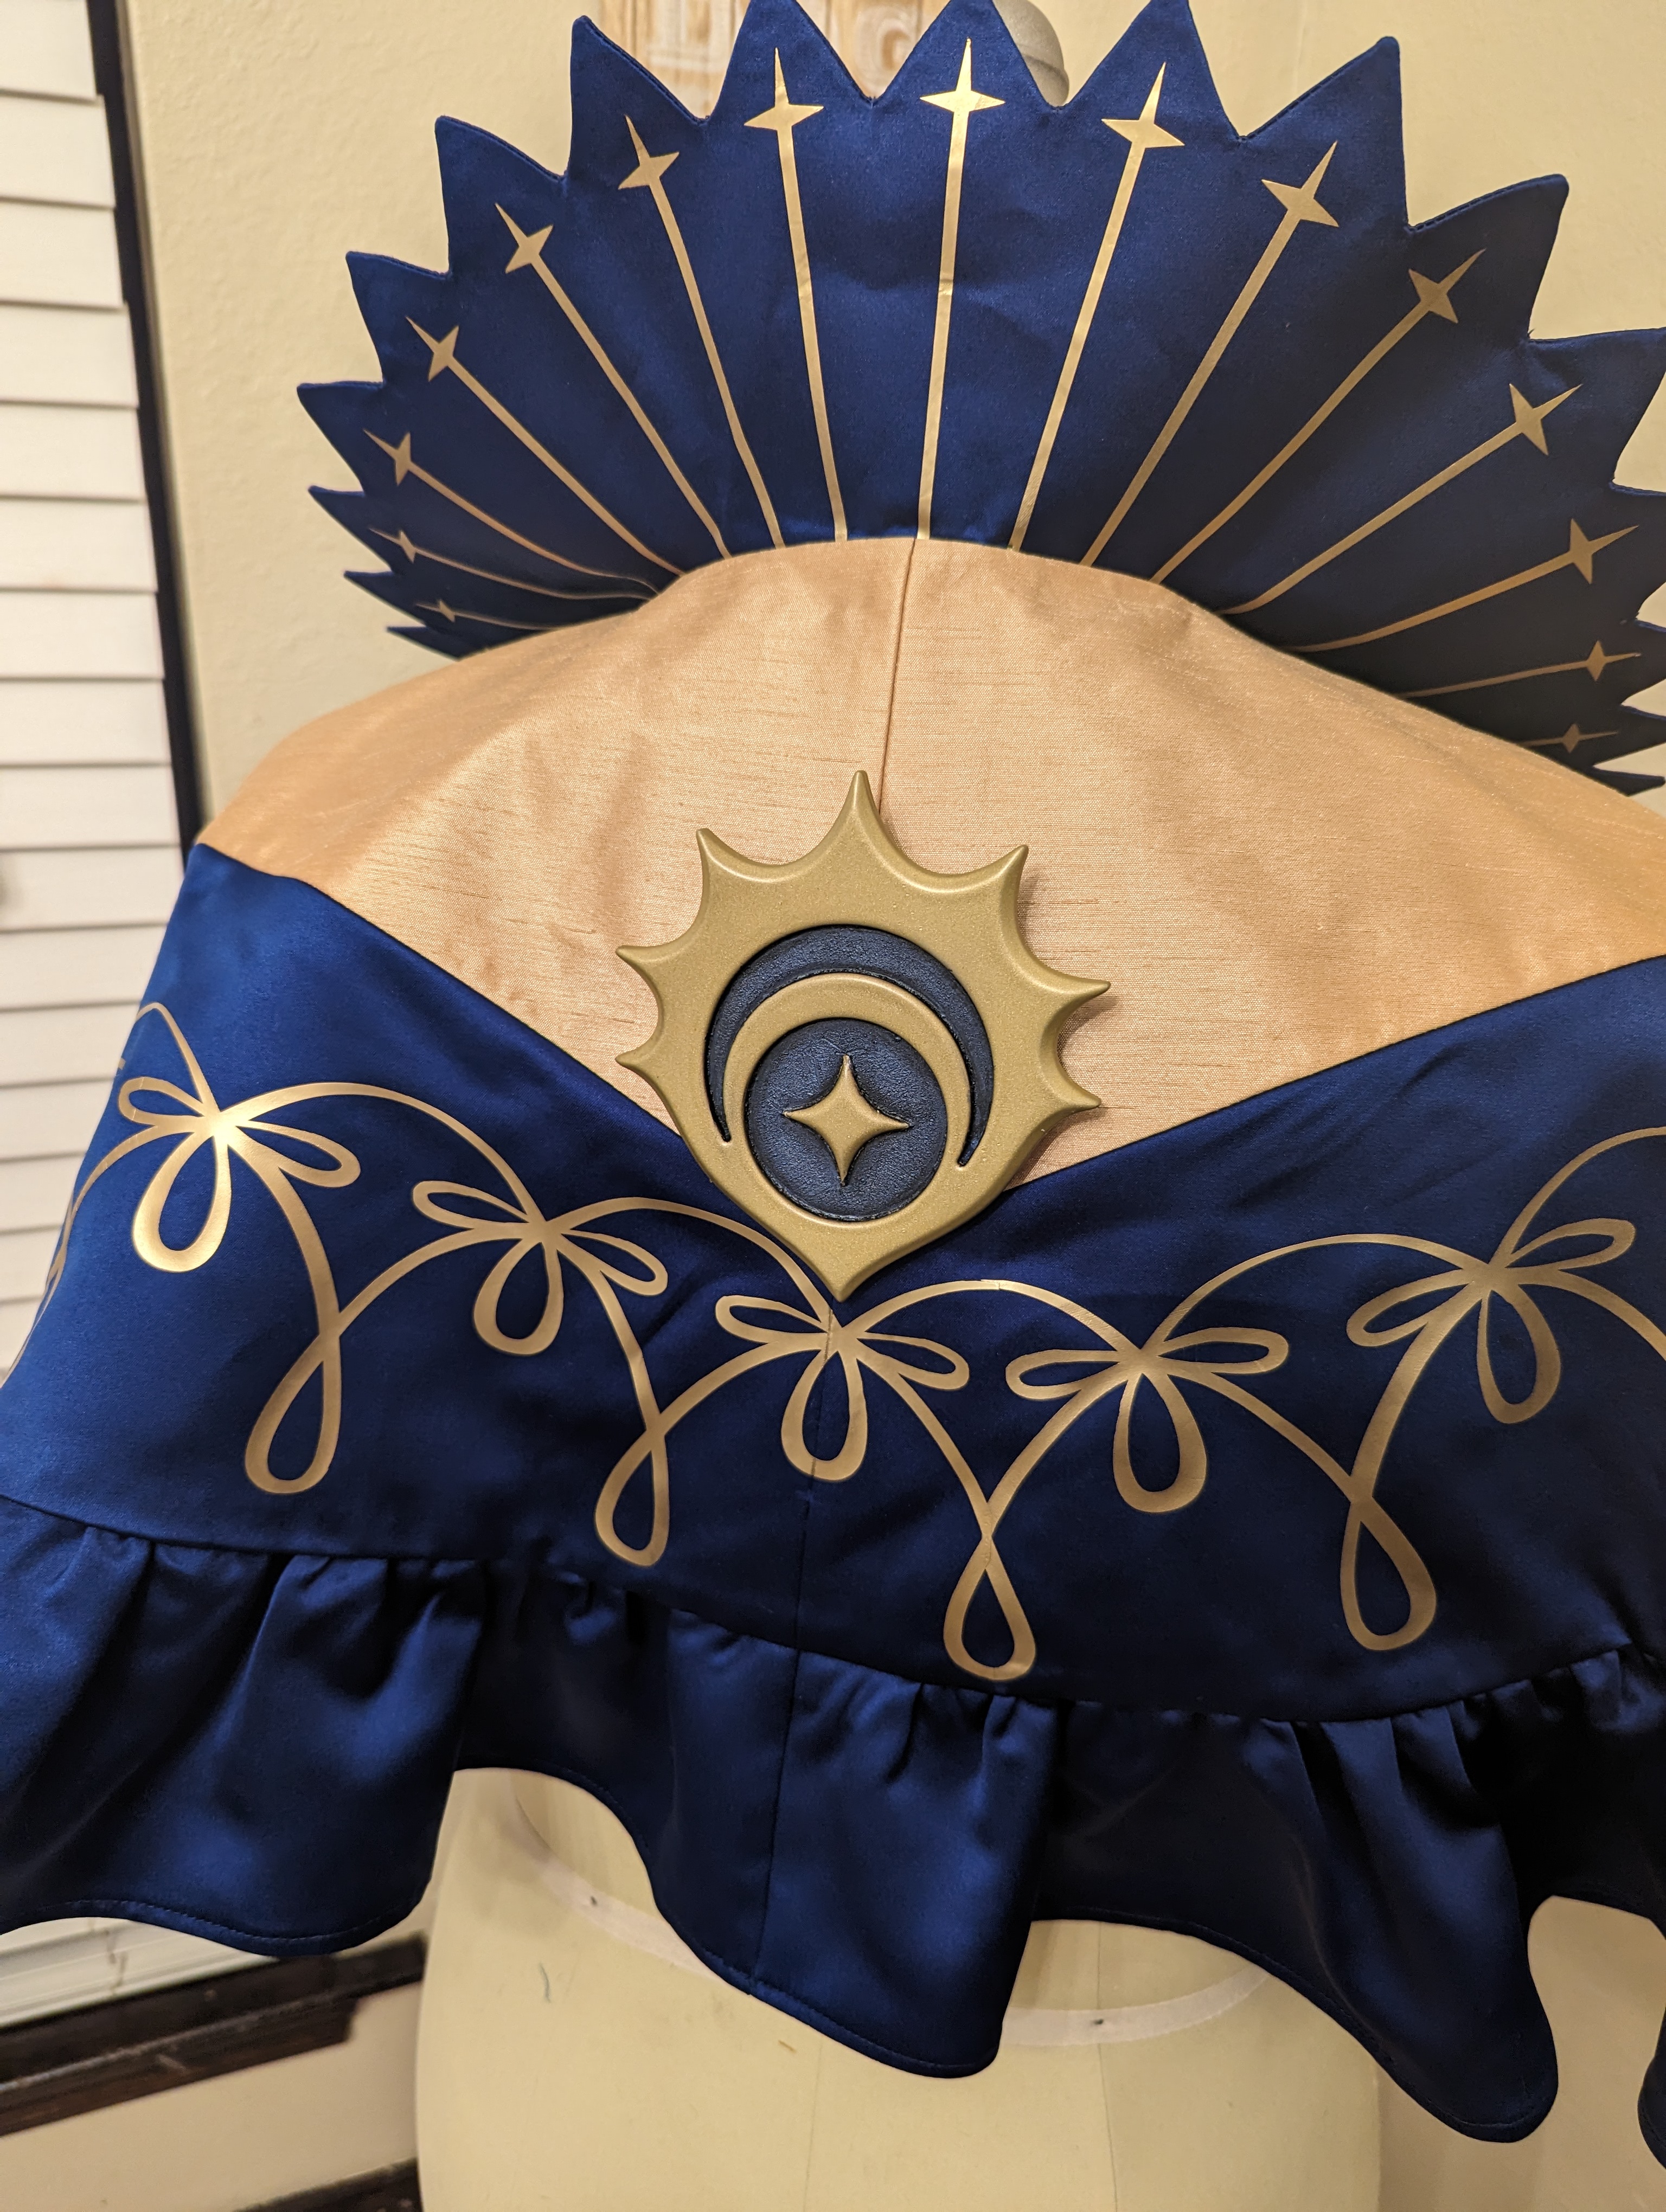
I formally started on this project in September 2022 with Rhea’s cape as well as her accessories. In terms of the fabric pieces, I followed Indigo Jinjo’s tutorial pretty closely with only a few minor variations, so I’m not going to go too much into that information here. Kirsty put a lot of thought into the cape and capelet construction mechanics, and the final result is great!
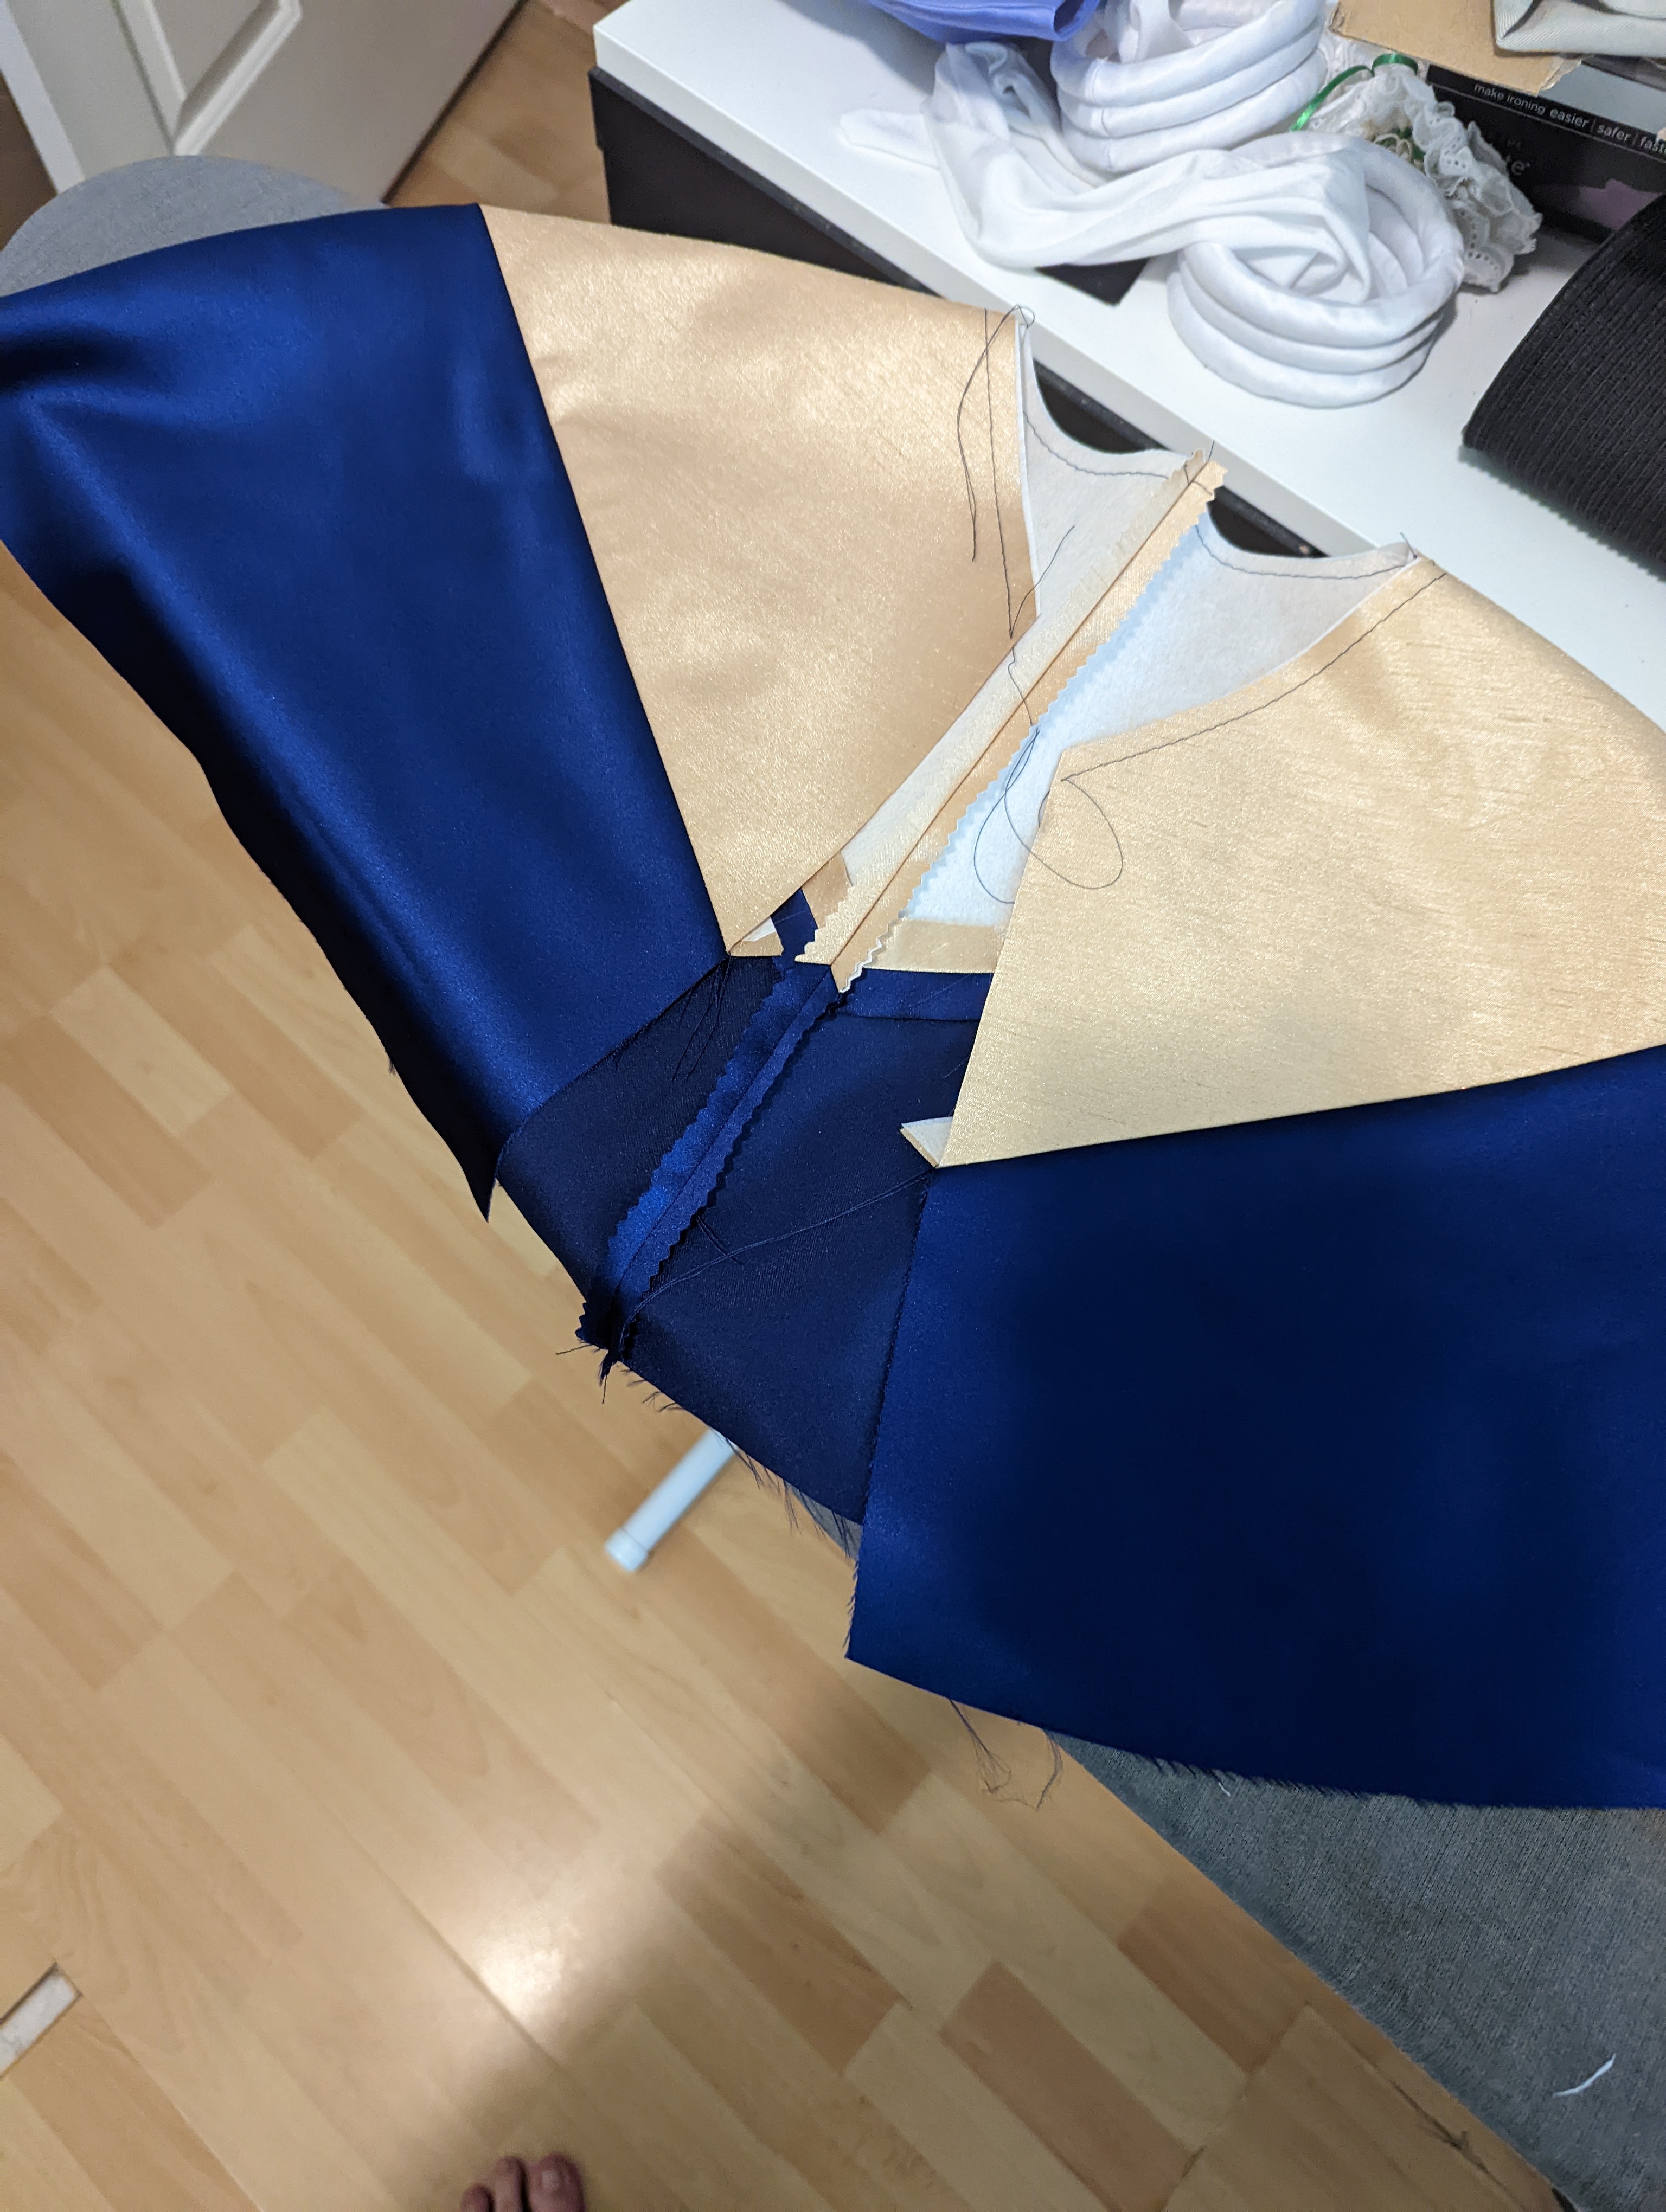
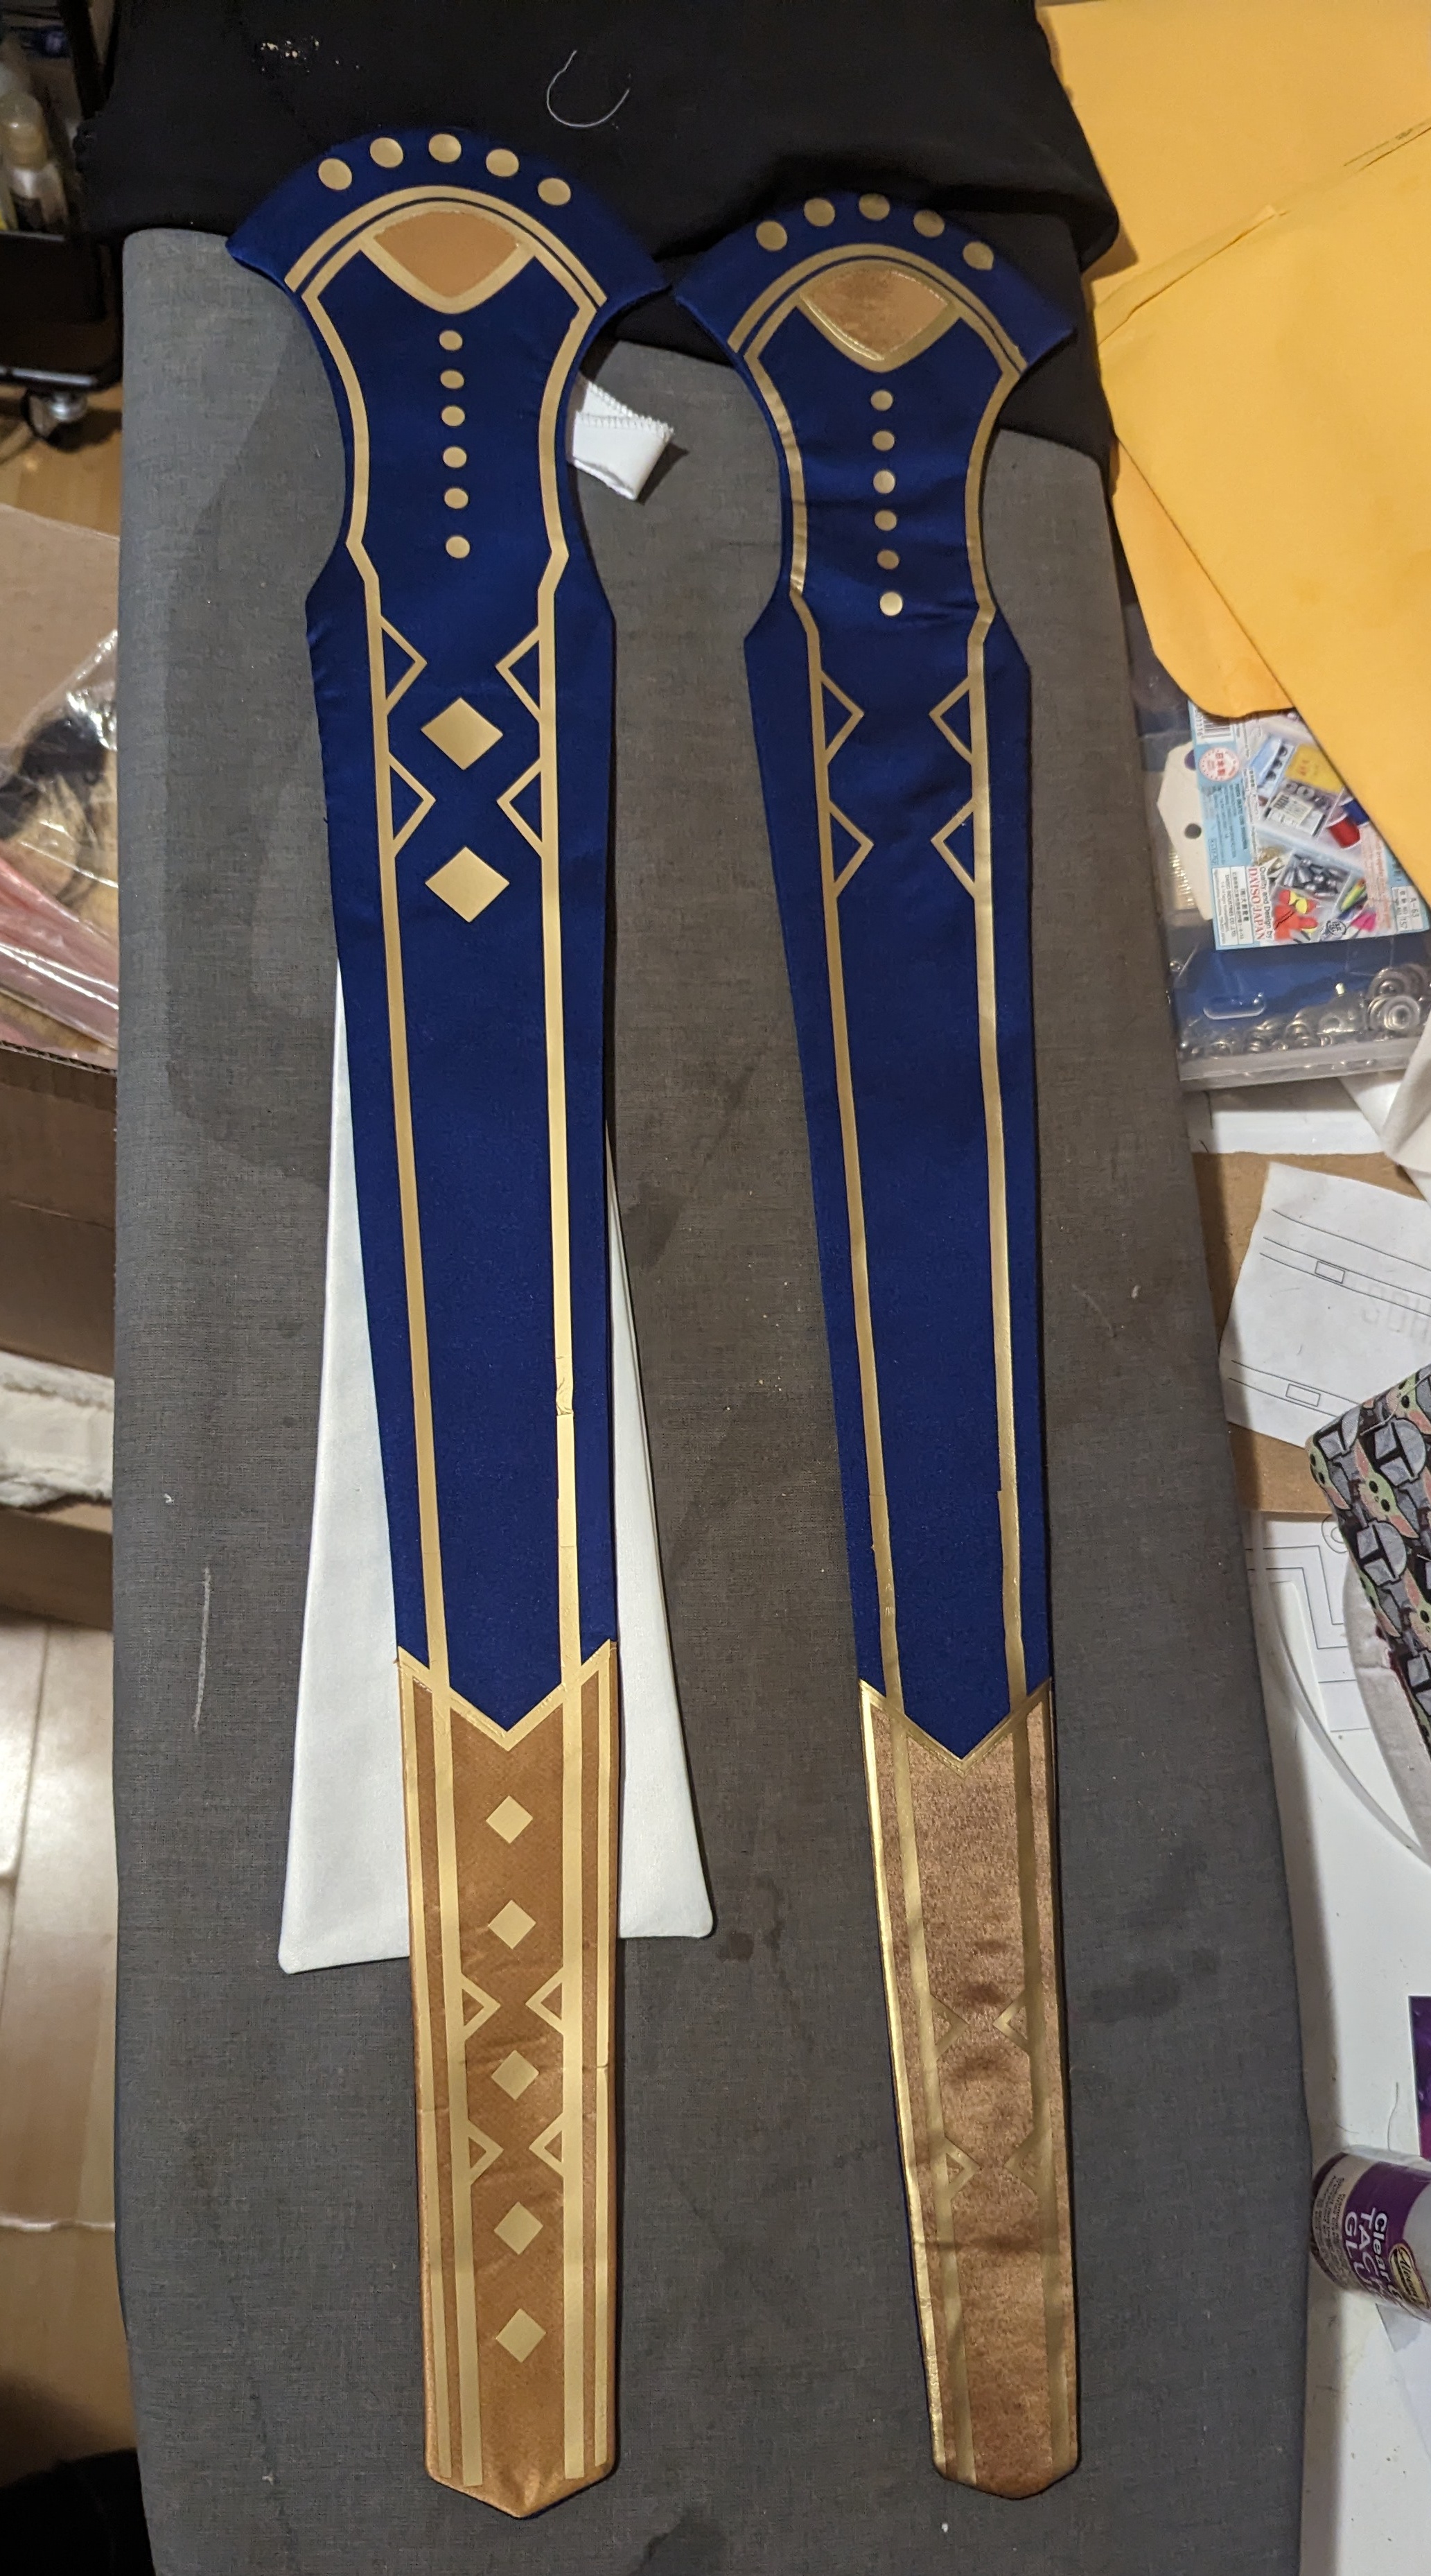
In terms of fabric, I used a gorgeous deep royal poly blue satin from Mood Fabrics, a faux dupioni for the gold portions of the capelet (make sure your grainlines match if you use something similar!), and The Dangerous Ladies printed satin for the back of the cape.
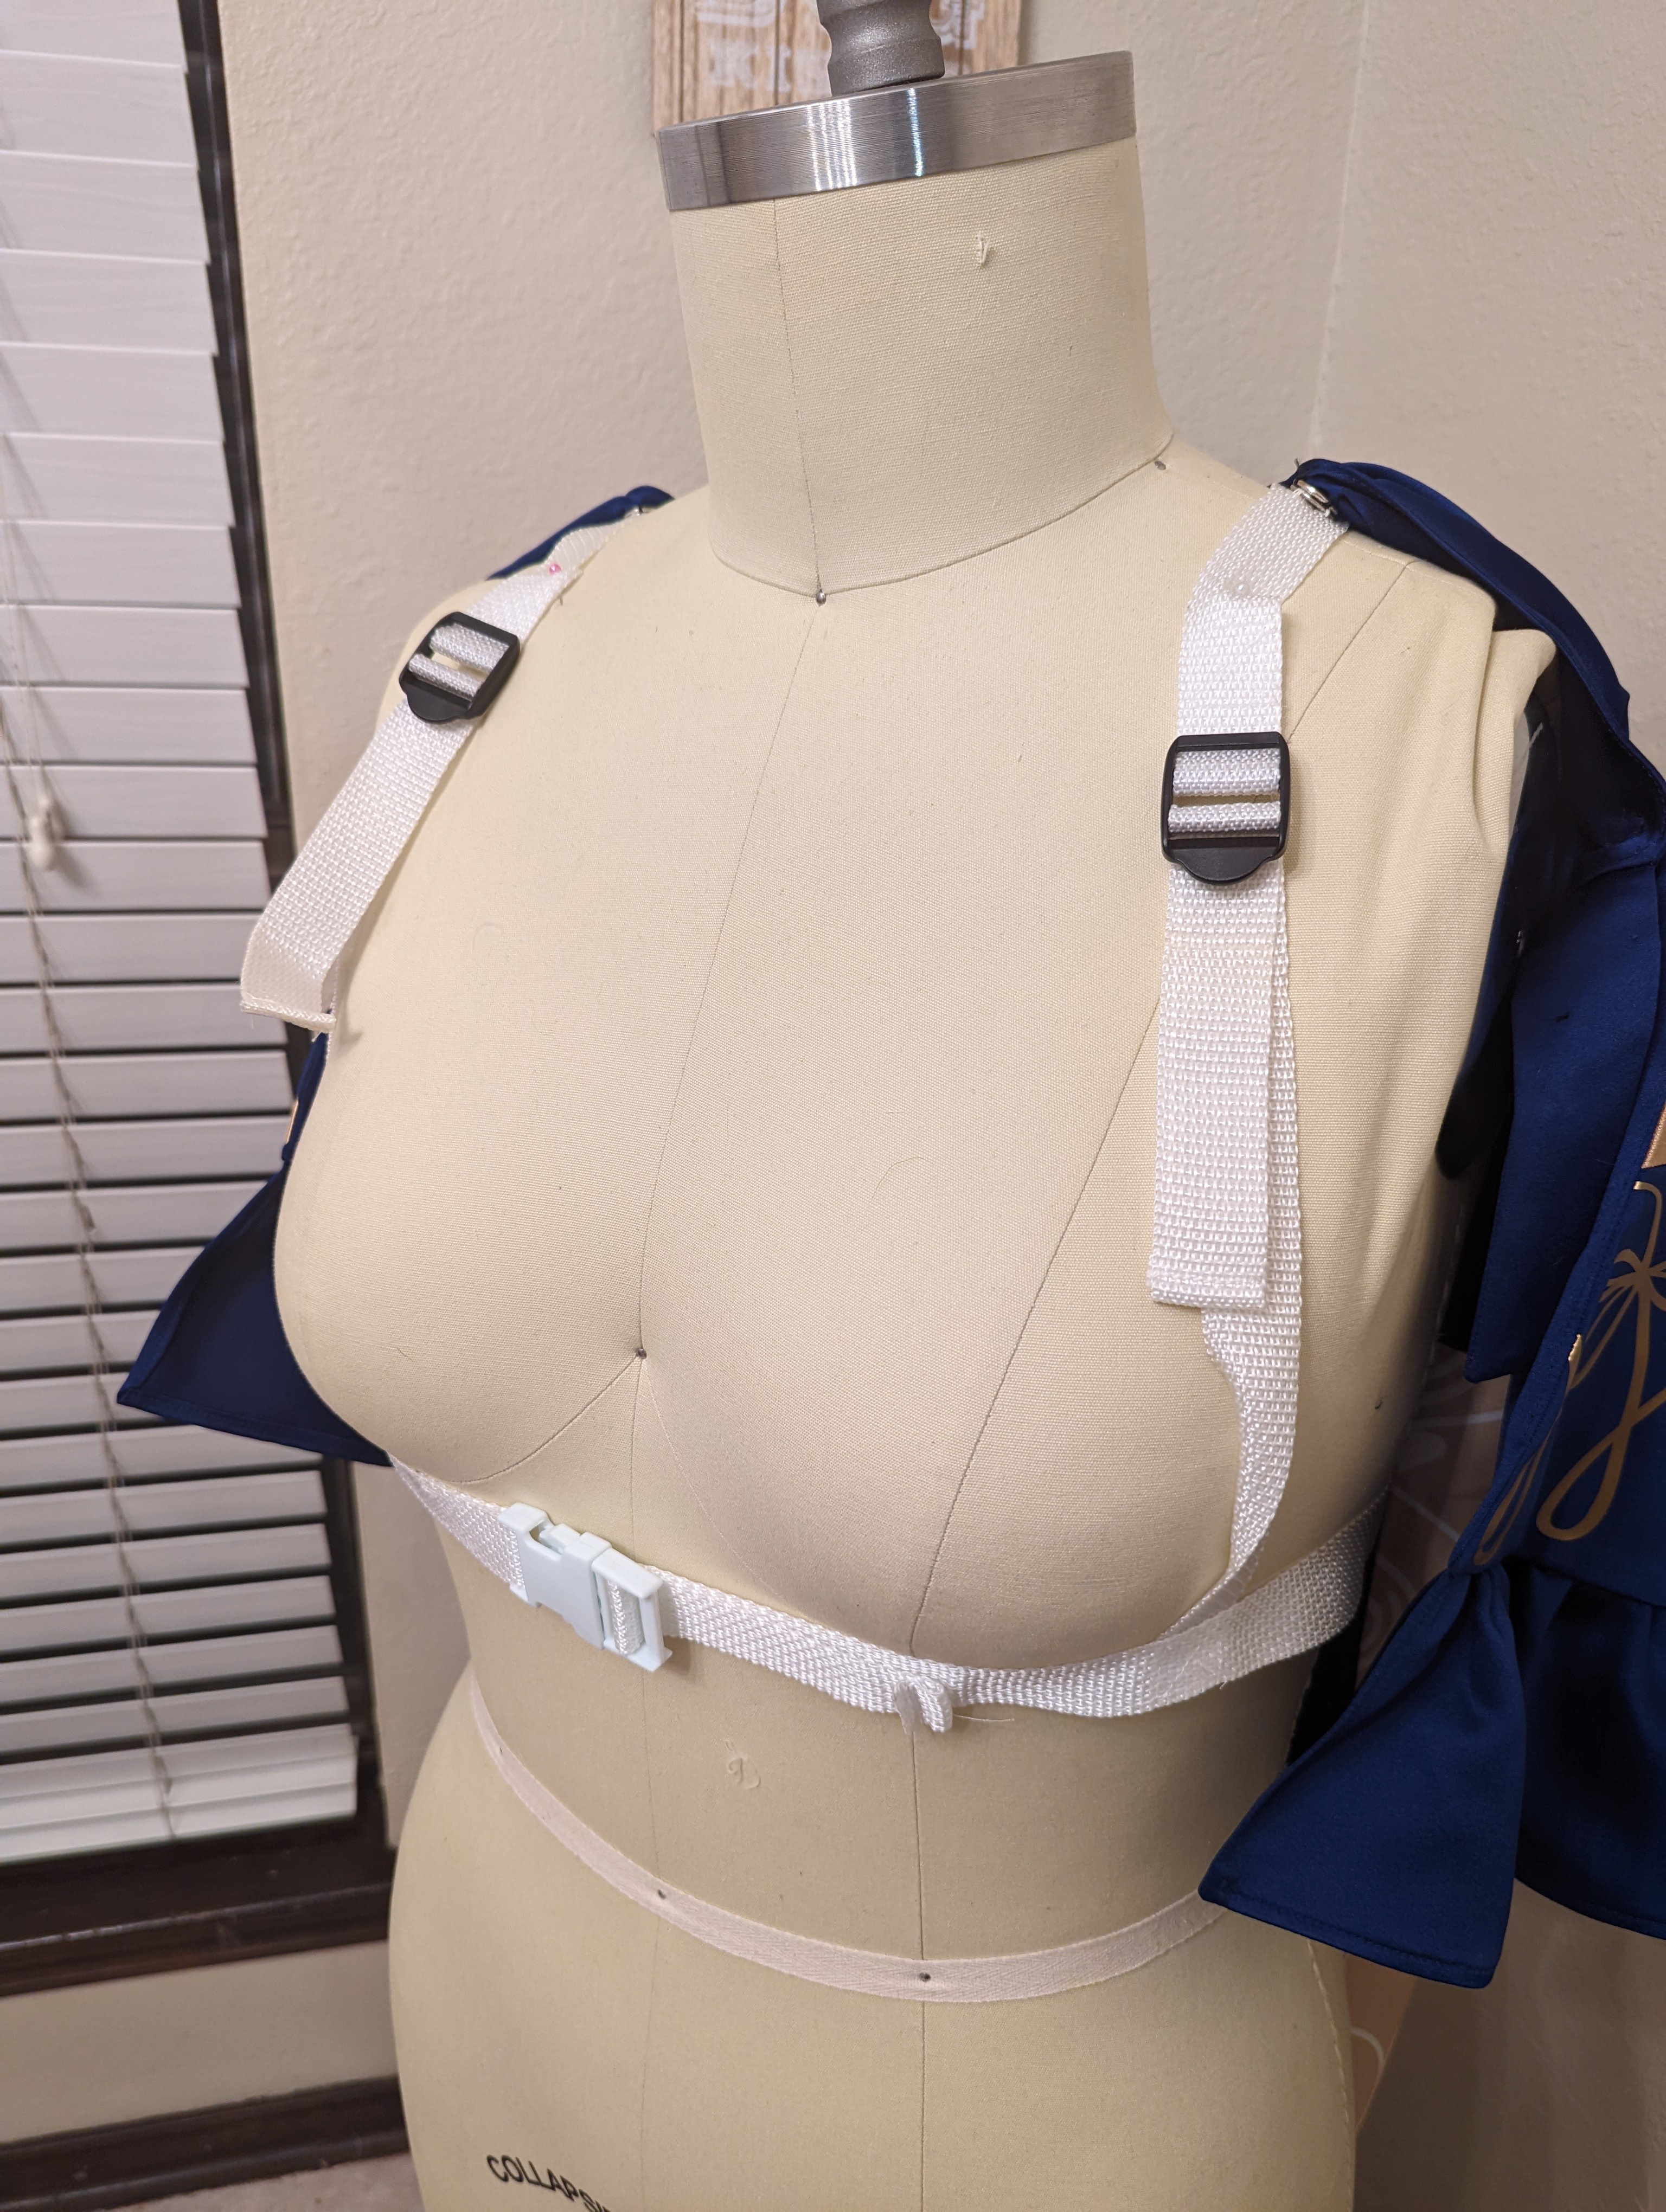
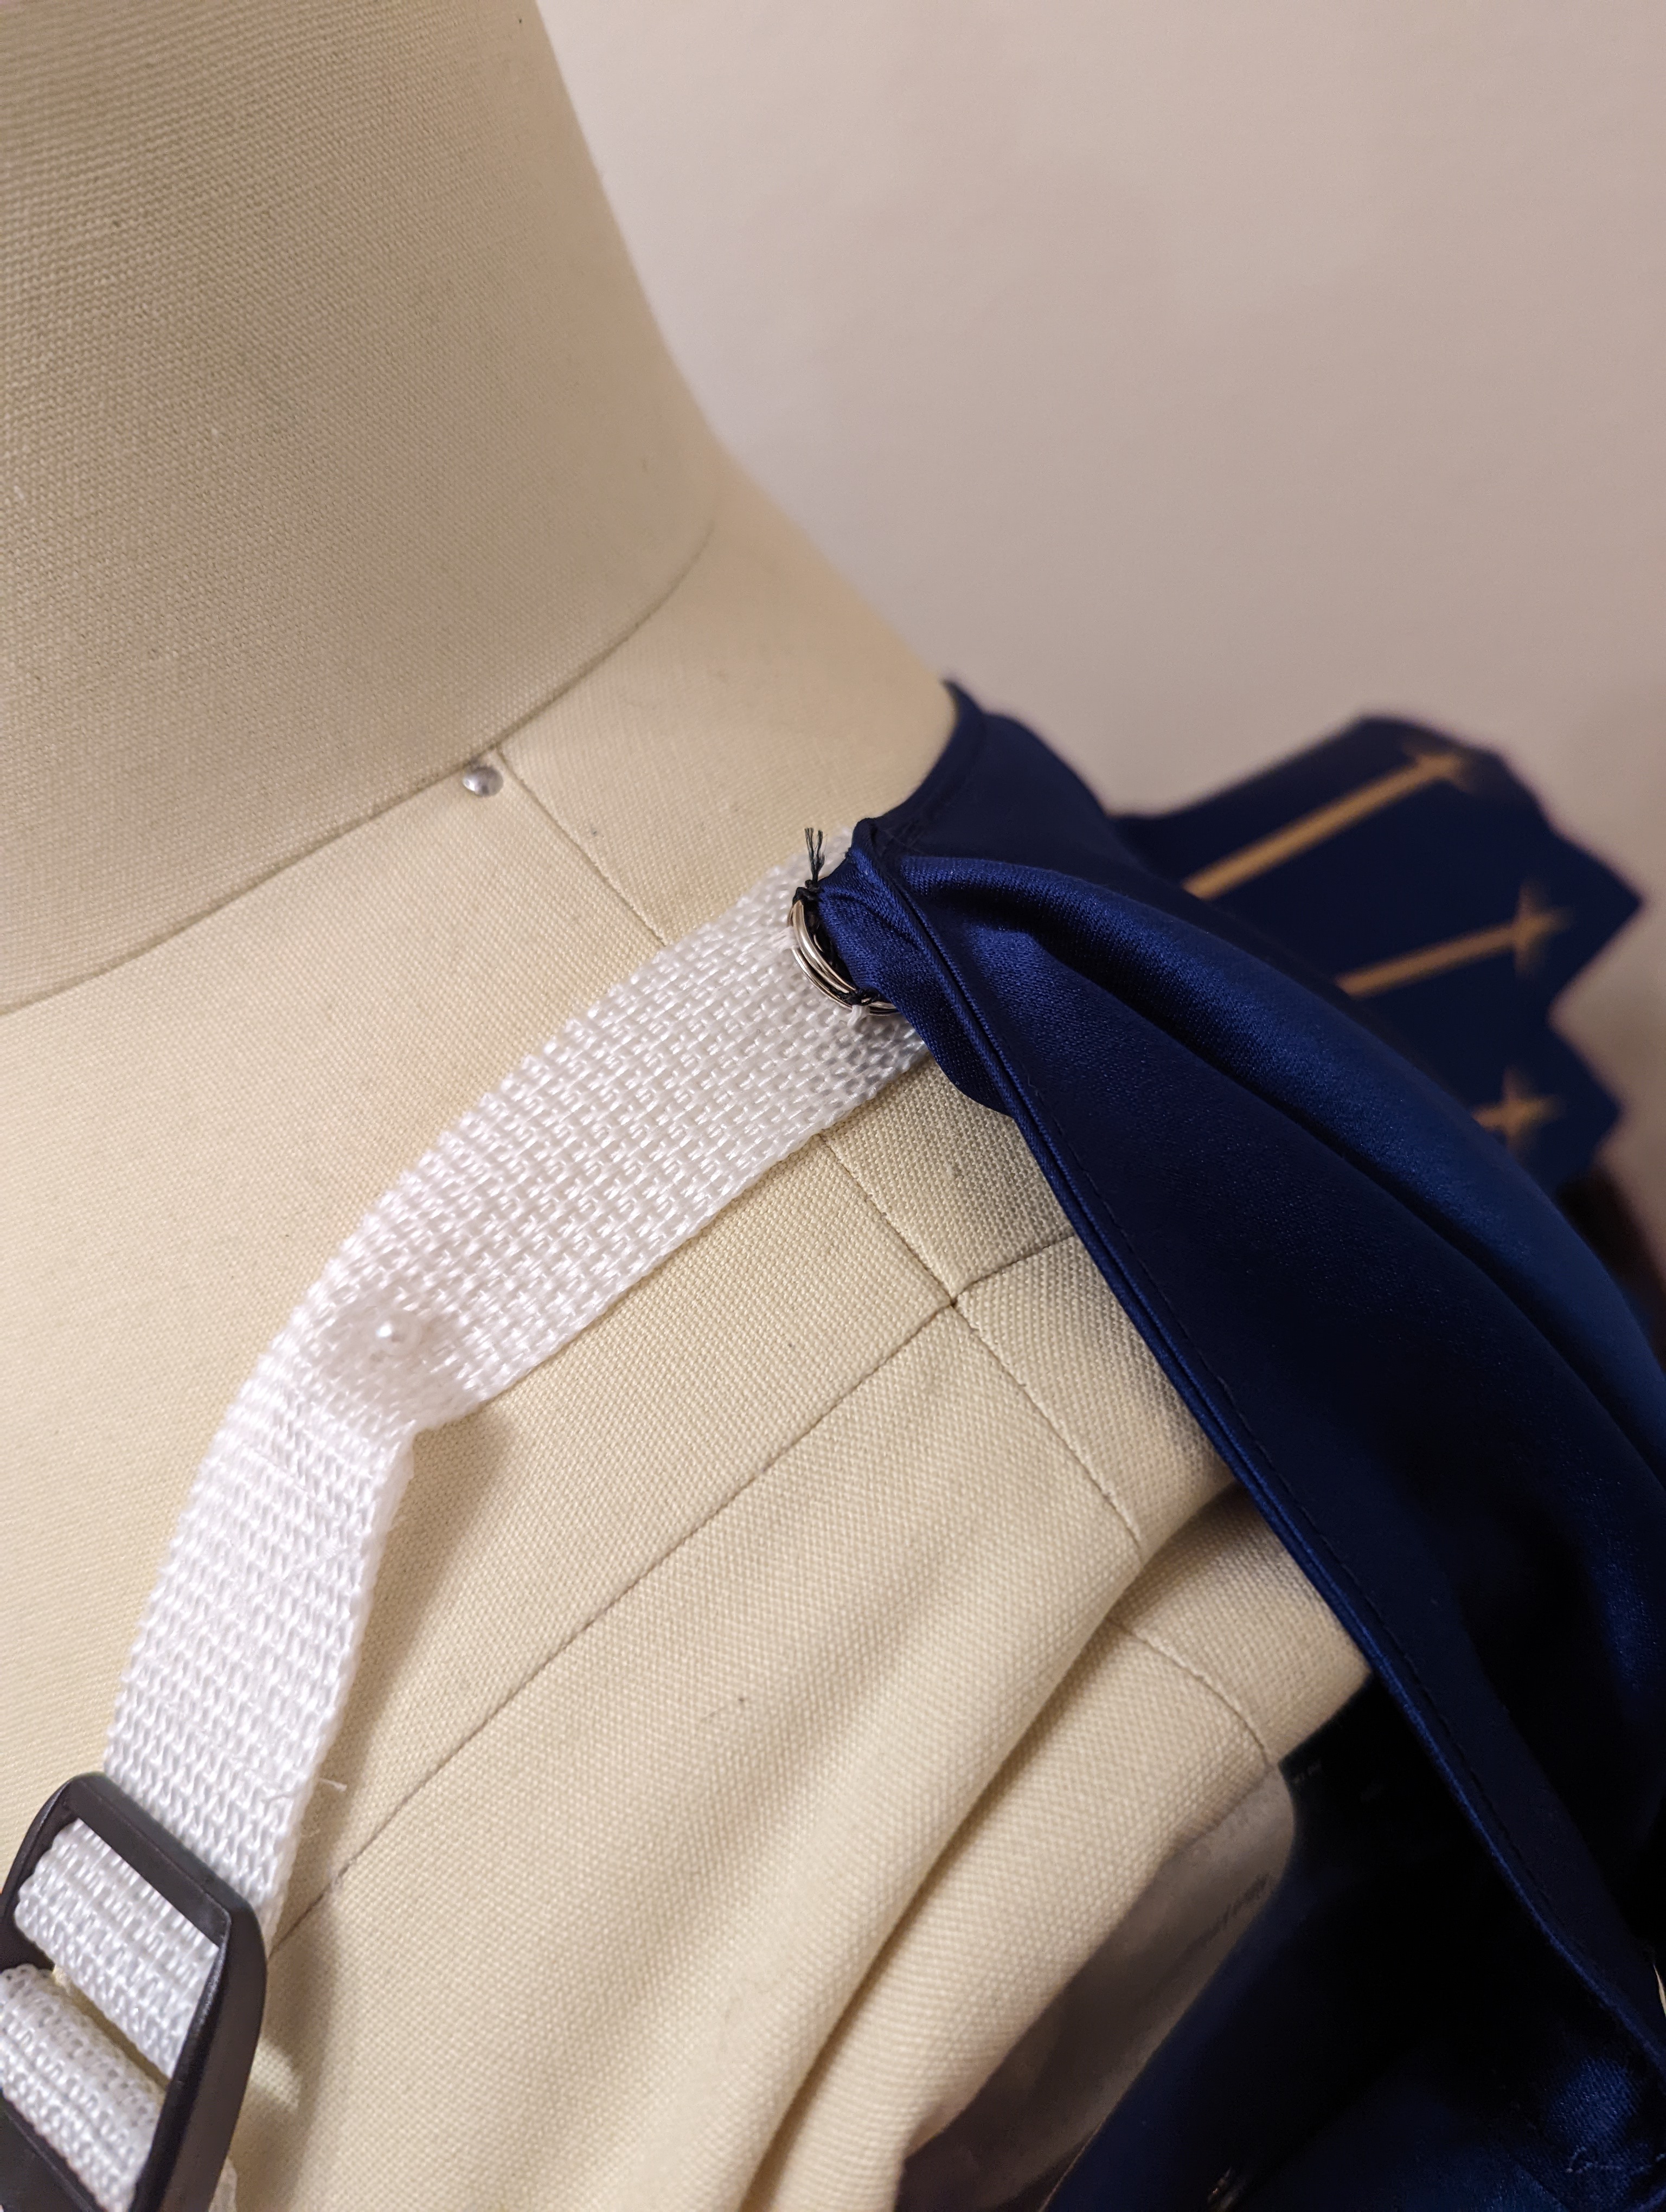

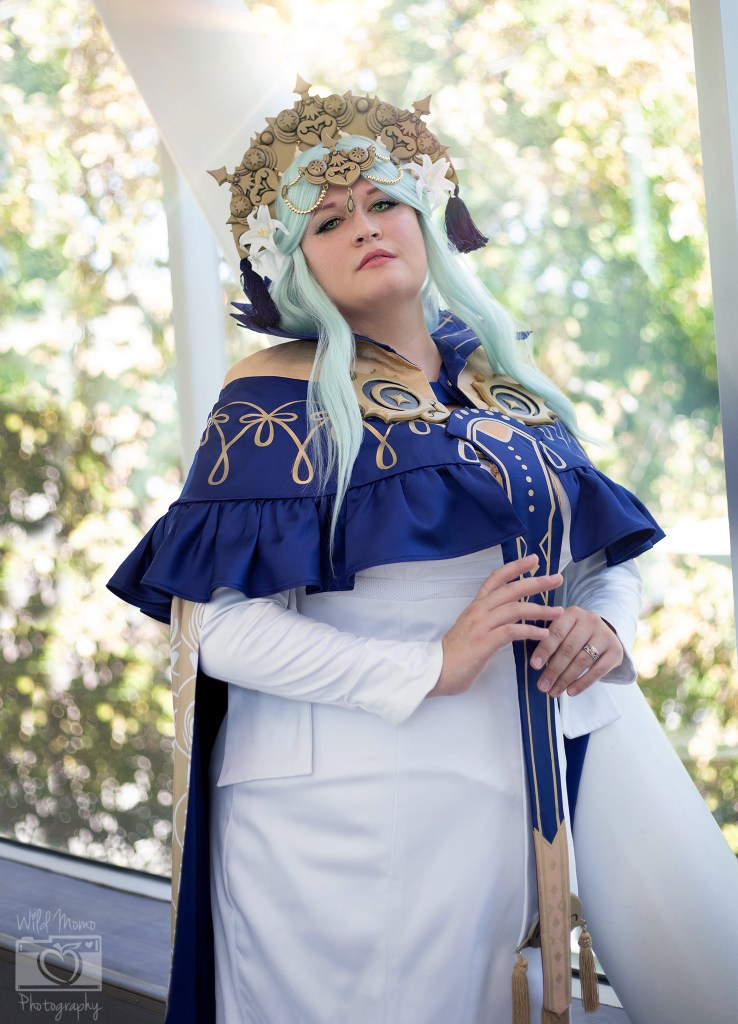
The collar portion of the capelet does like to flip down if the capelet slides back on your shoulders, and this is an issue Kirsty addresses in the tutorial portion of her pattern. To help counteract this issue when I’m wearing Rhea to conventions, I made a simple harness with white nylon webbing. It’s designed to sit right at my underbust and is barely visible when the cape is worn, so I decided against cutting holes into my base dress for the harness.
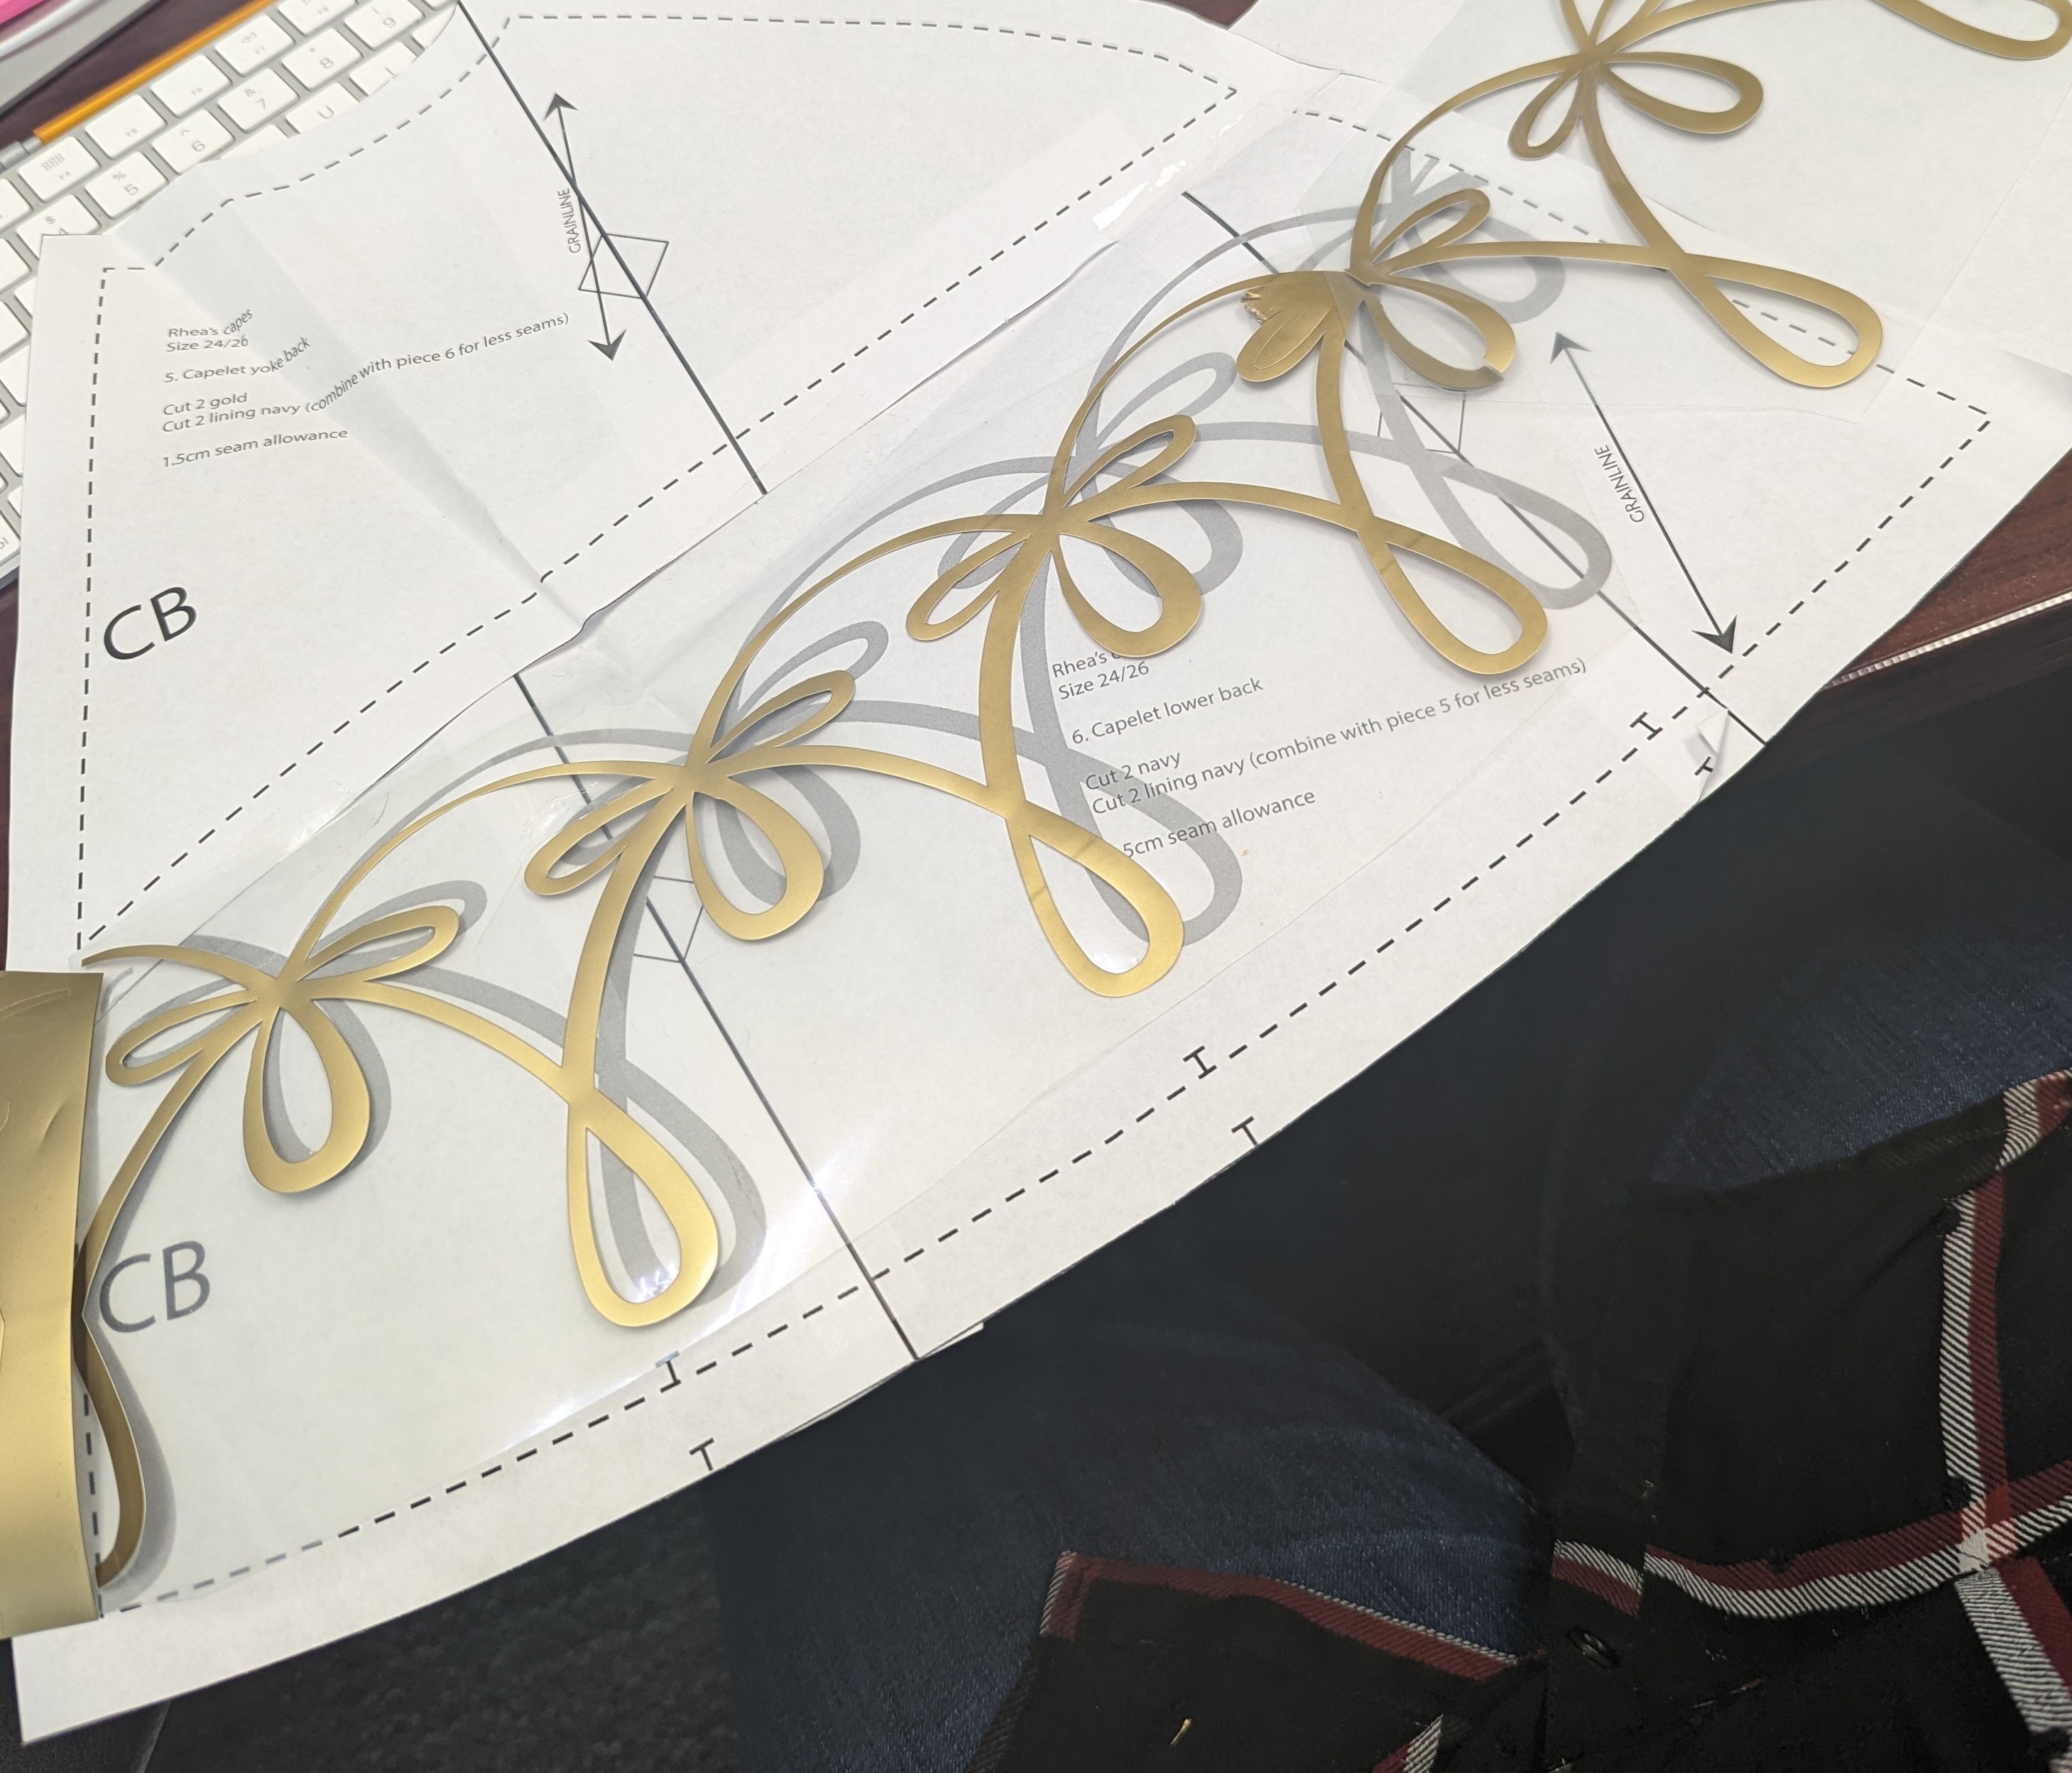
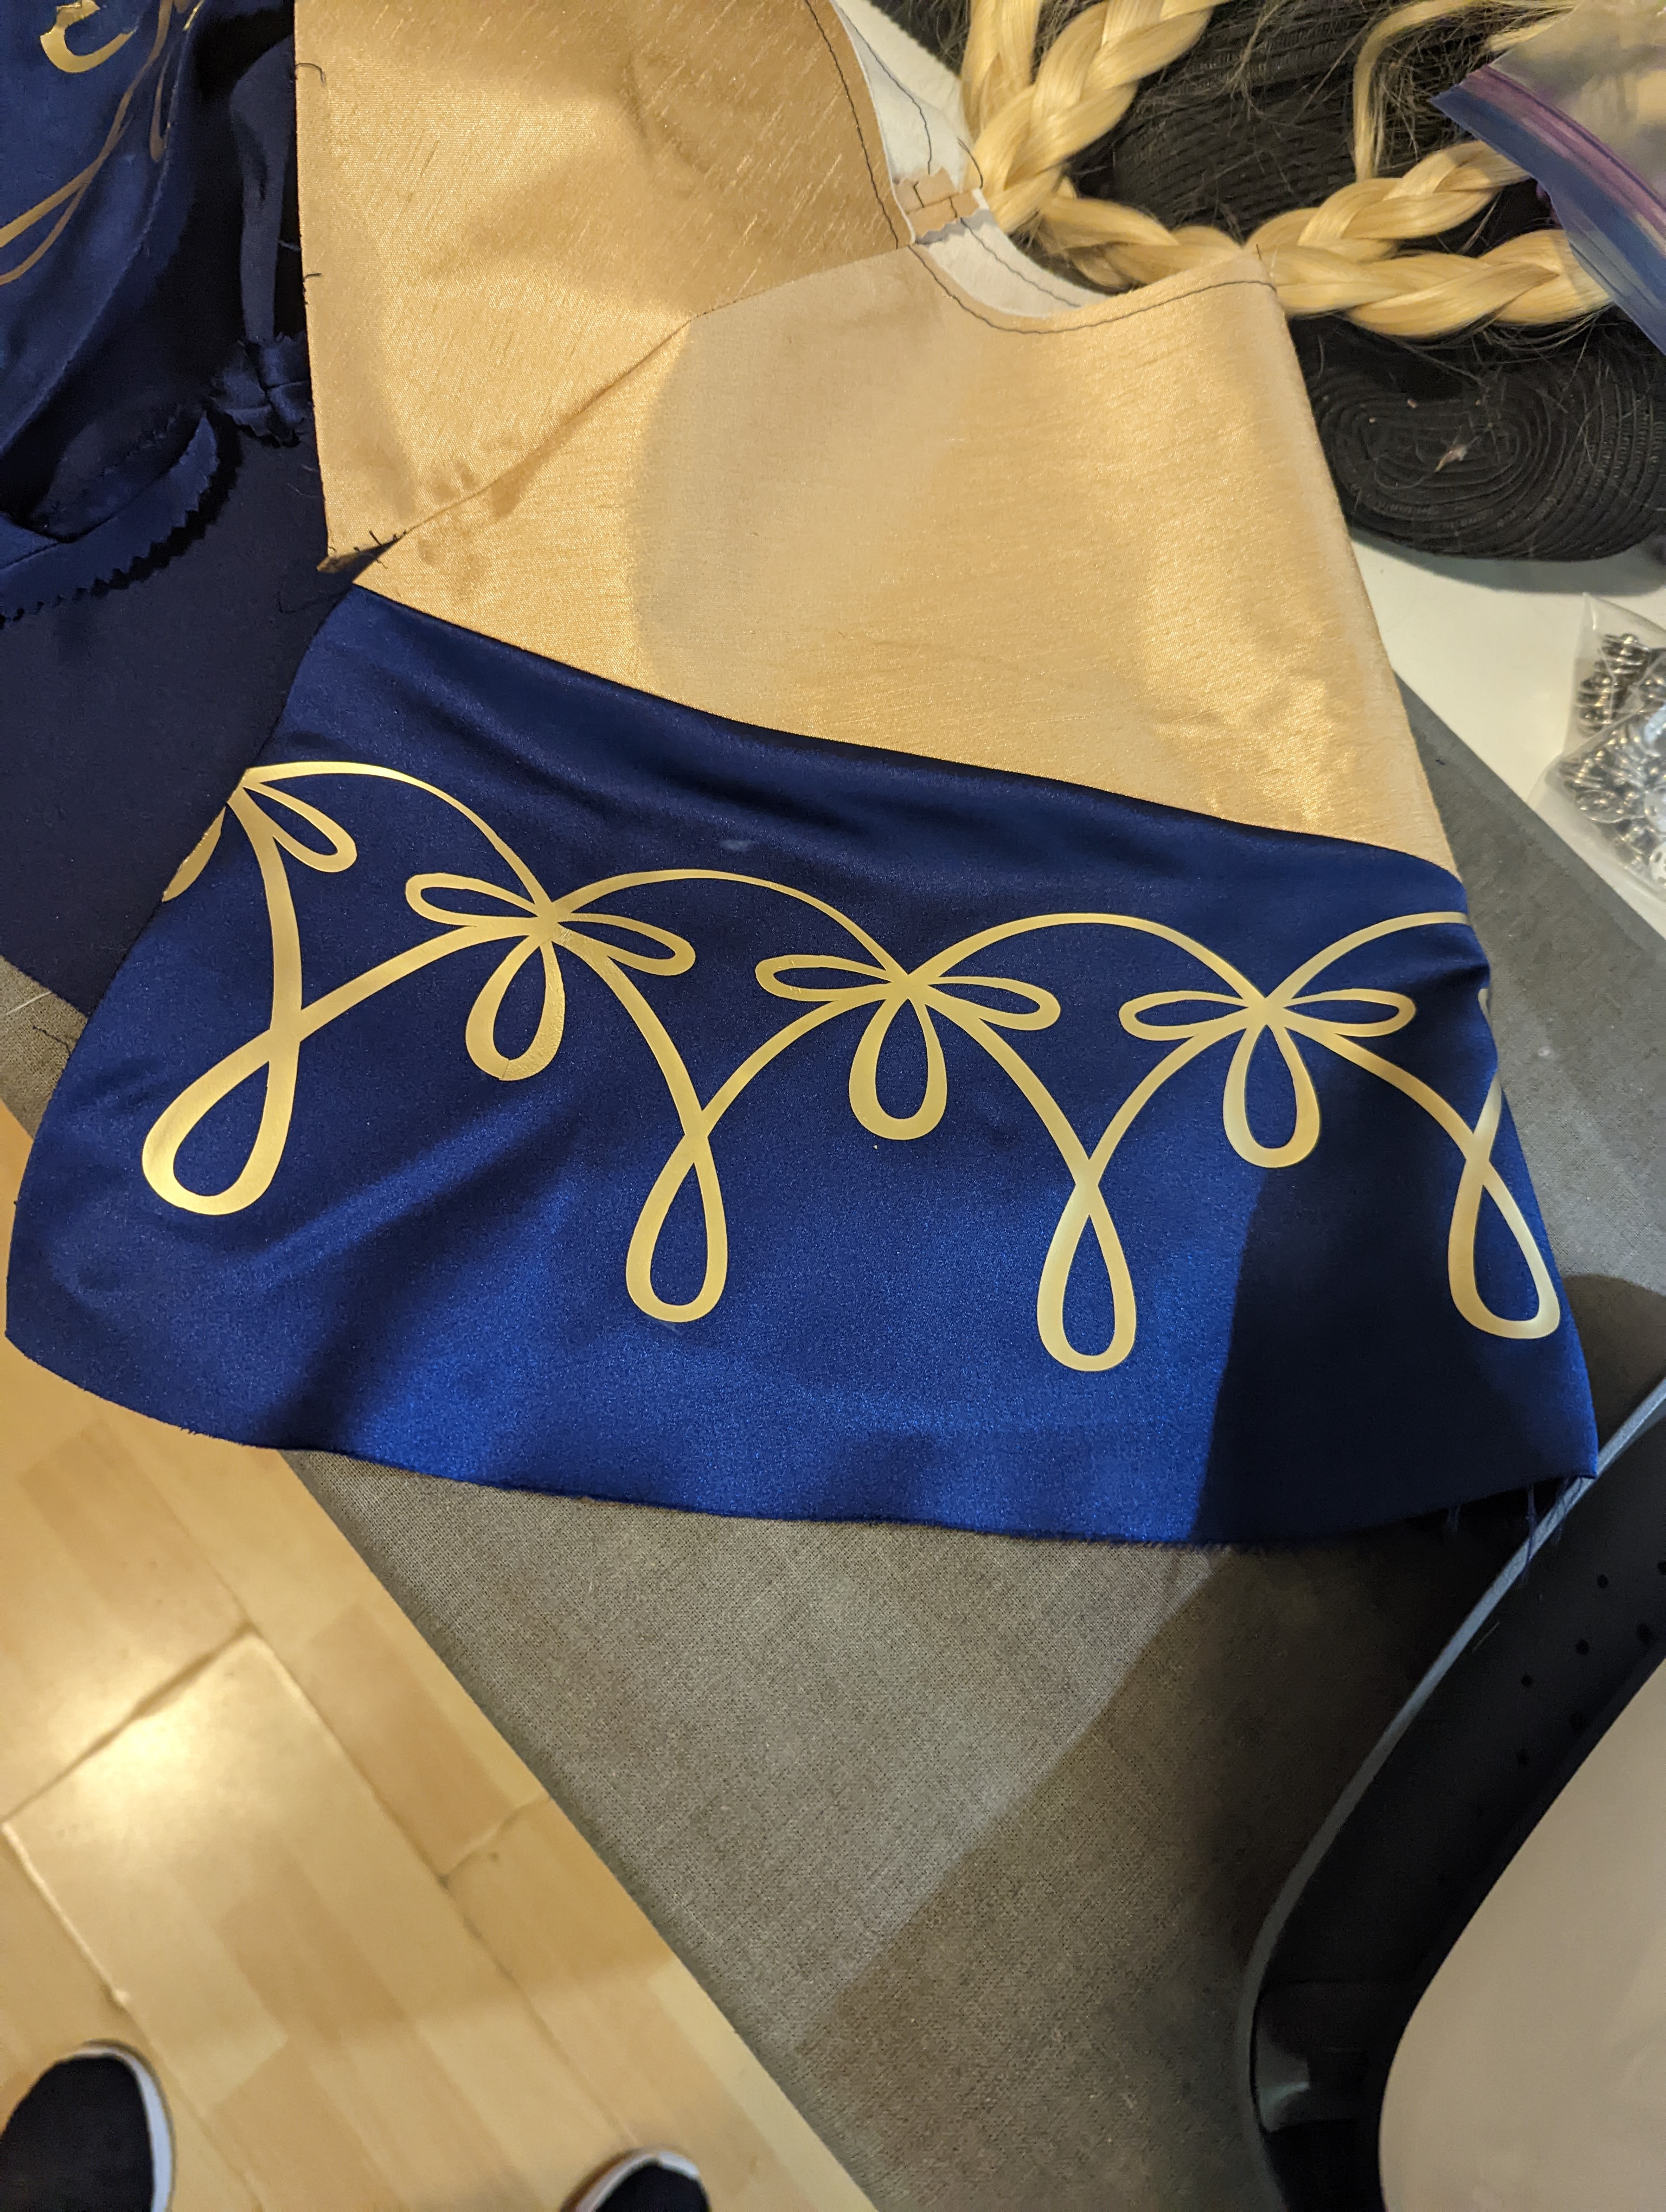
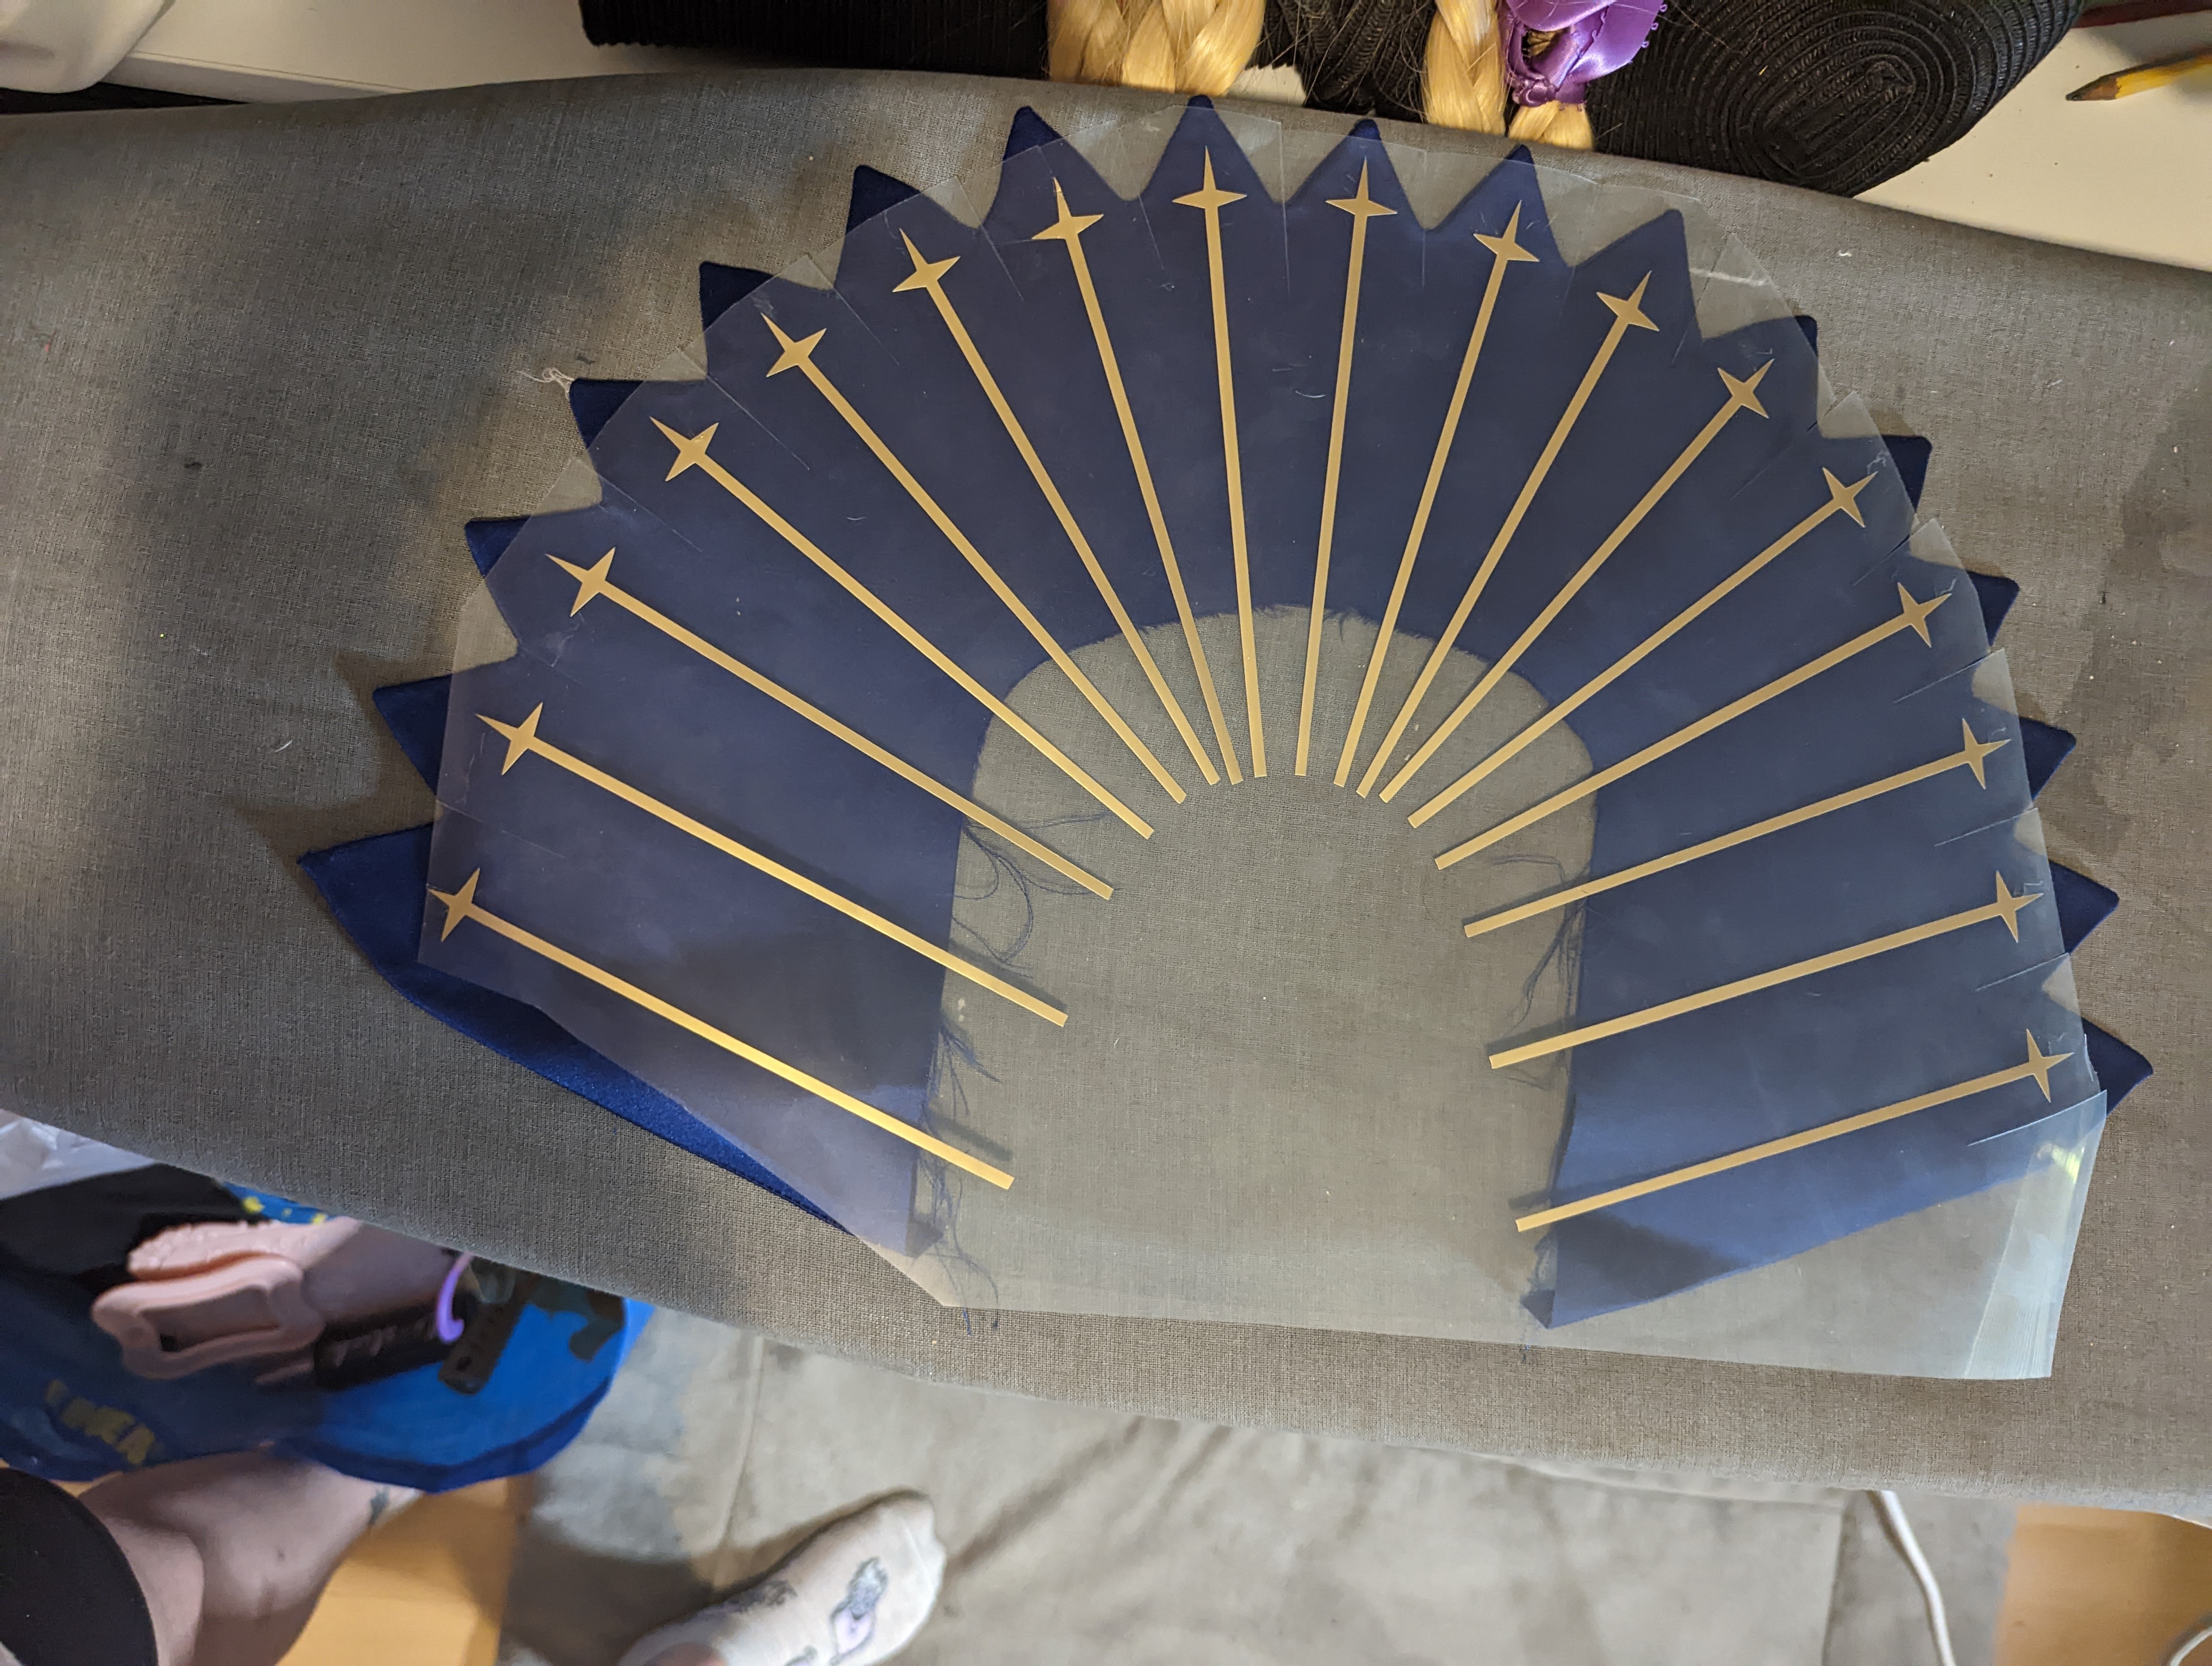
Perhaps the most frustrating part of the capelet was getting the vectors for the fiddly design bits to cooperate. Kirsty is a lifesaver and includes these in her patterns, but for some reason Cricut Design Space hates SVG files, which IS SUPER FREAKING DUMB. To counter this absolute clownery, I split the files in Adobe Illustrator so that they’d fit on my cutting mats (seriously, don’t get me started on Design Space. It’s such a dumb program and I’m so ready to switch to a different brand of cutter as a result). I also took measurements of the designs off my paper patterns. Once I imported the SVGs into Design Space, I adjusted the size of the designs to match the paper patterns. I used my go-to Cricut Sportflex in Gold since it’s a good match for the faux dupioni and spray paint I used on the accessories.
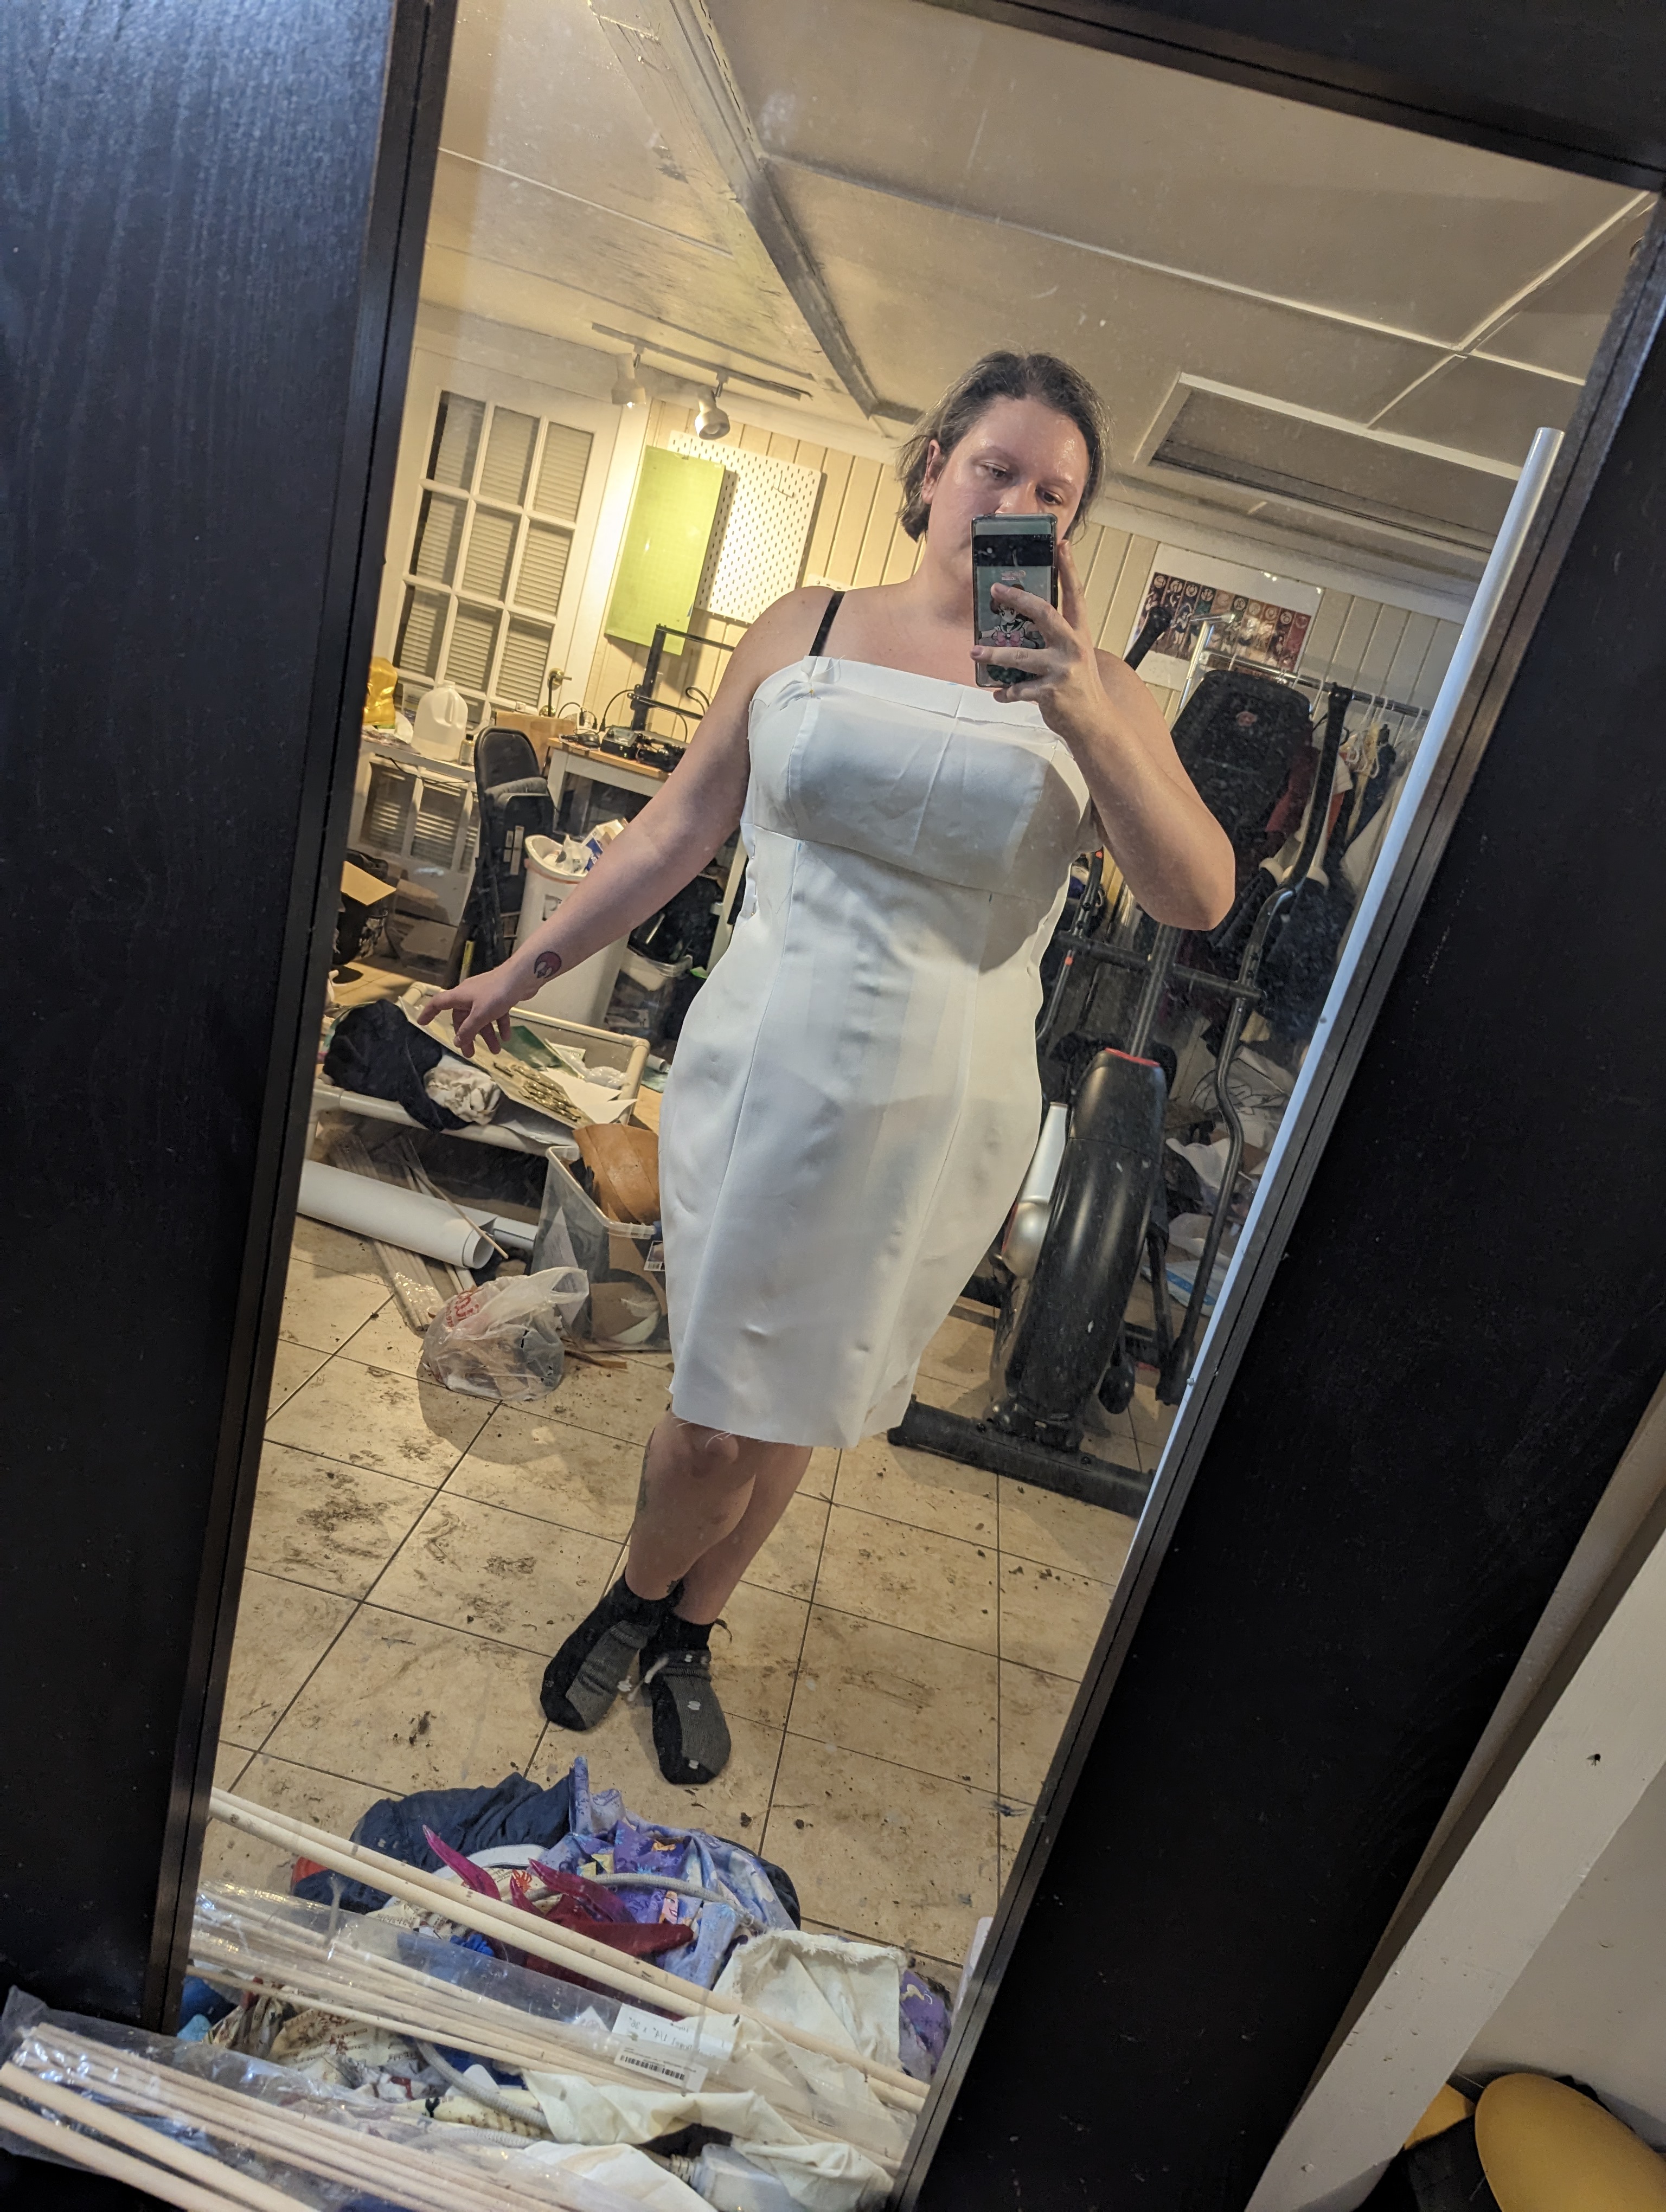
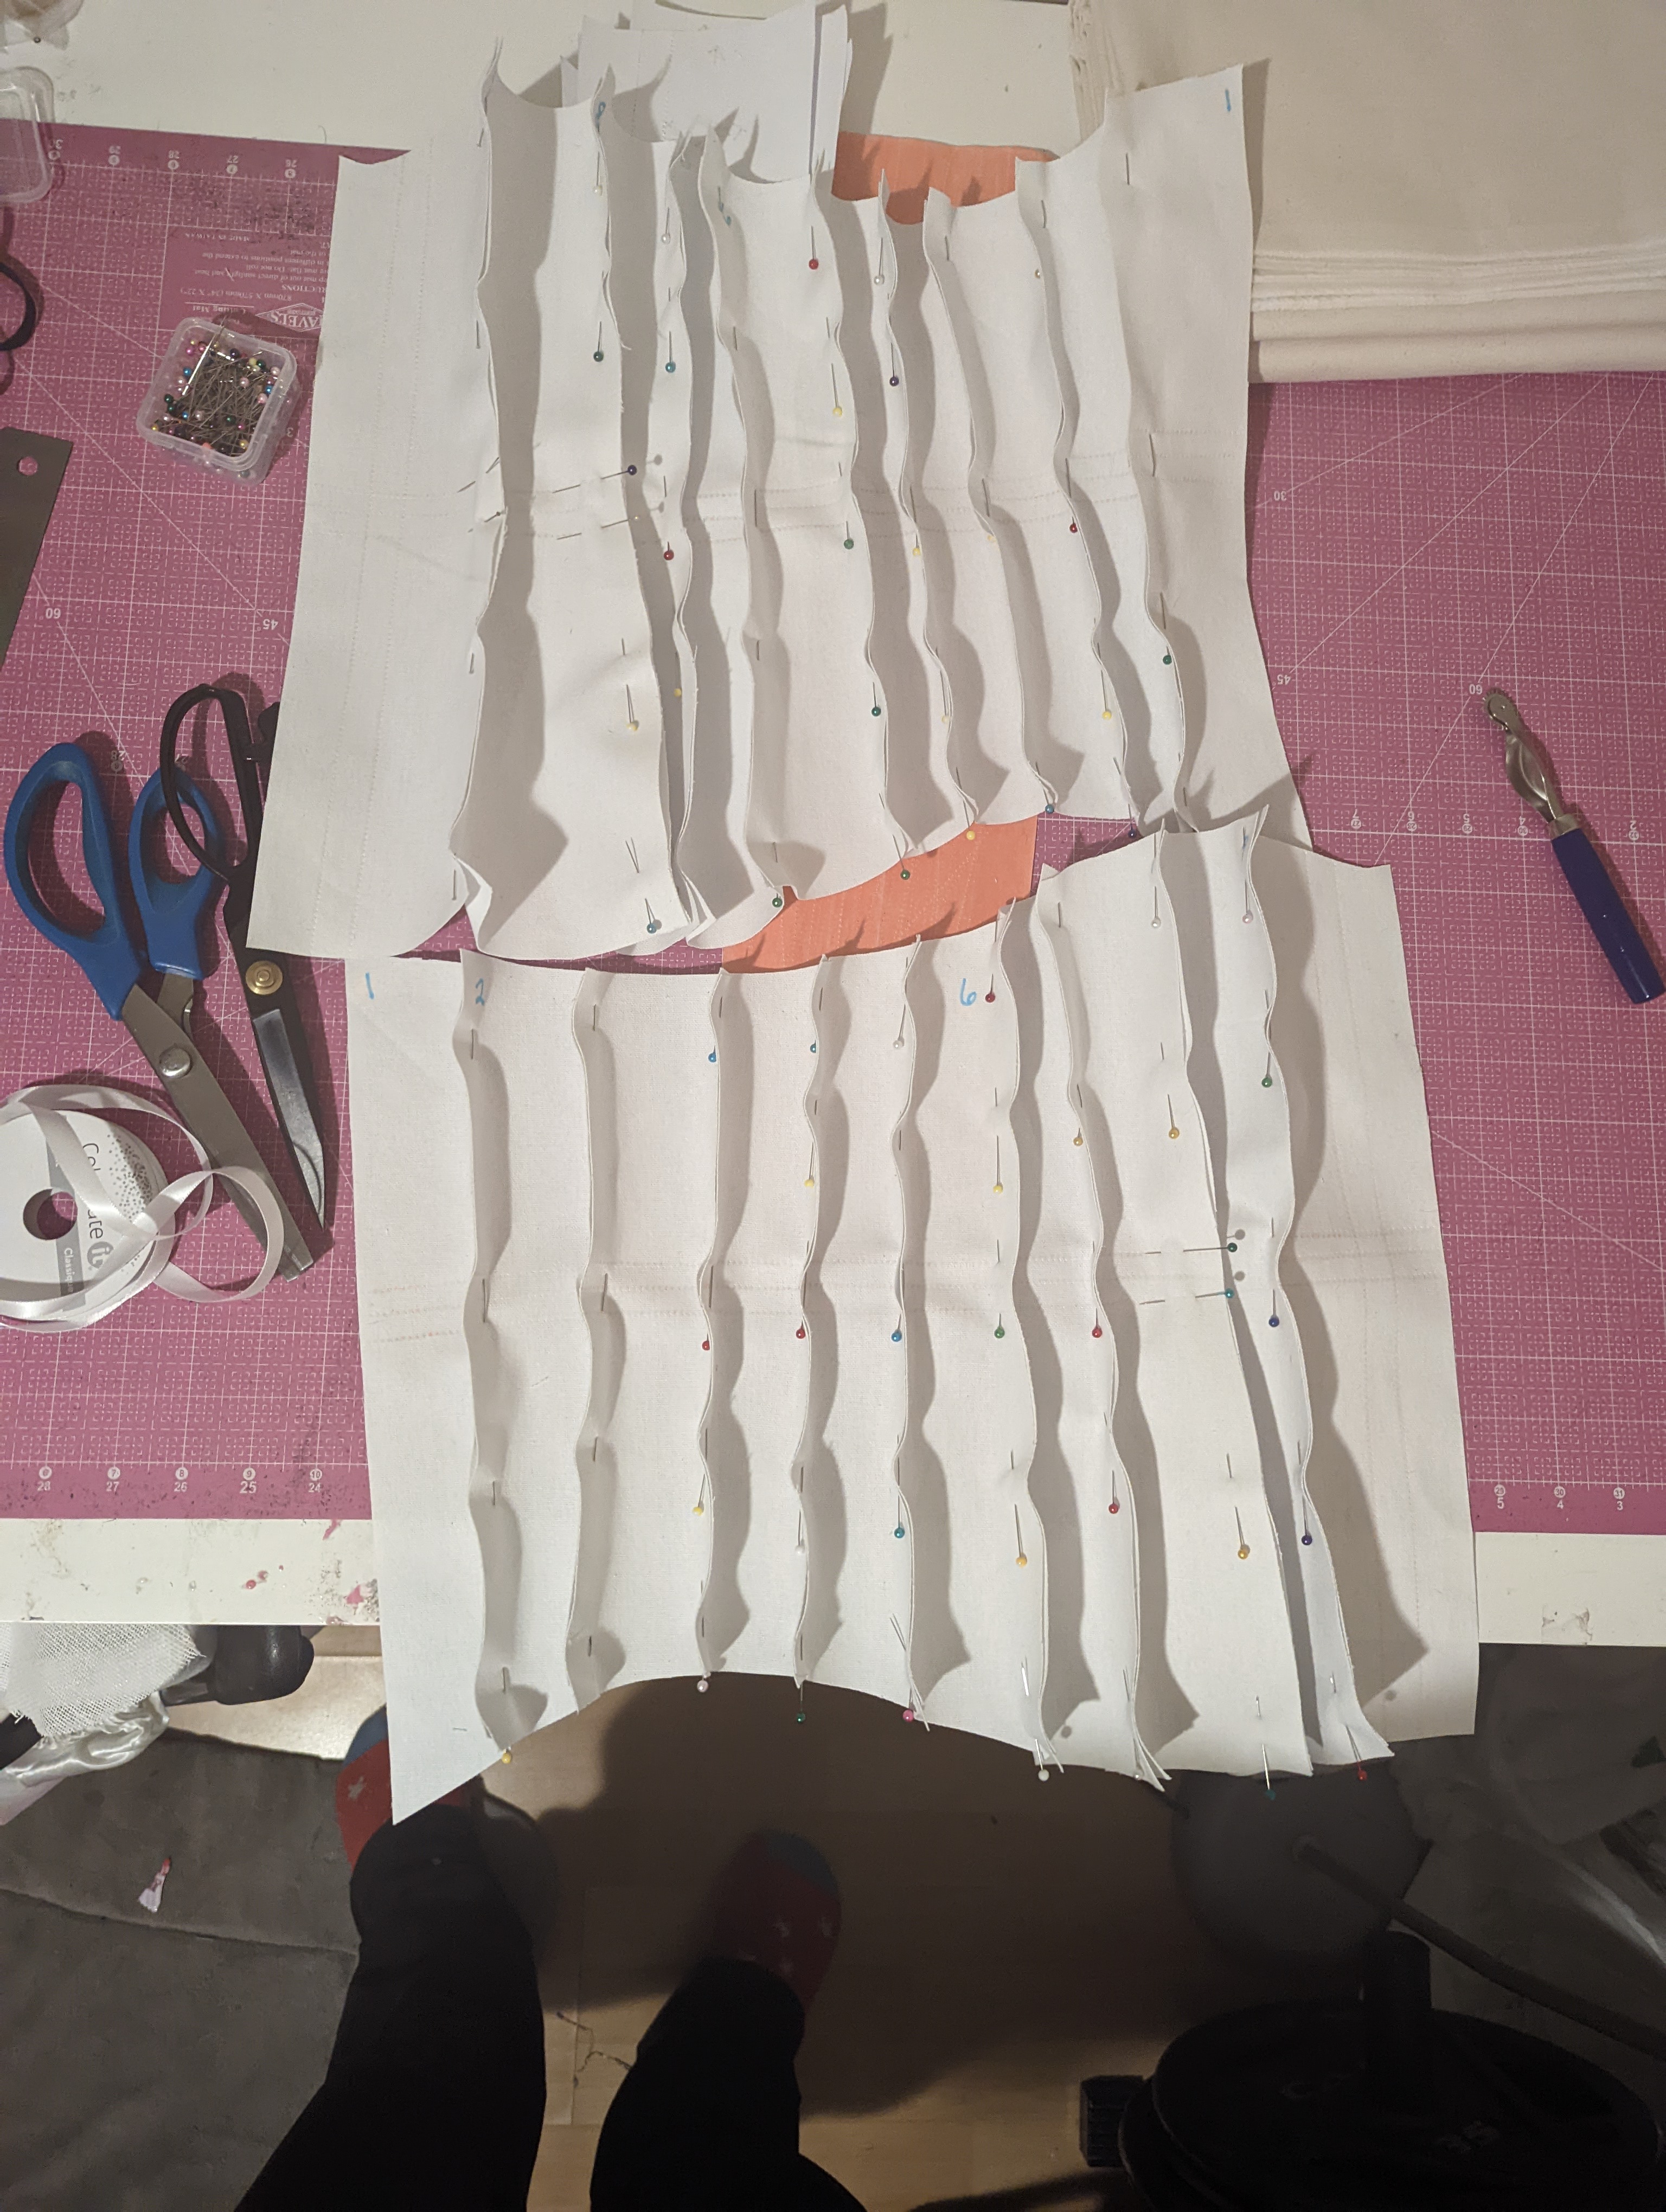
Again, the dress is fairly straight forward and I made it with minimal deviation from Kirsty’s instructions. The main adjustment I made was a Full Bust Adjustment. This style of dress really relies on close tailoring, so definitely make a mockup of the bodice down through the hips at a bare minimum!
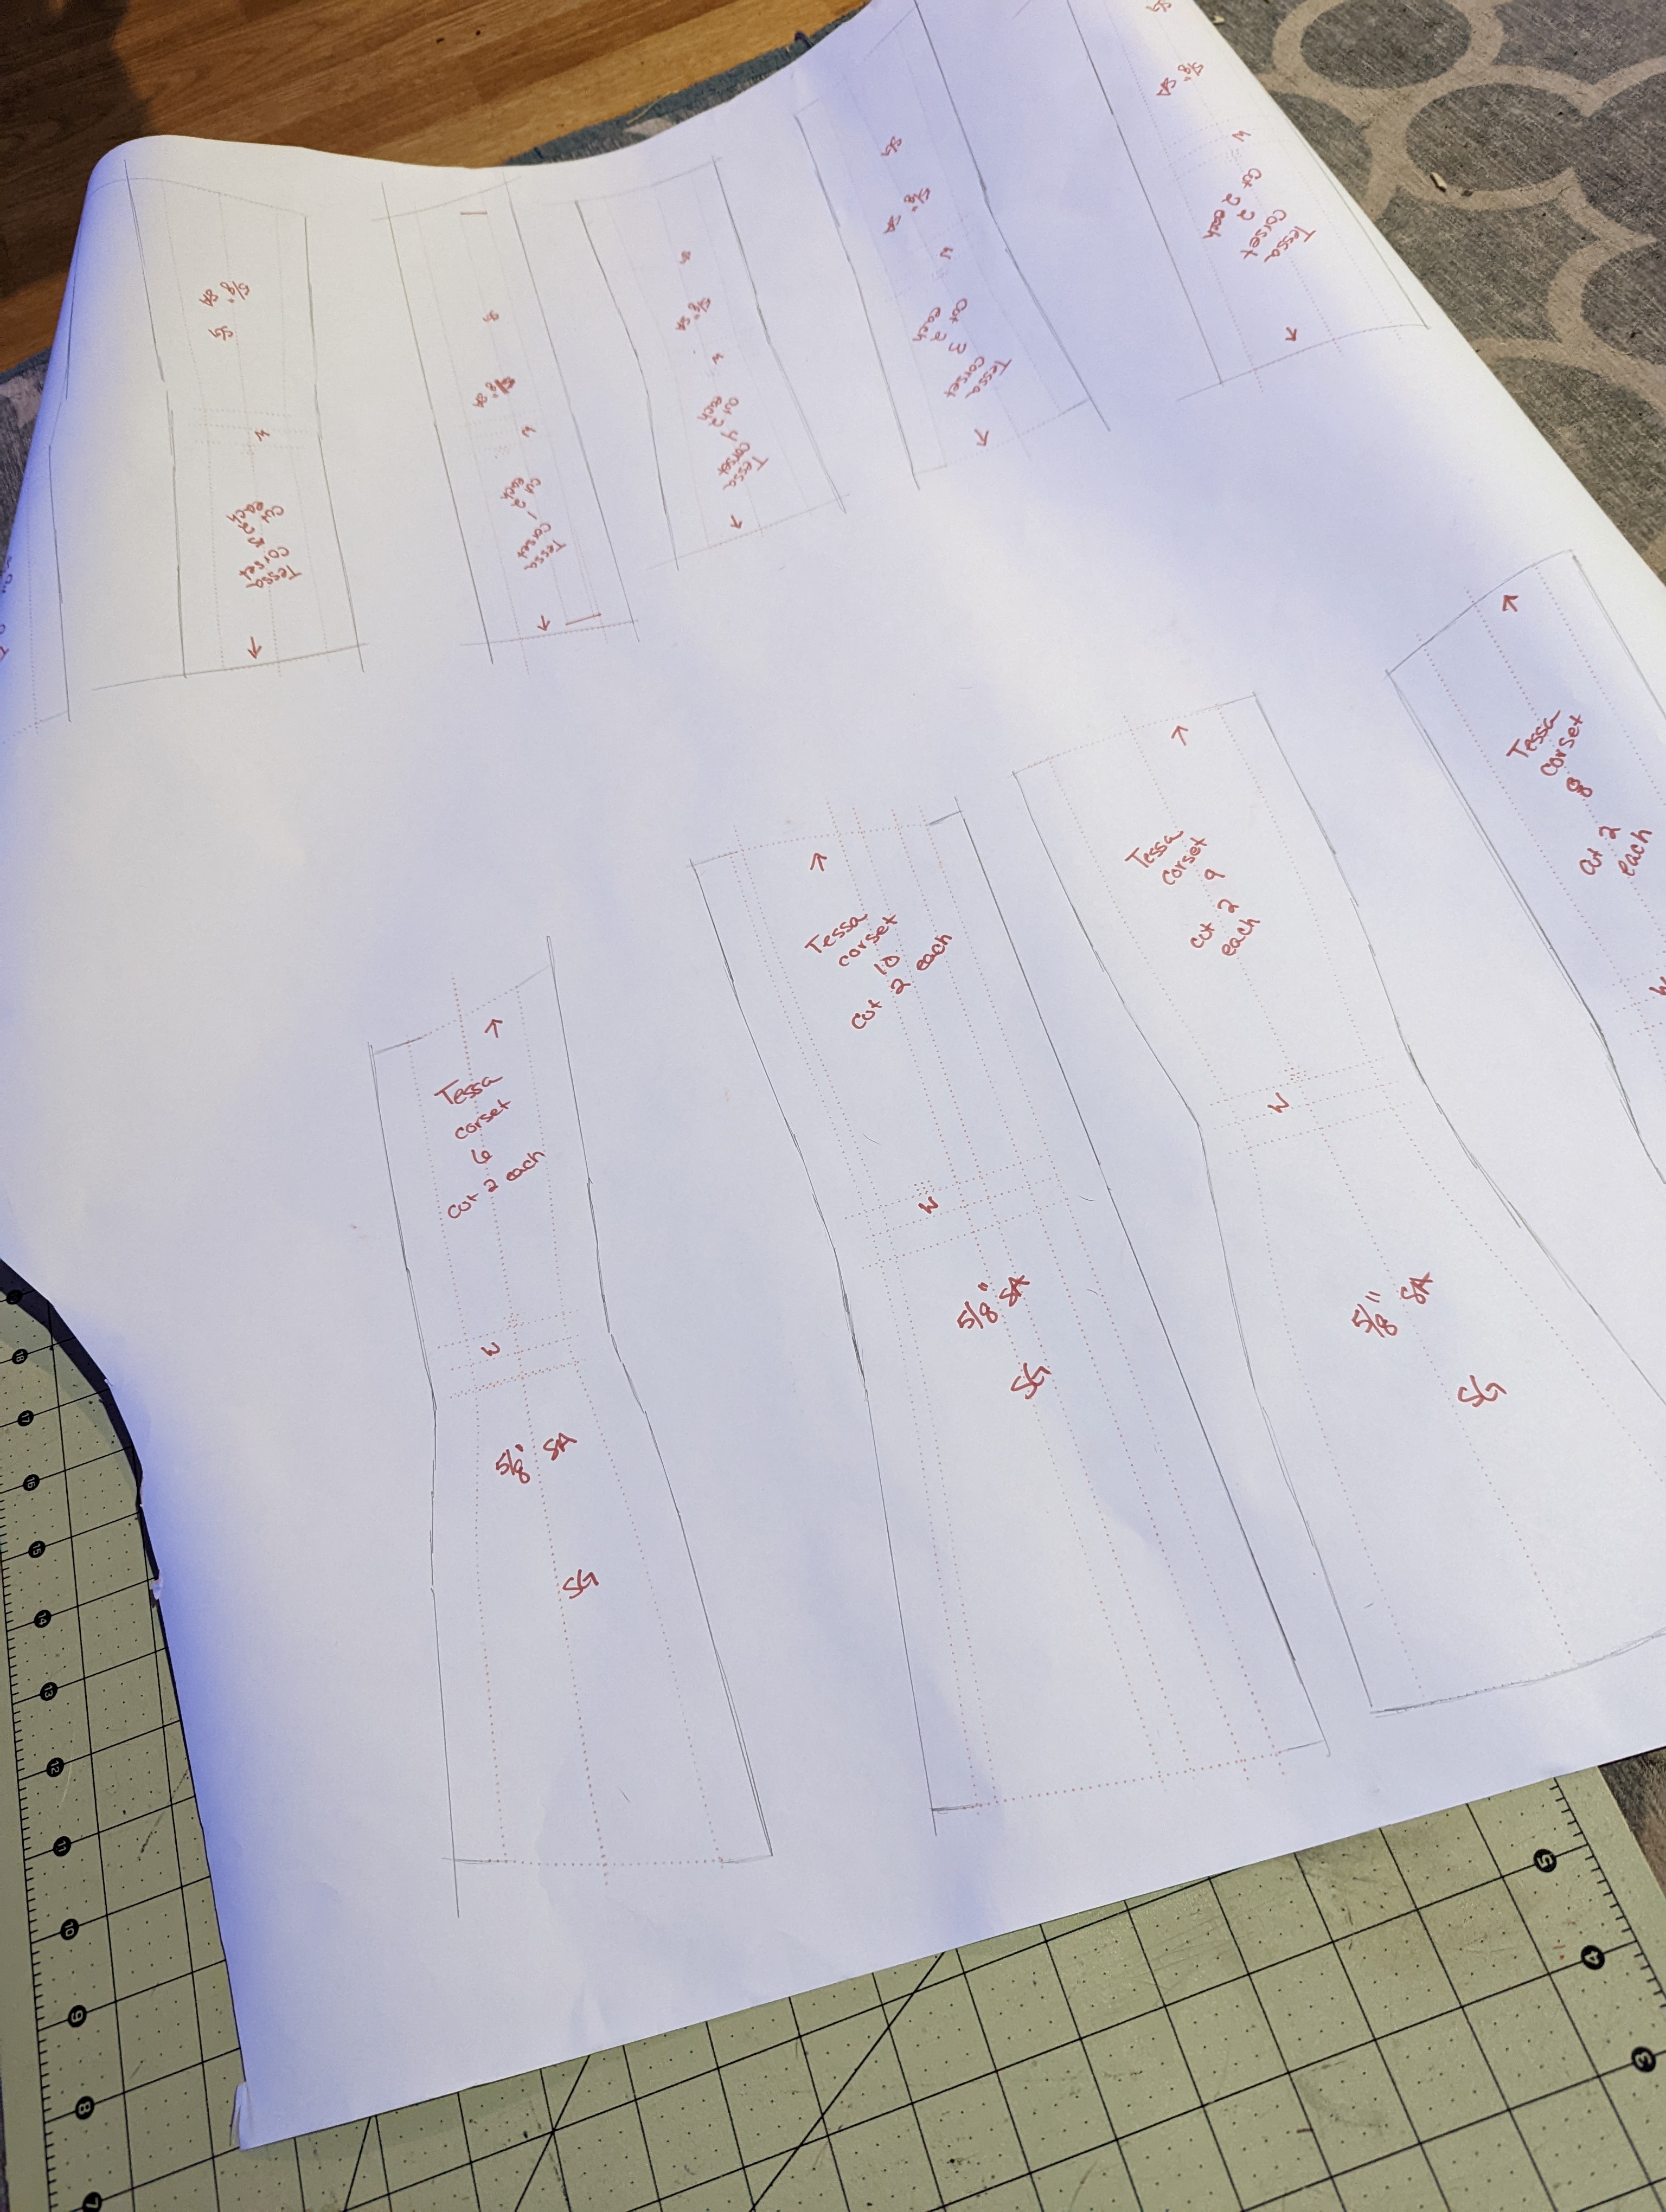

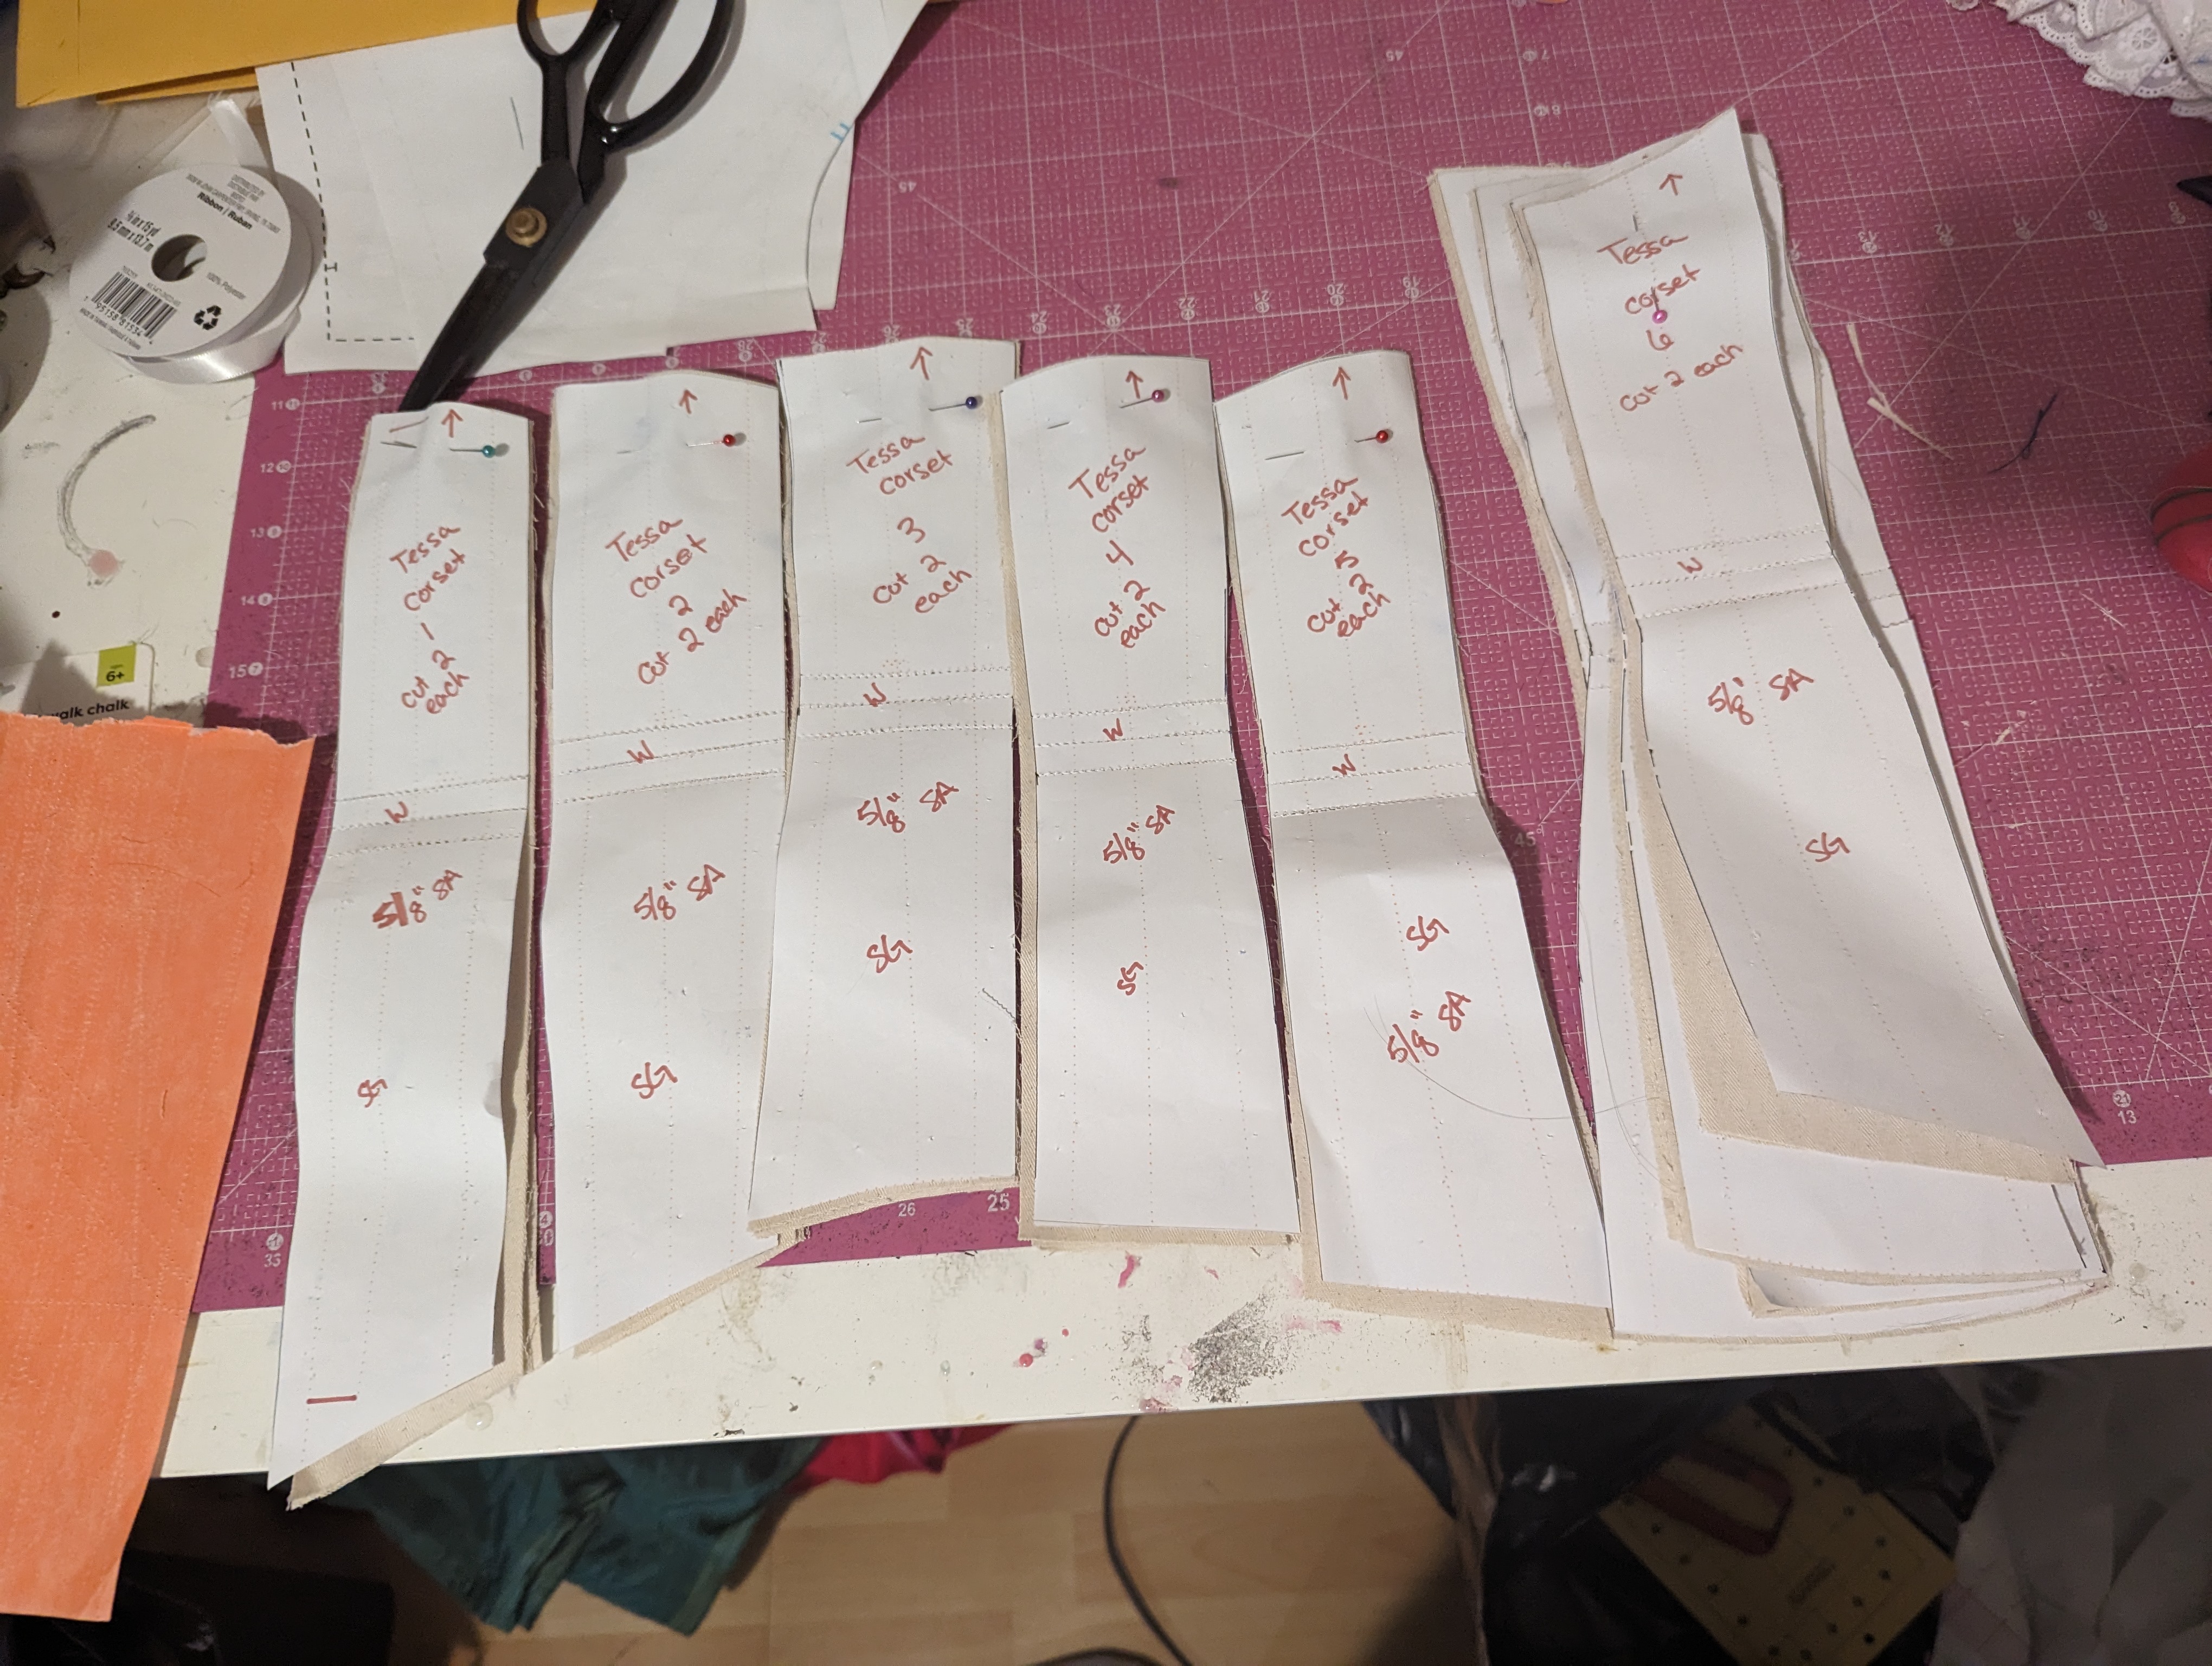
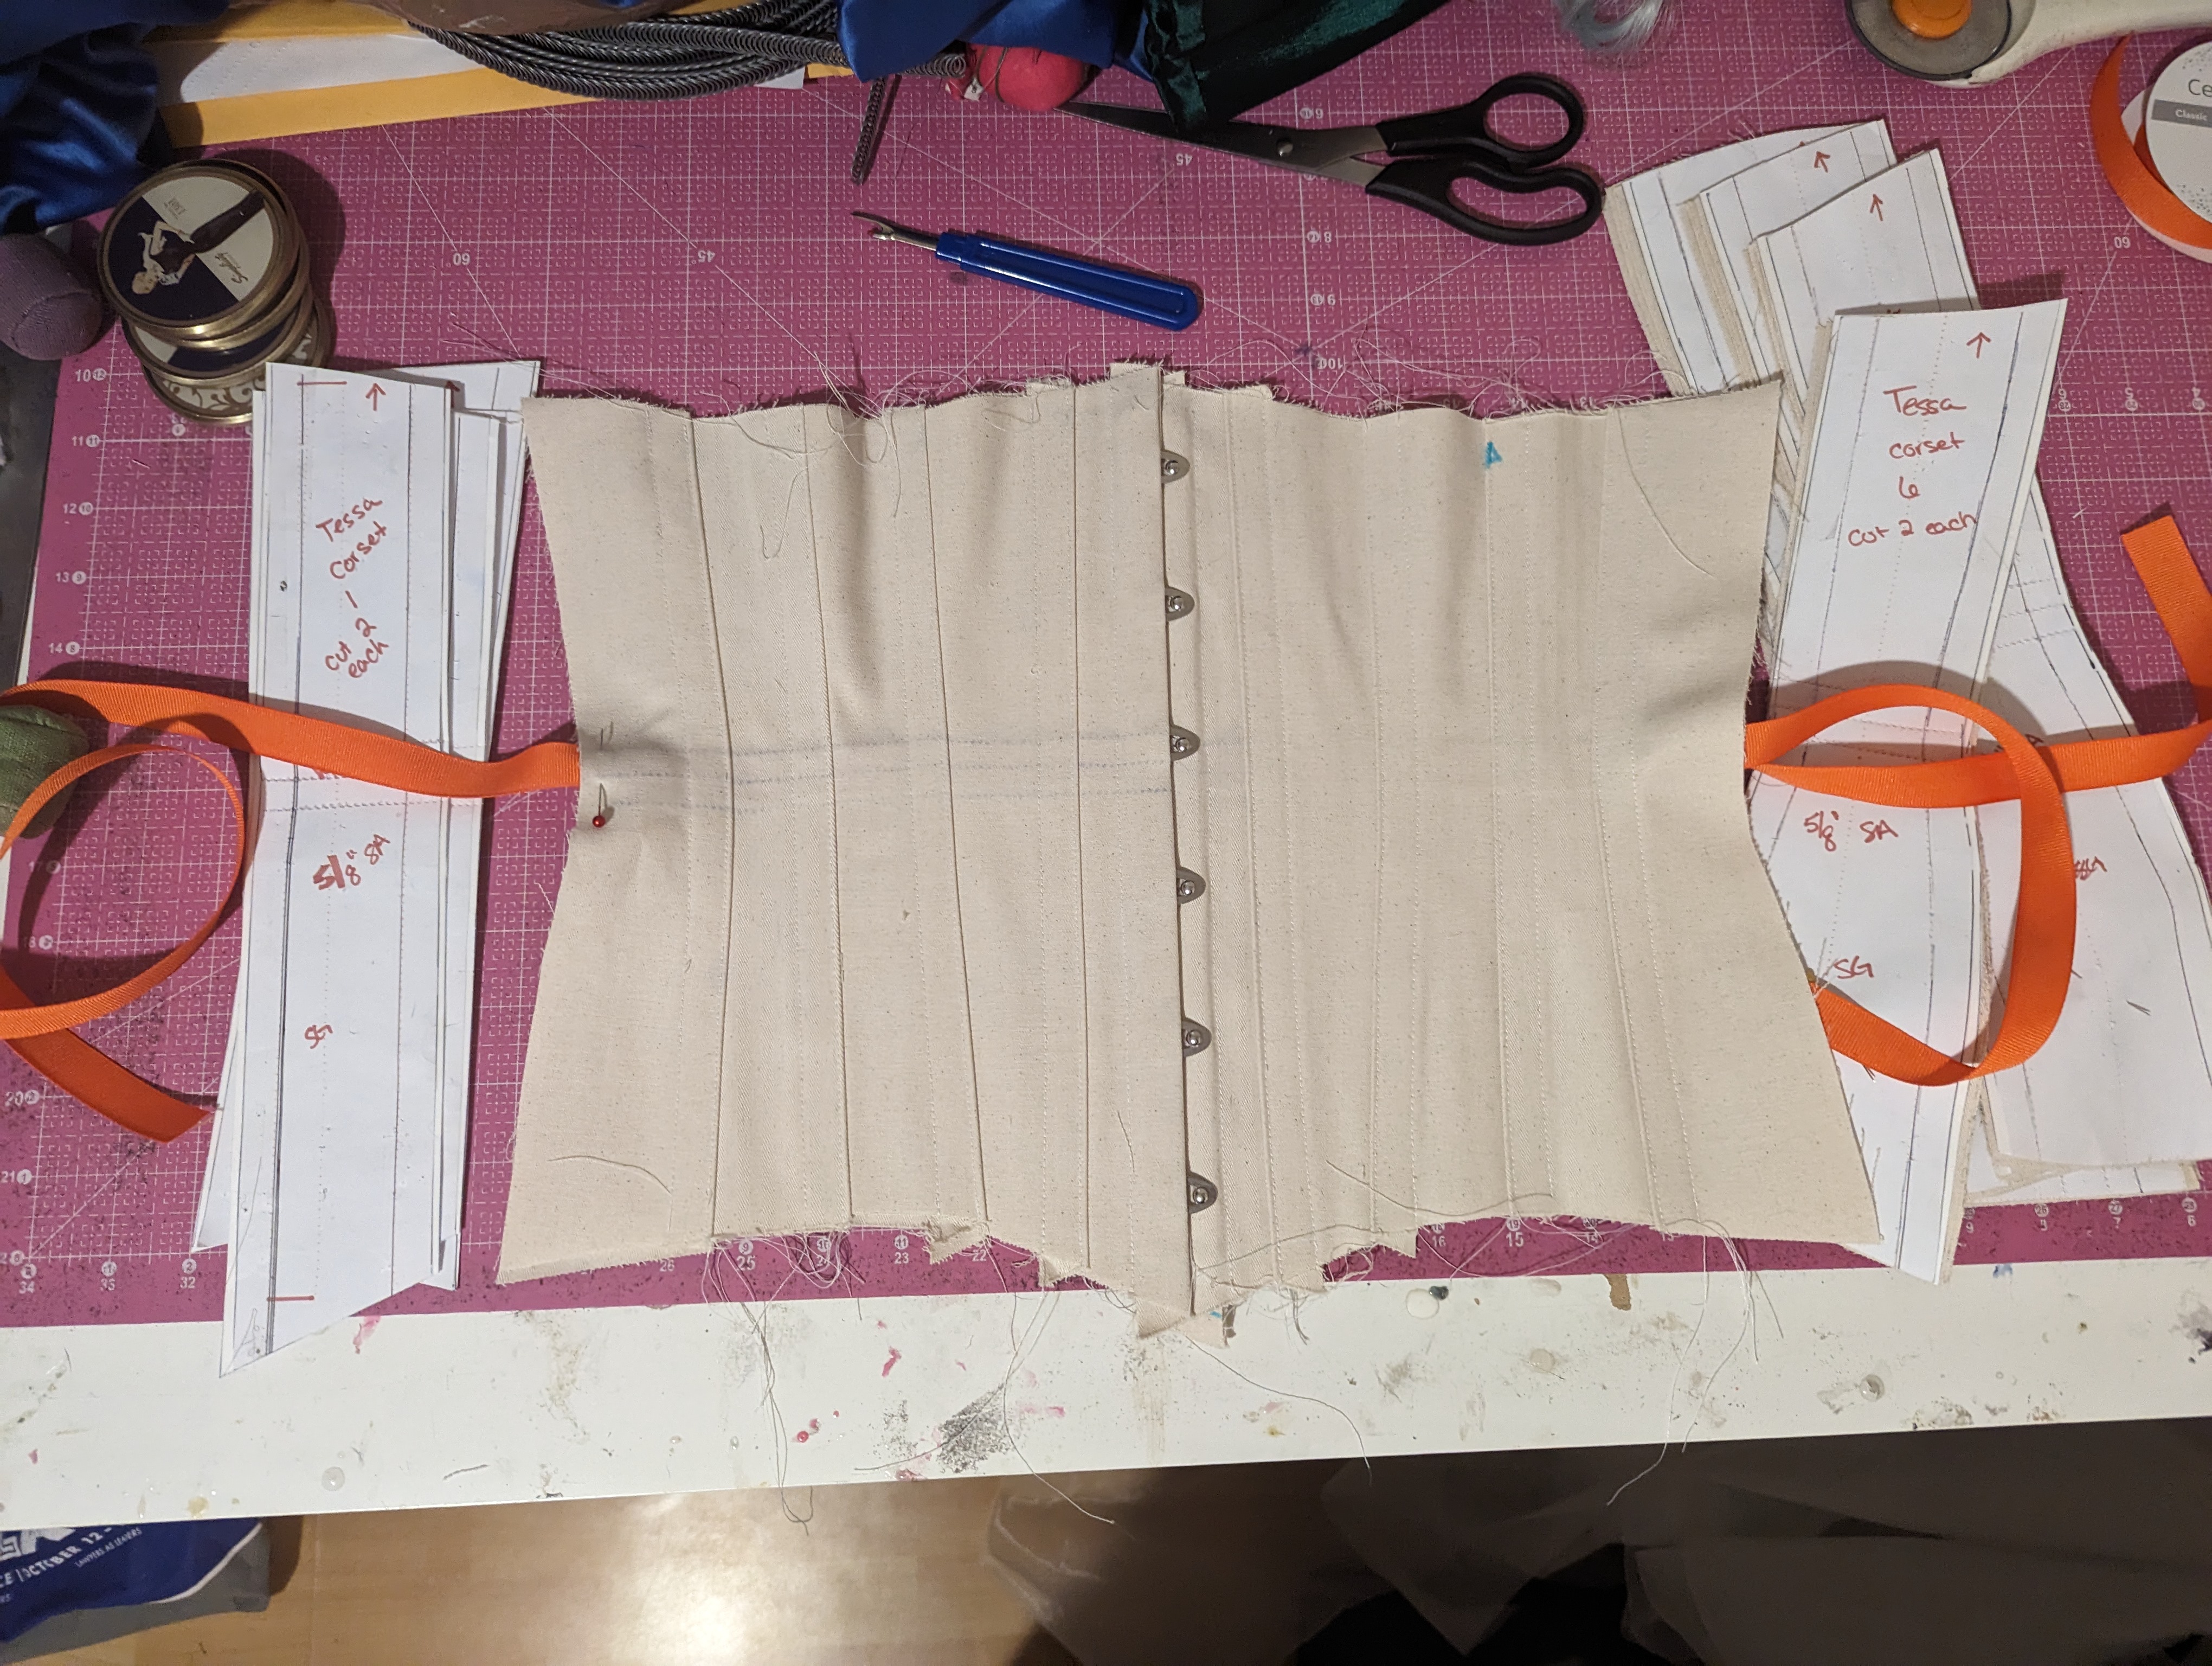
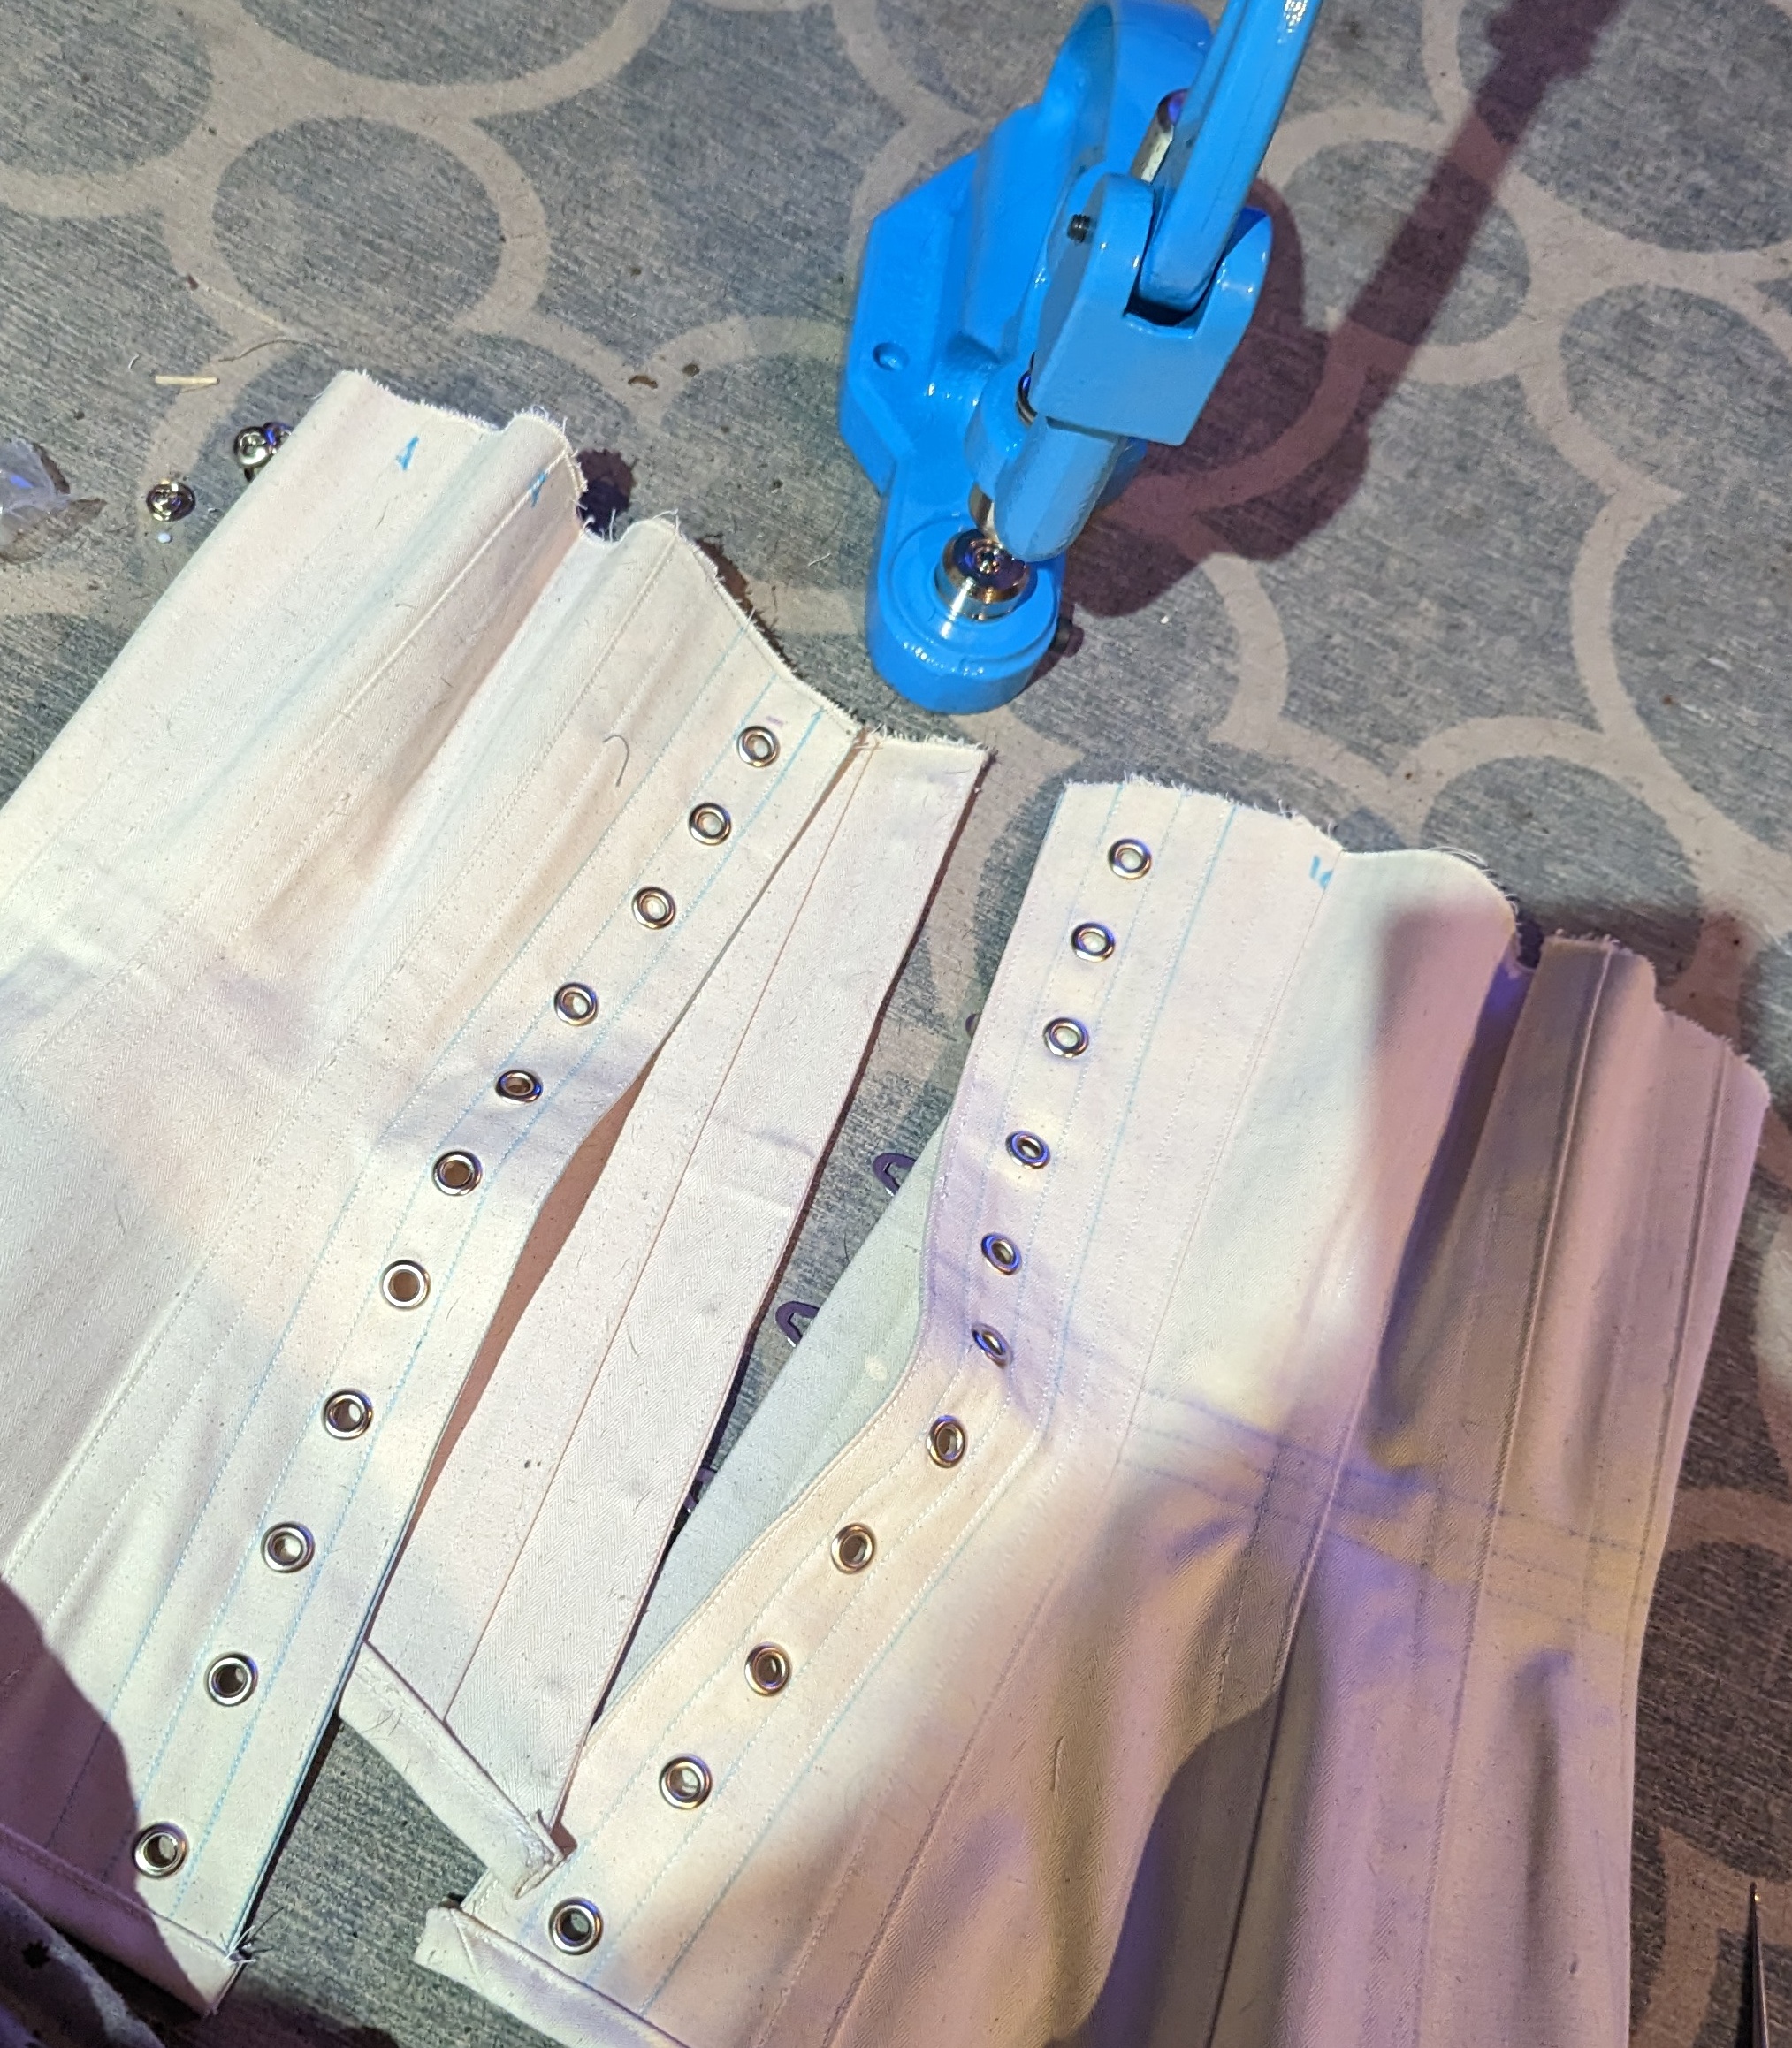
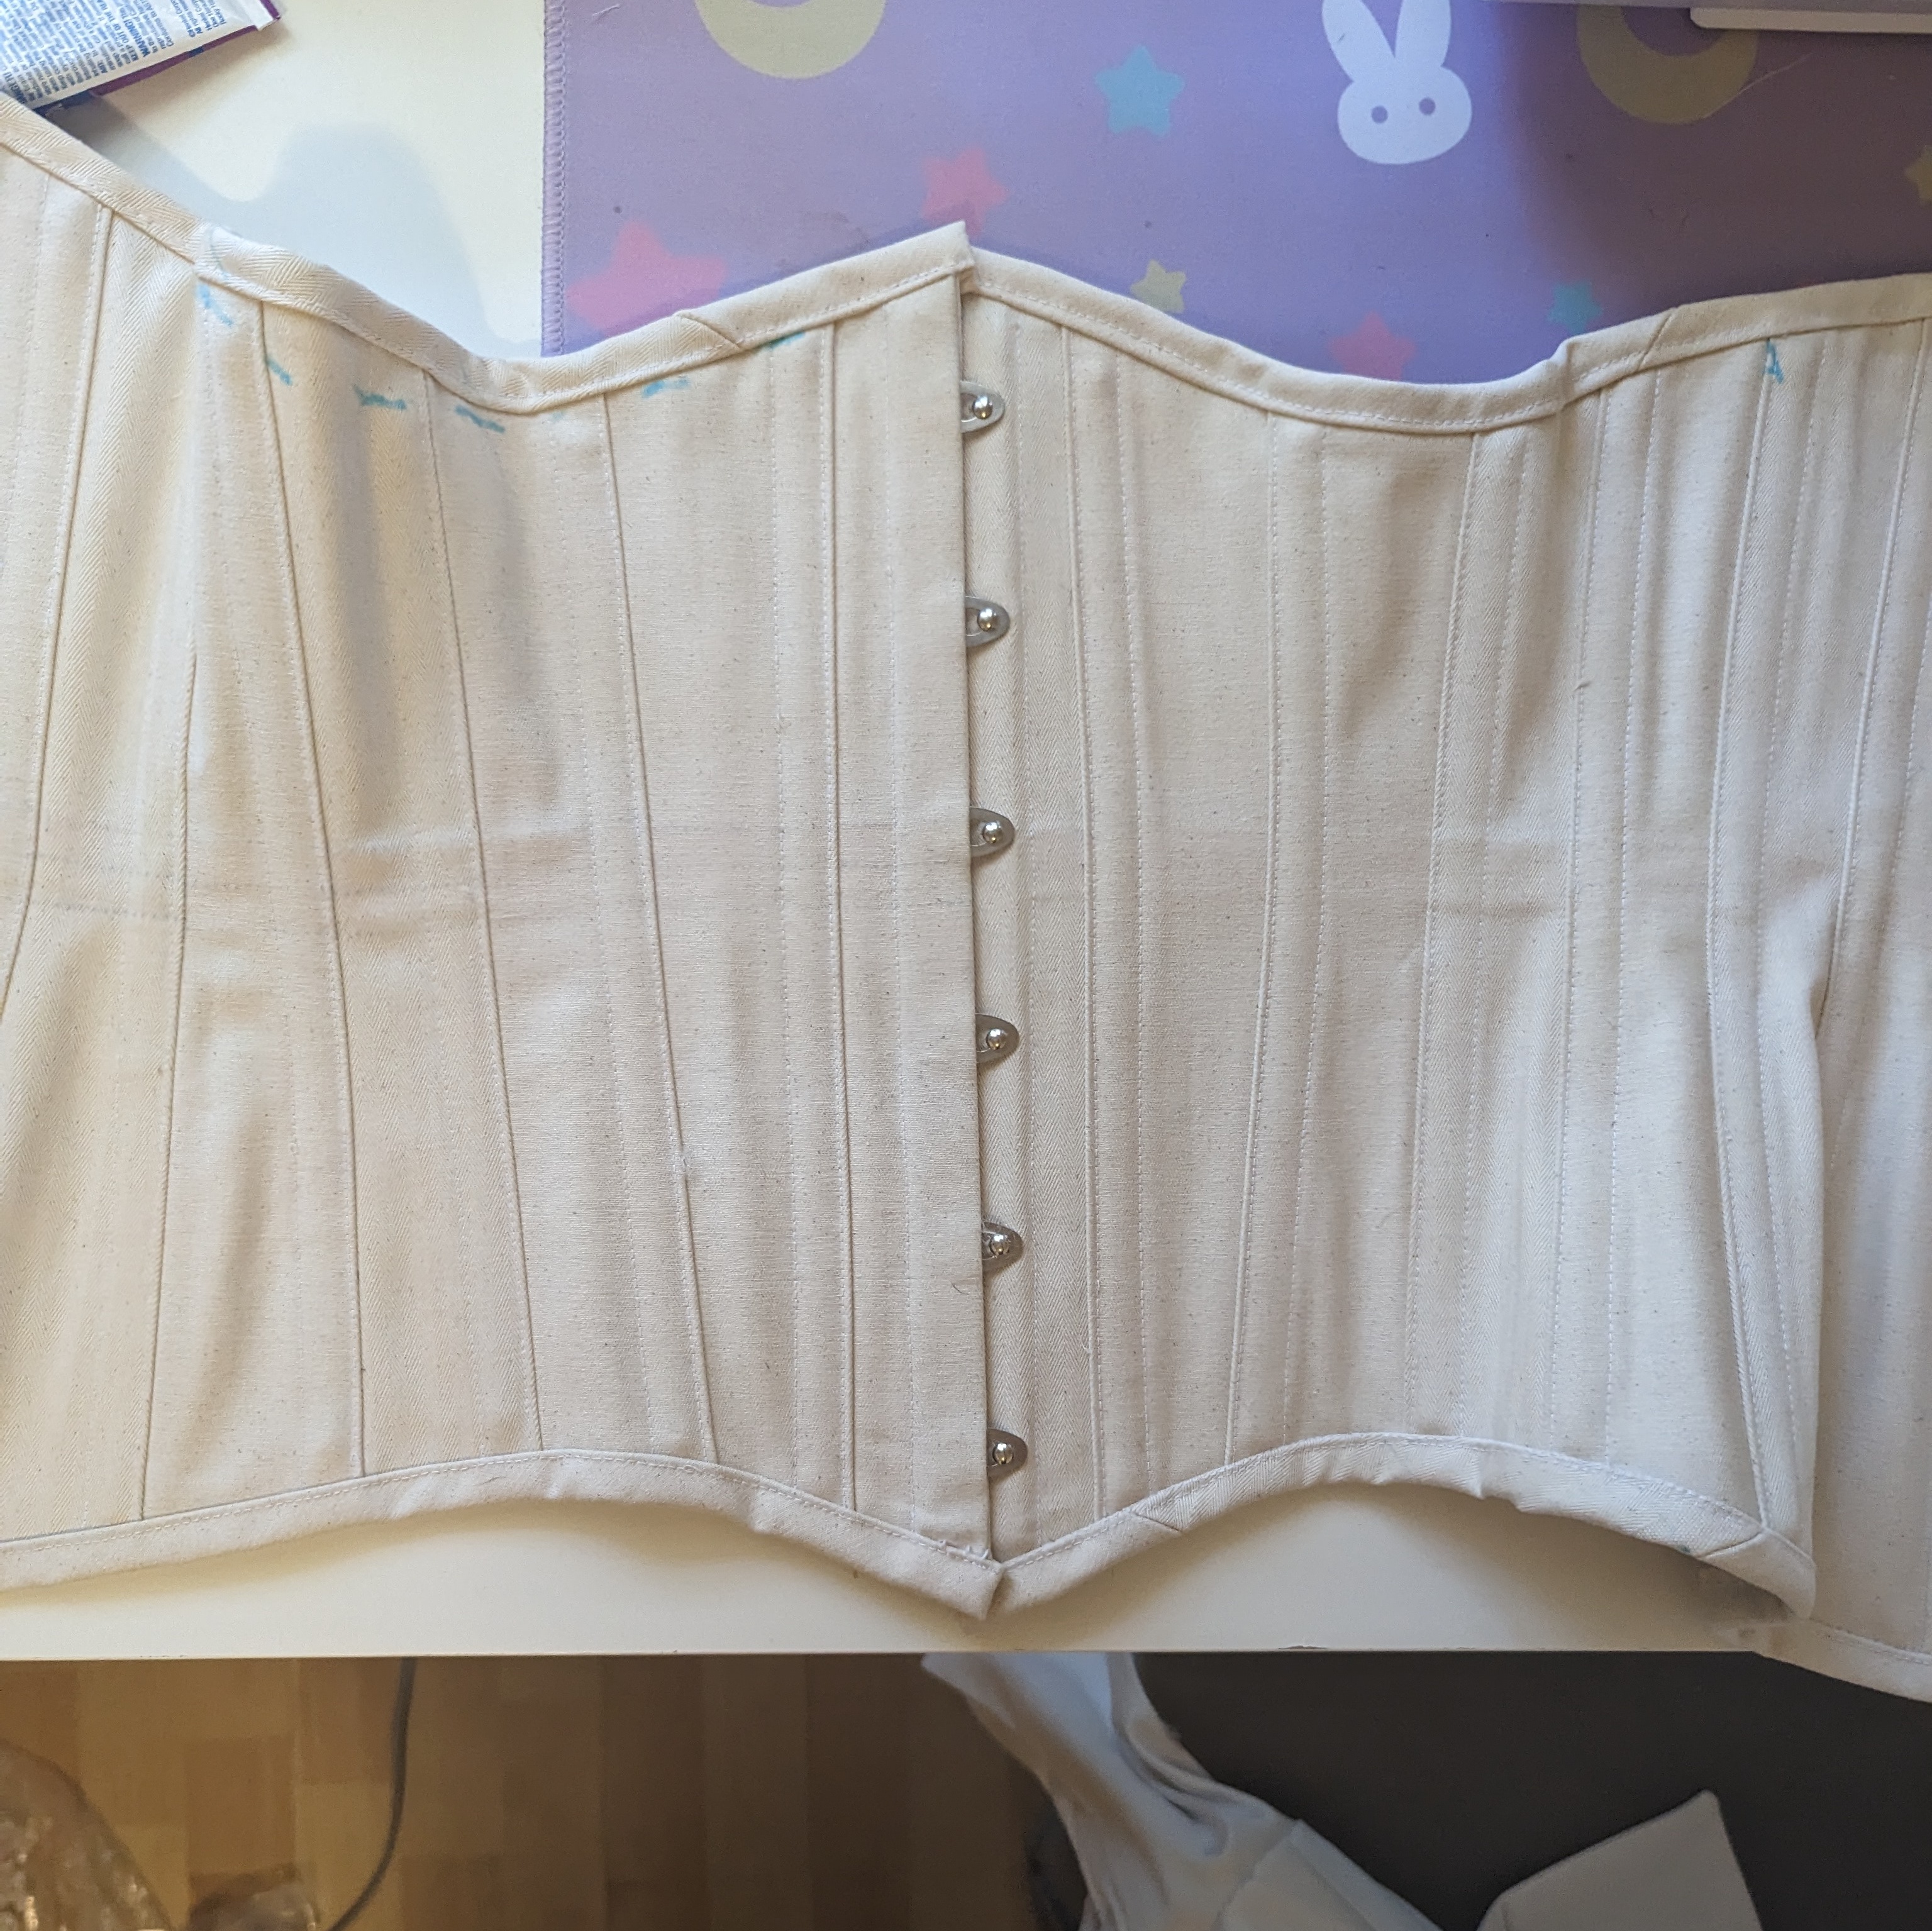
Underpinnings also played a big role in getting the silhouette I wanted for Rhea. I took this build as an opportunity to make a new foundation corset for some upcoming builds. I used the Tessa Longline Corset from Corsets by Caroline and made it with two layers of coutil and spiral steel boning throughout. It’s quickly become one of my favorite corsets and I’ve used it for lots of costumes this year! I’ll go into it more at a later date (probably when I cover my SSBU Princess Peach).
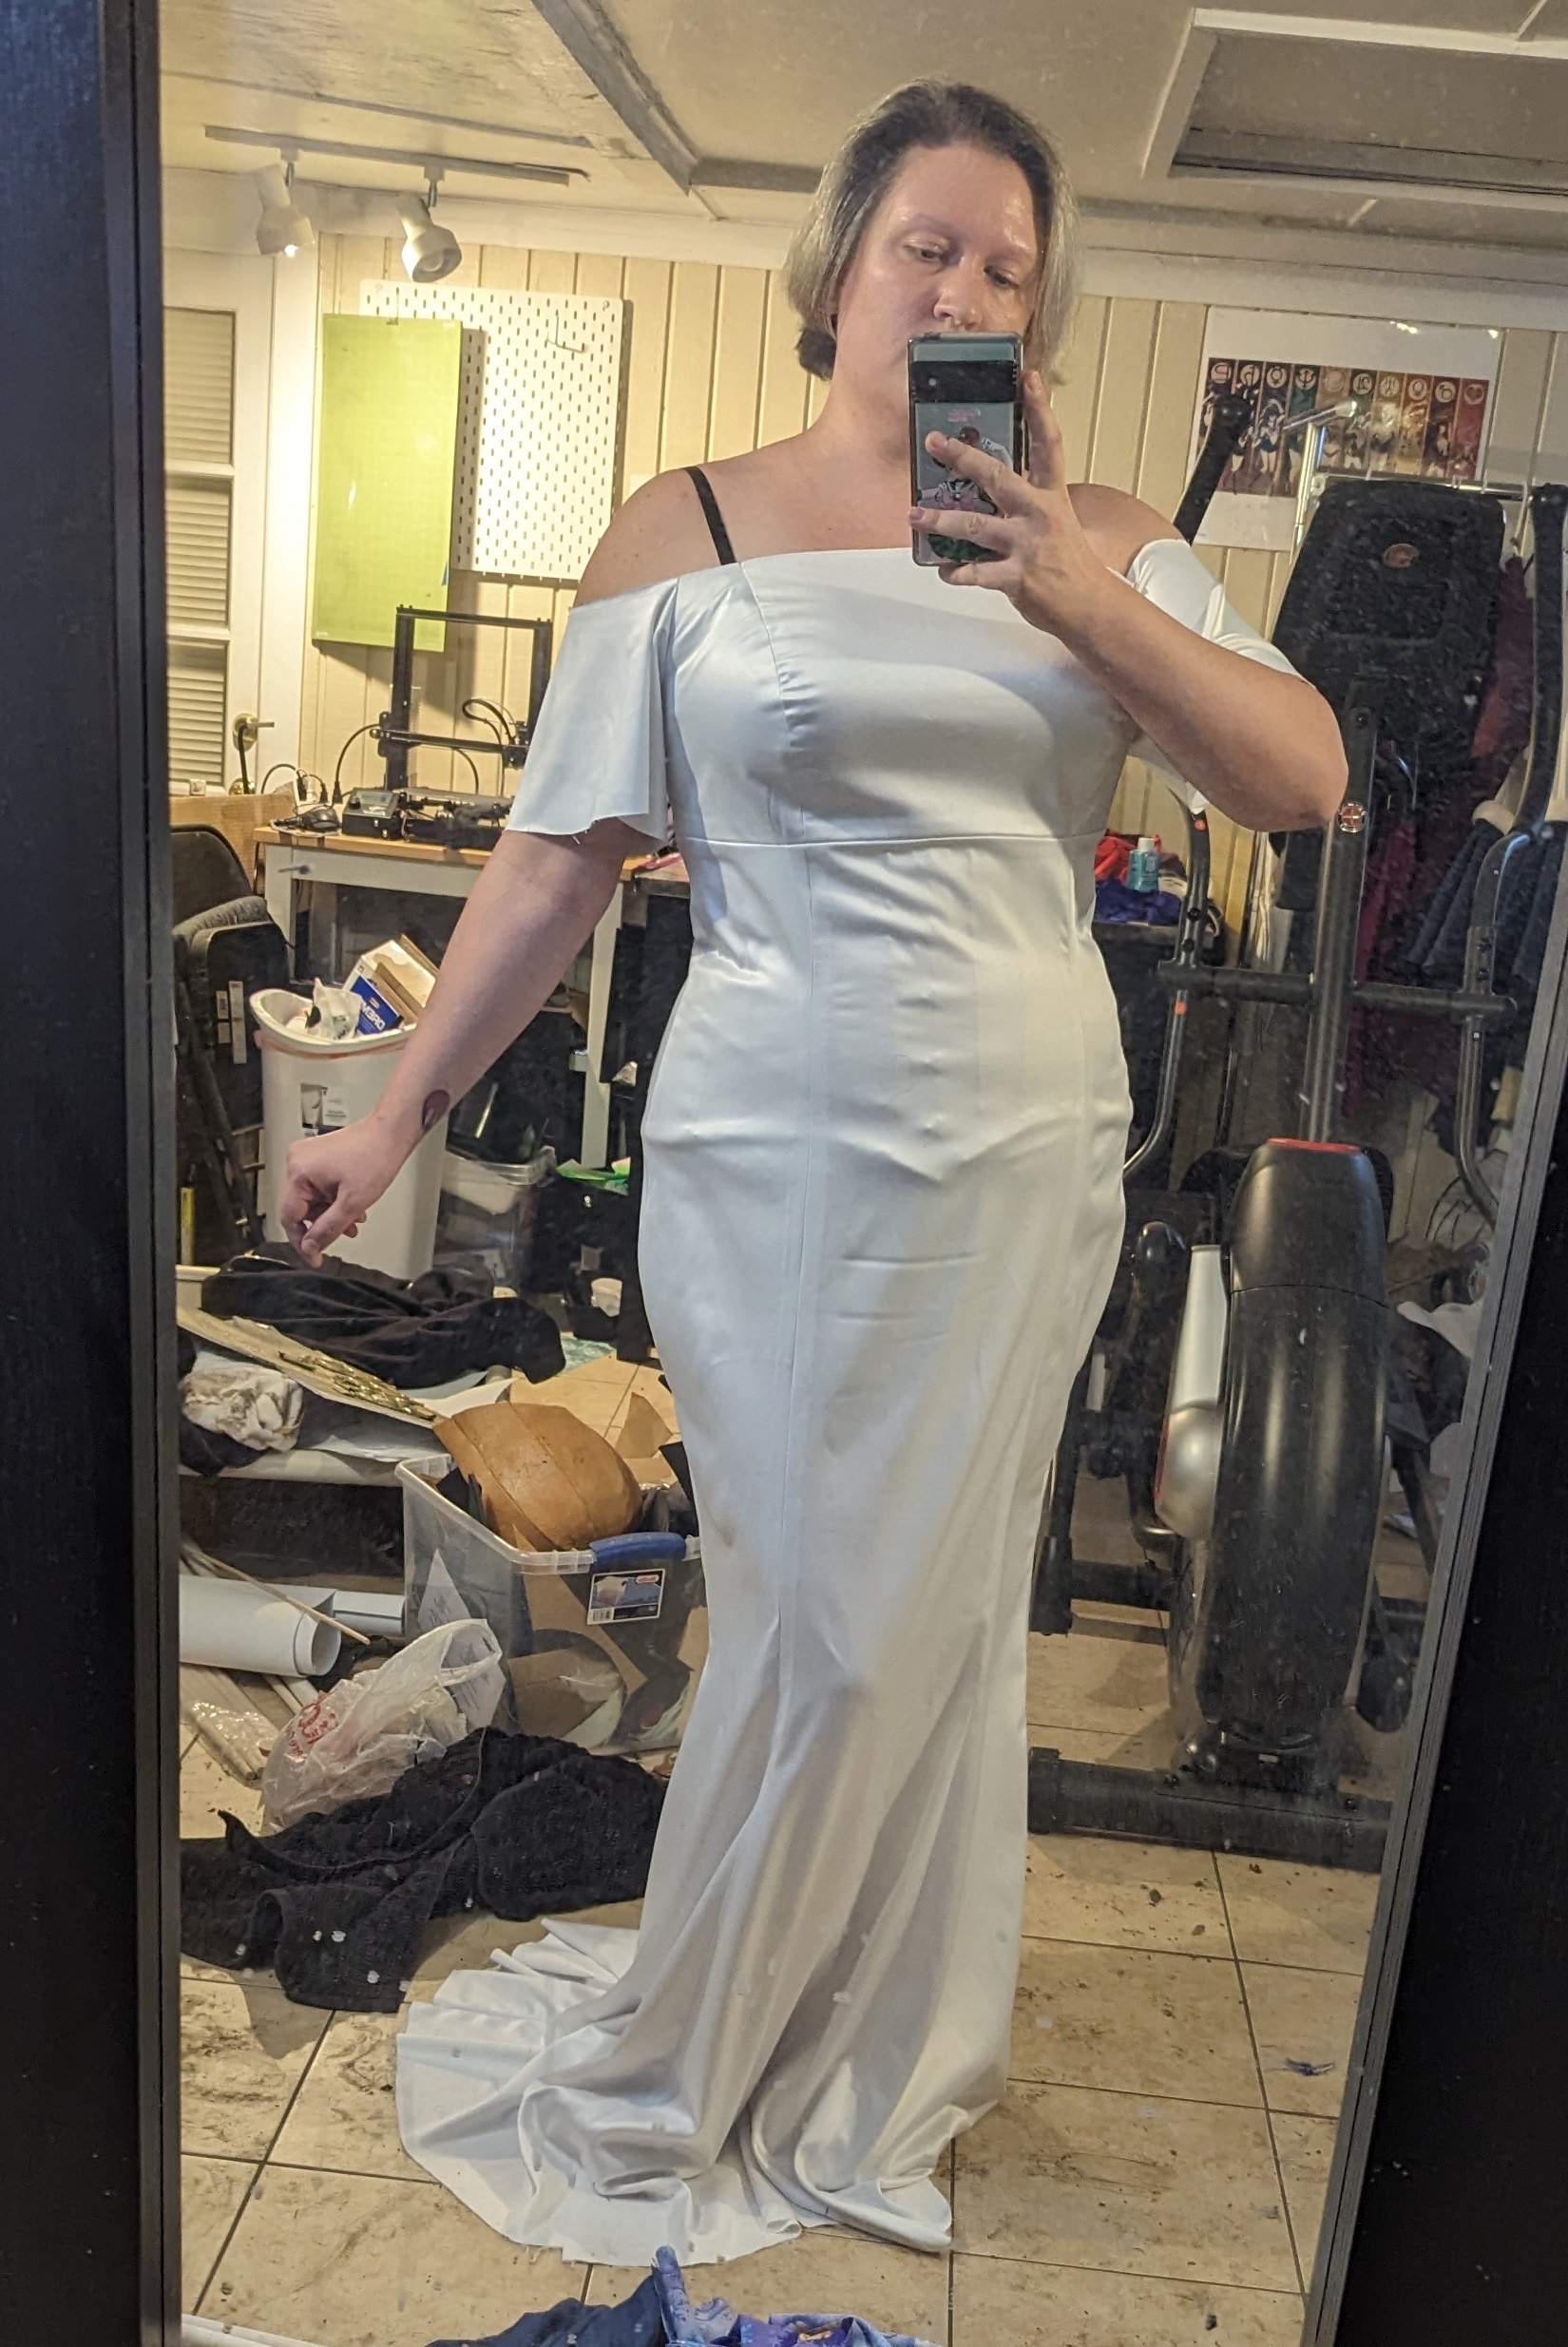
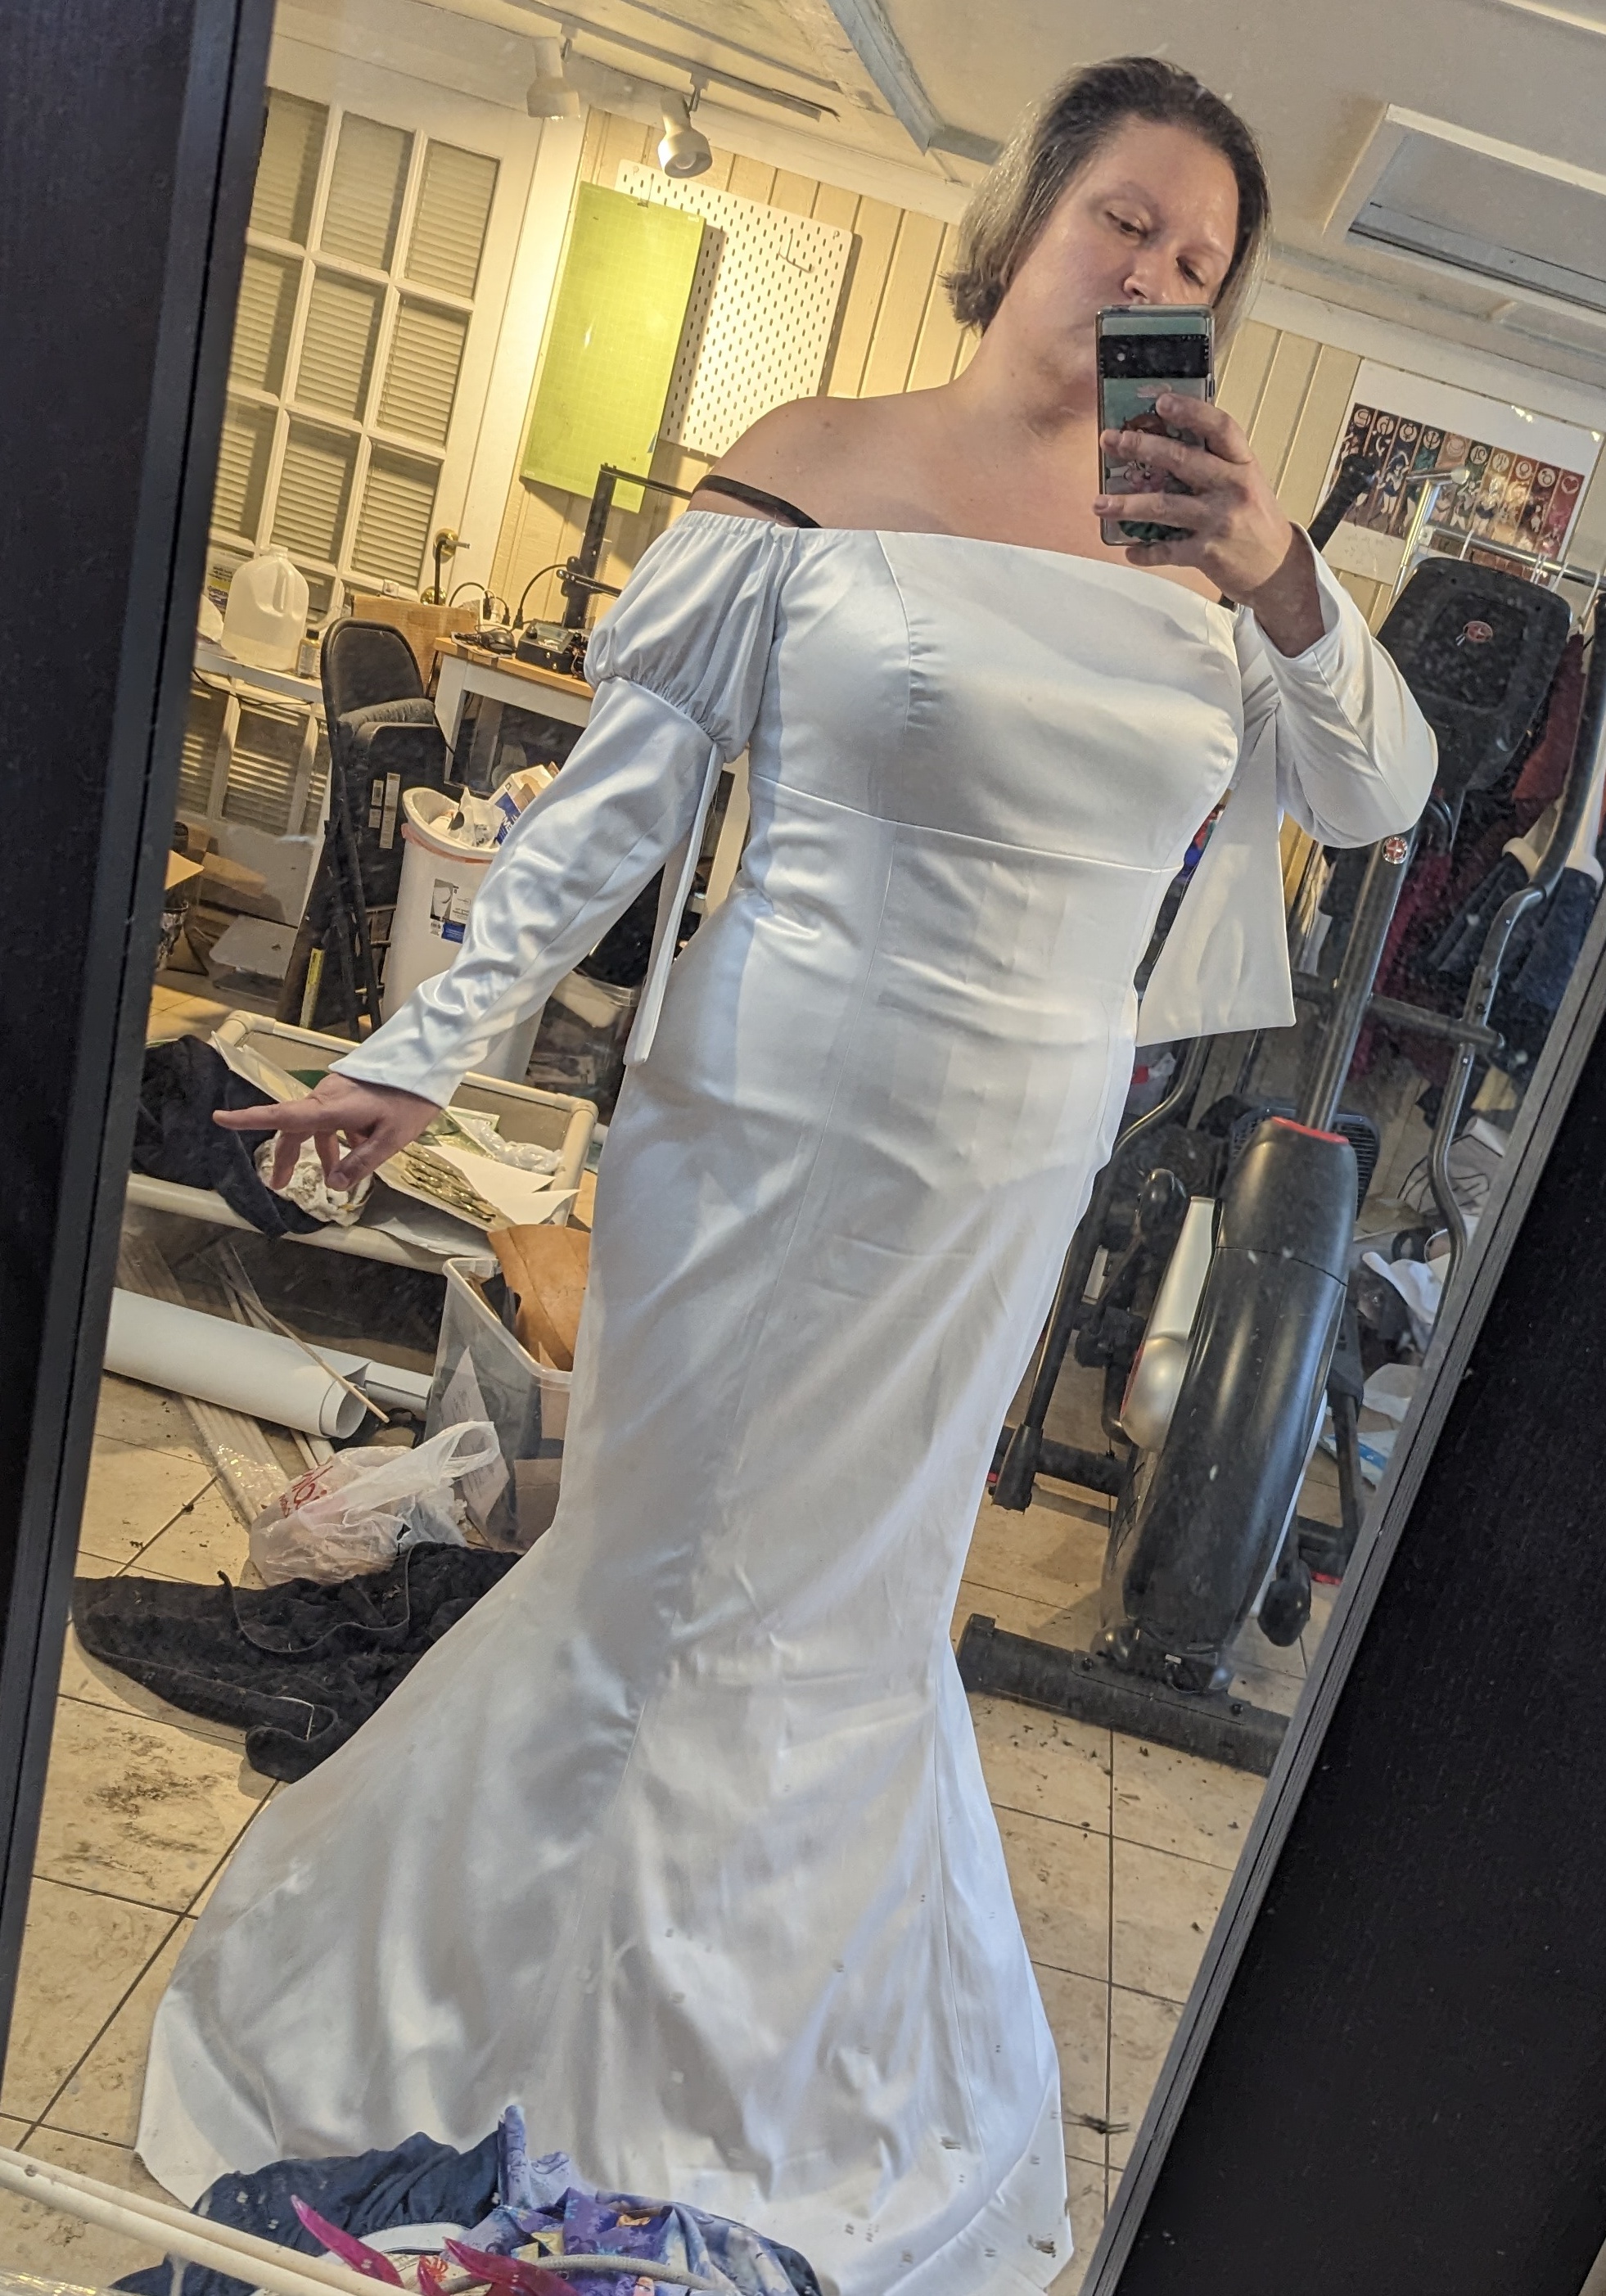
To give the bottom of the skirt that mermaid flair, I wore a crinoline that I made for Mistress Nine AGES ago. This is a fairly basic number modeled after some wedding crinolines I saw online. It has a pencil skirt made of spandex and the base is a circle skirt with some steel boning and a bit of tulle on top. Again, it’s simple, but it gets the job done!
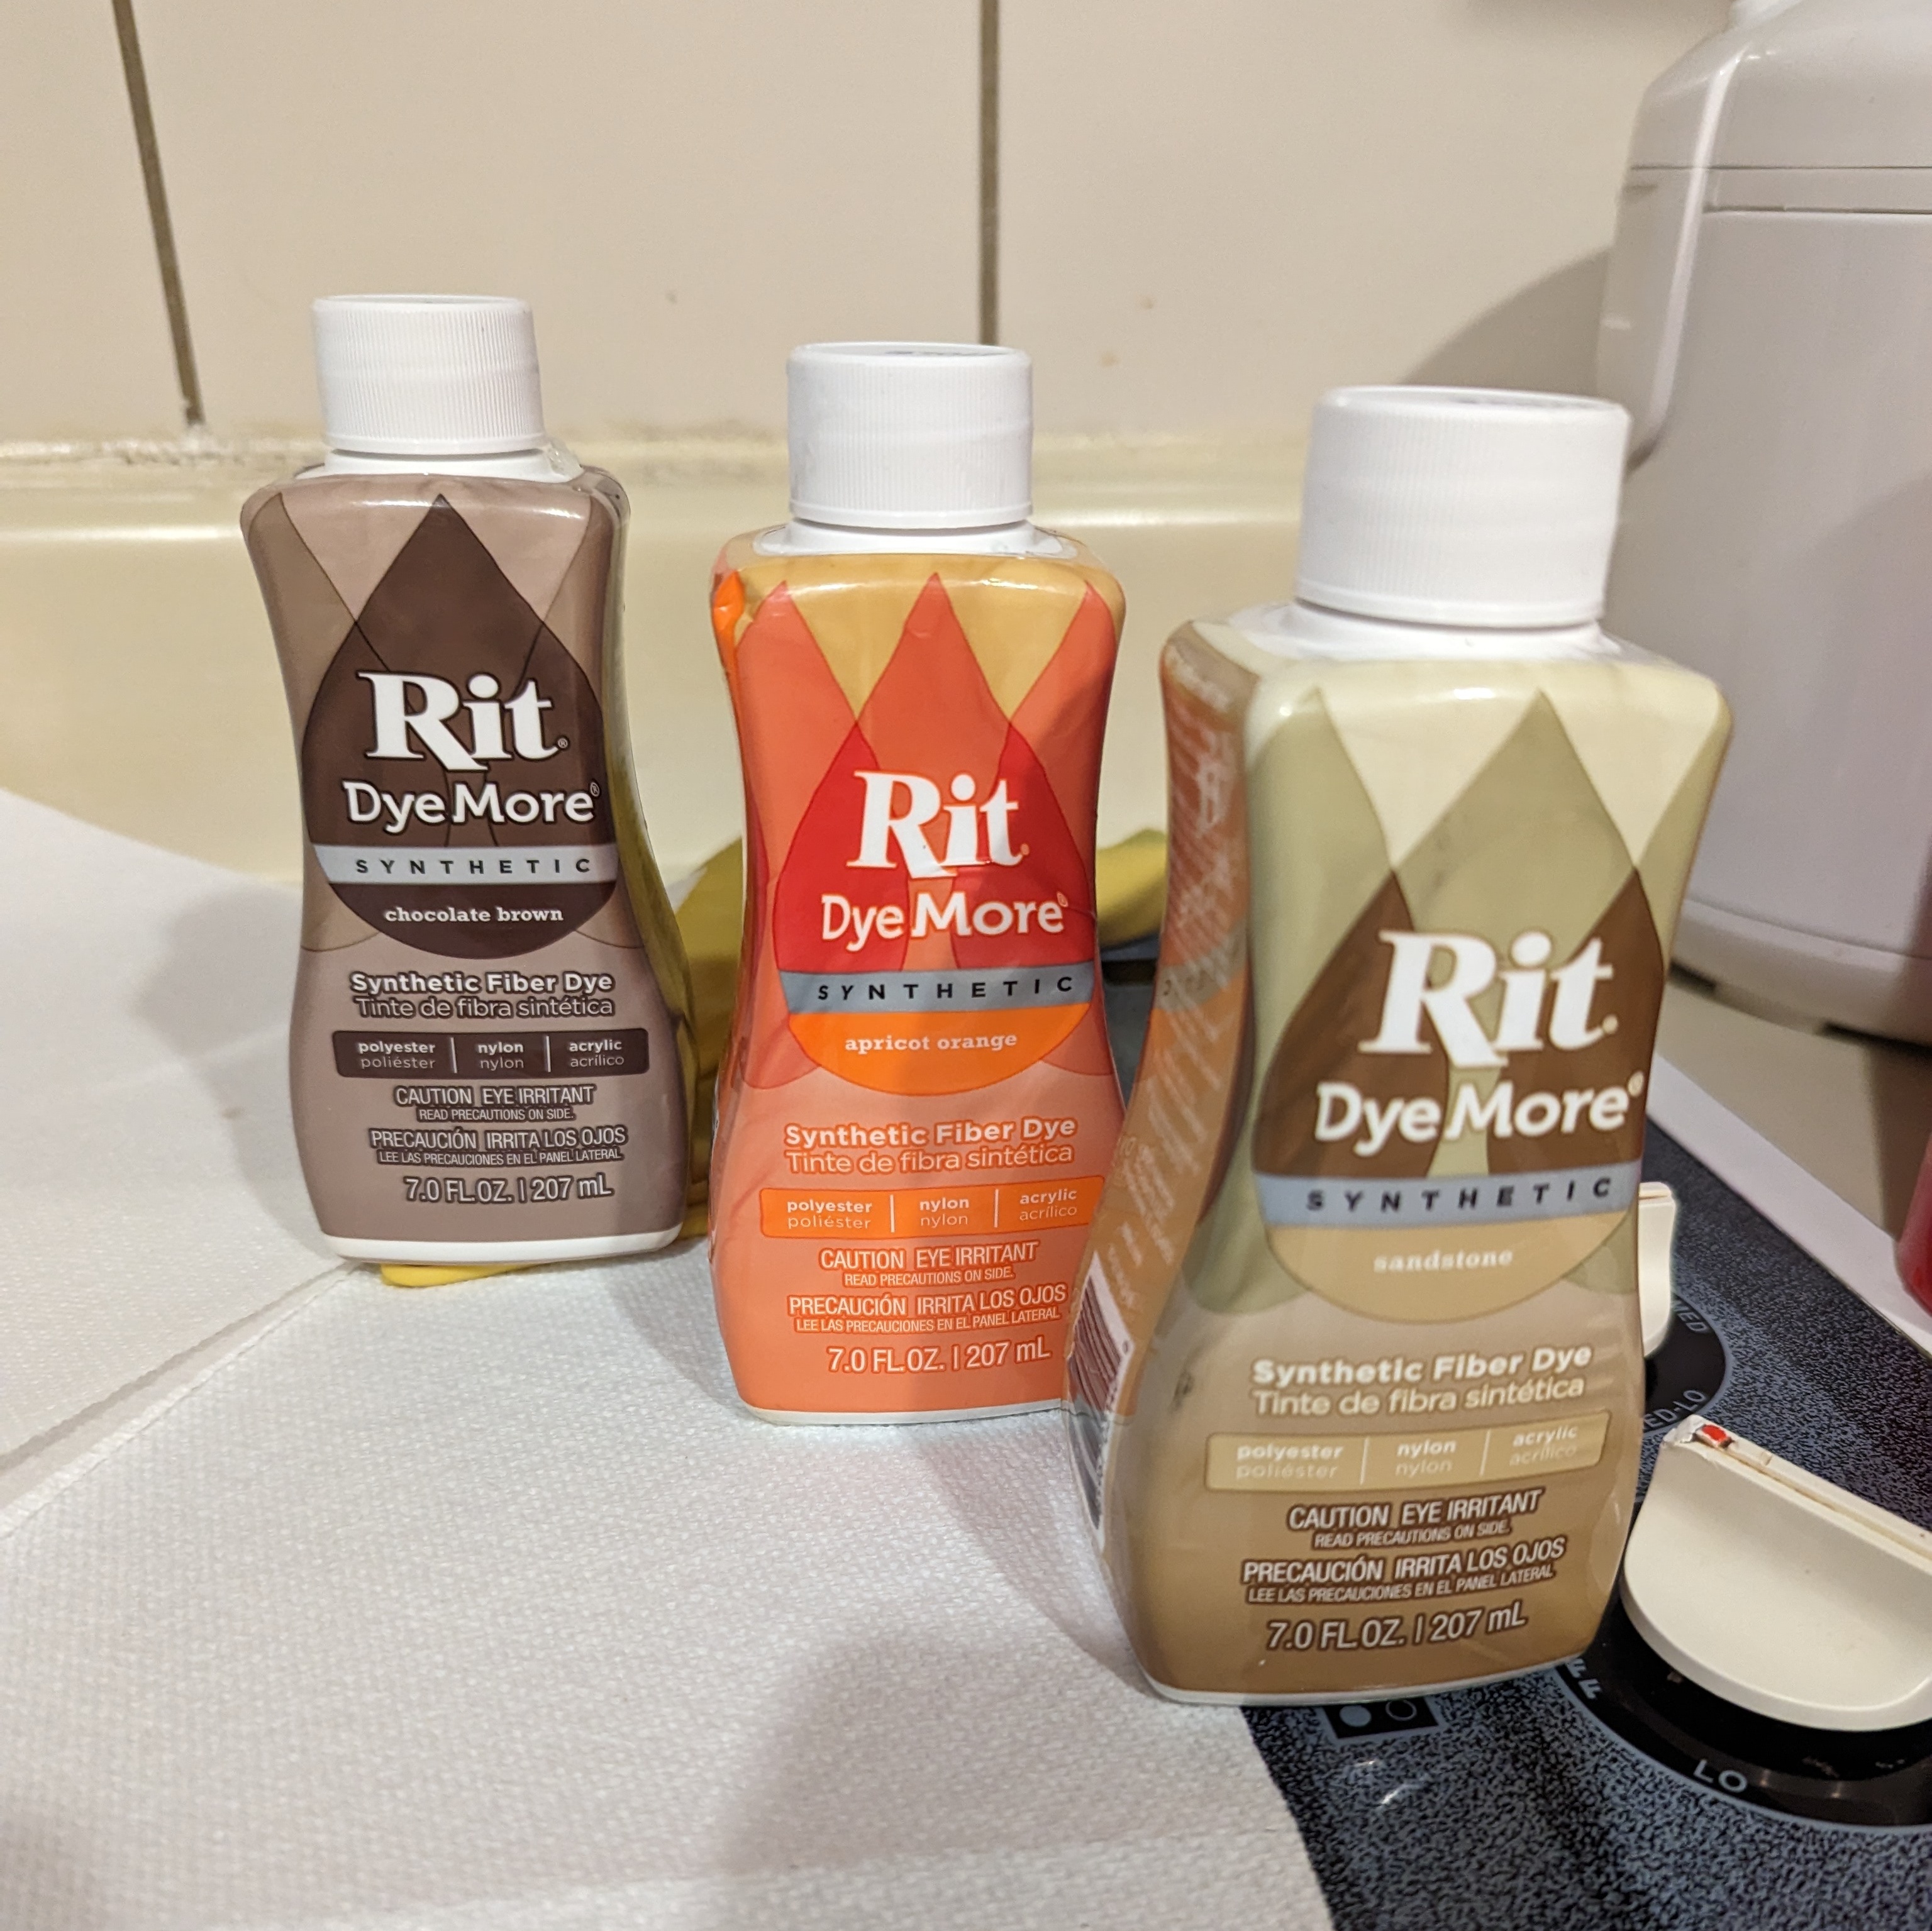


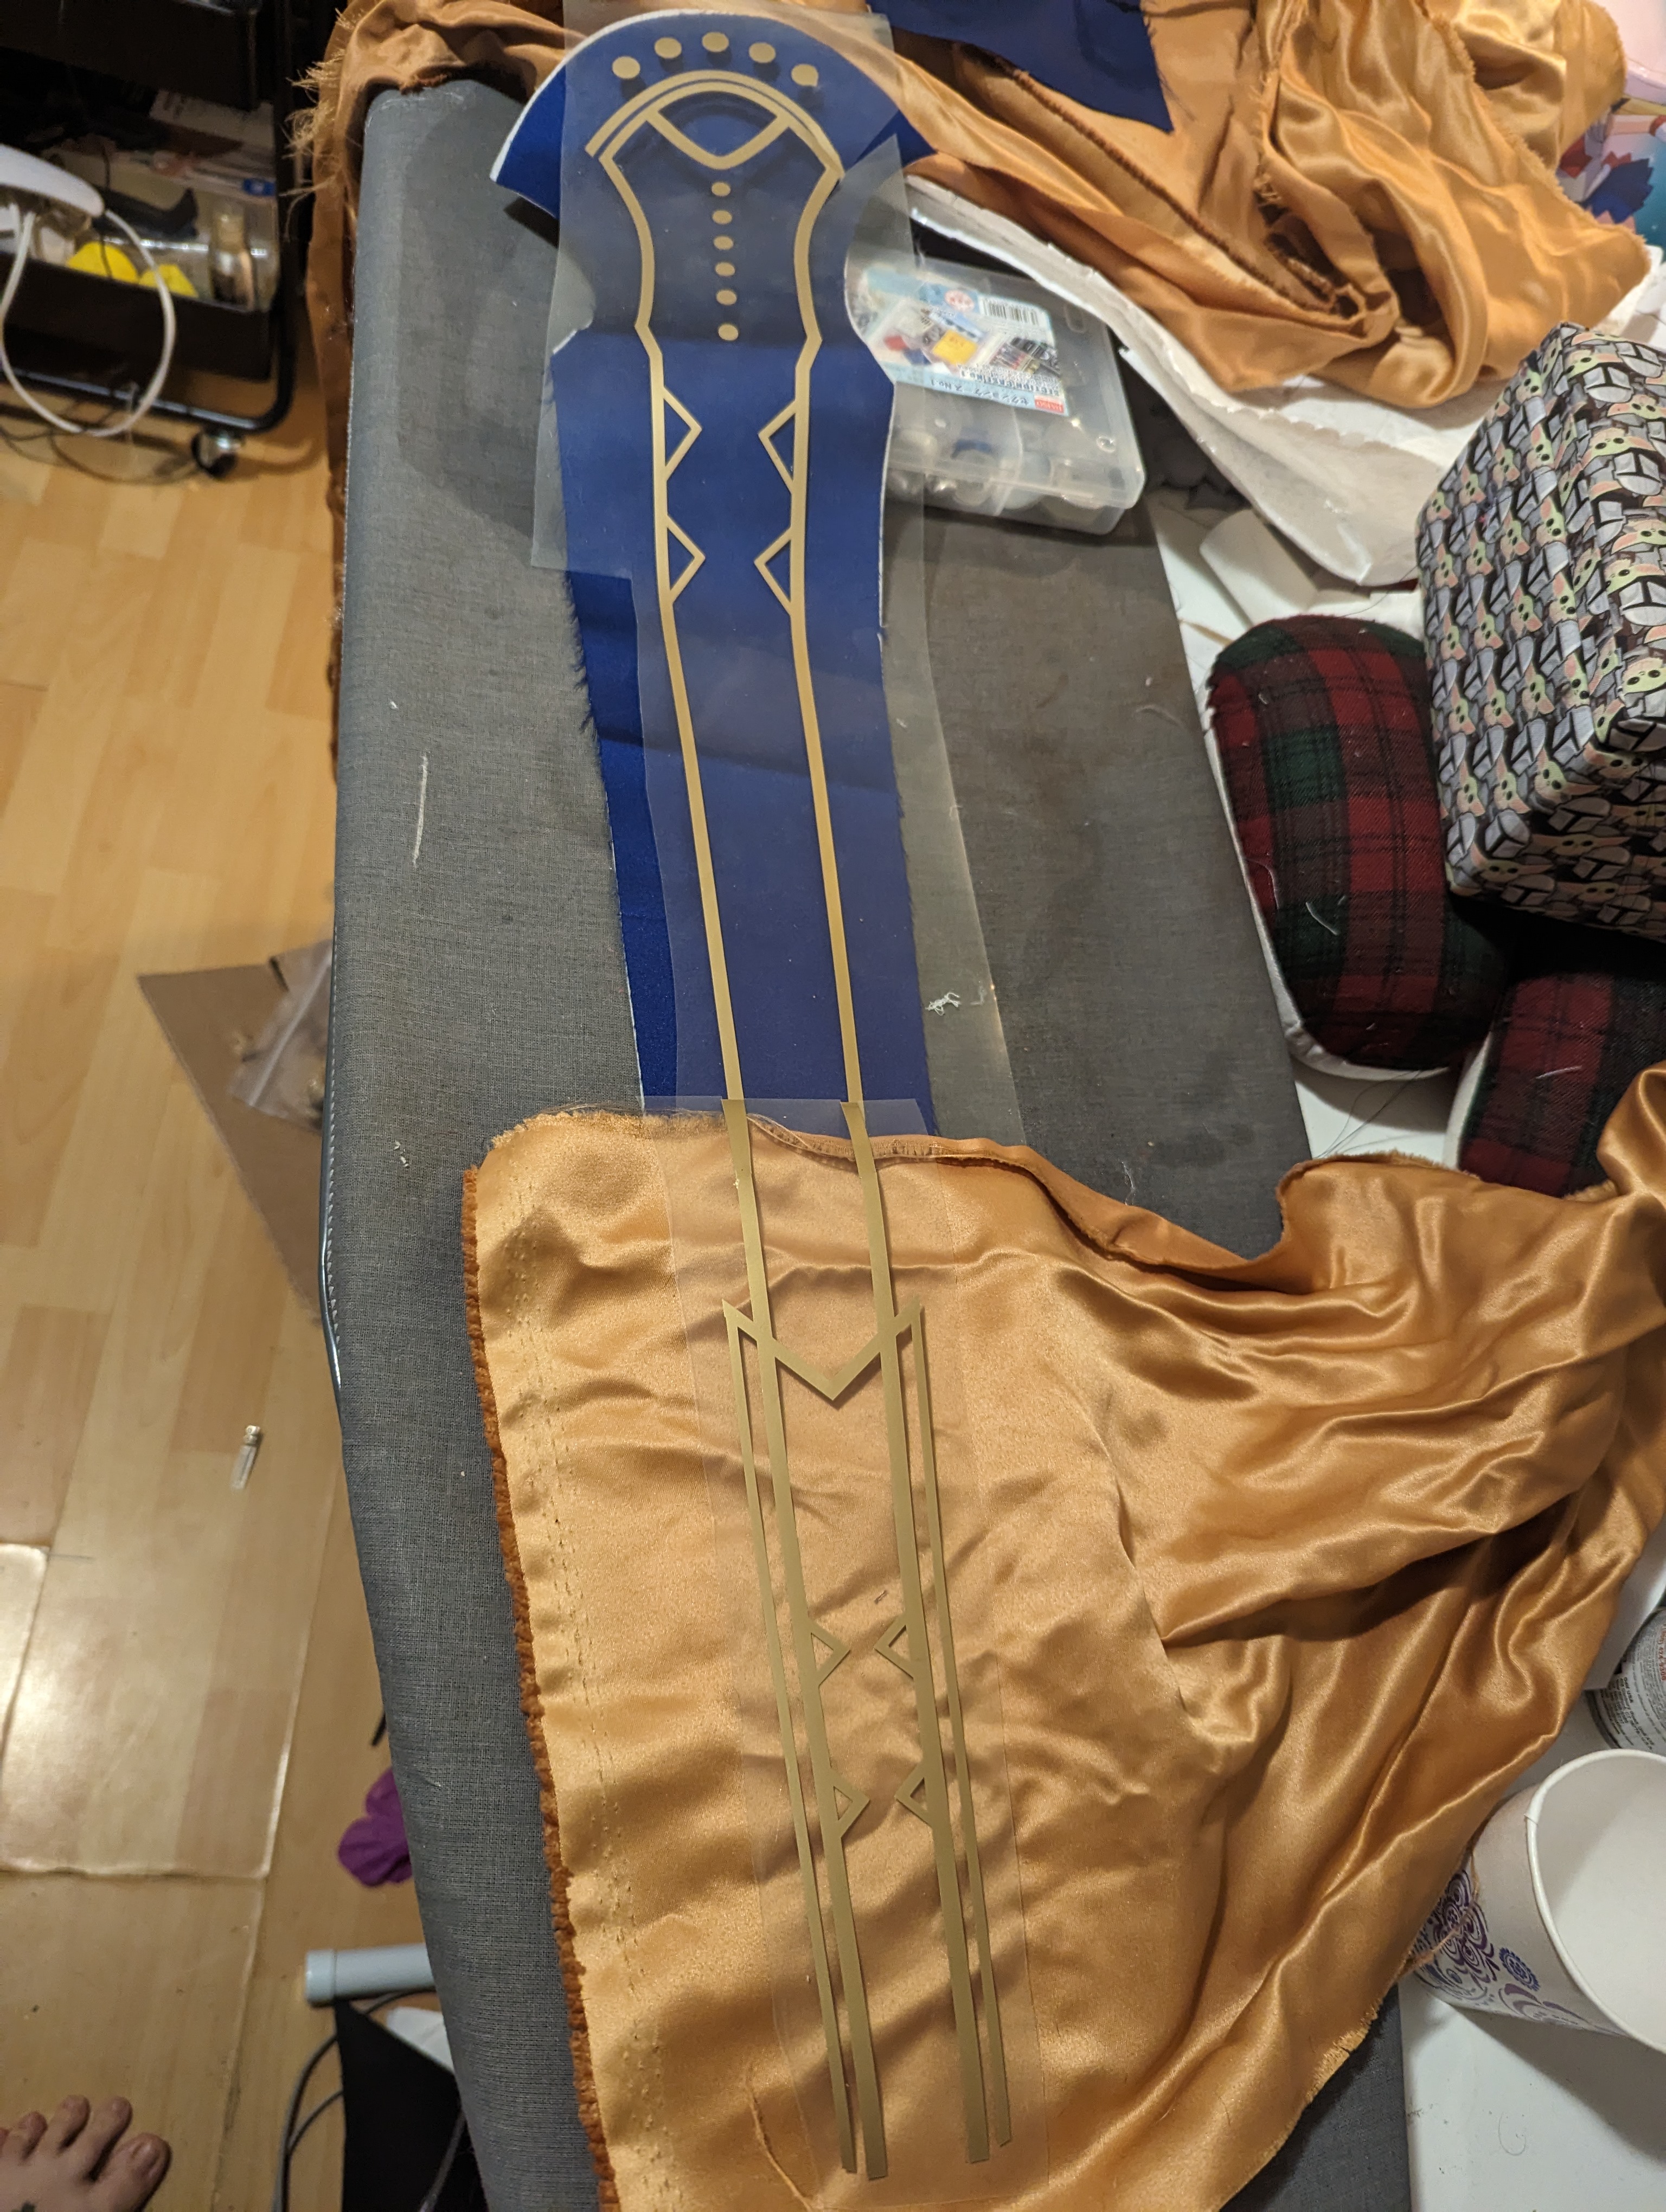
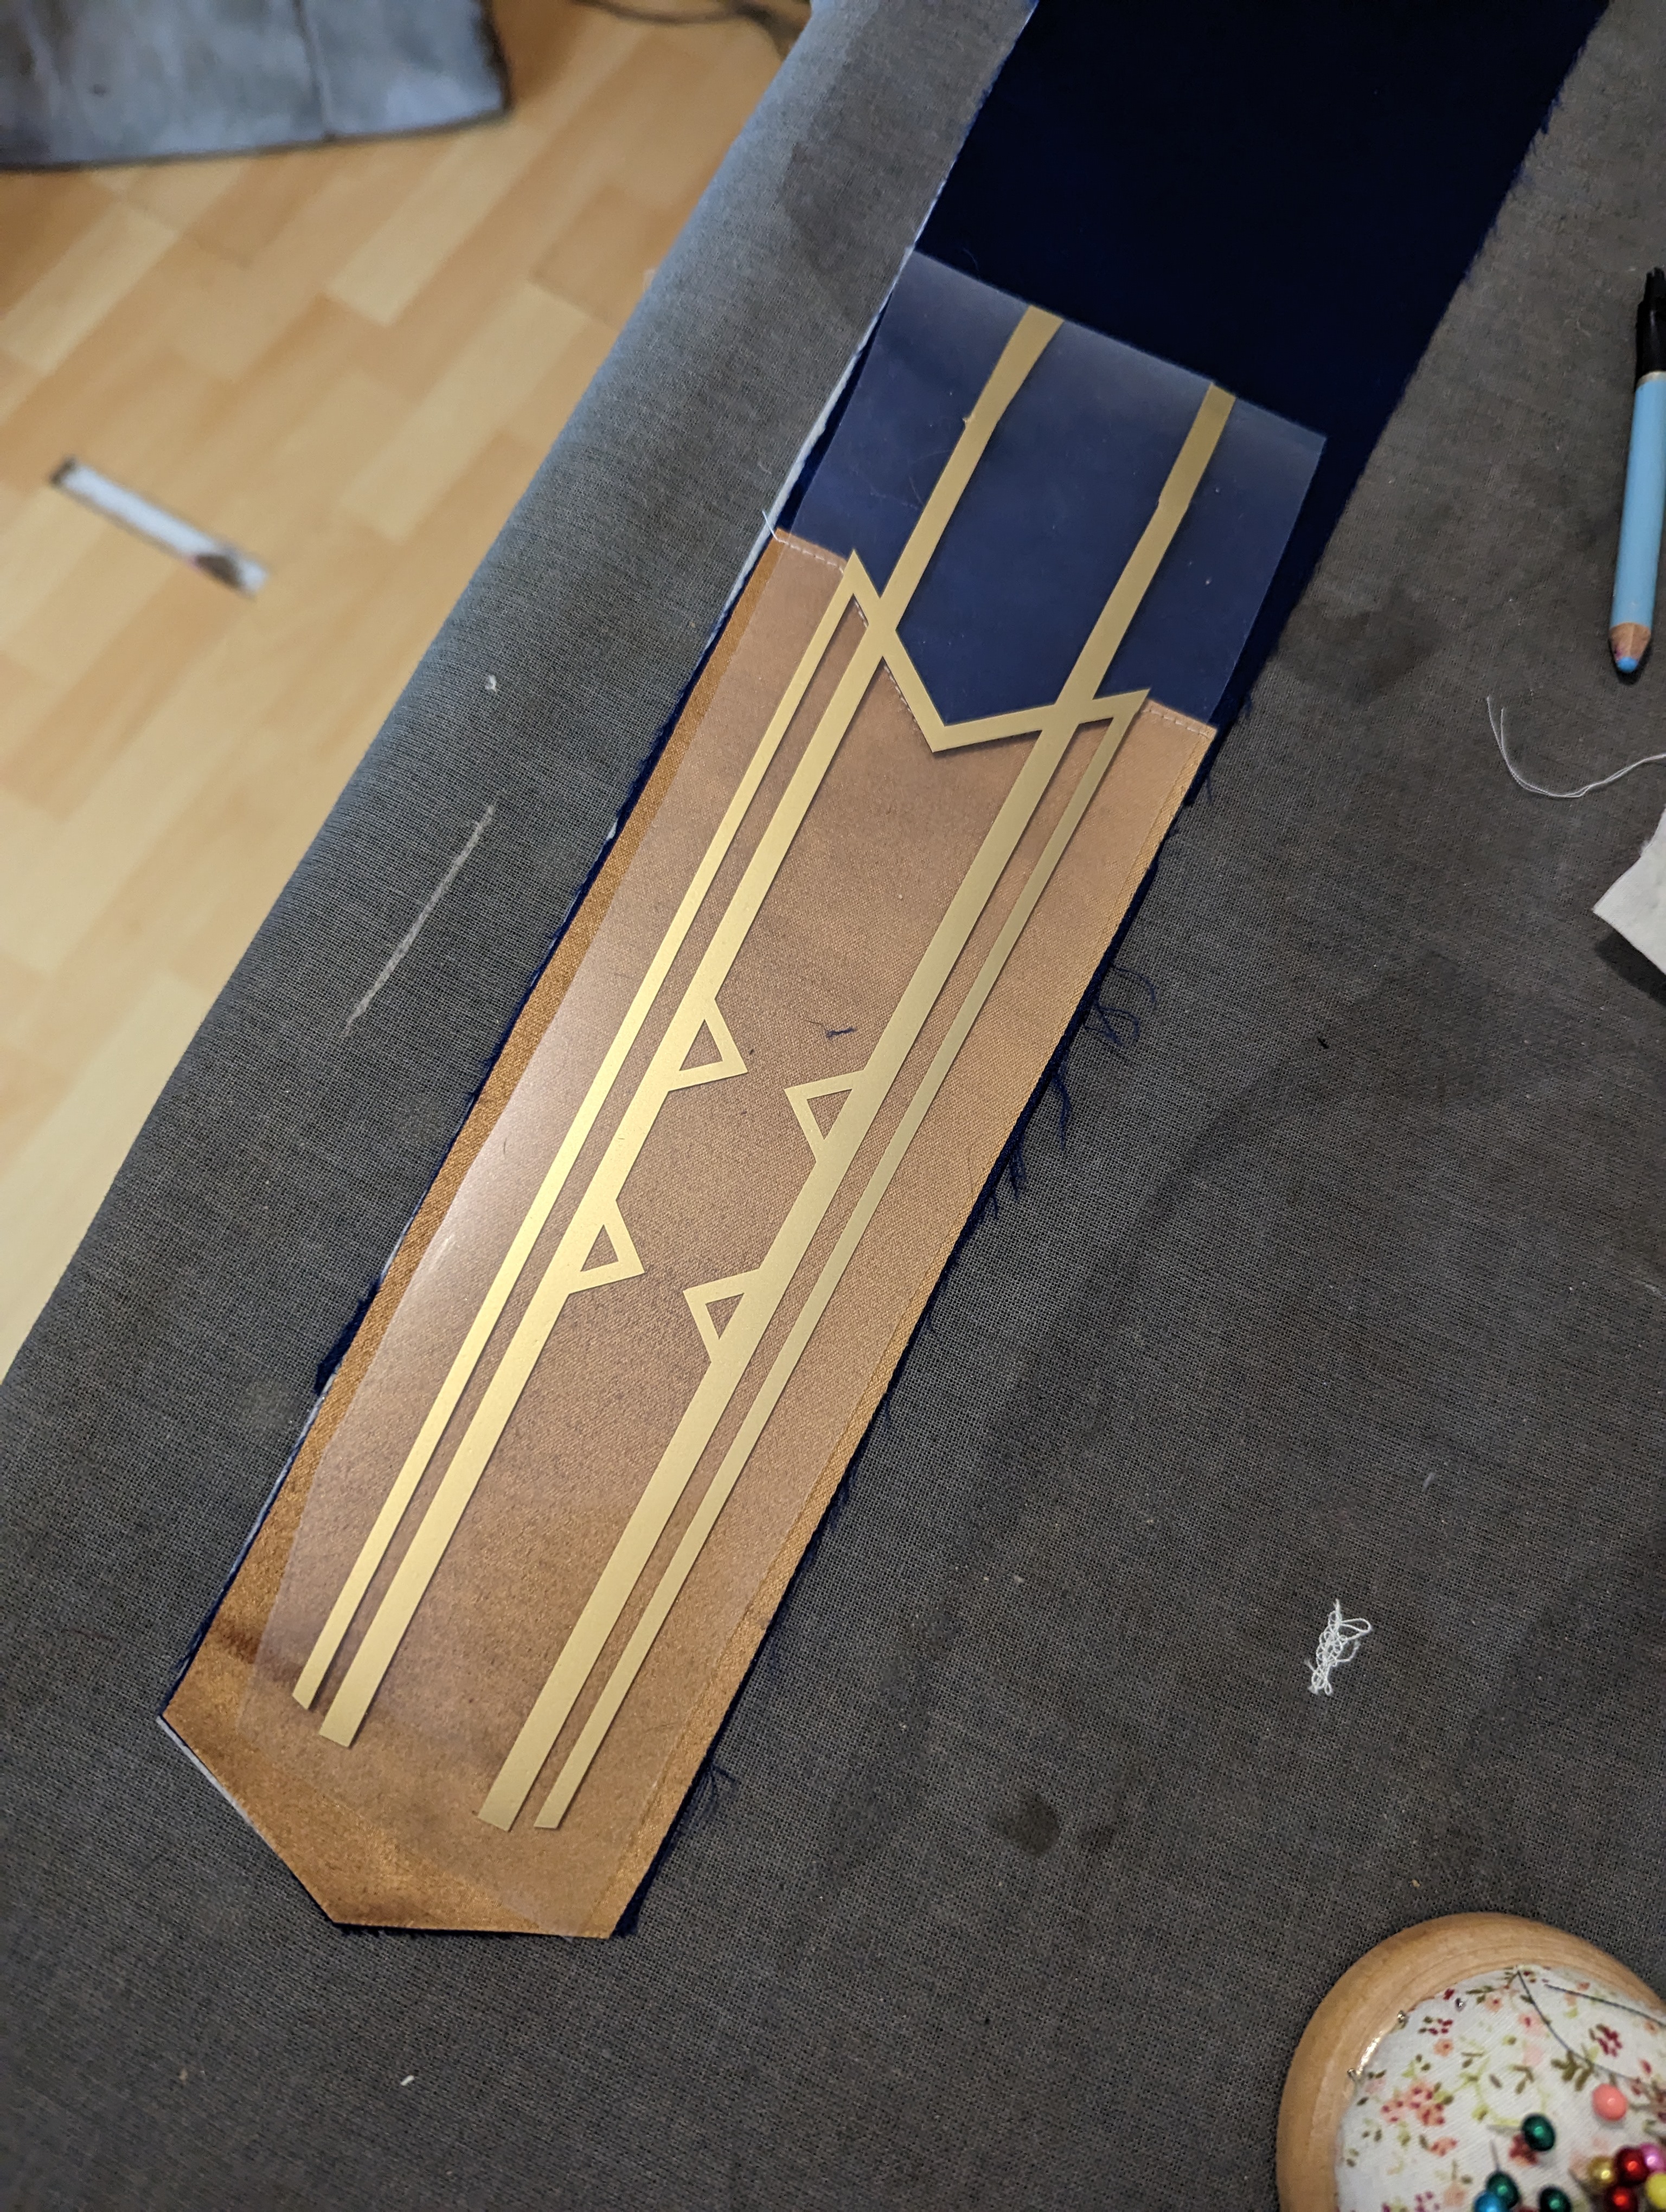
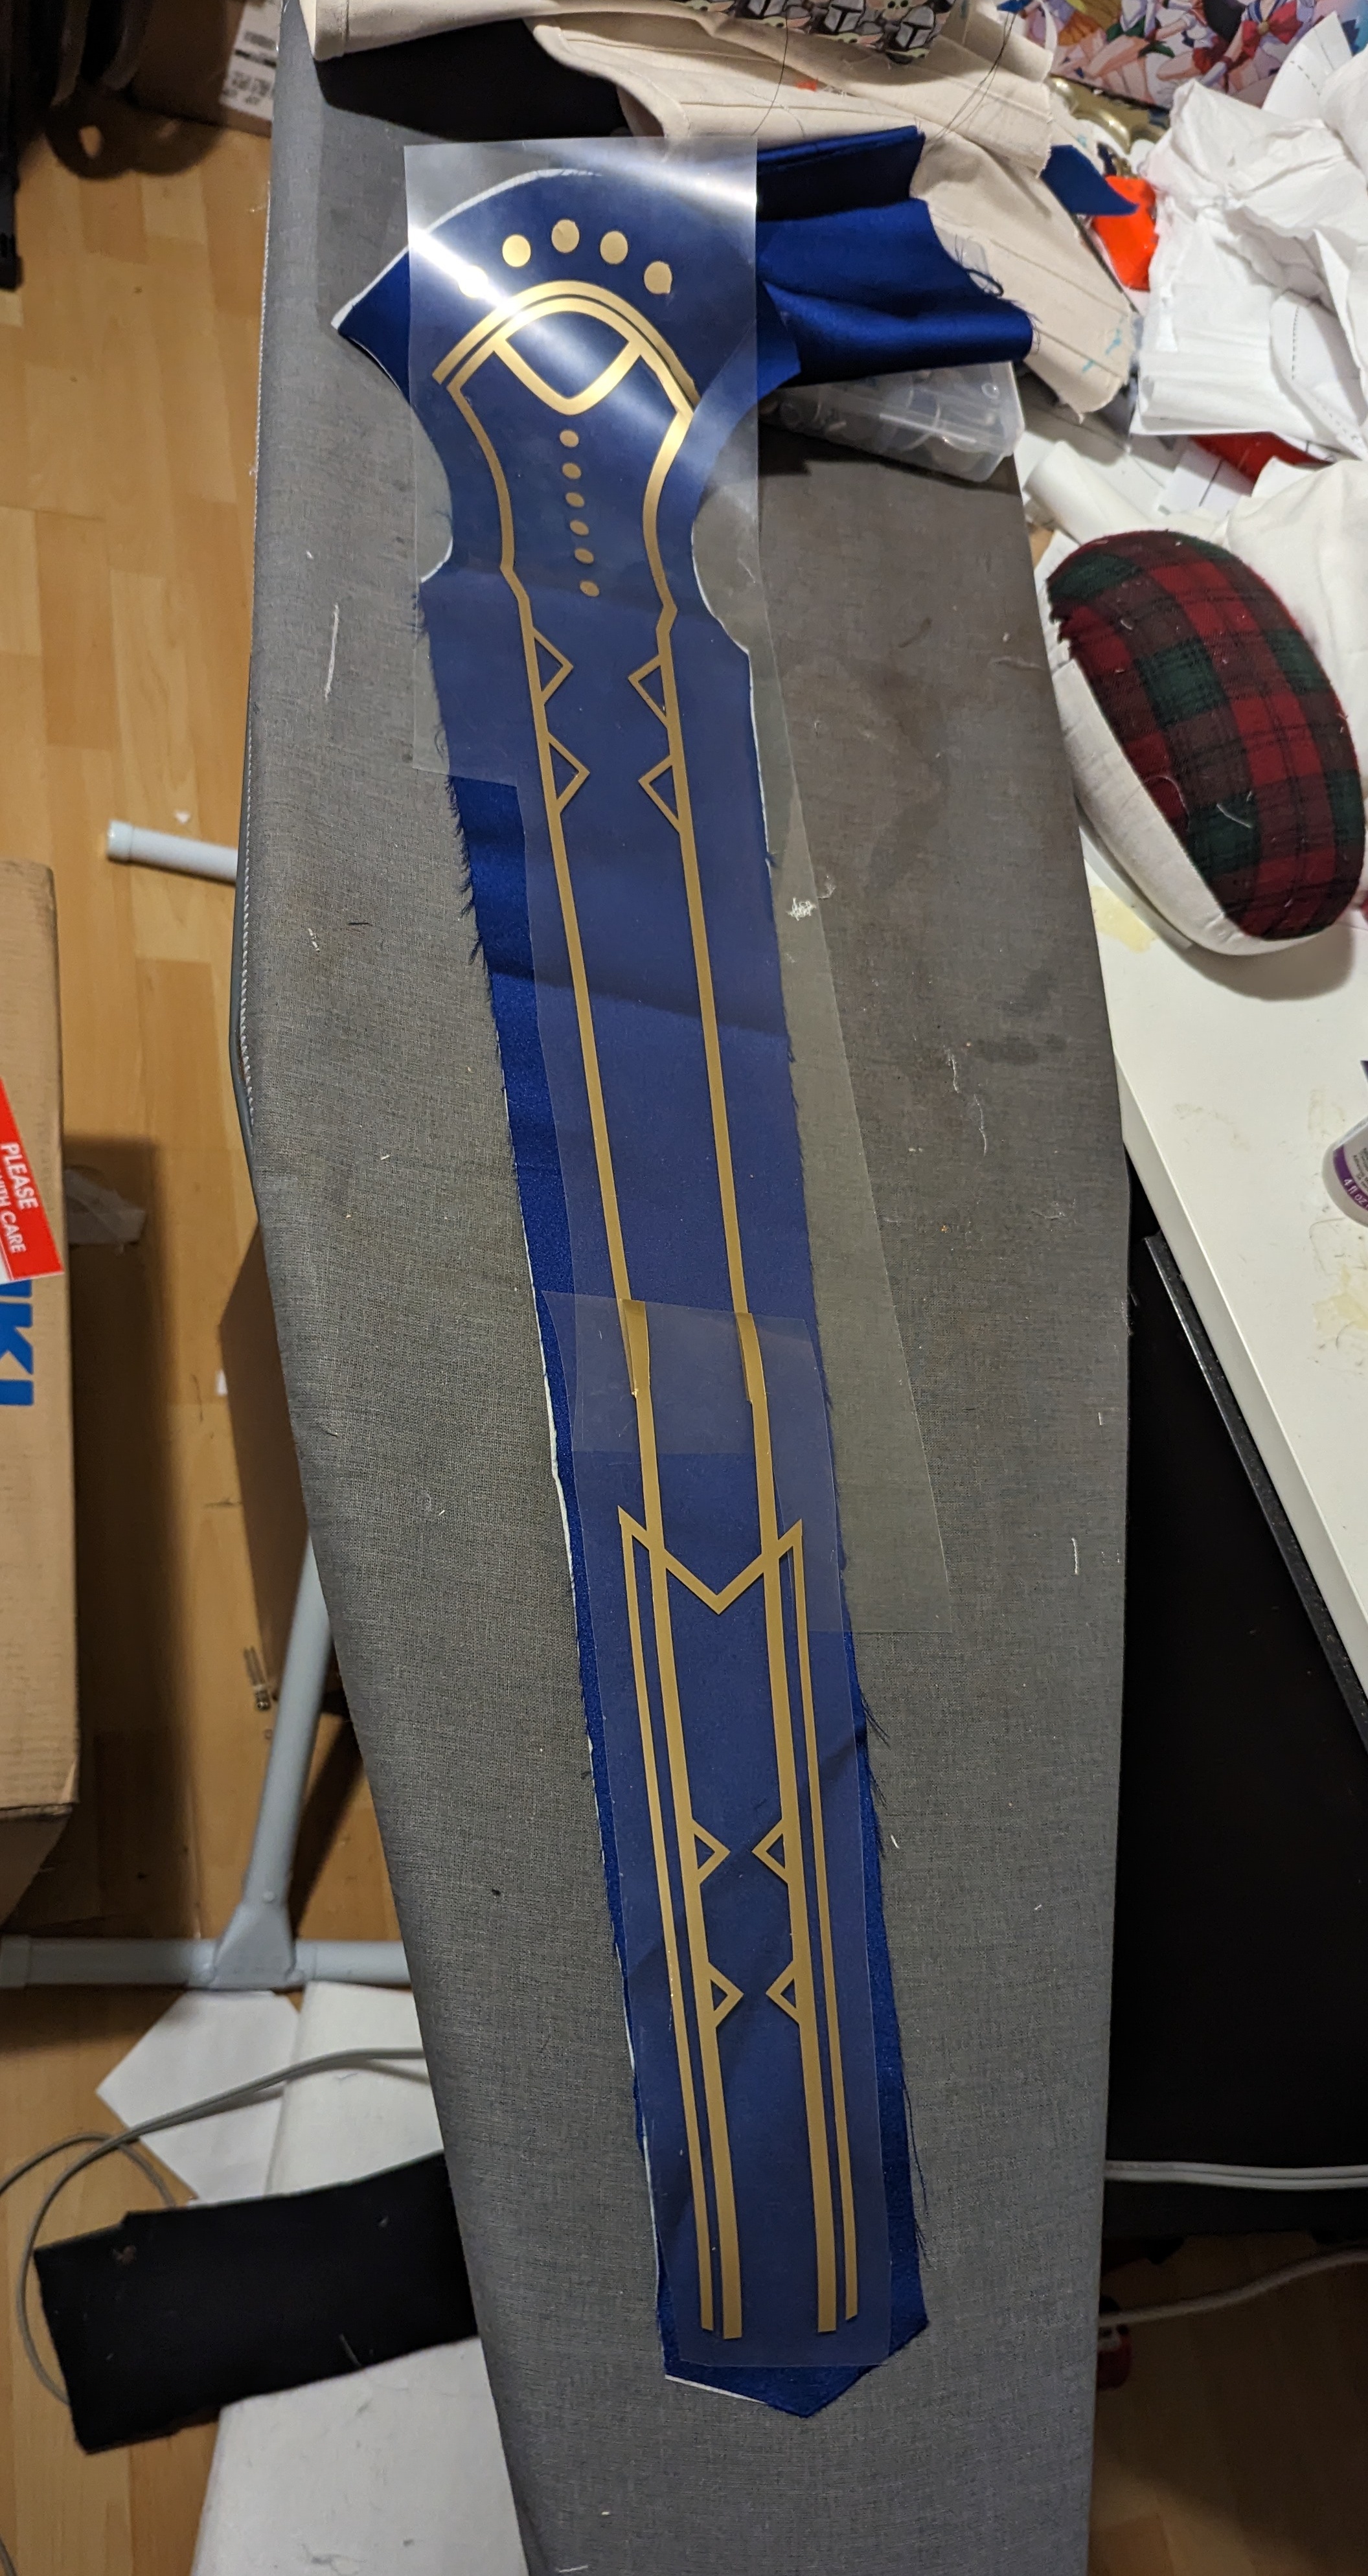
I had to do a bit of dye work for one of (yes, one of) Rhea’s tabbards. Sportflex is a great match for the gold faux dupioni I used, but it blended in too much for this section of the costume. I didn’t have a good complimentary gold on hand, so I had to make some fabric soup with scrap white satin using Rit Dyemore. Their color charts are such a lifesaver!
I attached my dyed piece to my base satin with Heat N’ Bond light and then added my additional designs (again, using Kirsty’s vectors) with more Sportflex vinyl. I wound up having to do this twice, since I wasn’t careful enough pressing the vinyl the first time around.
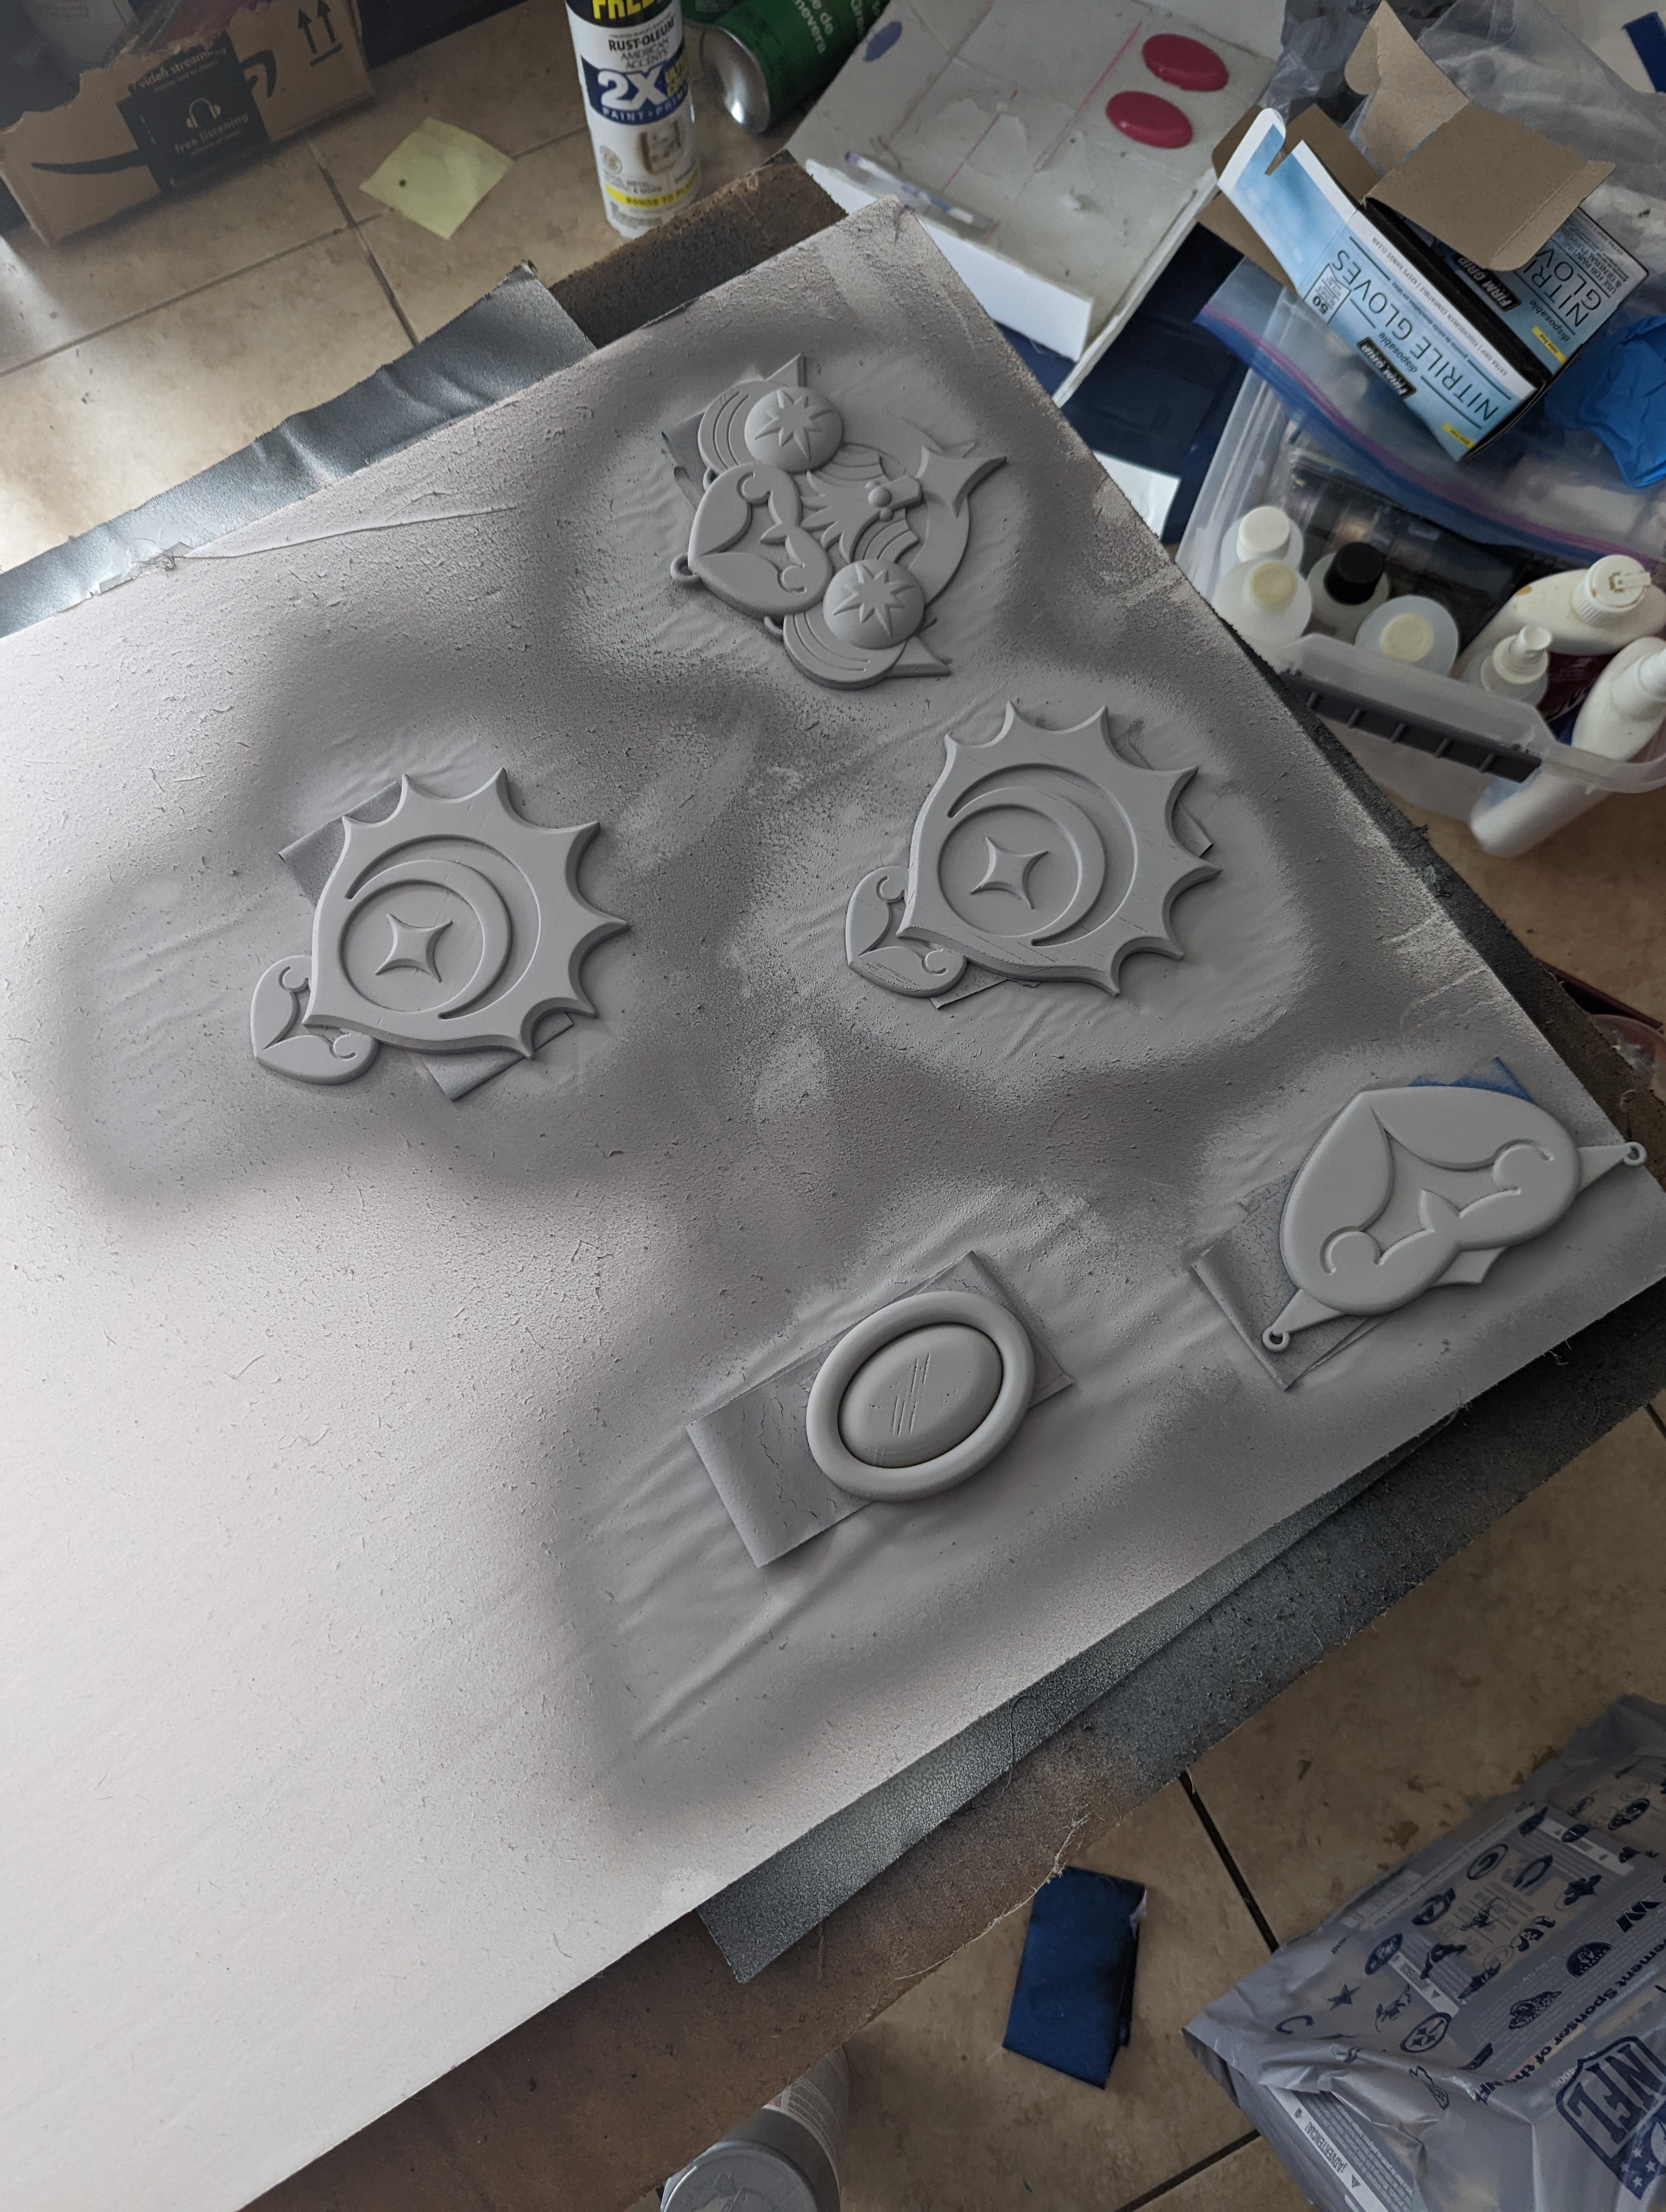
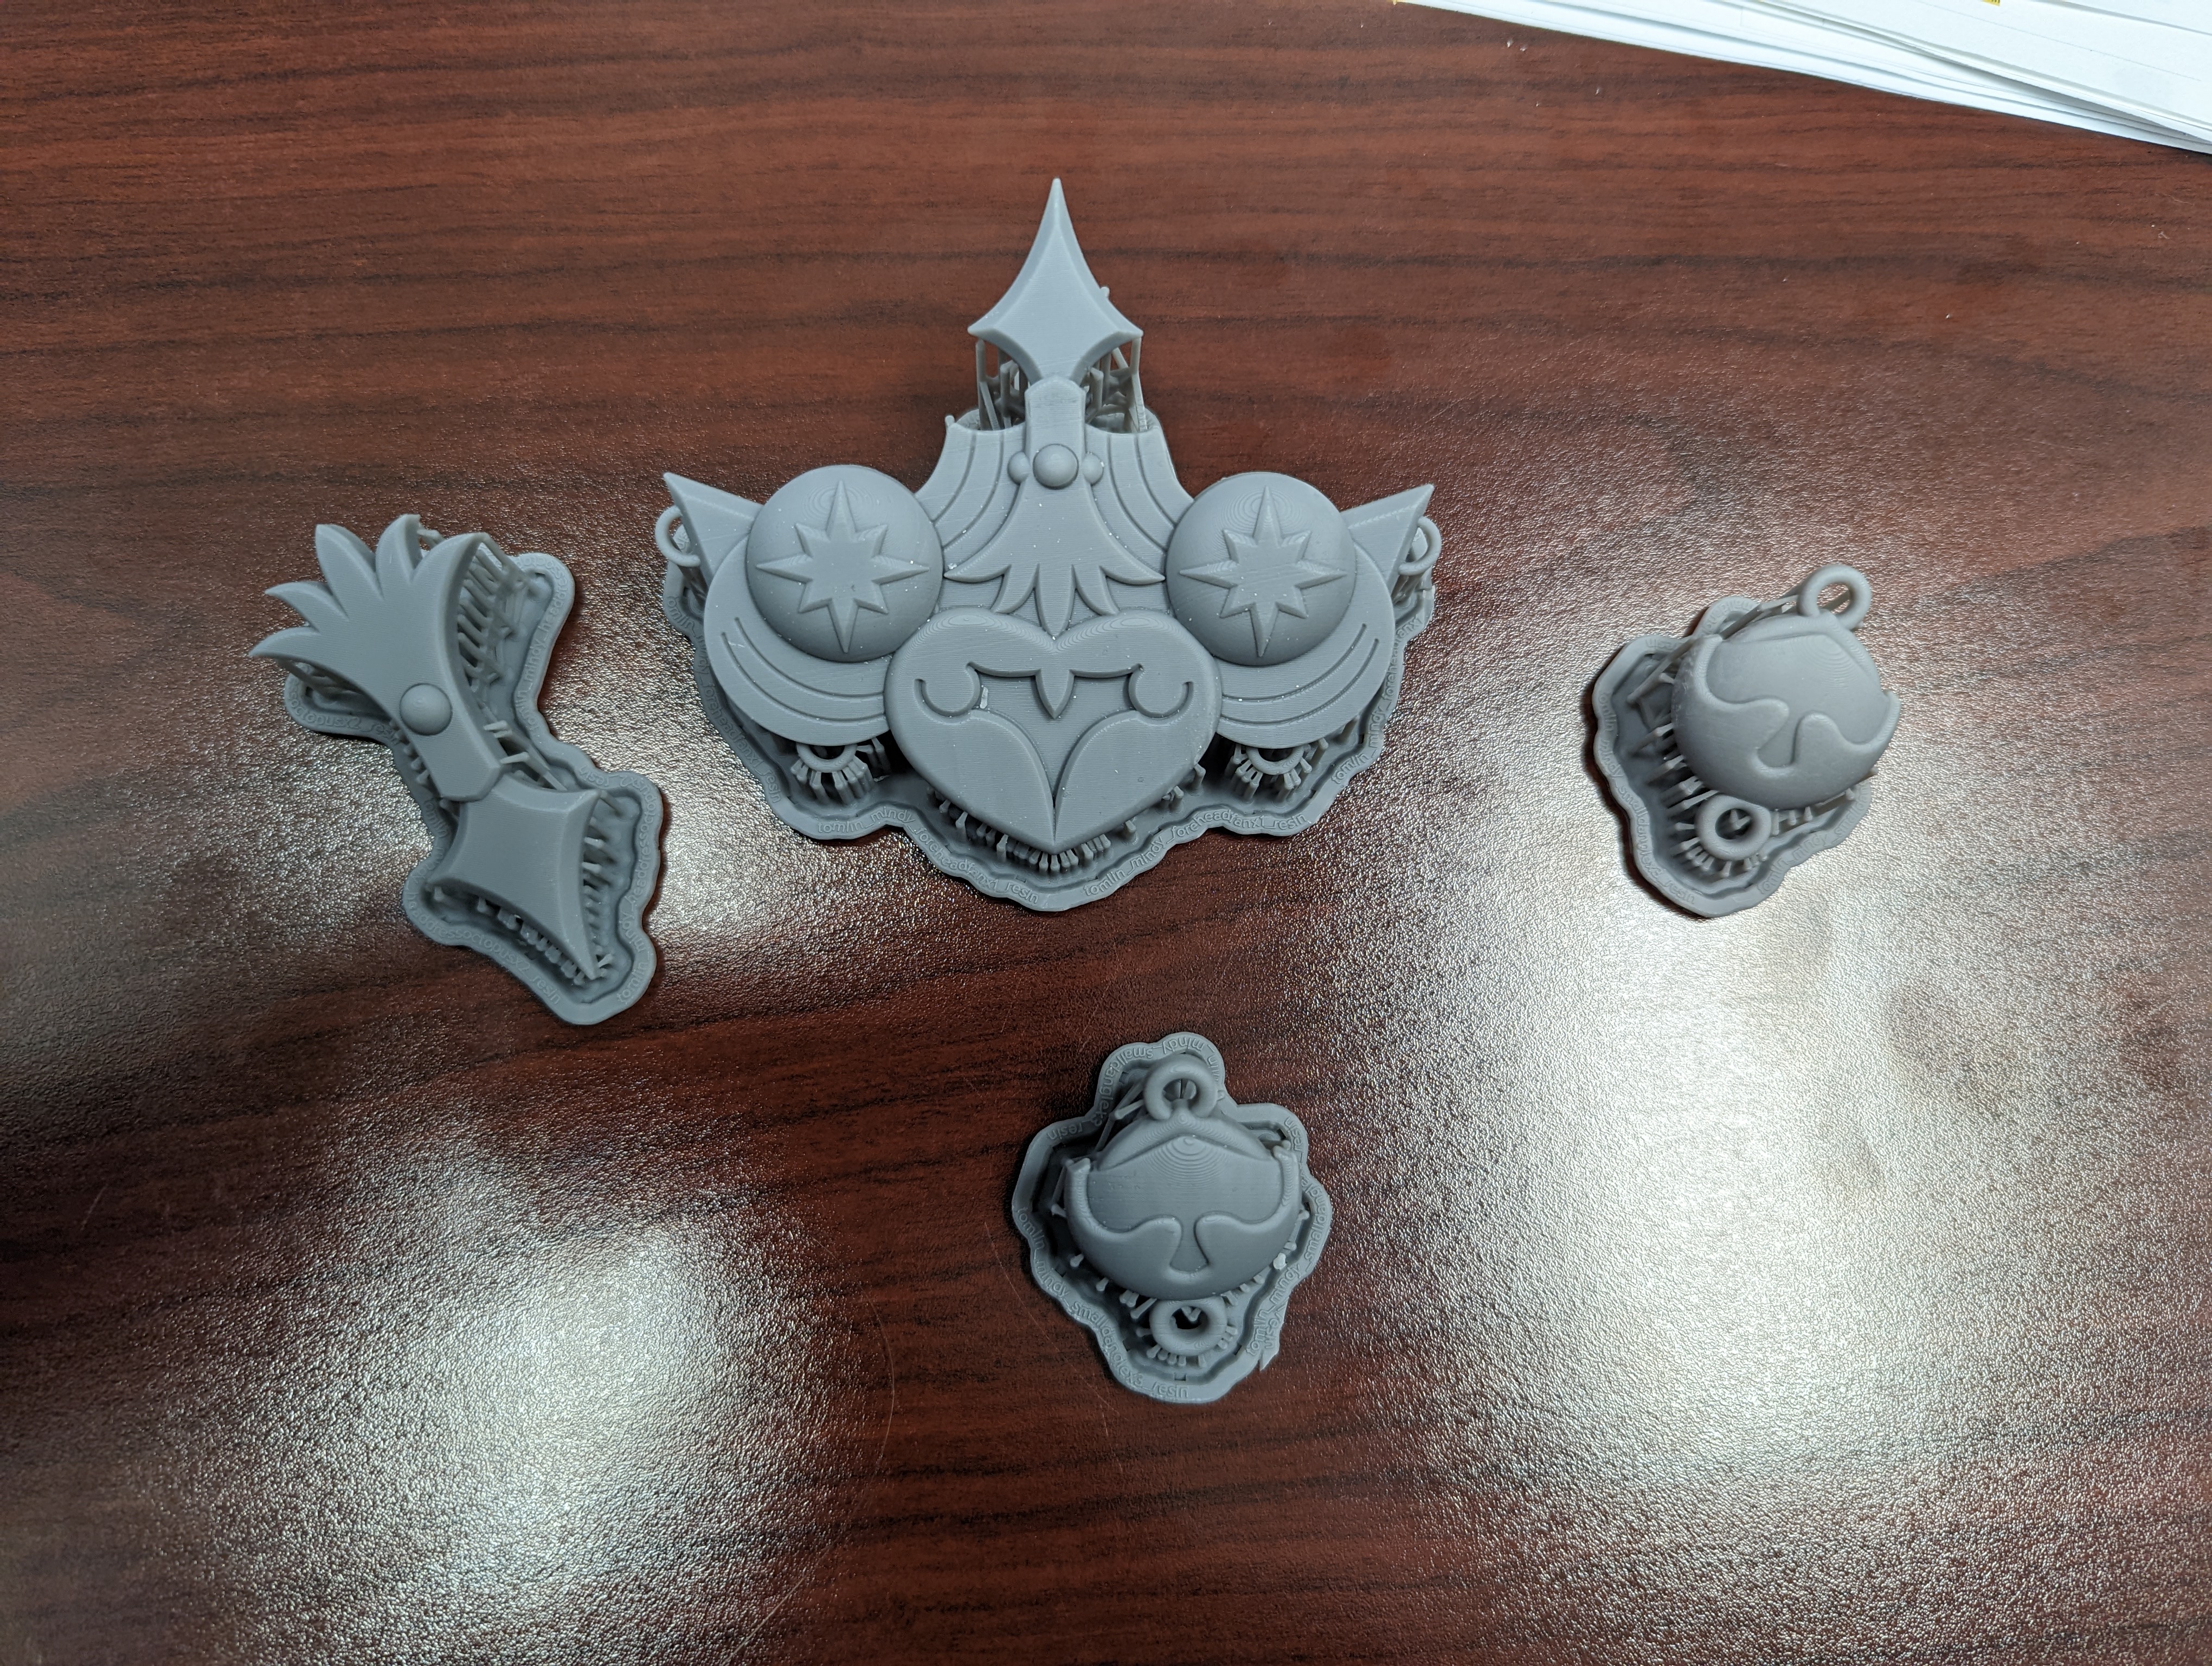
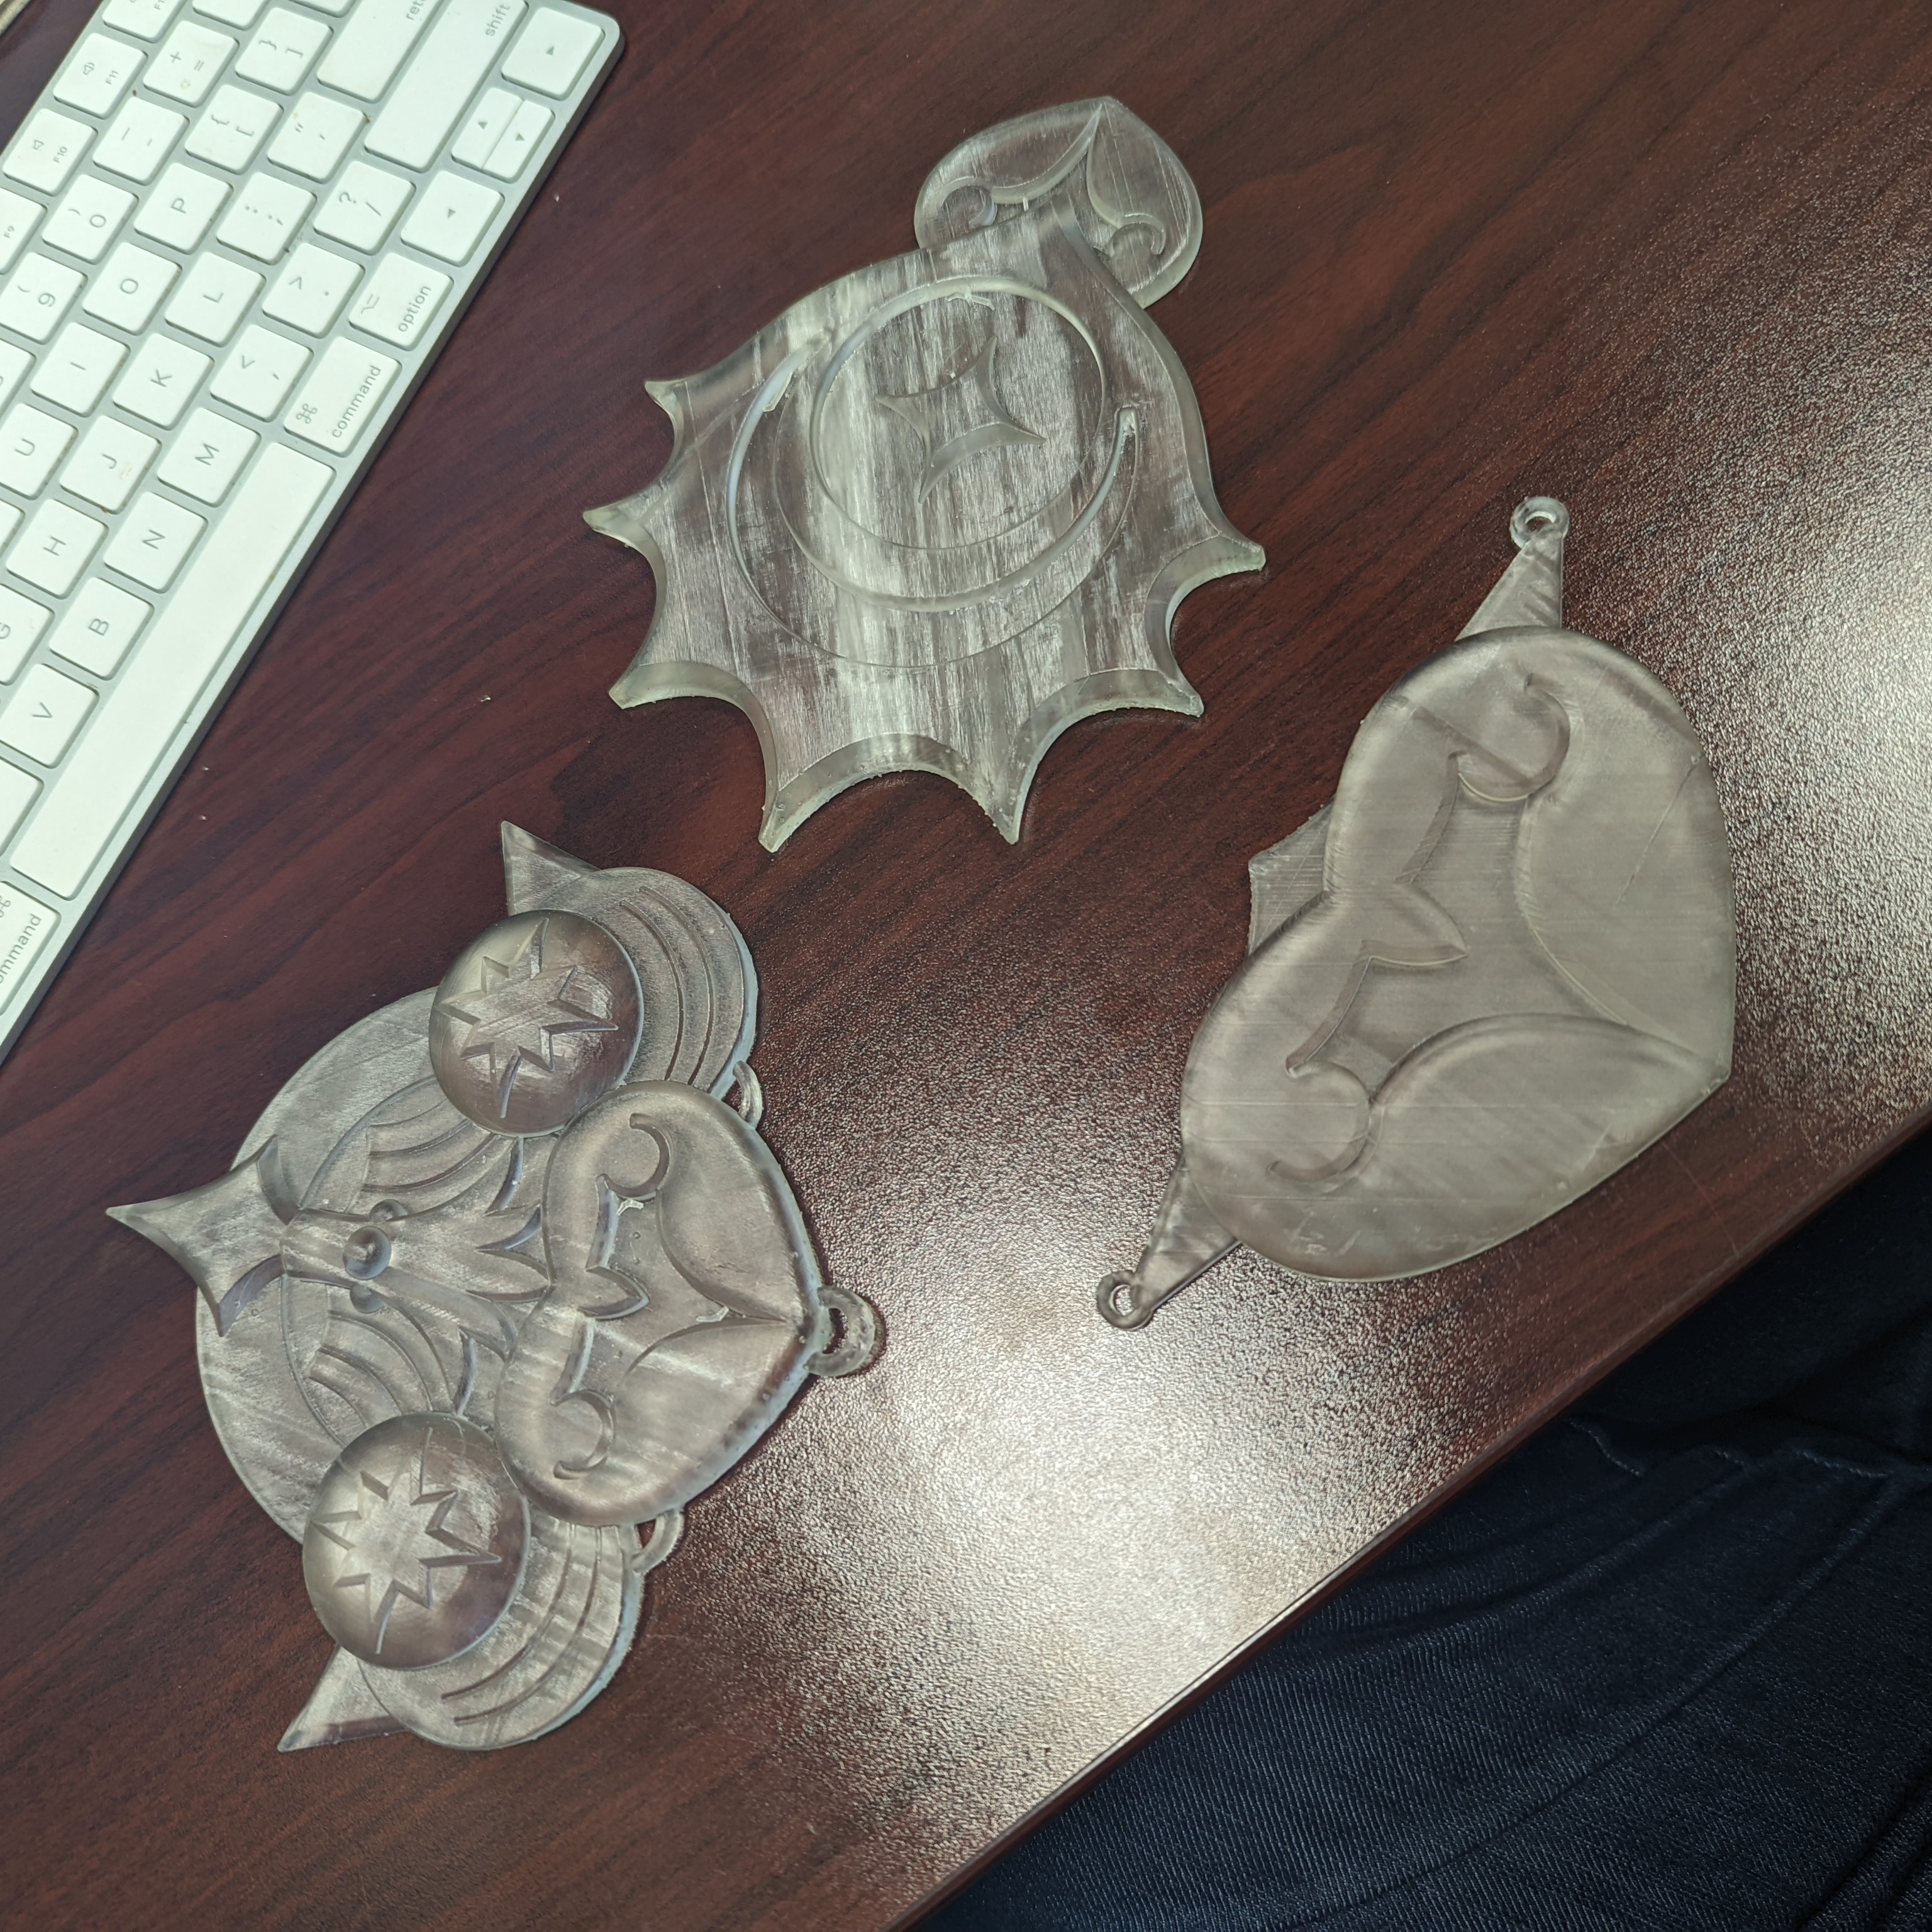
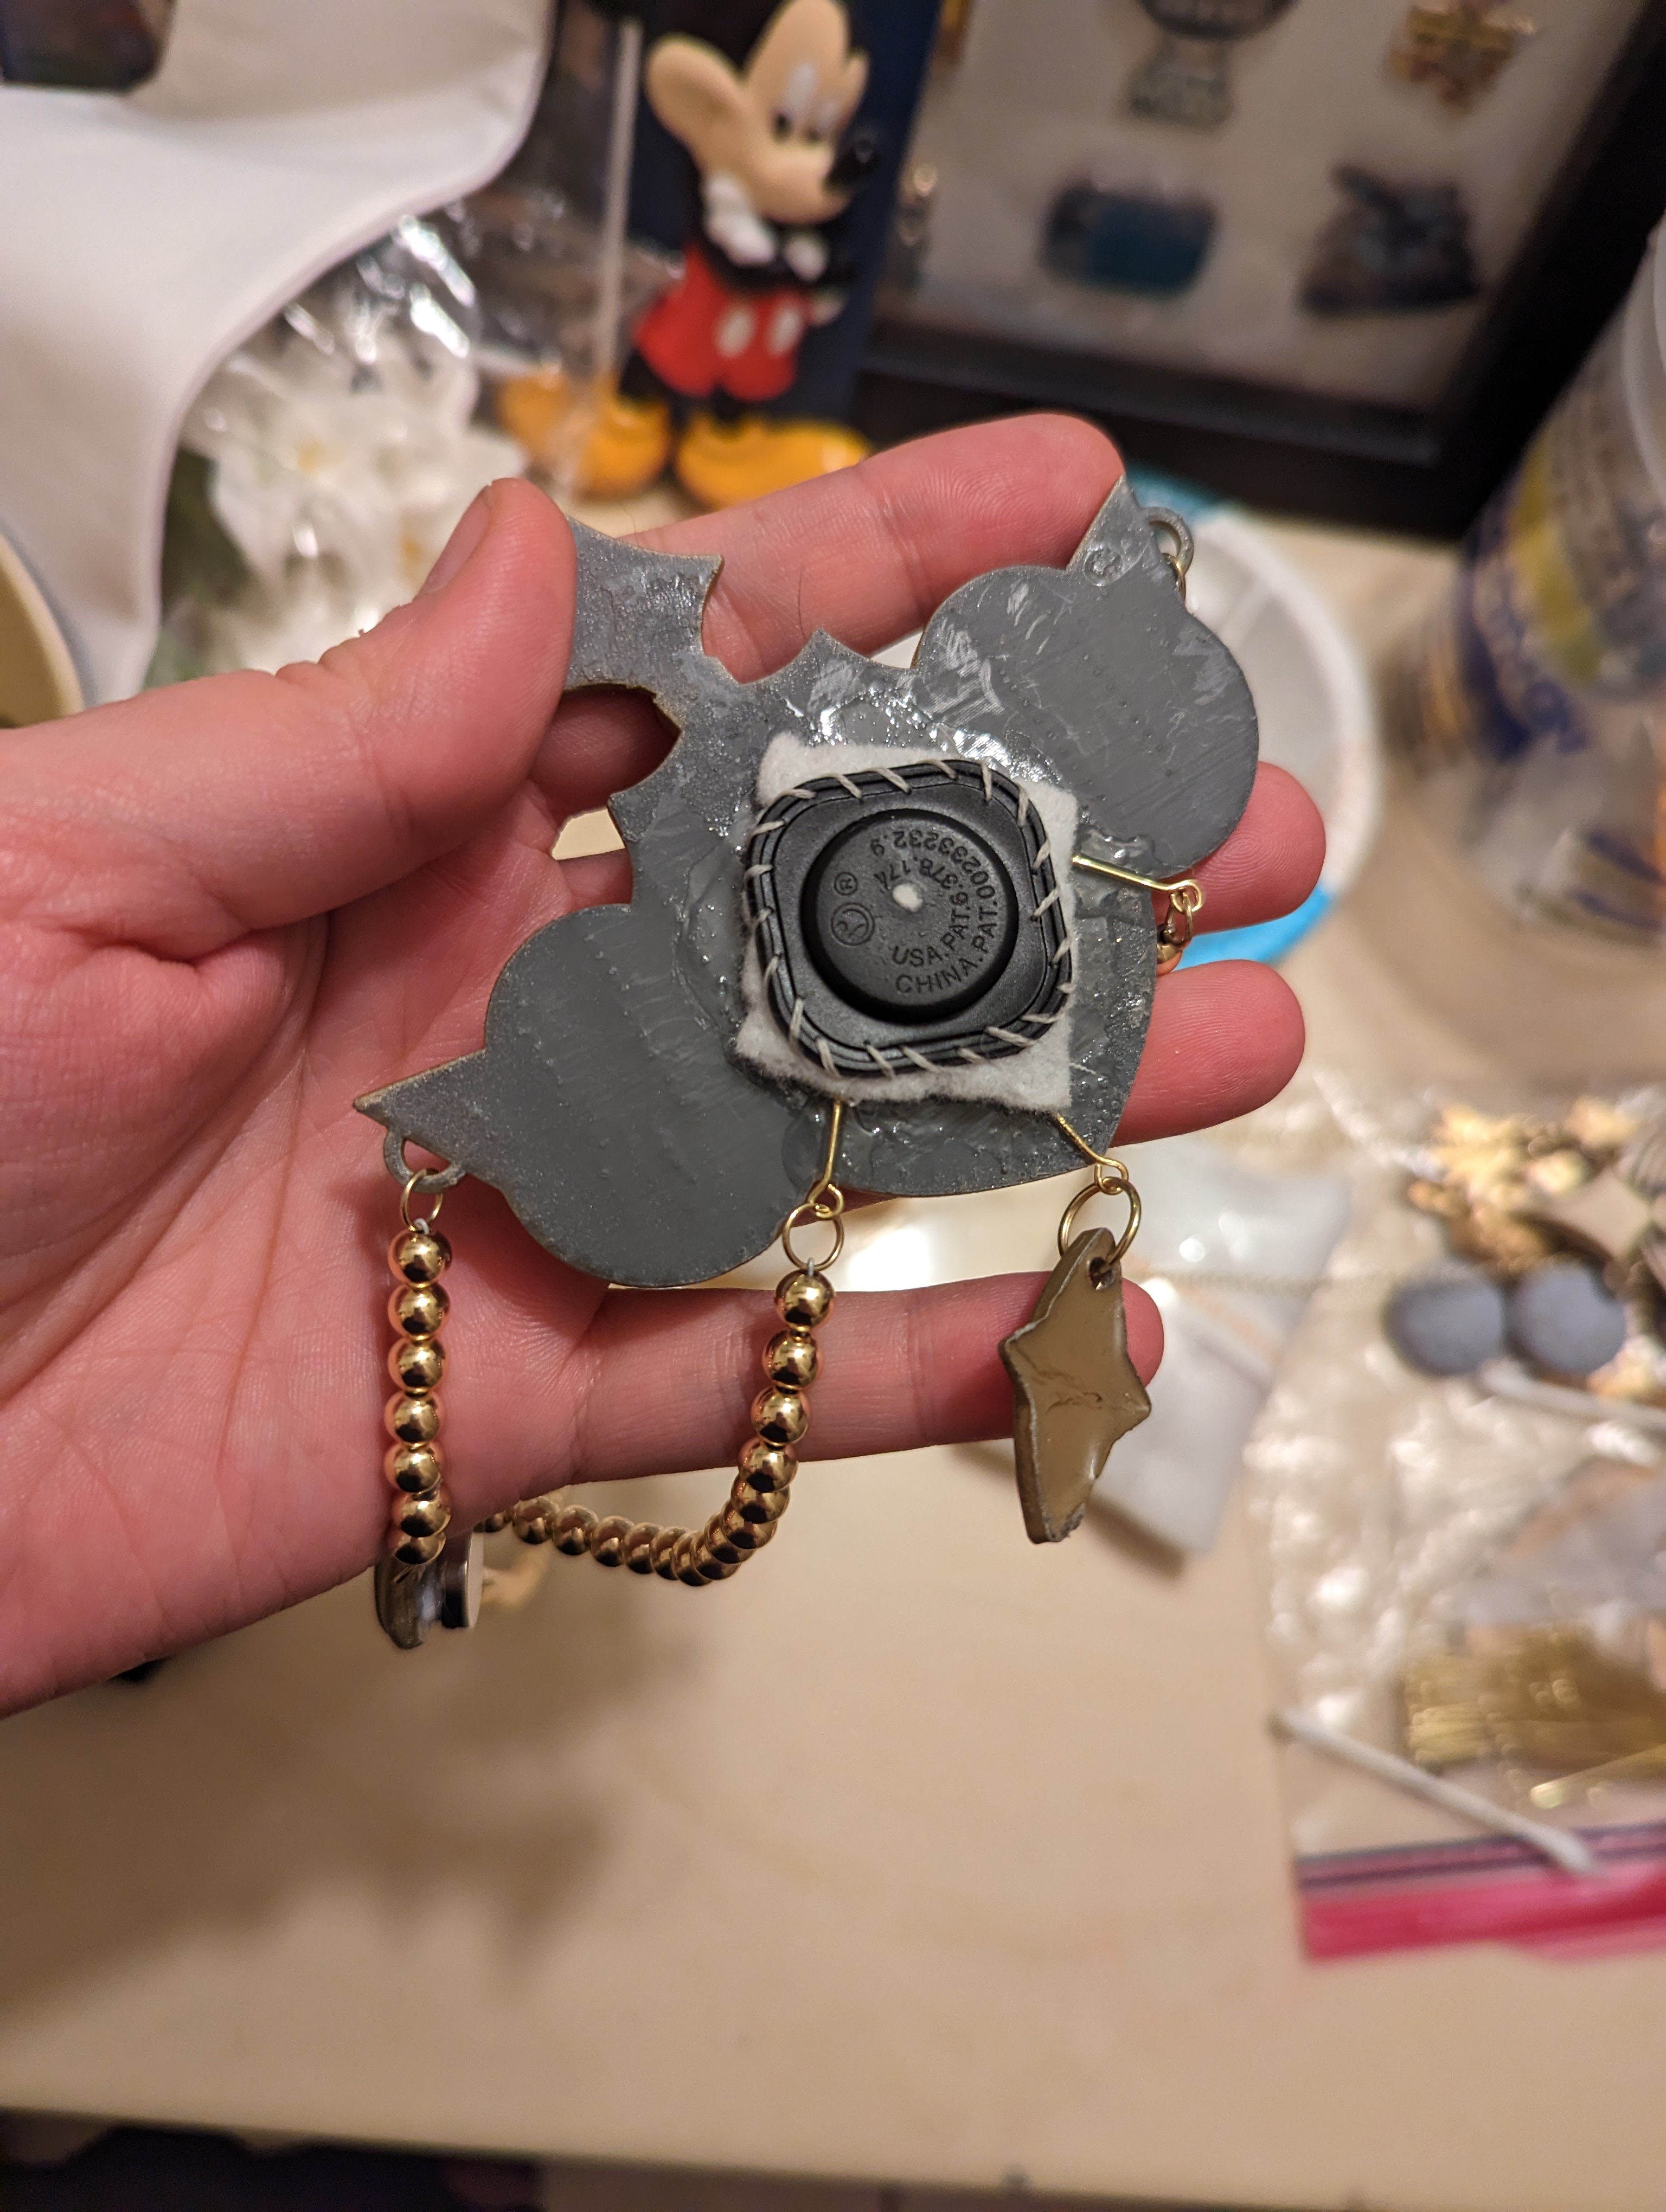
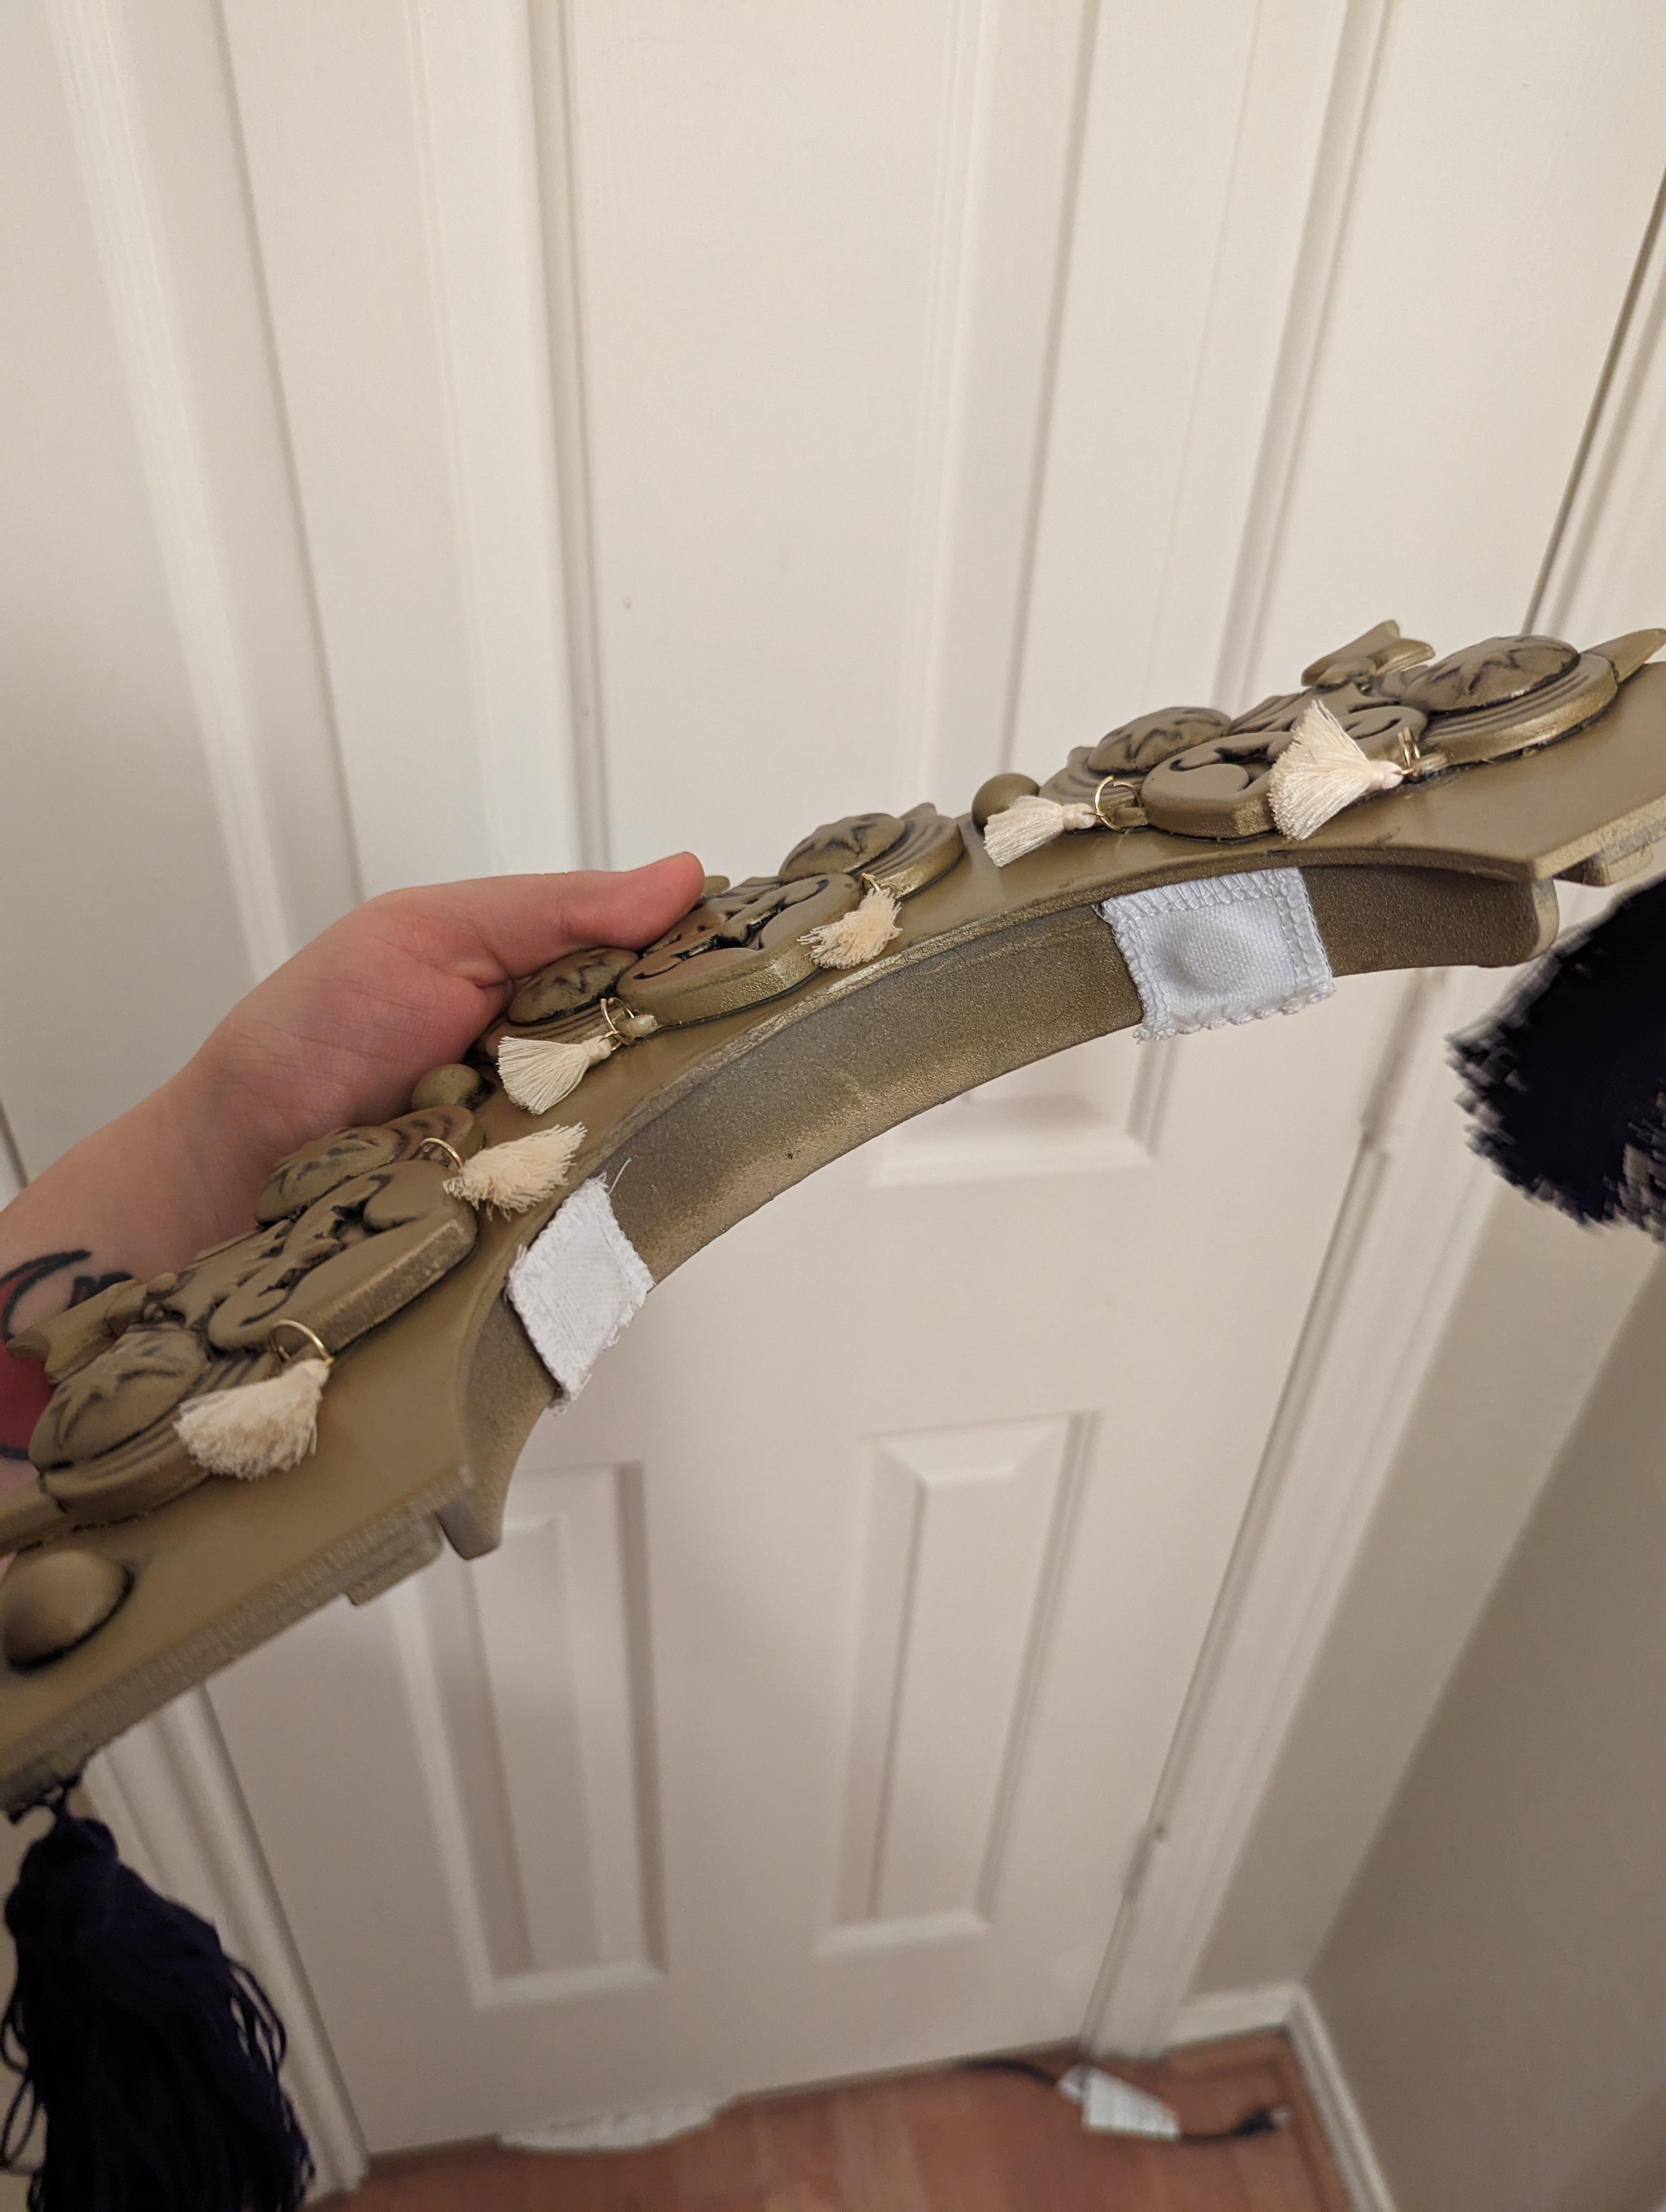
Circling back to the accessory pieces, Lutavia’s plan for a Rhea build was an original design, so my first task on that front was to print off any remaining accessories for her default look in the game using The Dangerous Ladies’ files. I did this on the 3d printers (FDM and resin depending on the piece) at my work’s Makerspace.
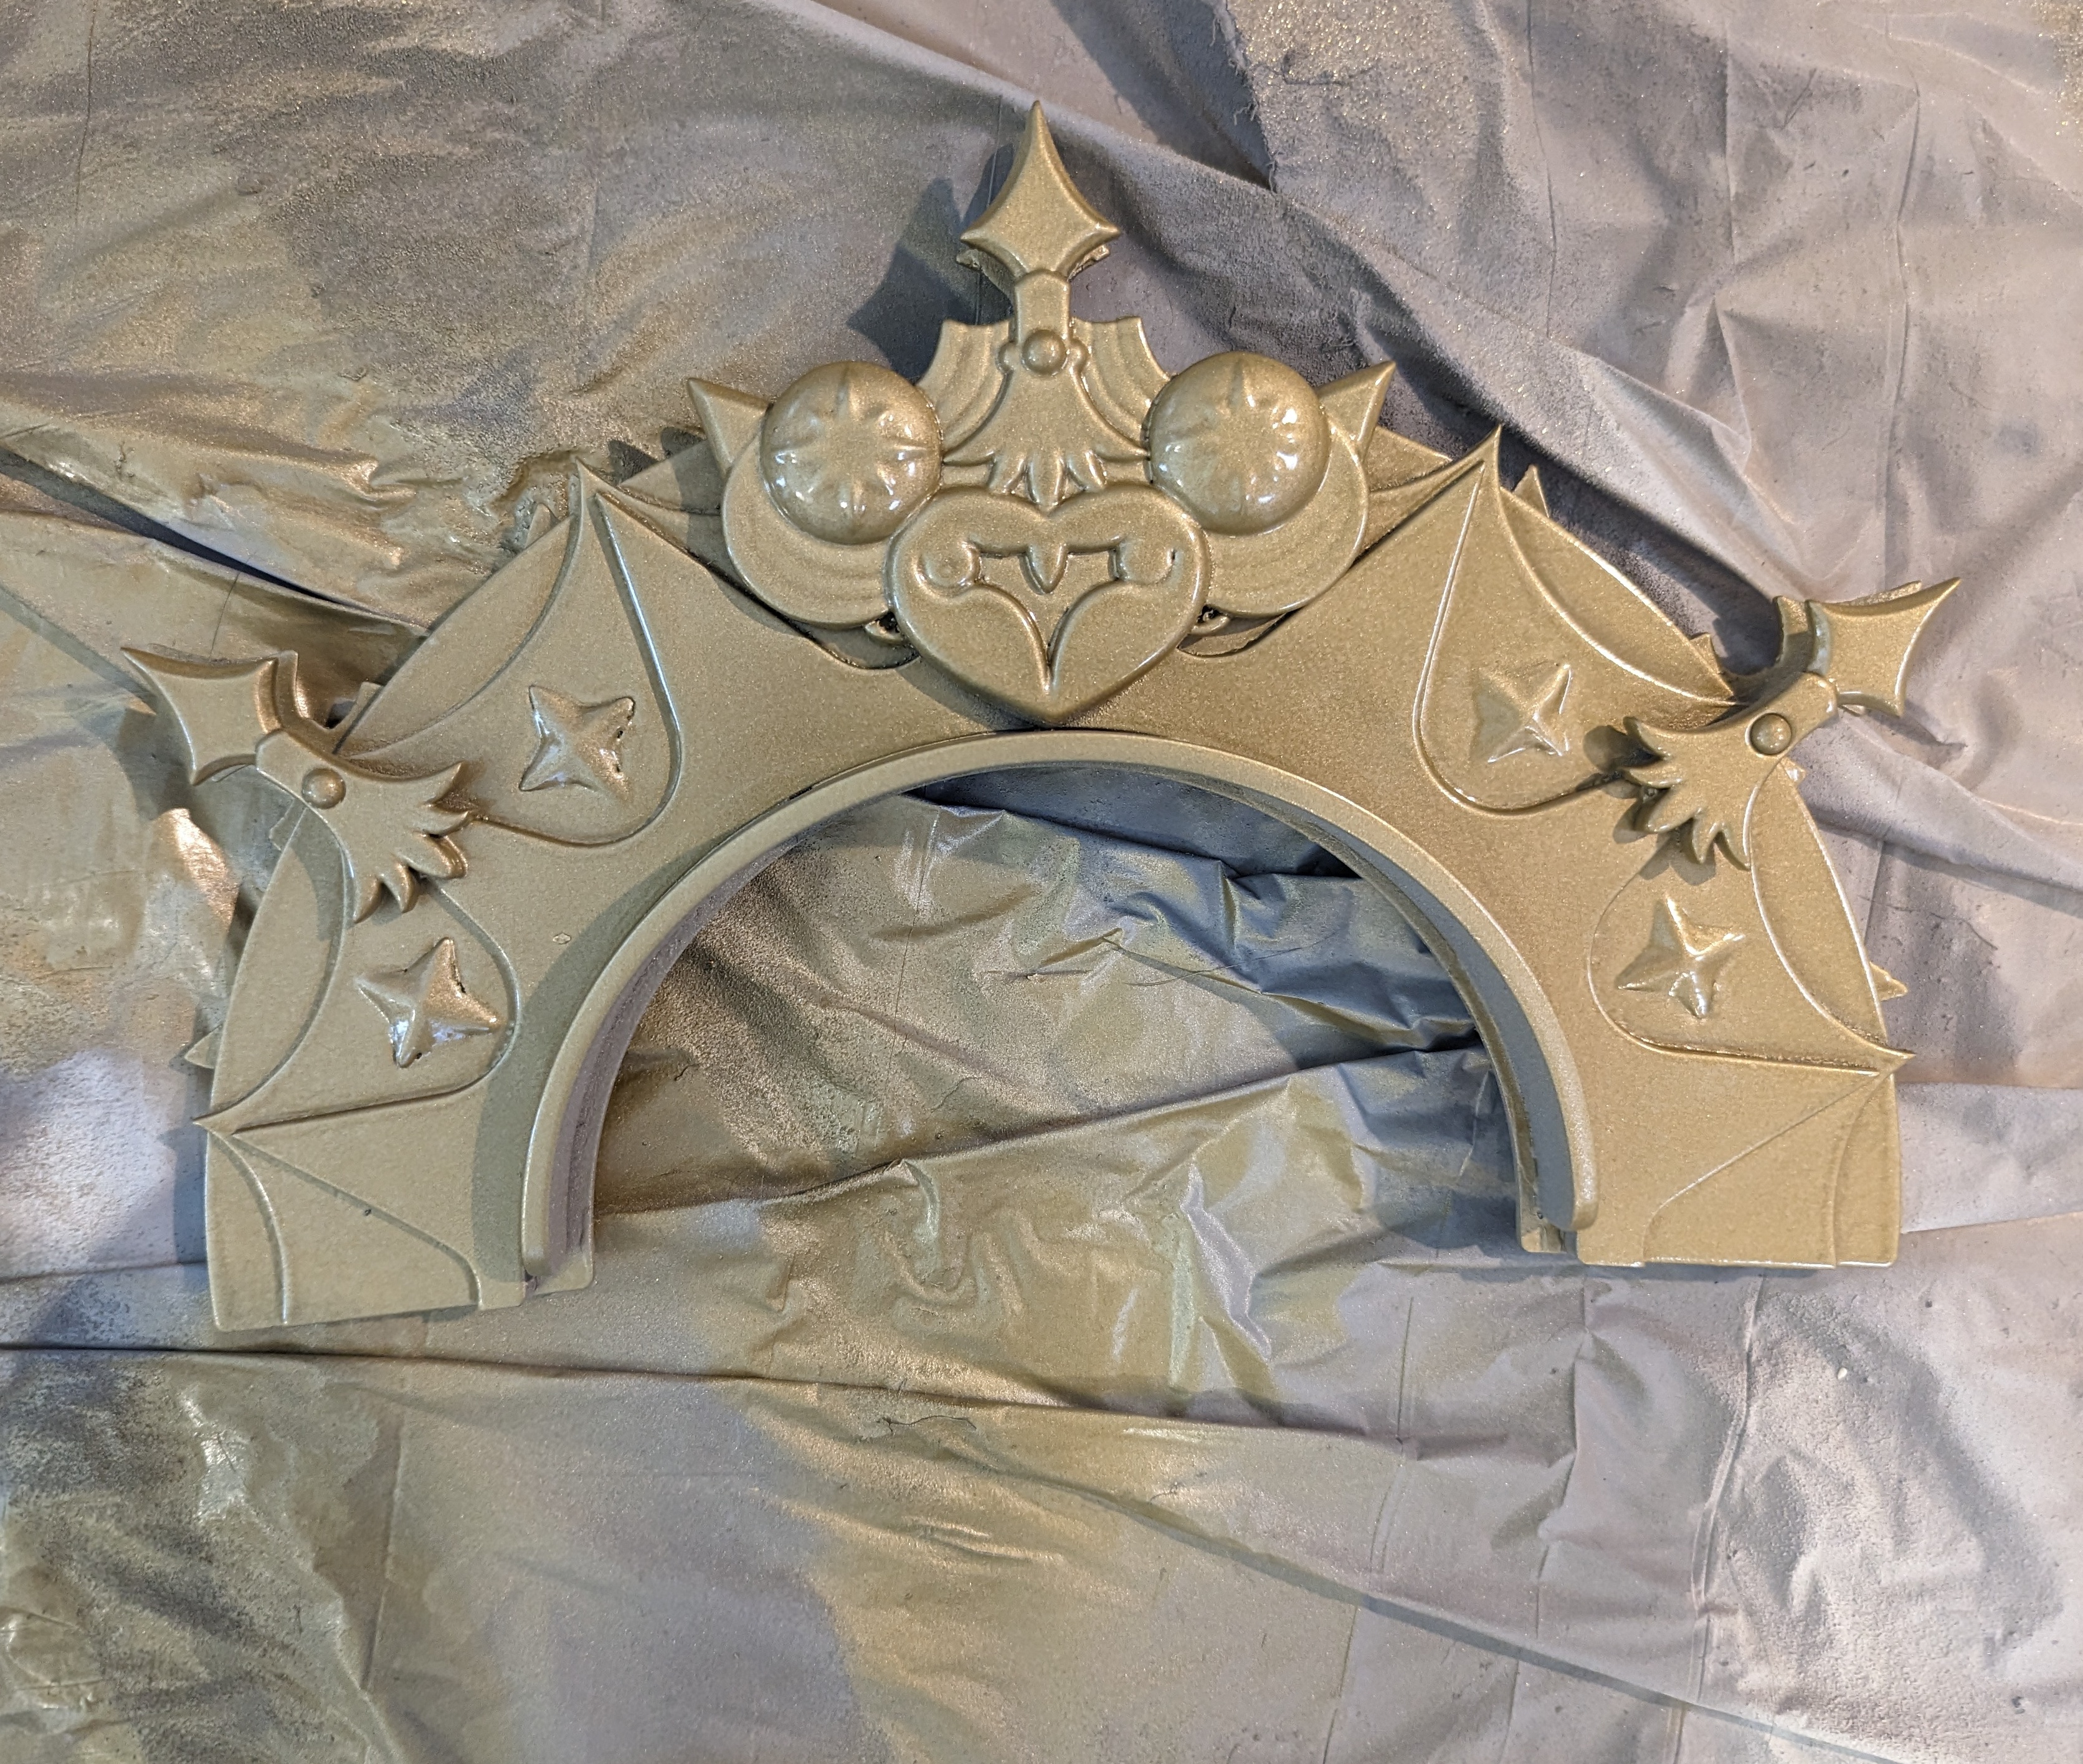
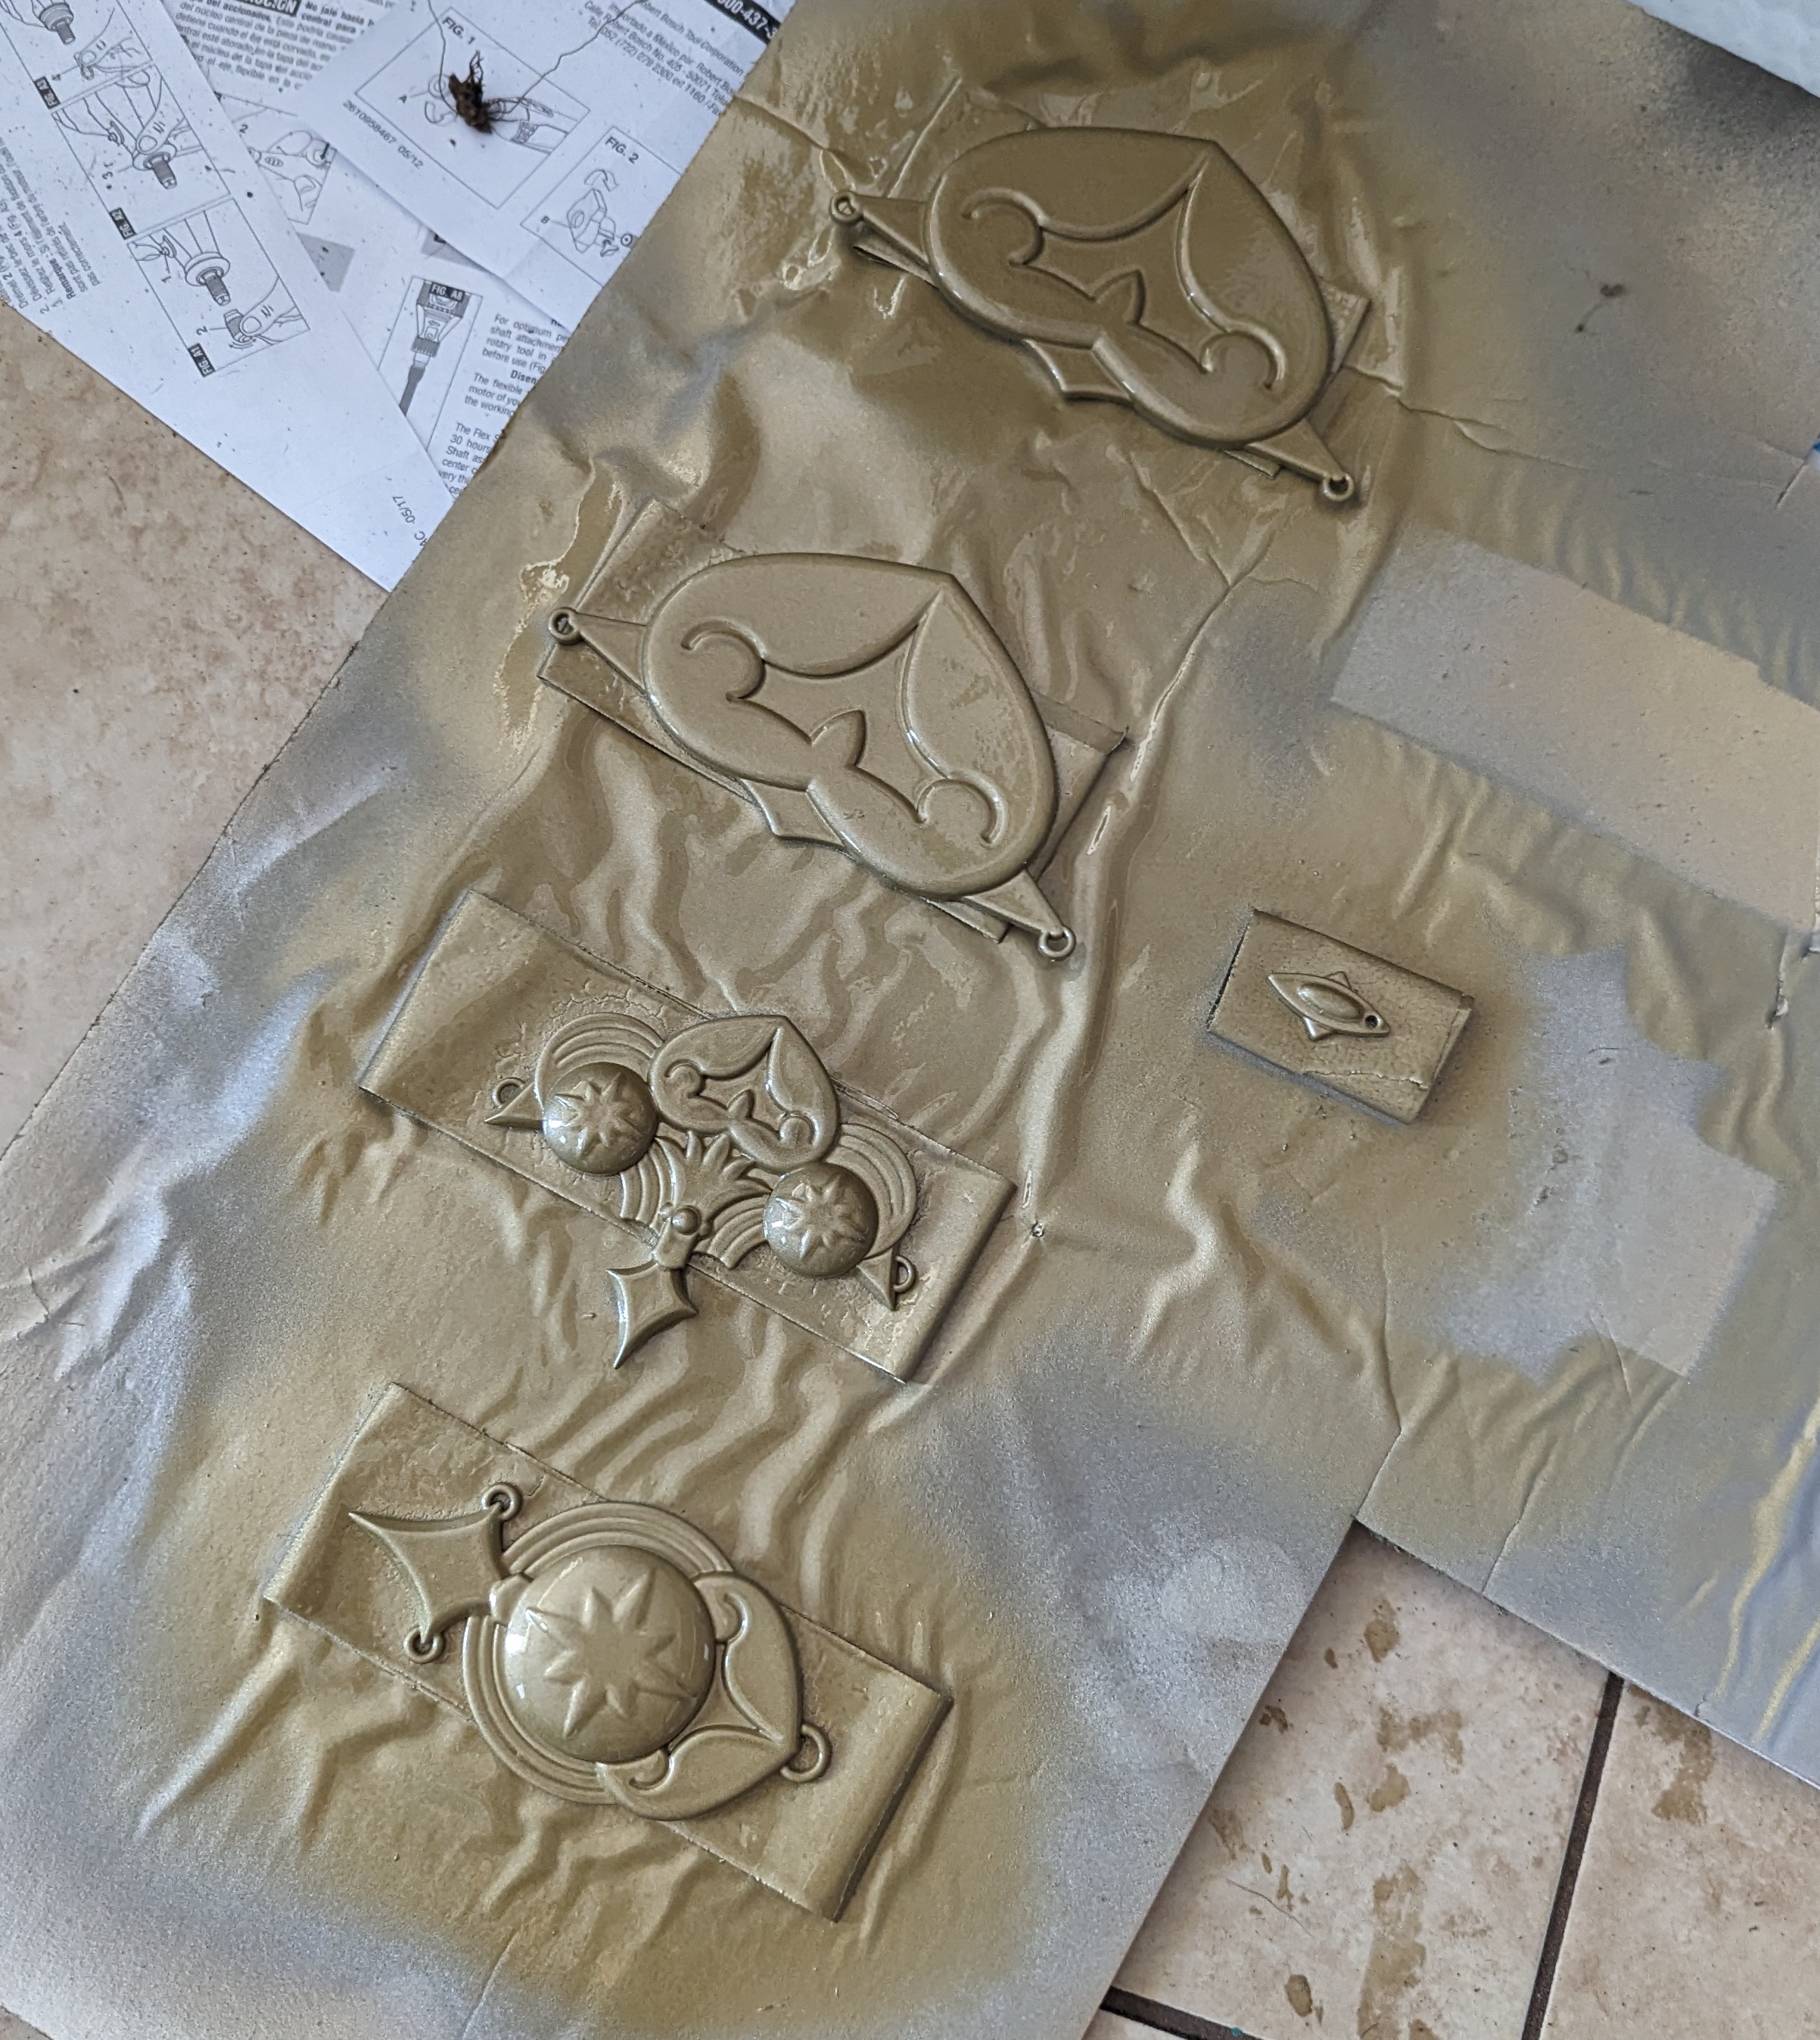
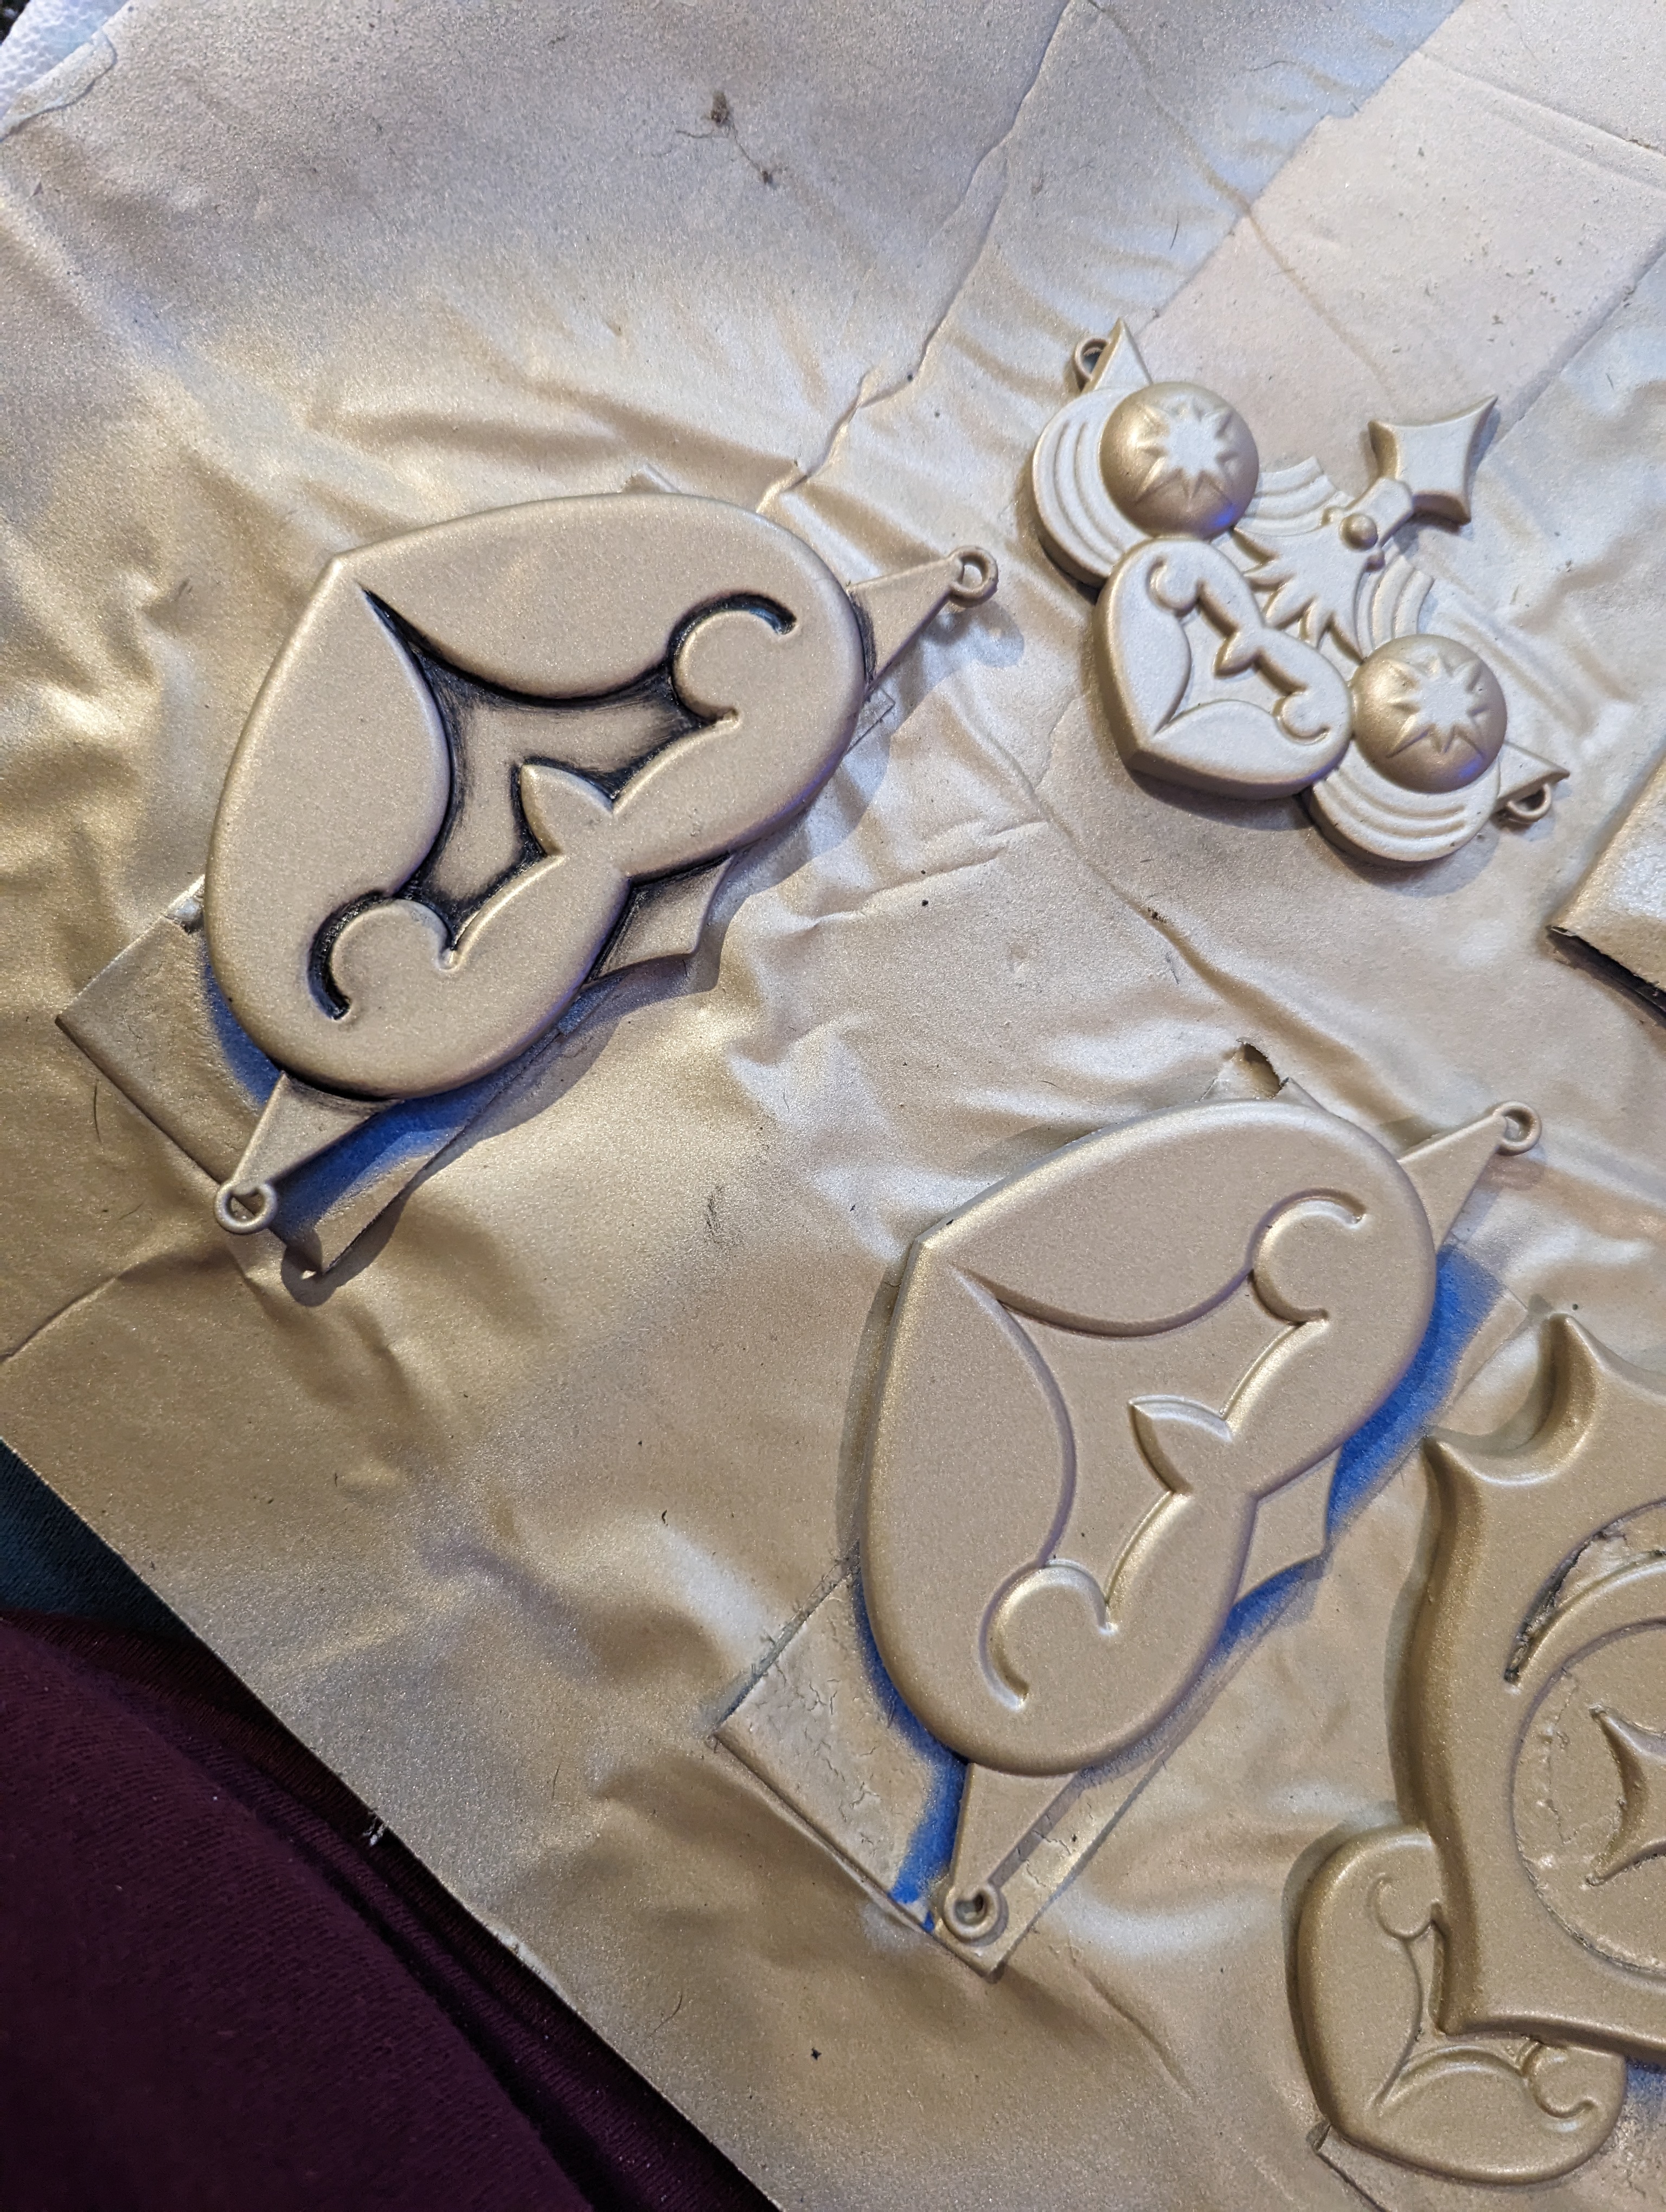

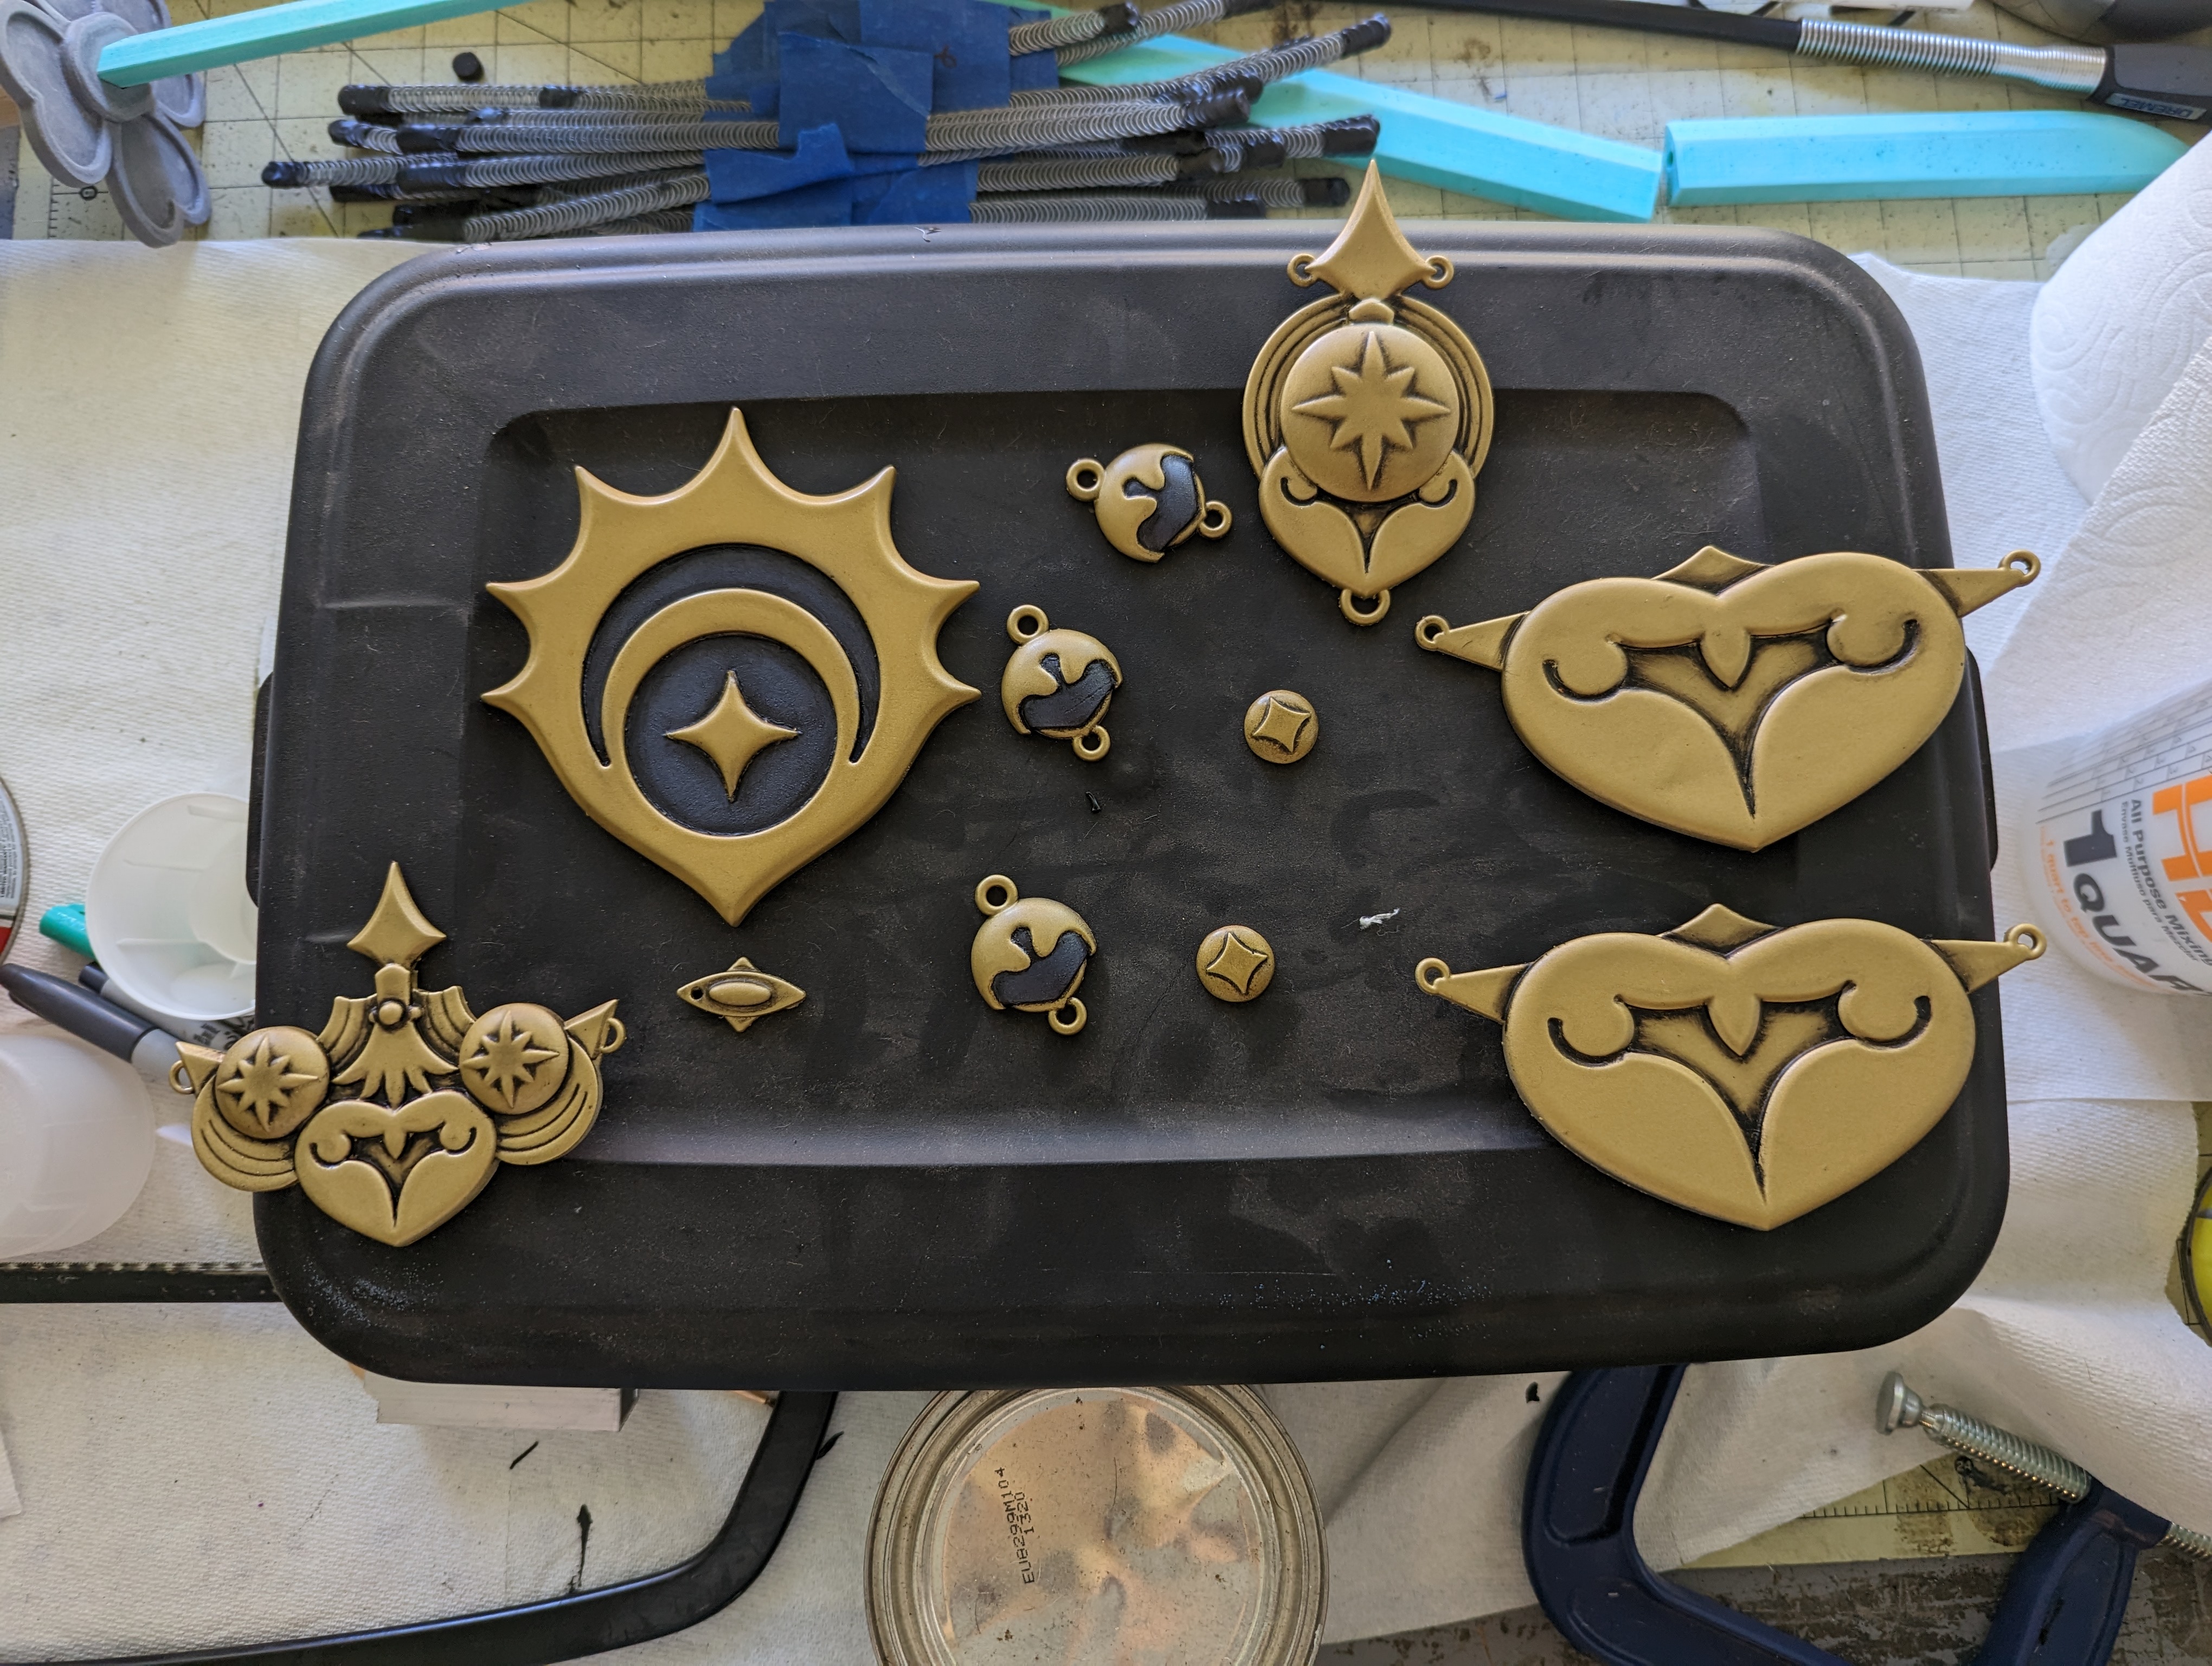
After doing all the usual bodyshopping (check out The Dangerous Ladies guide, linked above), I spray painted all the 3d pieces with my go-to gold as a base (Rustoleum in Pure Gold) and then sealed it with a Krylon matte spray paint. Once my matte spray paint dried for at least a full day, I hit all my pieces with an oil wash. I picked this technique up when I made Byleth’s Sword of the Creator and I’m honestly obsessed with how well it brings out tiny details like these.
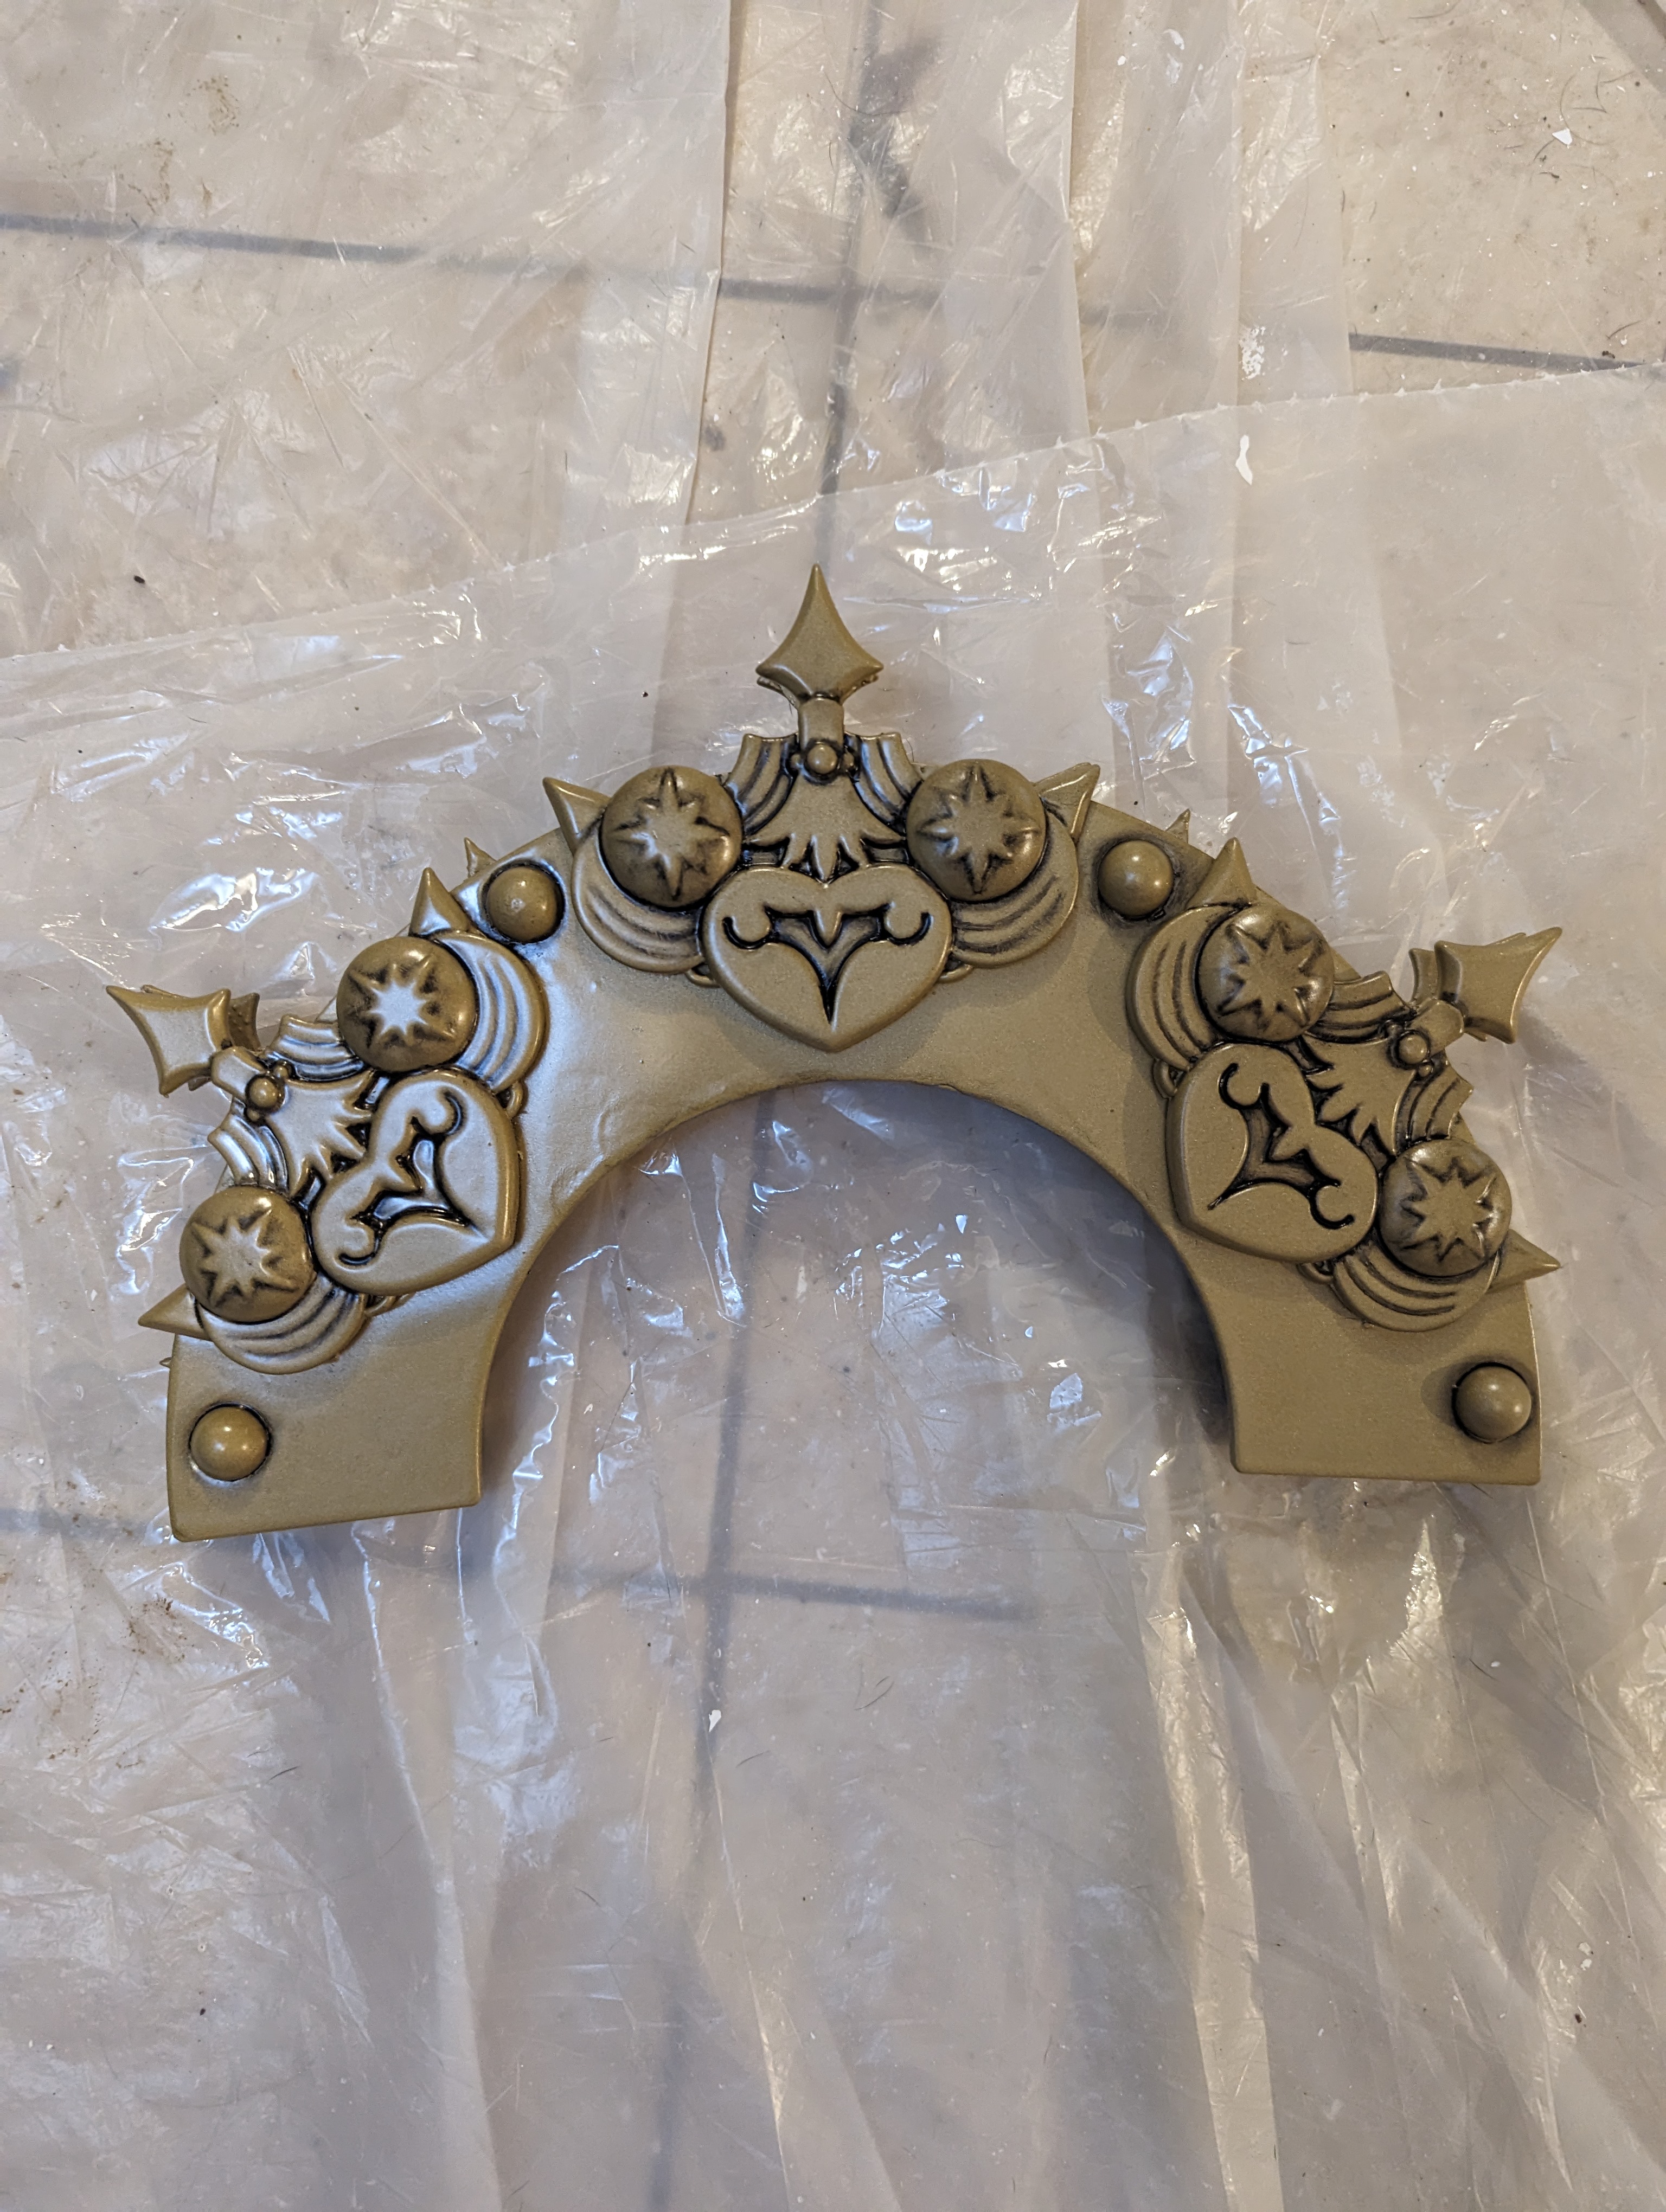
Rigging was one of the big challenges for this build. I already covered the cape/capelet combo, but are TONS of little accessory pieces that float throughout the costume. I used a variety of attachment methods depending on where the accessory was positioned.

For most of the pieces that were attached to the fabric parts, I sewed Velcro to a bit of felt and then glued the felt to the backside of the accessory. Most of my go-to glues, including e6000 (make sure you’re in a well ventilated area if you use this, please!) and hot glue, play better with felt than they do the backside of Velcro, so this is a more reliable method than gluing the Velcro directly to the accessory. It also helps to roughly sand or score the print to get the glue to stick! The respective Velcro side was sewn to the fabric itself. I used jump rings and other jewelry findings as necessary for all the beaded sections and dangly pieces.
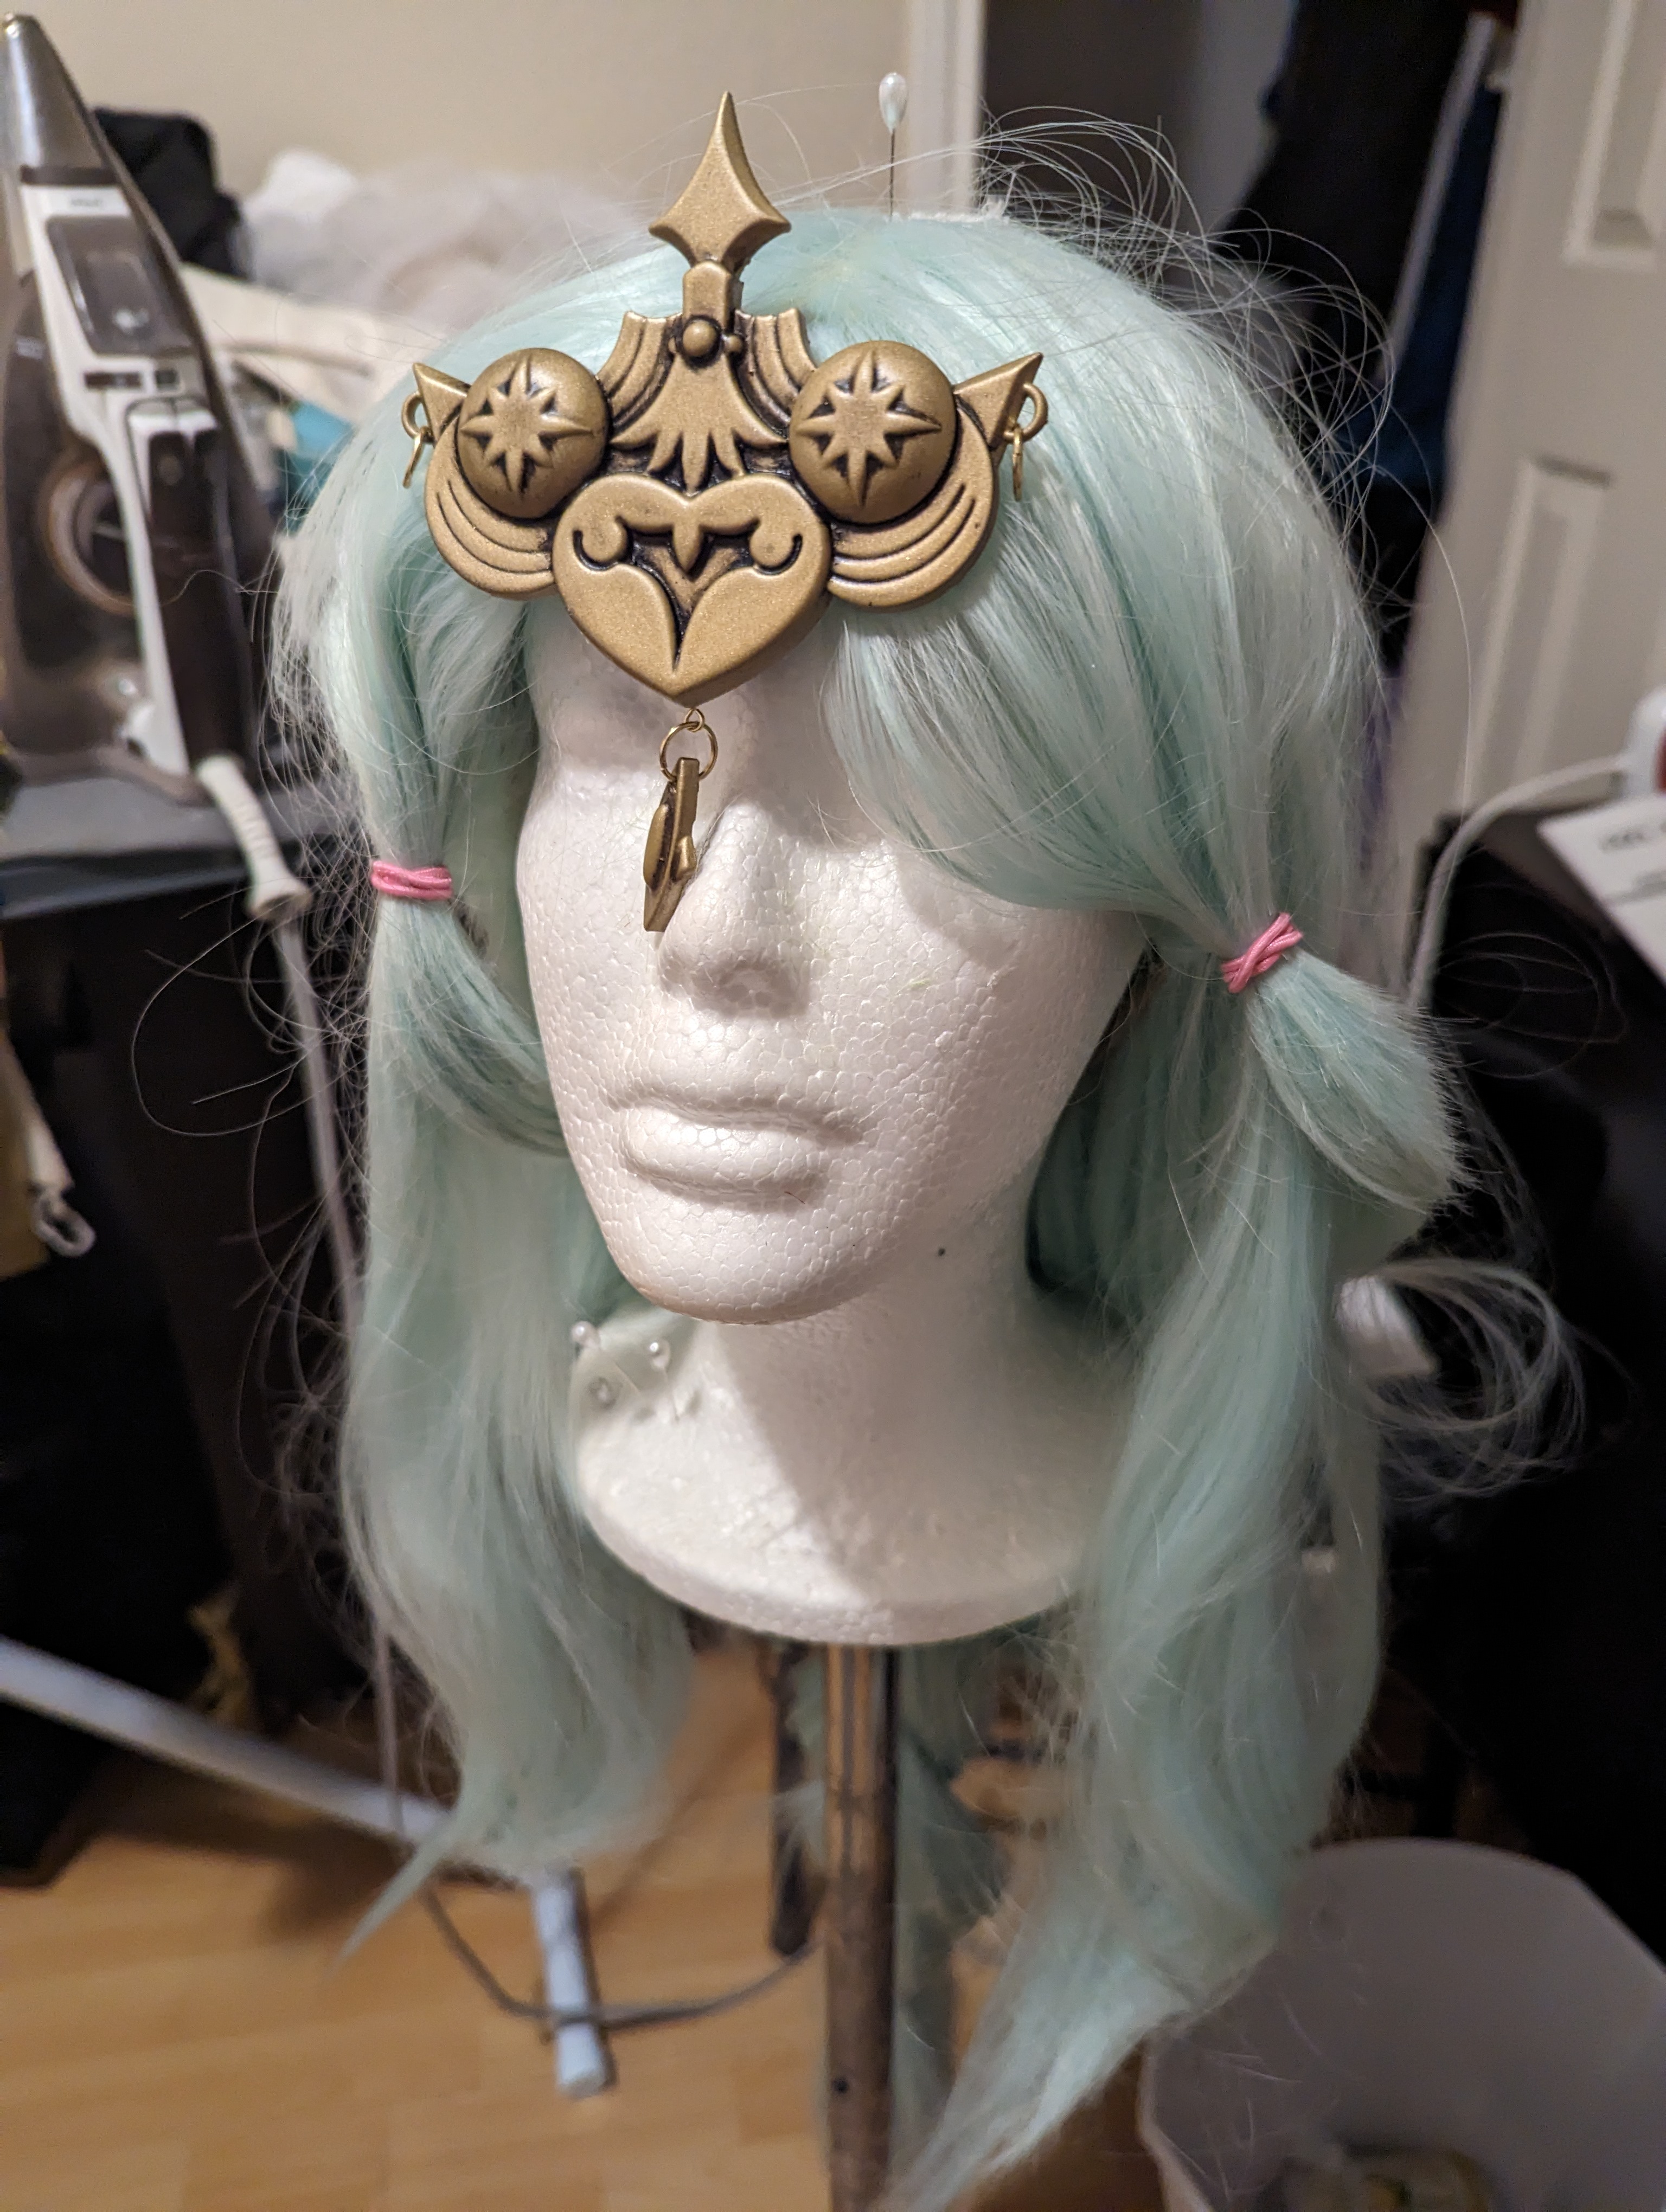
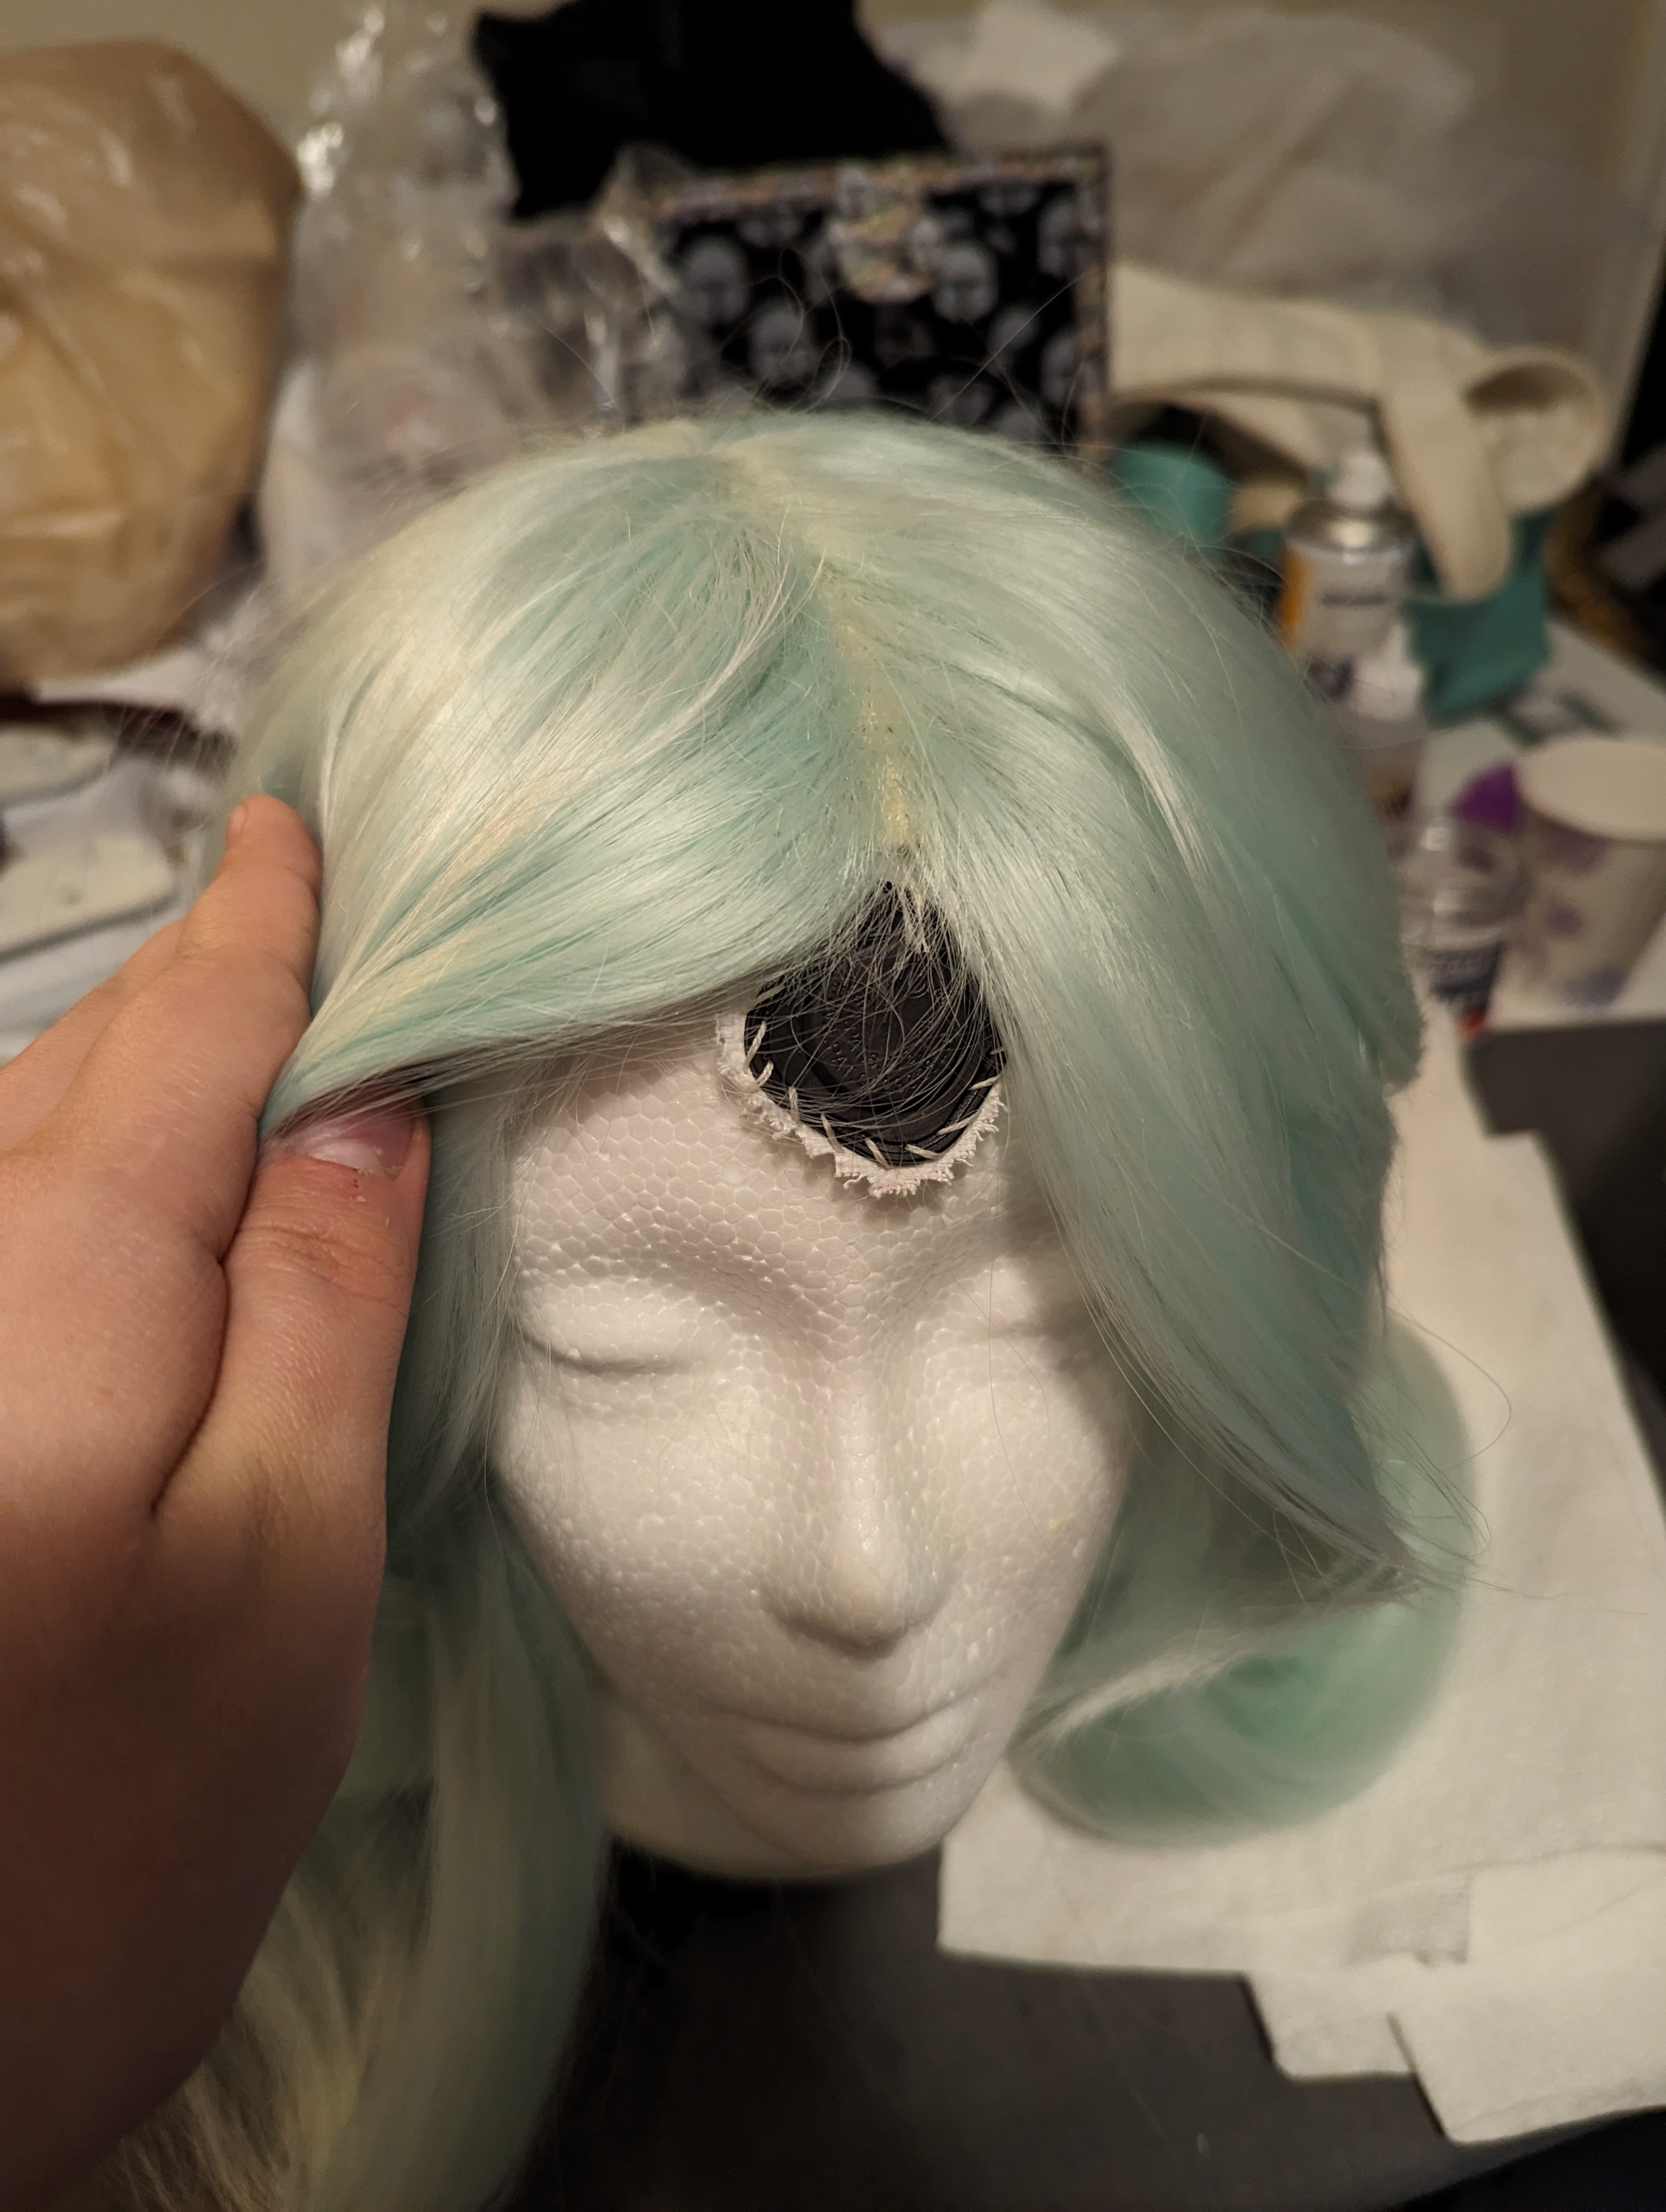
The wig was the true challenge, and once again, rare earth magnets were my MVPs. I sewed several small pockets out of scrap coutil to hold the magnets. I then glued these pockets to the bottom of the headdress and the back of the smaller accessories. After this, I put my wig on, marked where I wanted all my accessories to sit, and sewed the corresponding pockets of coutil to the inside of the wig cap, making VERY sure that the correct side of the magnet faced out. This was an incredibly time consuming process, but it makes getting ready super fast!

Thoughts on this Build:
Yet again, what I thought would be a relatively simple project given the materials I started with turned into an overwhelming but thankfully not insurmountable beast. I’m so, so incredibly grateful to have so many resources available to kickstart such a complex build. This was honestly one of my favorite looks of 2023 and I hope I have the chance to wear it to a con again soon!