Today’s post is all about full bust adjustments or FBAs! This is one of those tailoring topics that I don’t see covered often in the cosplay and costuming world (I learned about it by sewing my own clothes), but it’s so, so valuable.
Before diving into the how, let’s chat about the what and why of FBAs. Commercial and many independent pattern blocks are based on a standardized set of measurements known as the American Society for Testing and Materials (ASTM) Standards. When drafting these blocks, pattern makers assume a B-cup most of the time. Whether or not that’s accurate or useful is a discussion for another day (Seamwork has some really fascinating information on this and how it translates to real bodies, especially for us plus-size folks), but this is how many of the Big 4 patterns are drafted and most tutorials covering pattern blocks base their information on these standards as well.
If you’re NOT a B-cup, you may have made costumes that should fit in theory, but might have some weird issues, especially in the chest and shoulders. This is where a FBA comes in! This alteration gives you more fullness for a larger cup size while still fitting your other measurements. And yes, there is a small bust adjustment as well! It’s the same process I’m sharing below, but instead of adding fullness, you’re removing it. Check out Seamwork’s article, Four Essential Small Bust Adjustments, for more information.
A quick aside: many Big 4 pattern companies have patterns now that allow you to choose your cup size, but that practice still isn’t the norm. Some indie pattern companies also feature different cup sizes, like Charm and Cashmerette, but again, it’s not the norm. Knowing how to do this adjustment will enable you to alter any pattern you come across as needed.
For this post, I’m using IndigoJingo‘s pattern for Lisa from Genshin Impact. The bodice of the base dress is strapless and features a sweetheart neckline with princess seams. I specifically chose this pattern since the tutorials I referred to when I was learning didn’t show this kind of neckline. Most show bodices with sleeves, but the process is the same! I’ll include more tutorials at the bottom of the page if you want to see other examples for different necklines.
Tools Needed:


- Desired pattern, center front and side front pieces
- Paper
- Tape
- Ruler
- Tape measure
- Scissors
- Writing utensils. I’m using multiple colors here to better illustrate the lines needed.
Before you start messing with your pattern pieces, you’ll need to get some measurements. Specifically, the full bust and the high bust, illustrated below.
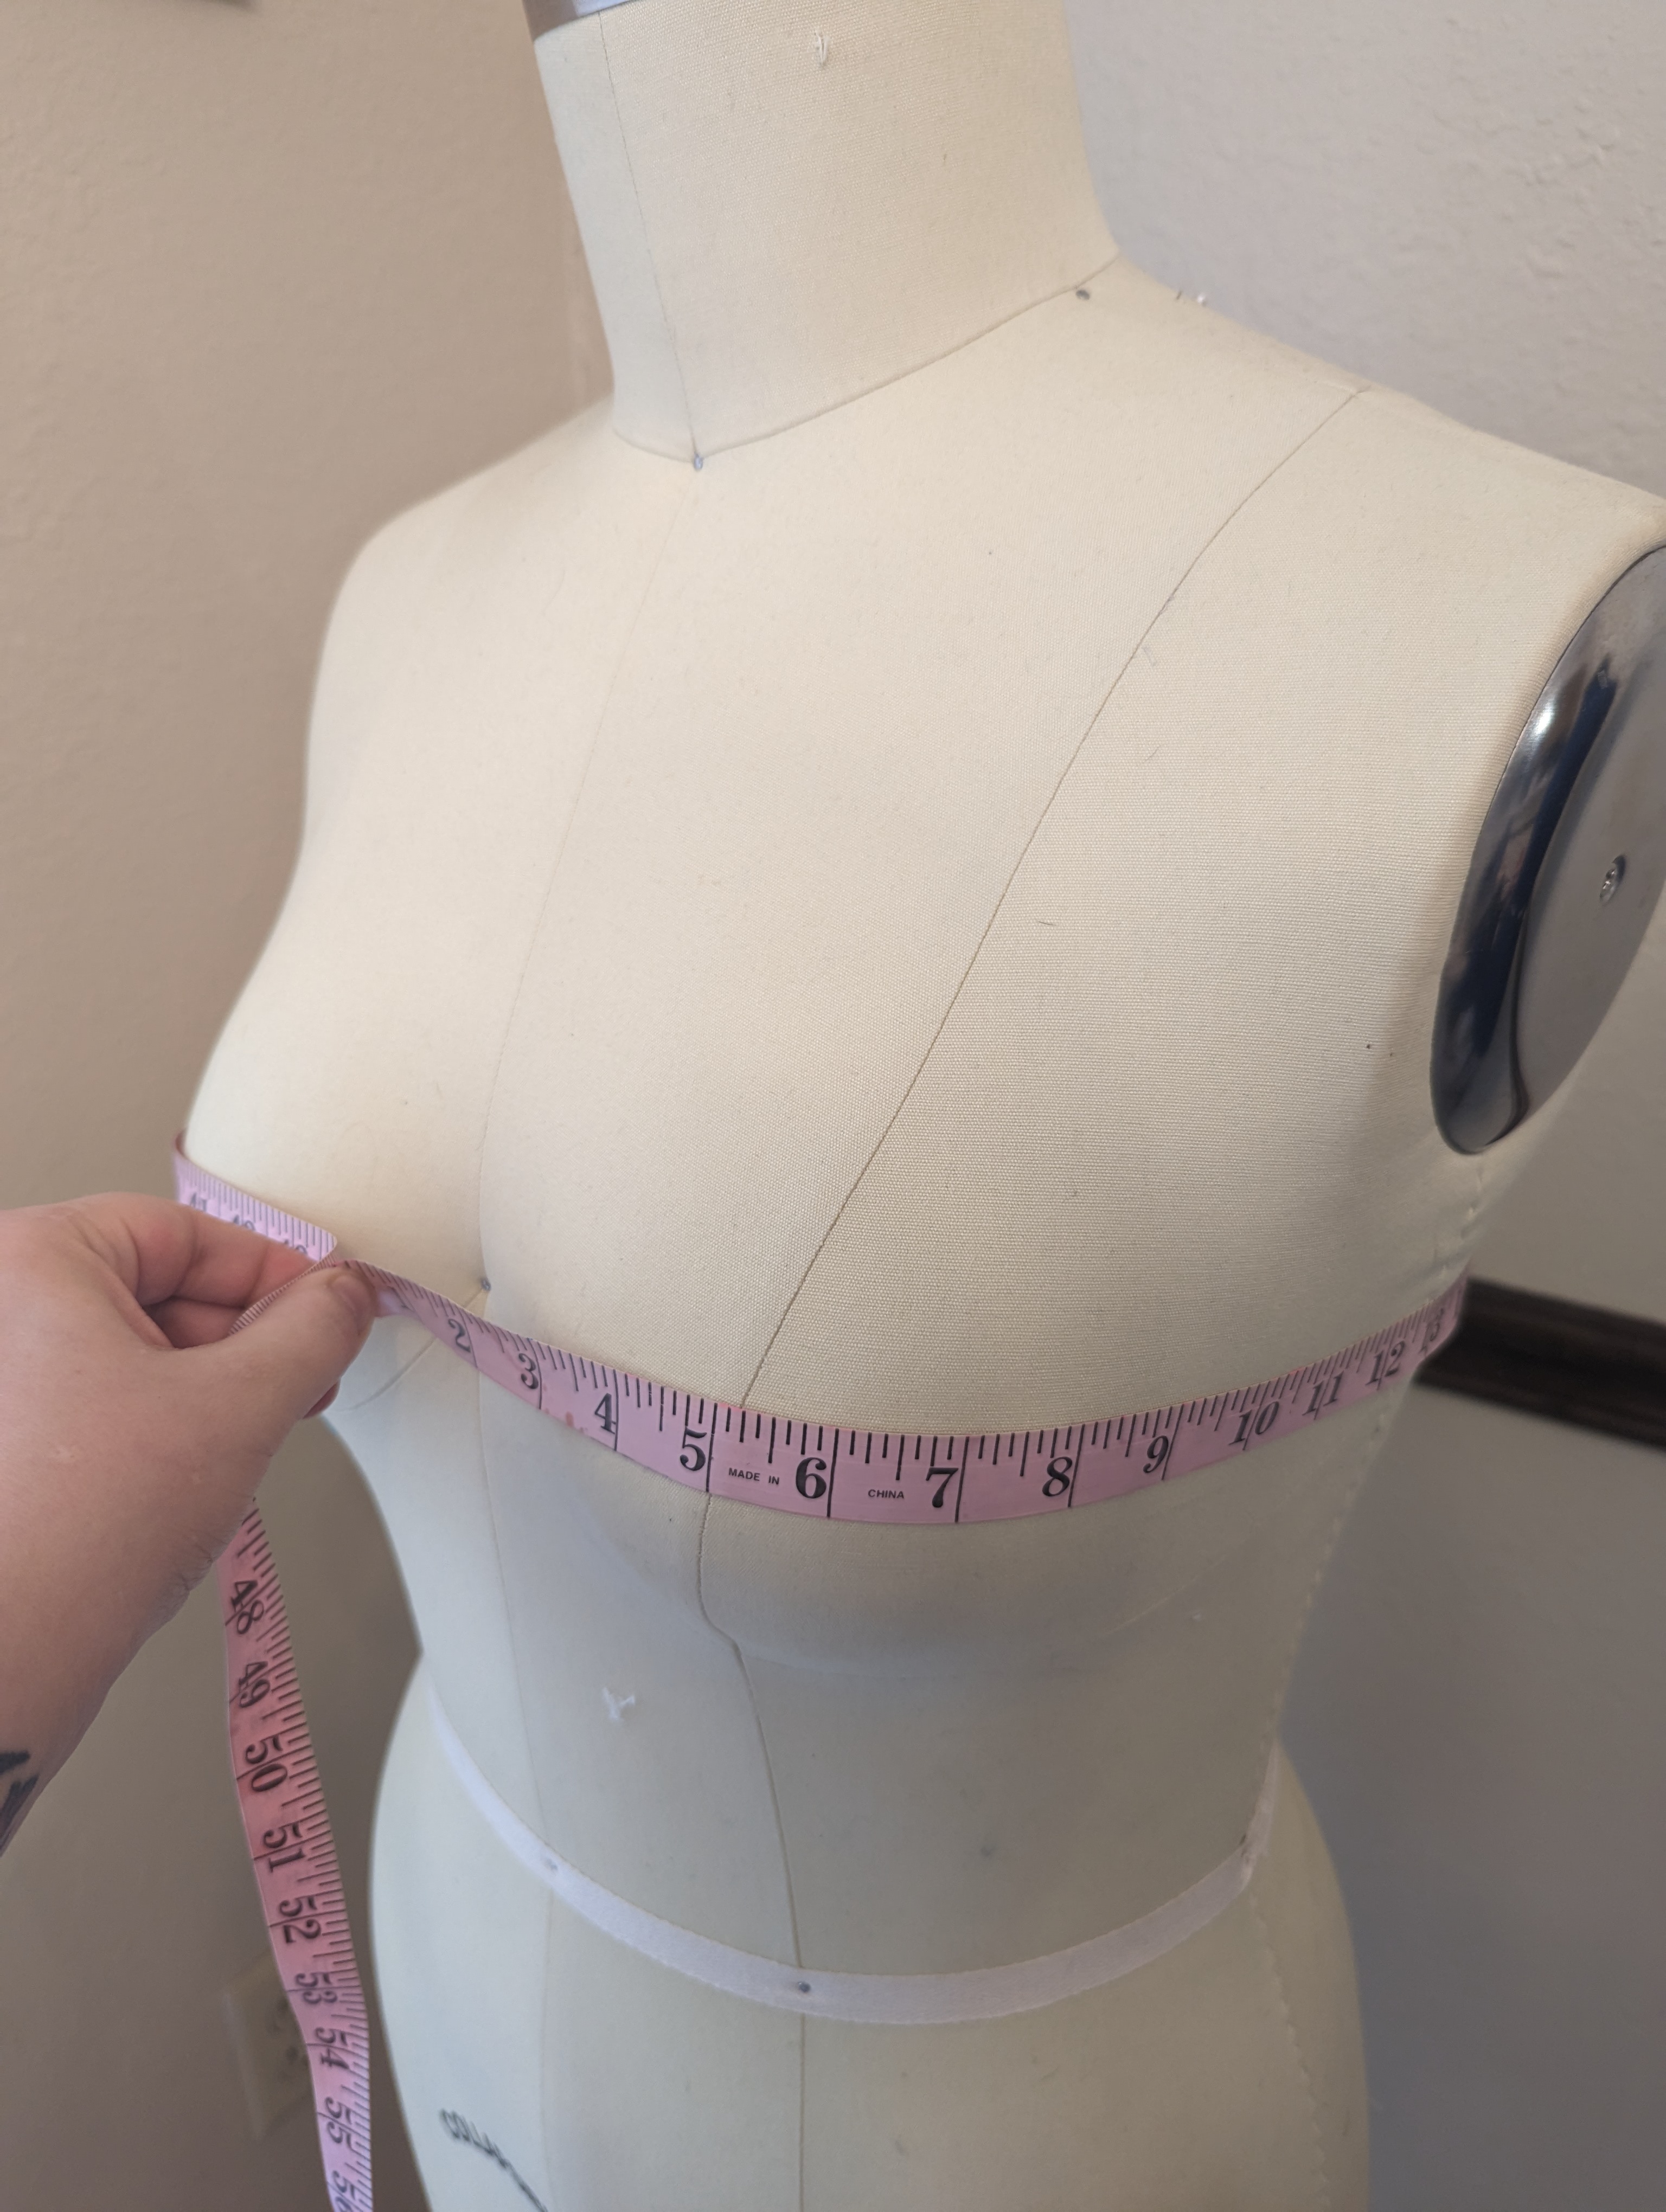
The full bust measurement, as the name indicates, should go around the fullest part of your bust or chest. This measurement should be parallel with the ground.

The high bust measurement goes around your back and ABOVE the bust.
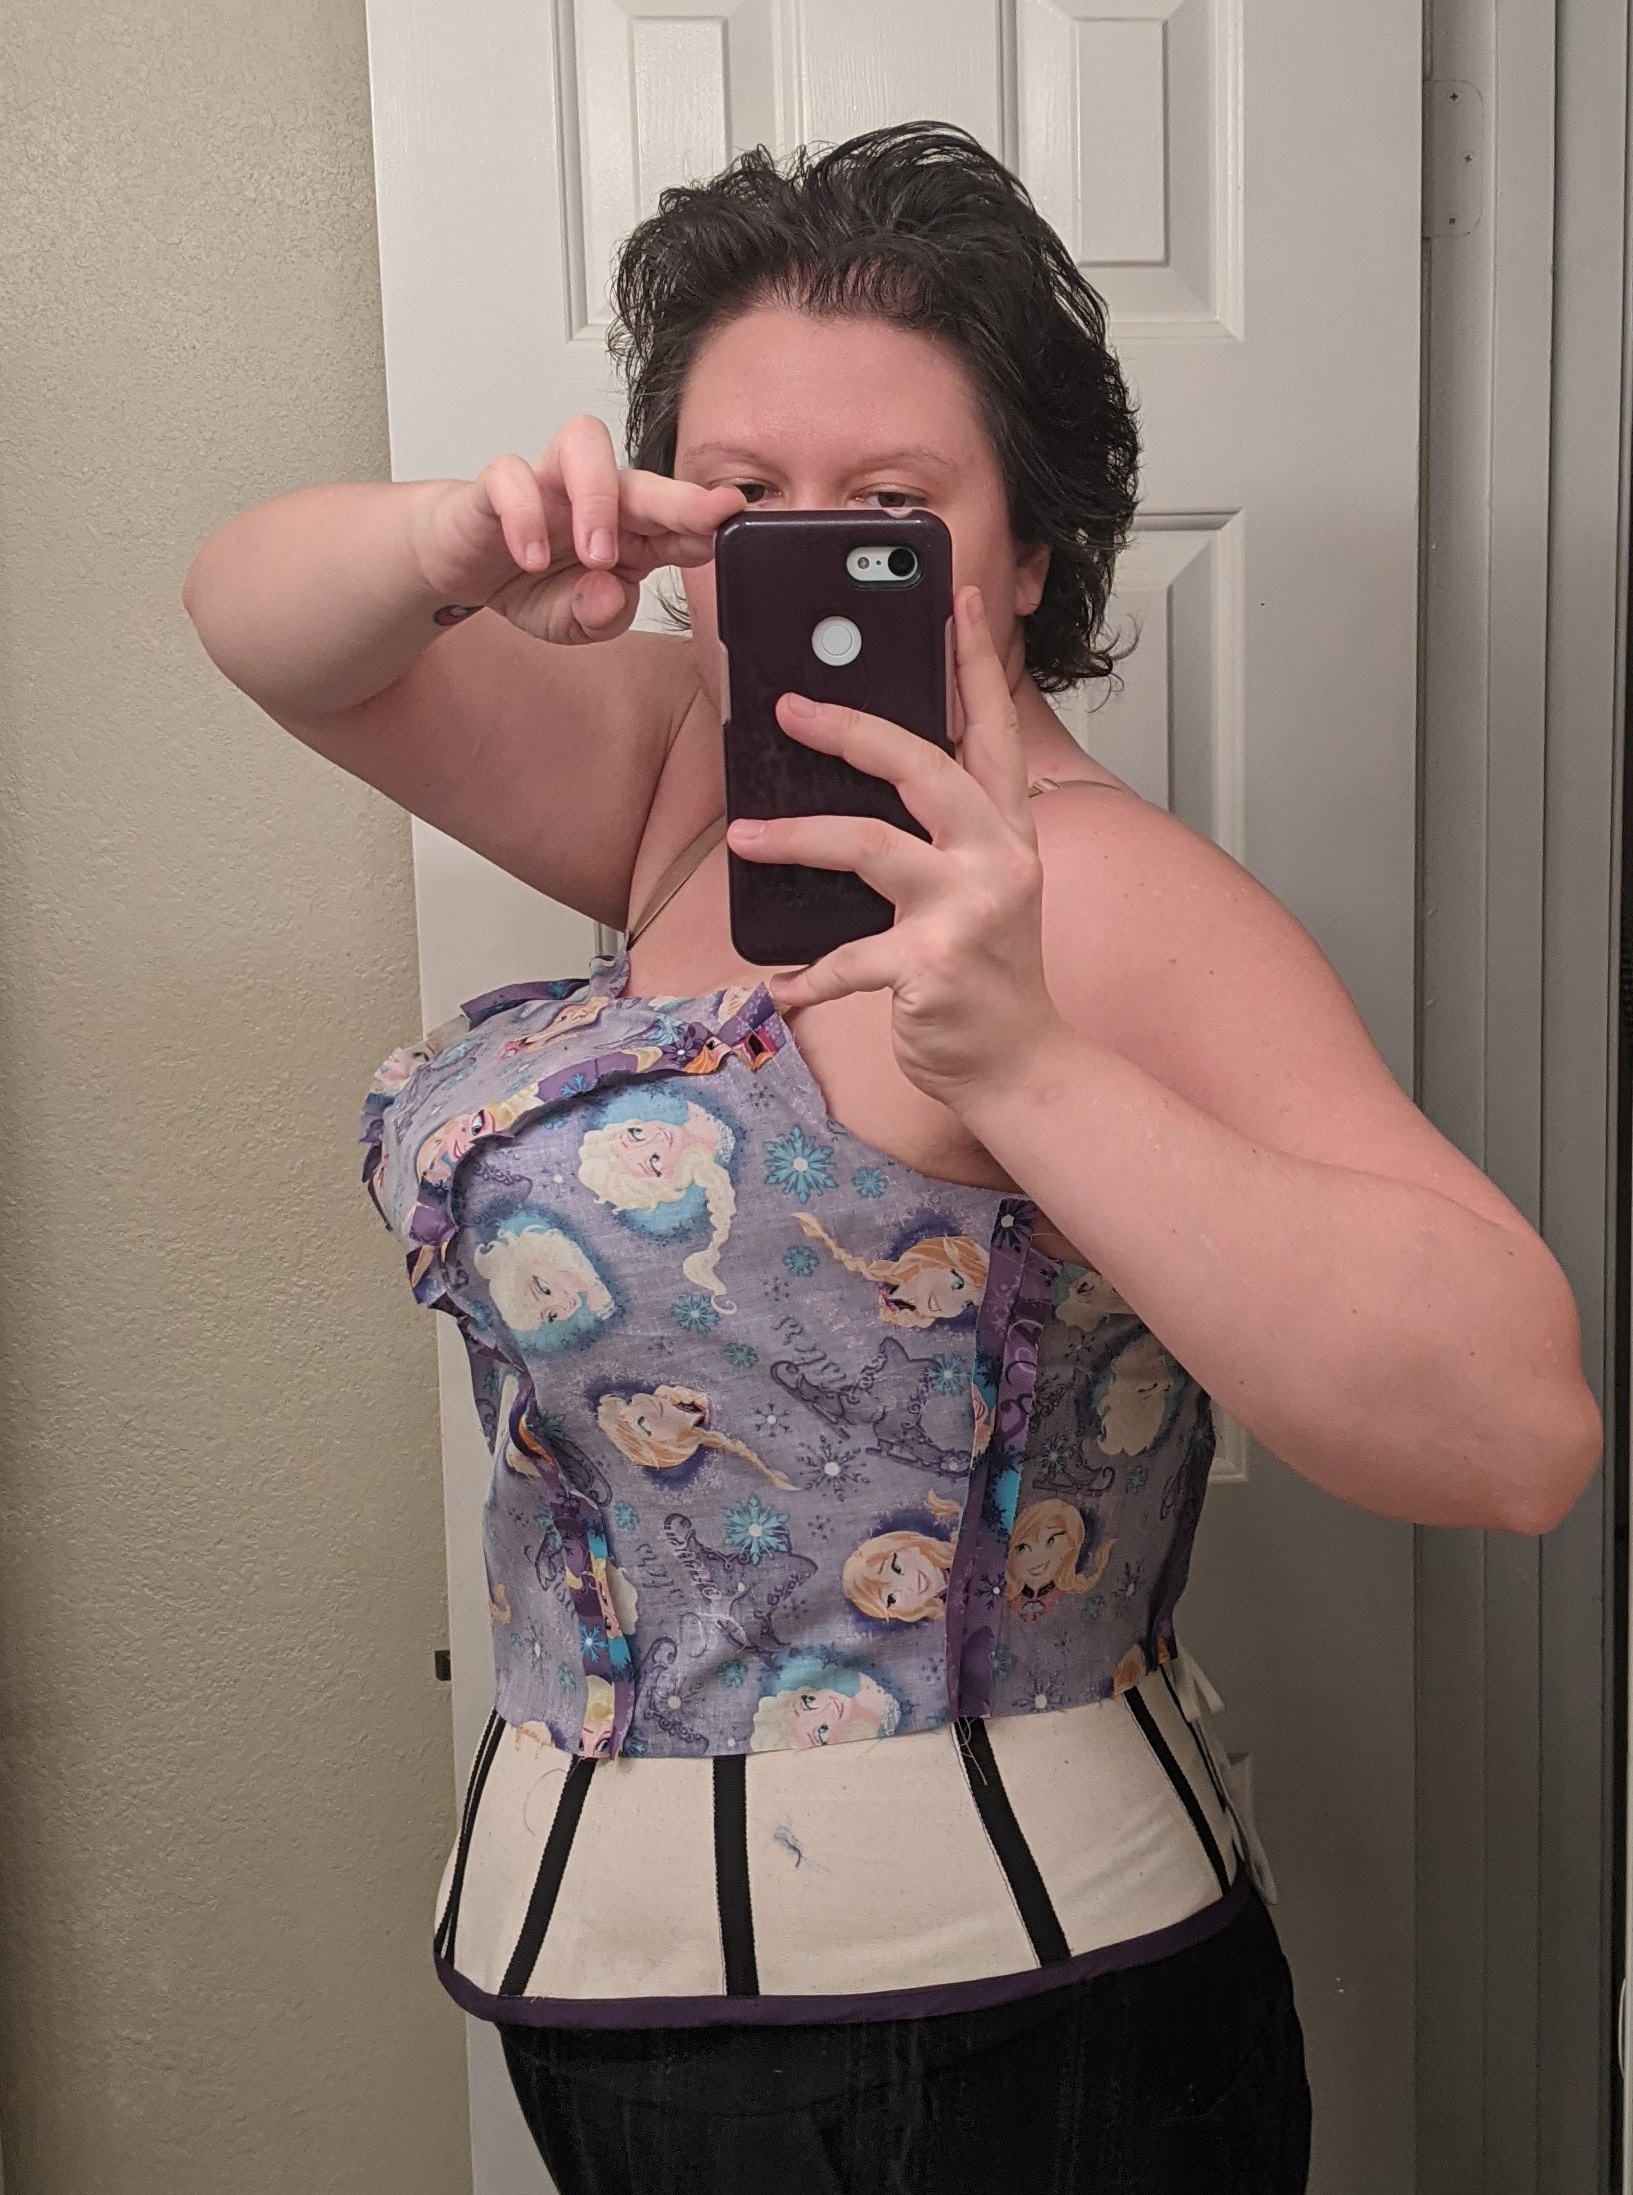
Make sure to get these measurements while wearing the undergarments and shapewear you intend to wear with your costume! (I have some older posts on my general approach to shapewear here and here) I cannot stress that last sentence enough. Like lots of cosplayers, I have my “cosplay silhouette” that I achieve through shapewear, which usually involves a corset and a pushup bra or two. It makes a dramatic difference with my overall measurements, which is very important on a snug garment like this one.

For this particular build, I made the dress over a custom corset, so I had to finalize this step prior to working on my FBA.
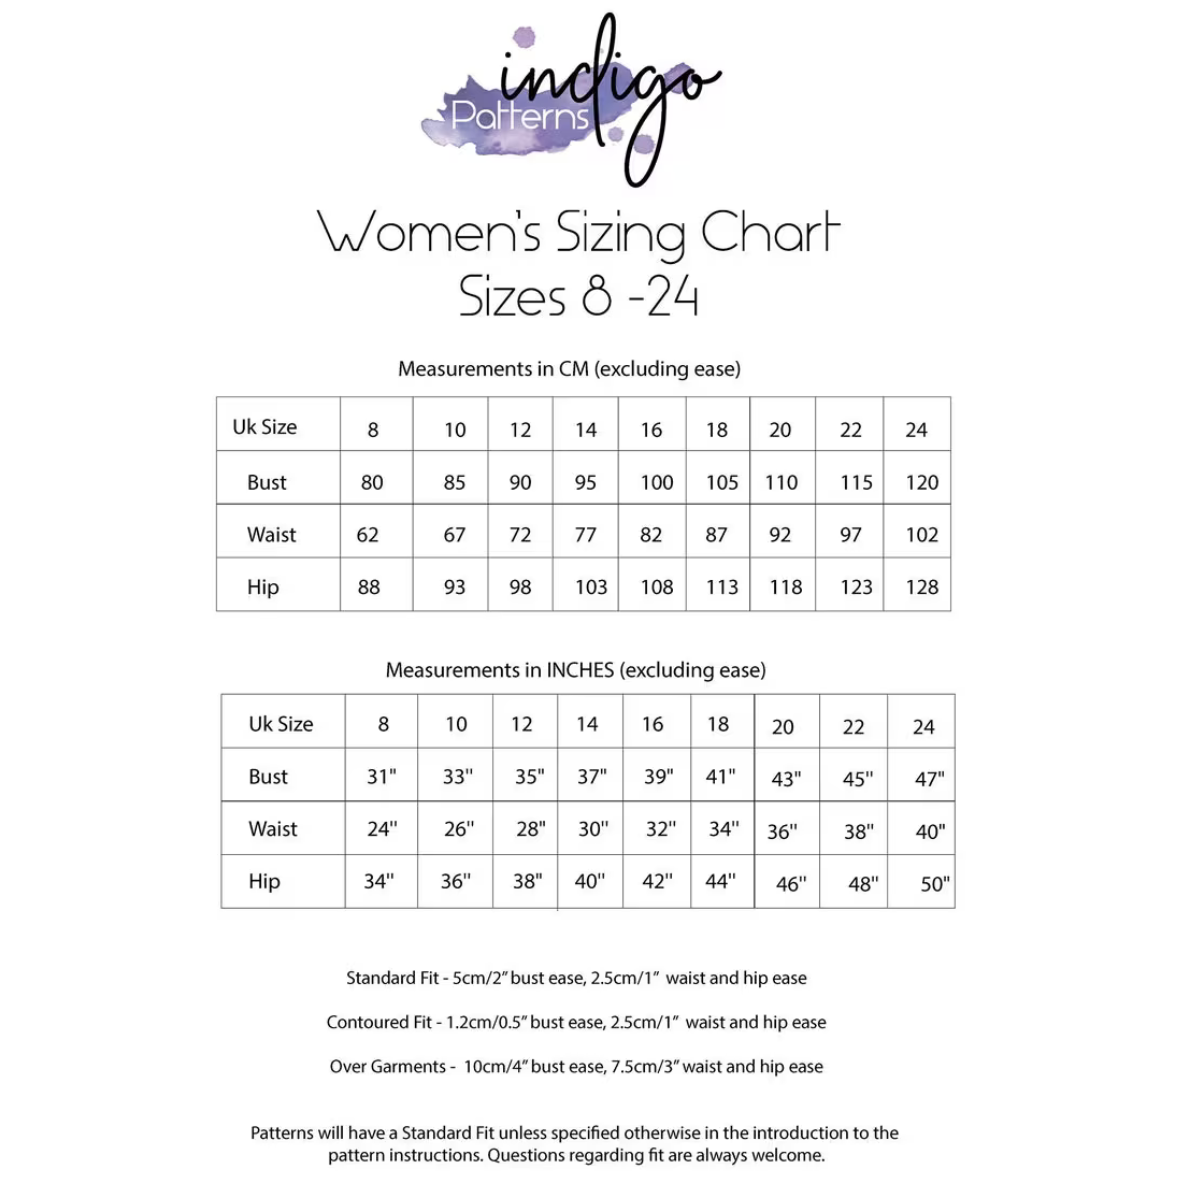
IndigoJinjo’s size chart for the Lisa pattern, pulled from her Etsy.
Once you have your measurements, take a look at the size chart for the pattern. When doing a FBA, we’re going to choose the bust size based on the high bust measurement. This ensures that the shoulders of the garment will fit as intended. Don’t worry about the waist measurement for now. We’ll circle back to it. For the purposes of this tutorial, I’m selecting a size 22 based on my high bust measurement of 45″.
Next, you need to figure out how much fullness to add. To do this, subtract your full bust from your high bust. Using my measurements, that’s 52″ all corseted and padded up – a high bust of 45″, resulting in a 7″ difference (usually 5-6″ in my daily wear clothes. Again, wear your shapewear for measurements!!!). Divide this in half (3.5″ for me) since we need to divide this for both sides of the body.
Once you’ve got your measurements, it’s time to alter the pattern pieces!
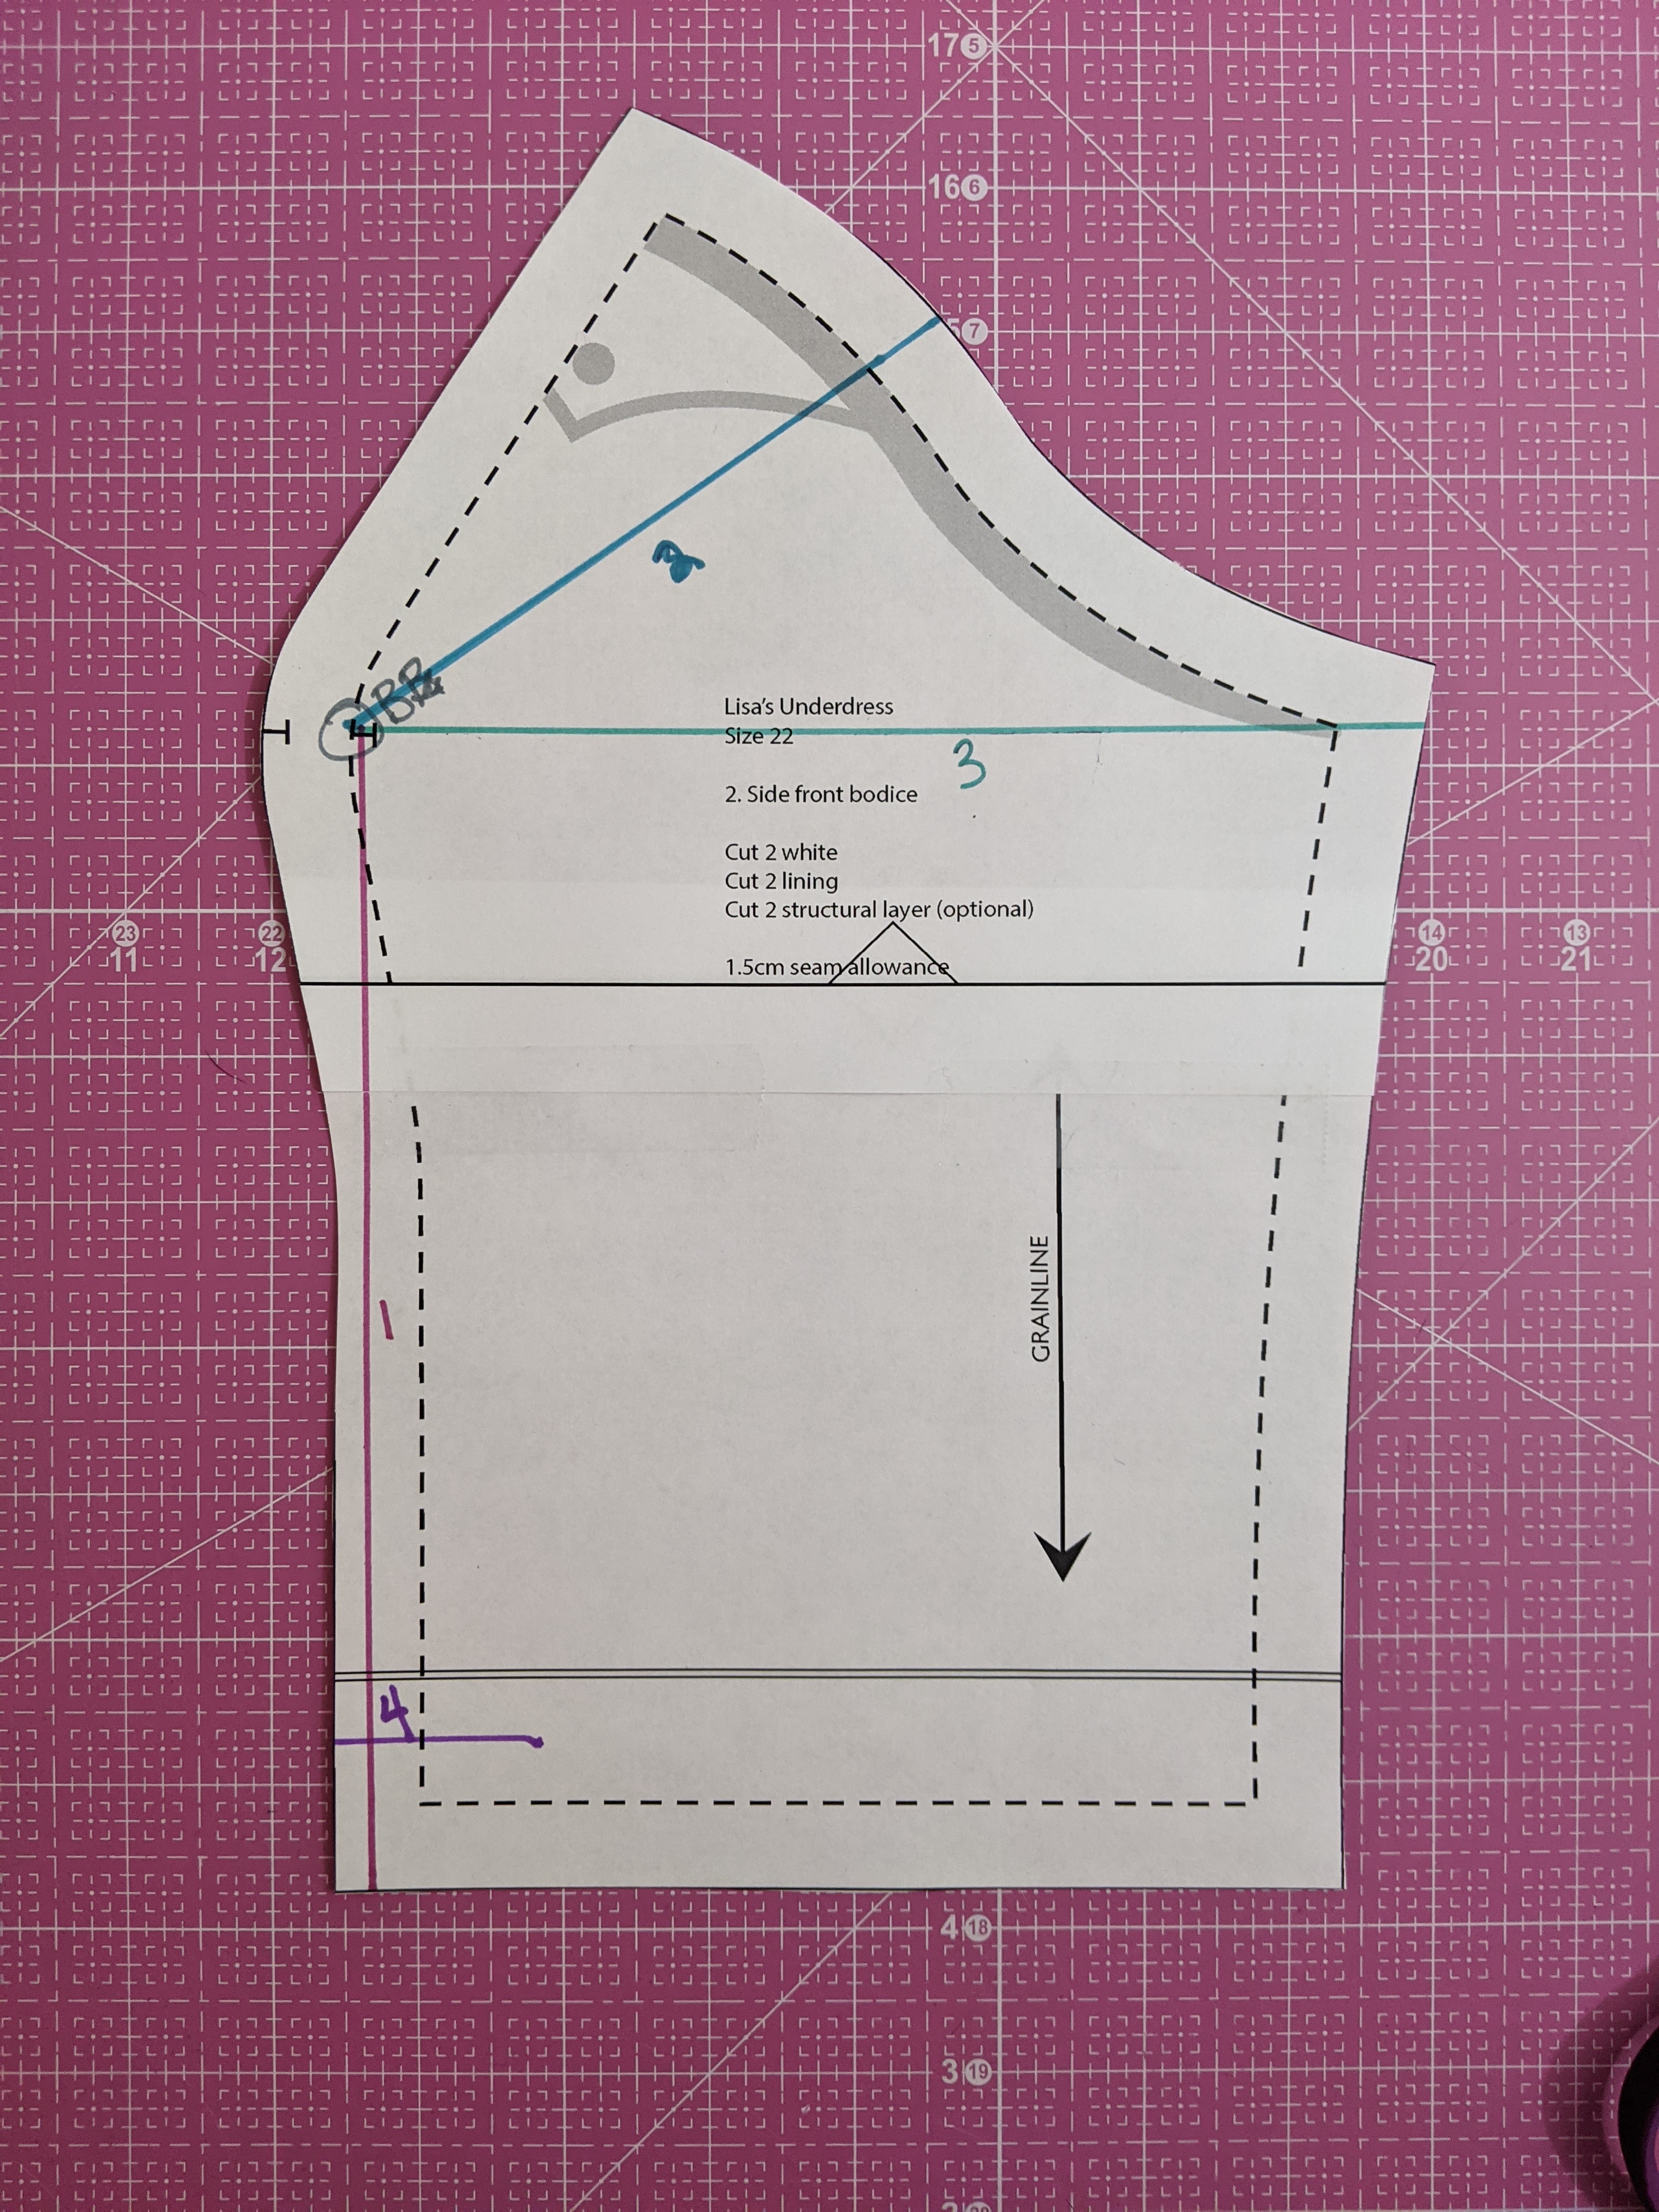
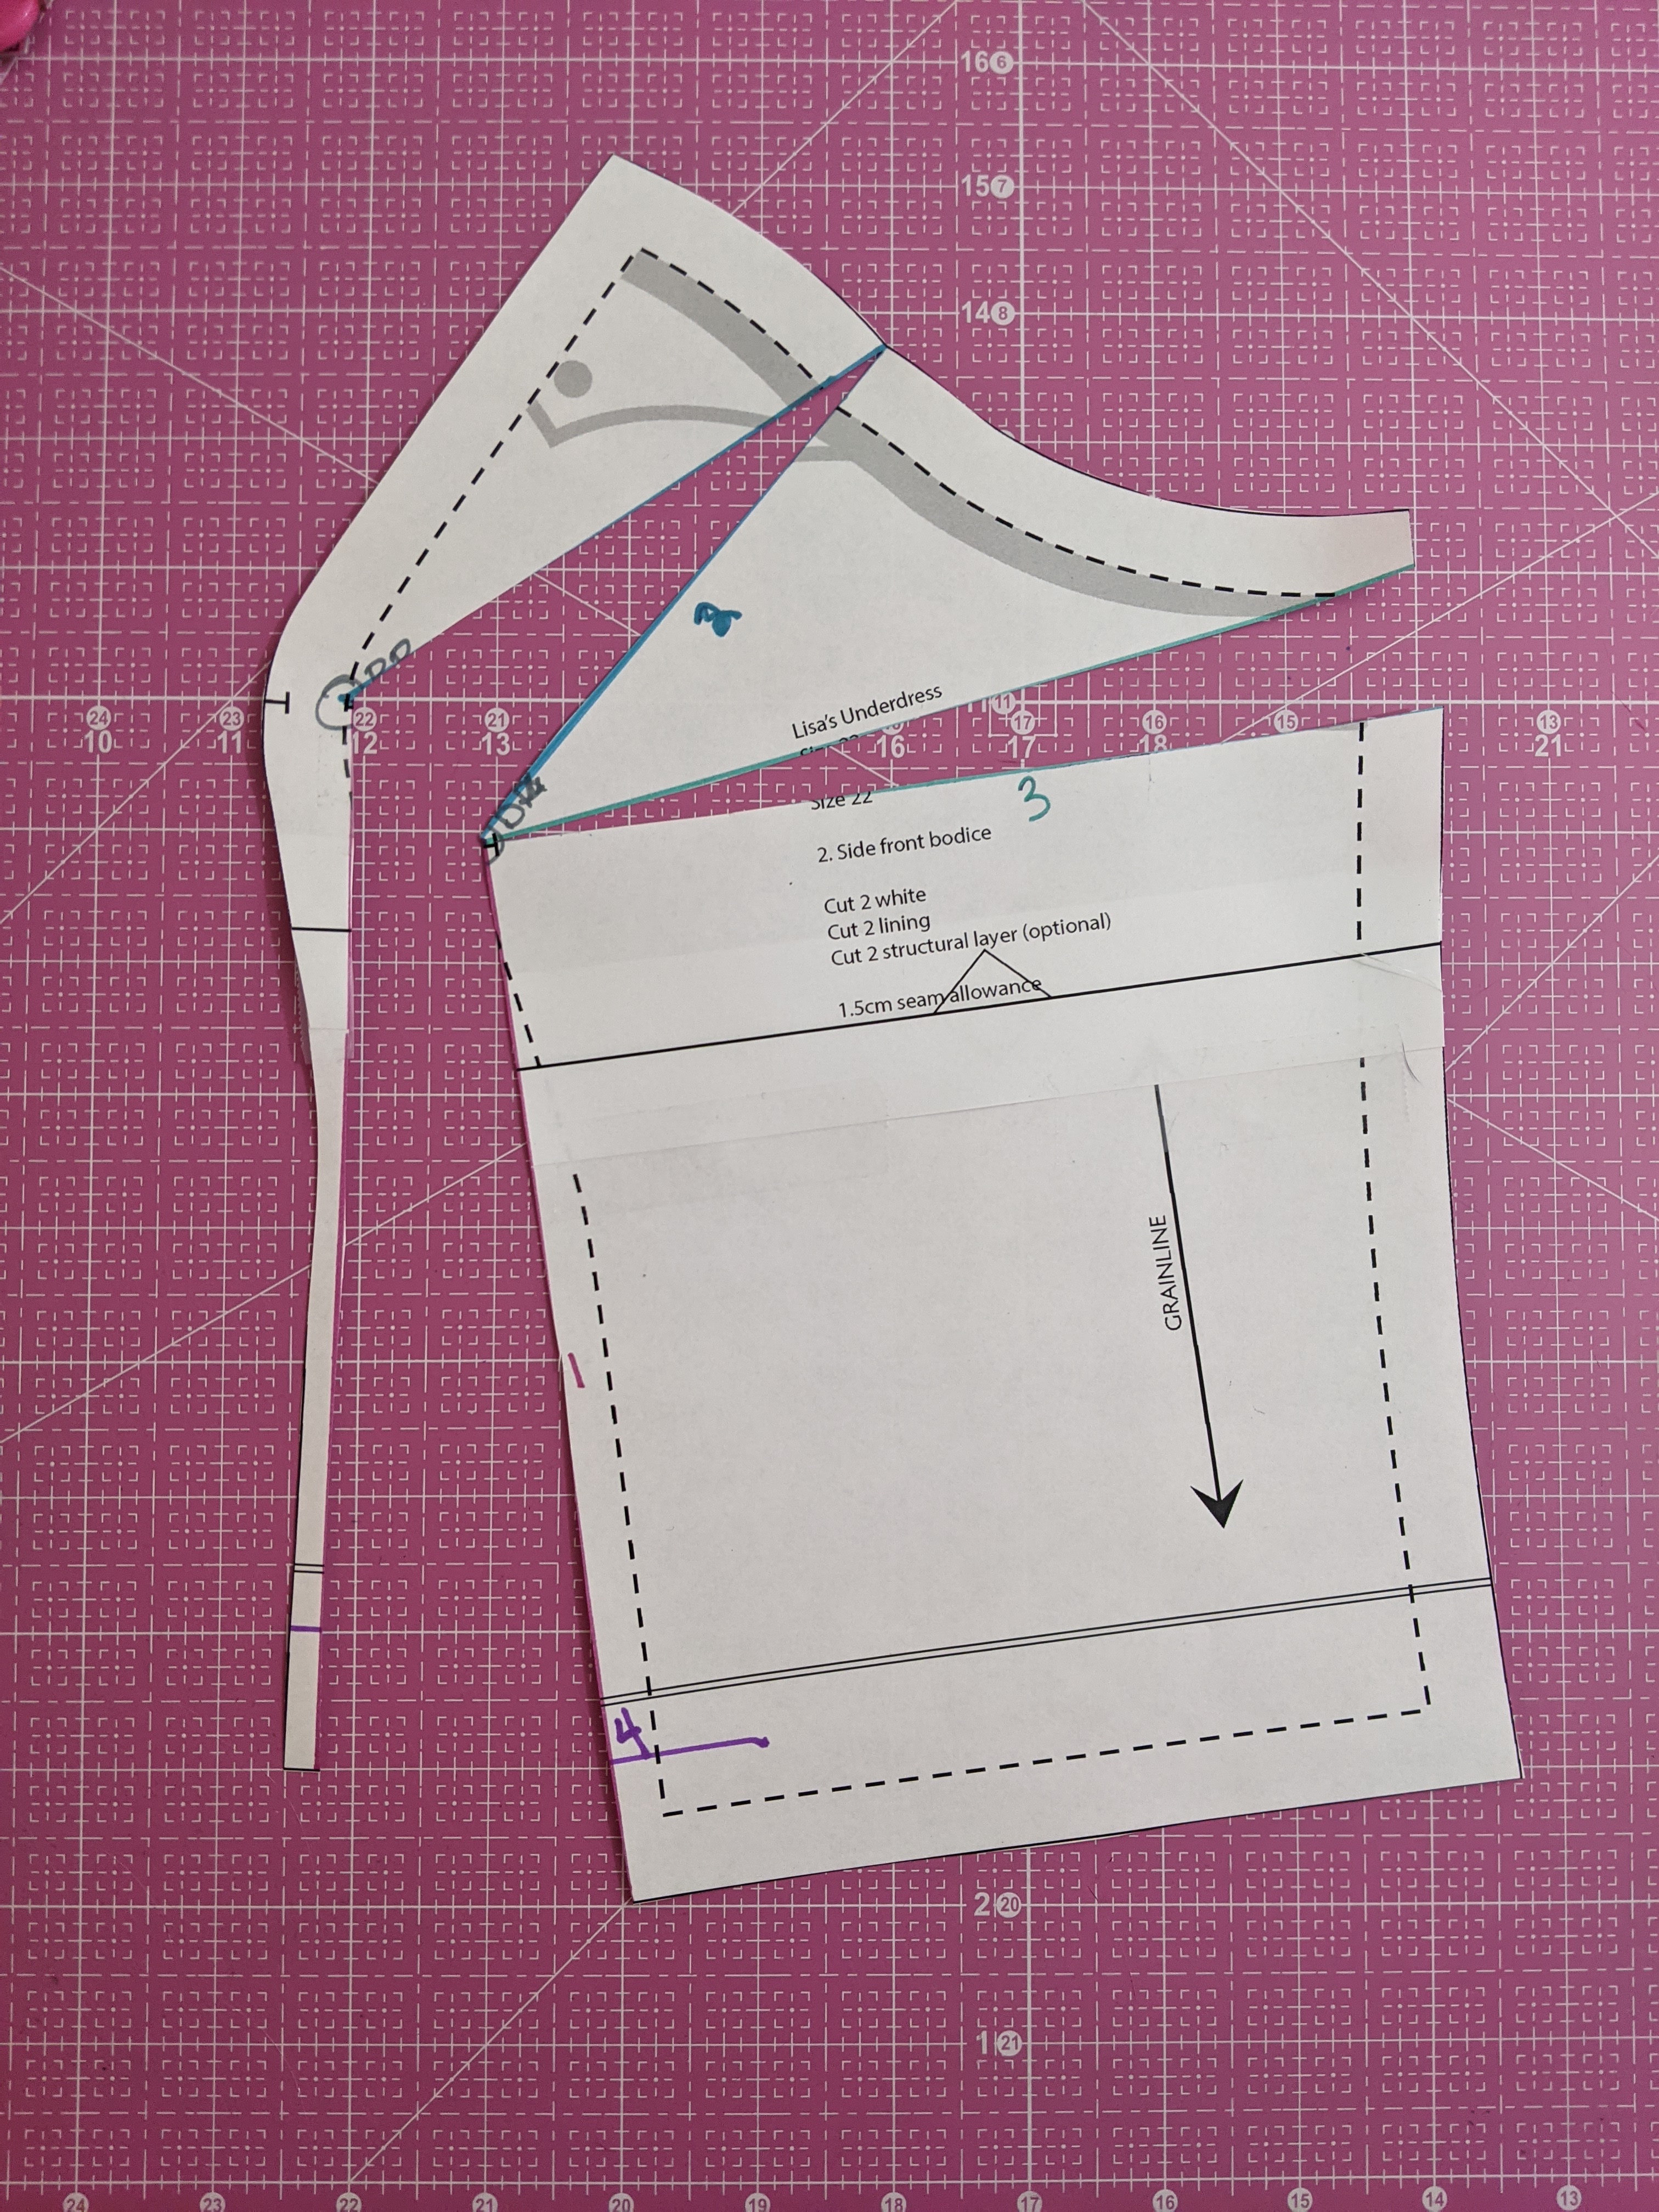
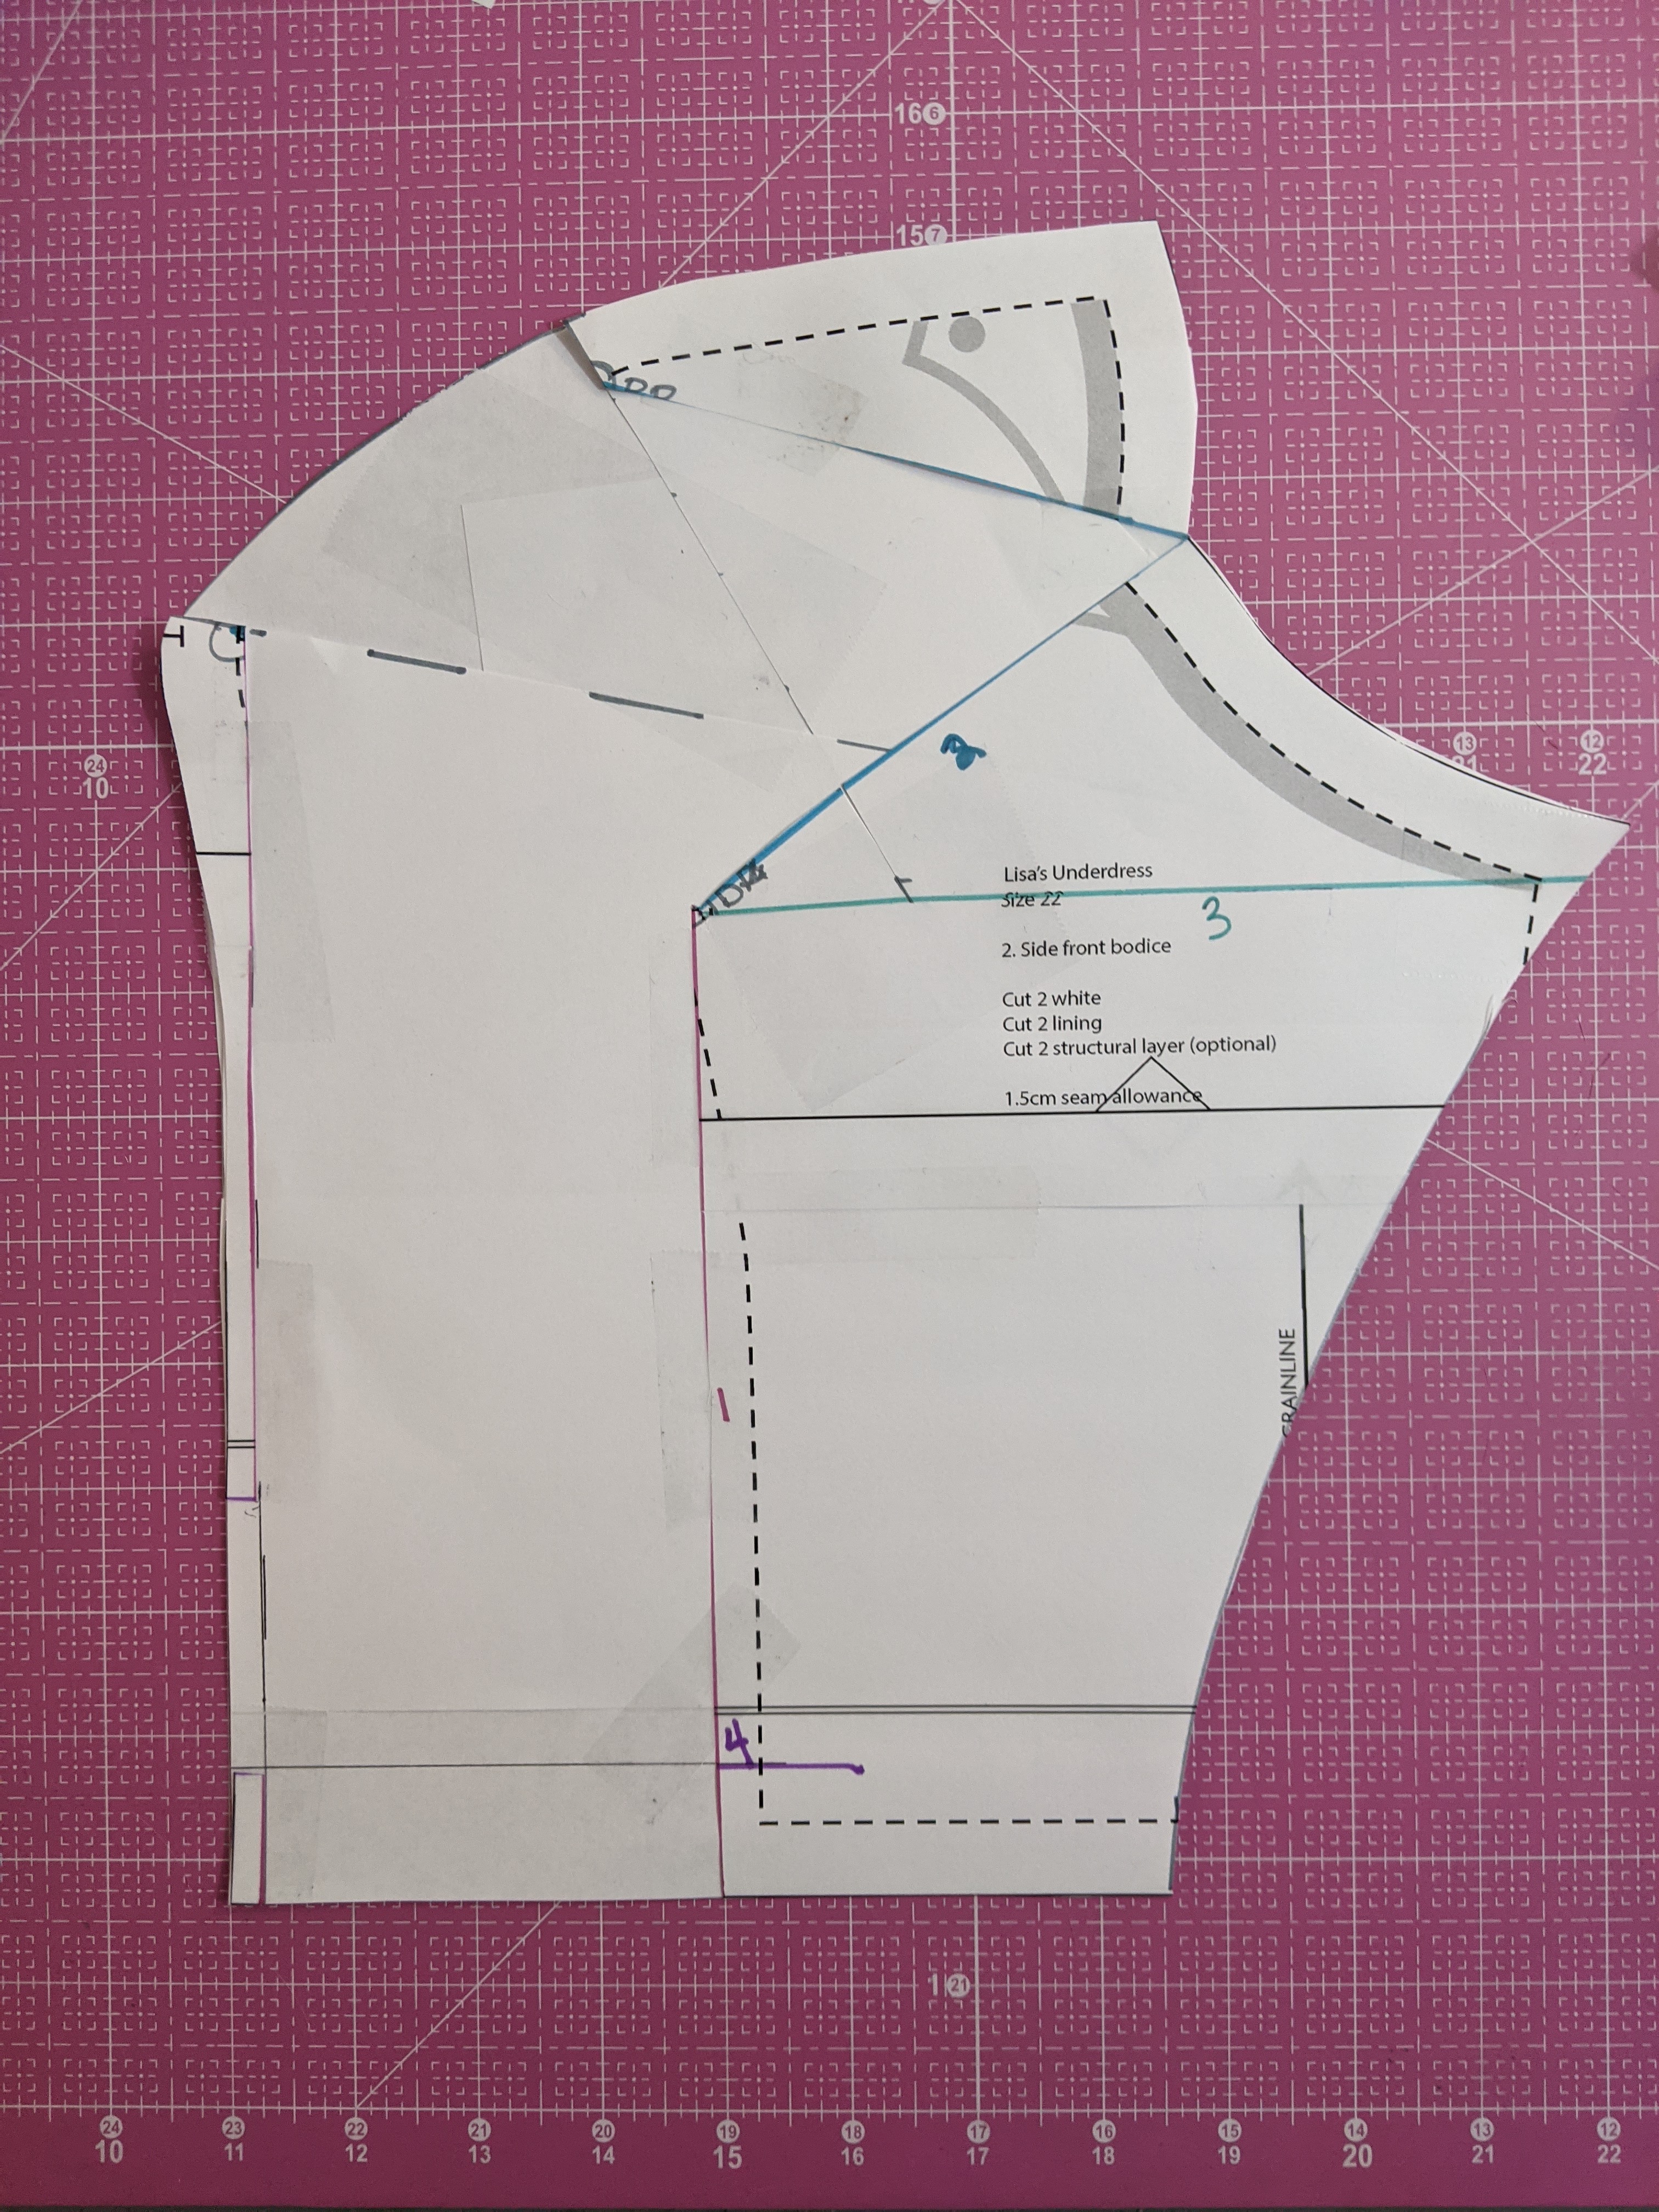
First, let’s draw in some guidelines on the side front. Find the bust apex, aka the fullest part of the bust. Give it a little circle. Most of our alteration lines run to this point.
Line 1 – Draw this straight down from the apex to the bottom of the piece. (If you see any photos with this drawn at a slight angle NO YOU DIDN’T. It should be parallel to the grainline/perpendicular to the lengthen/shorten line. I shouldn’t do modifications when sleepy)
Line 2 – Draw this at an angle up to where an armscye would be.
Line 3 – Draw a line from the bust apex out to the side seam.
Line 4 – At the side front seam, draw a line 1″ above the waist.
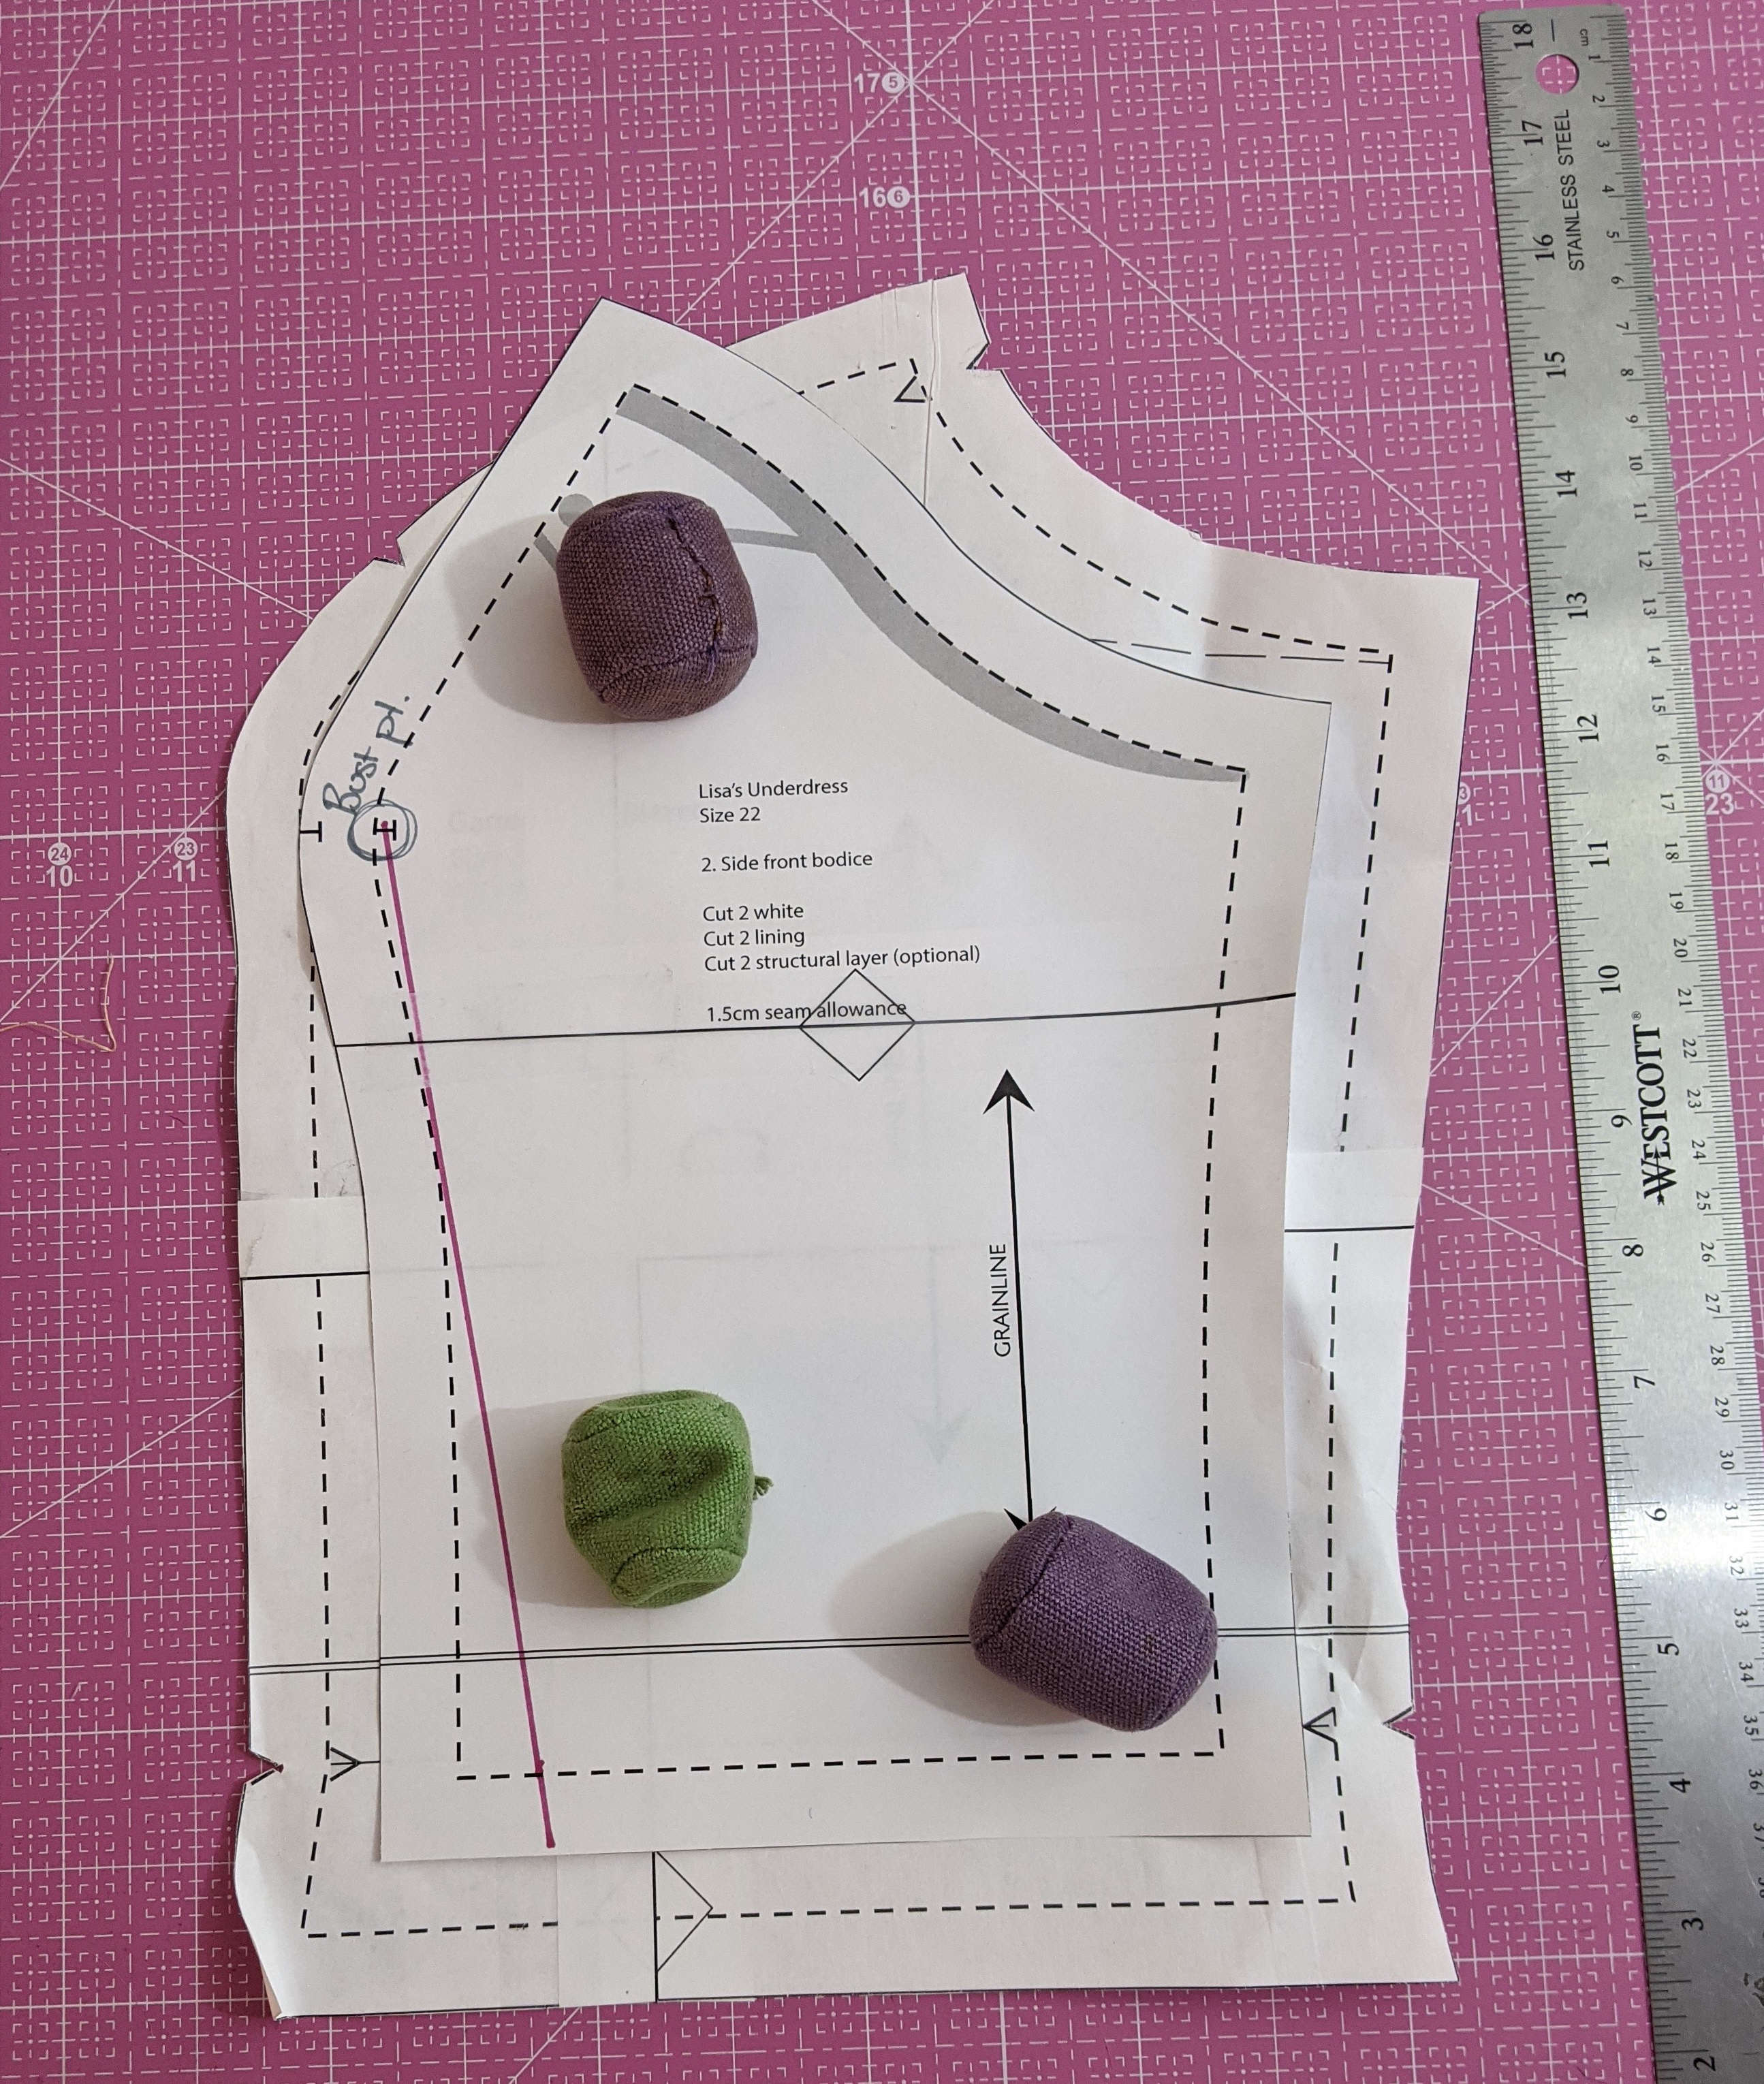
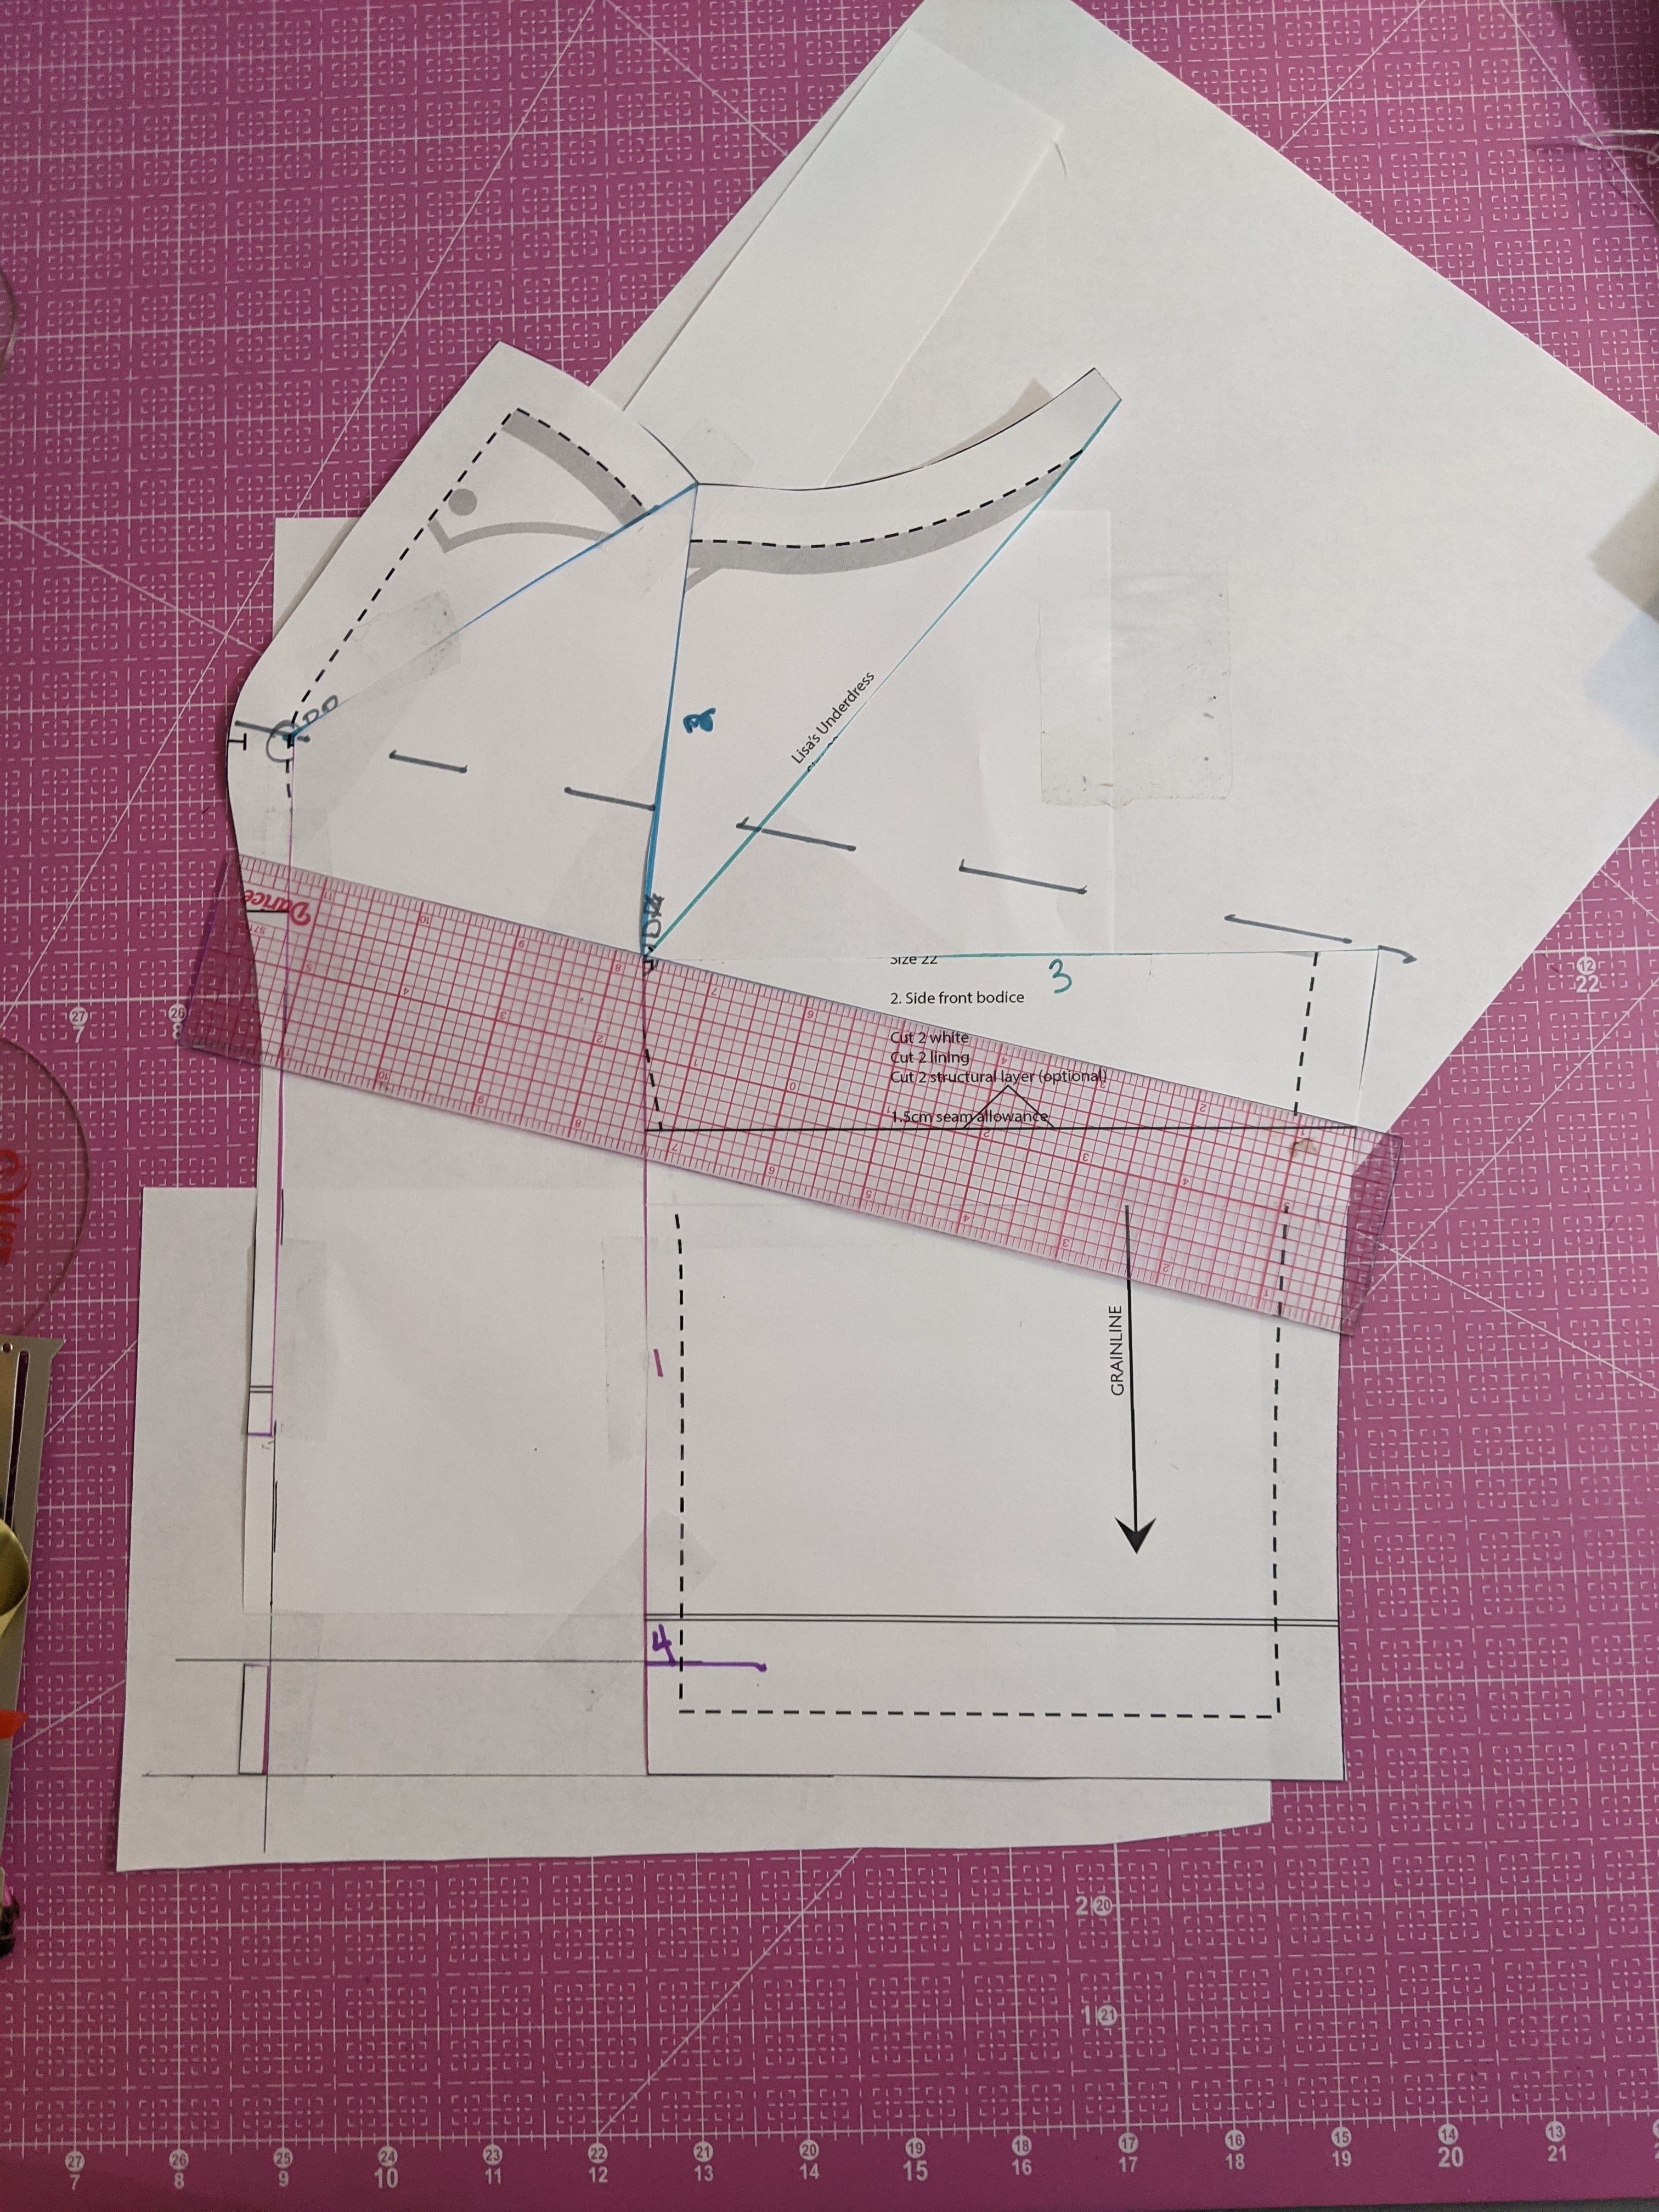
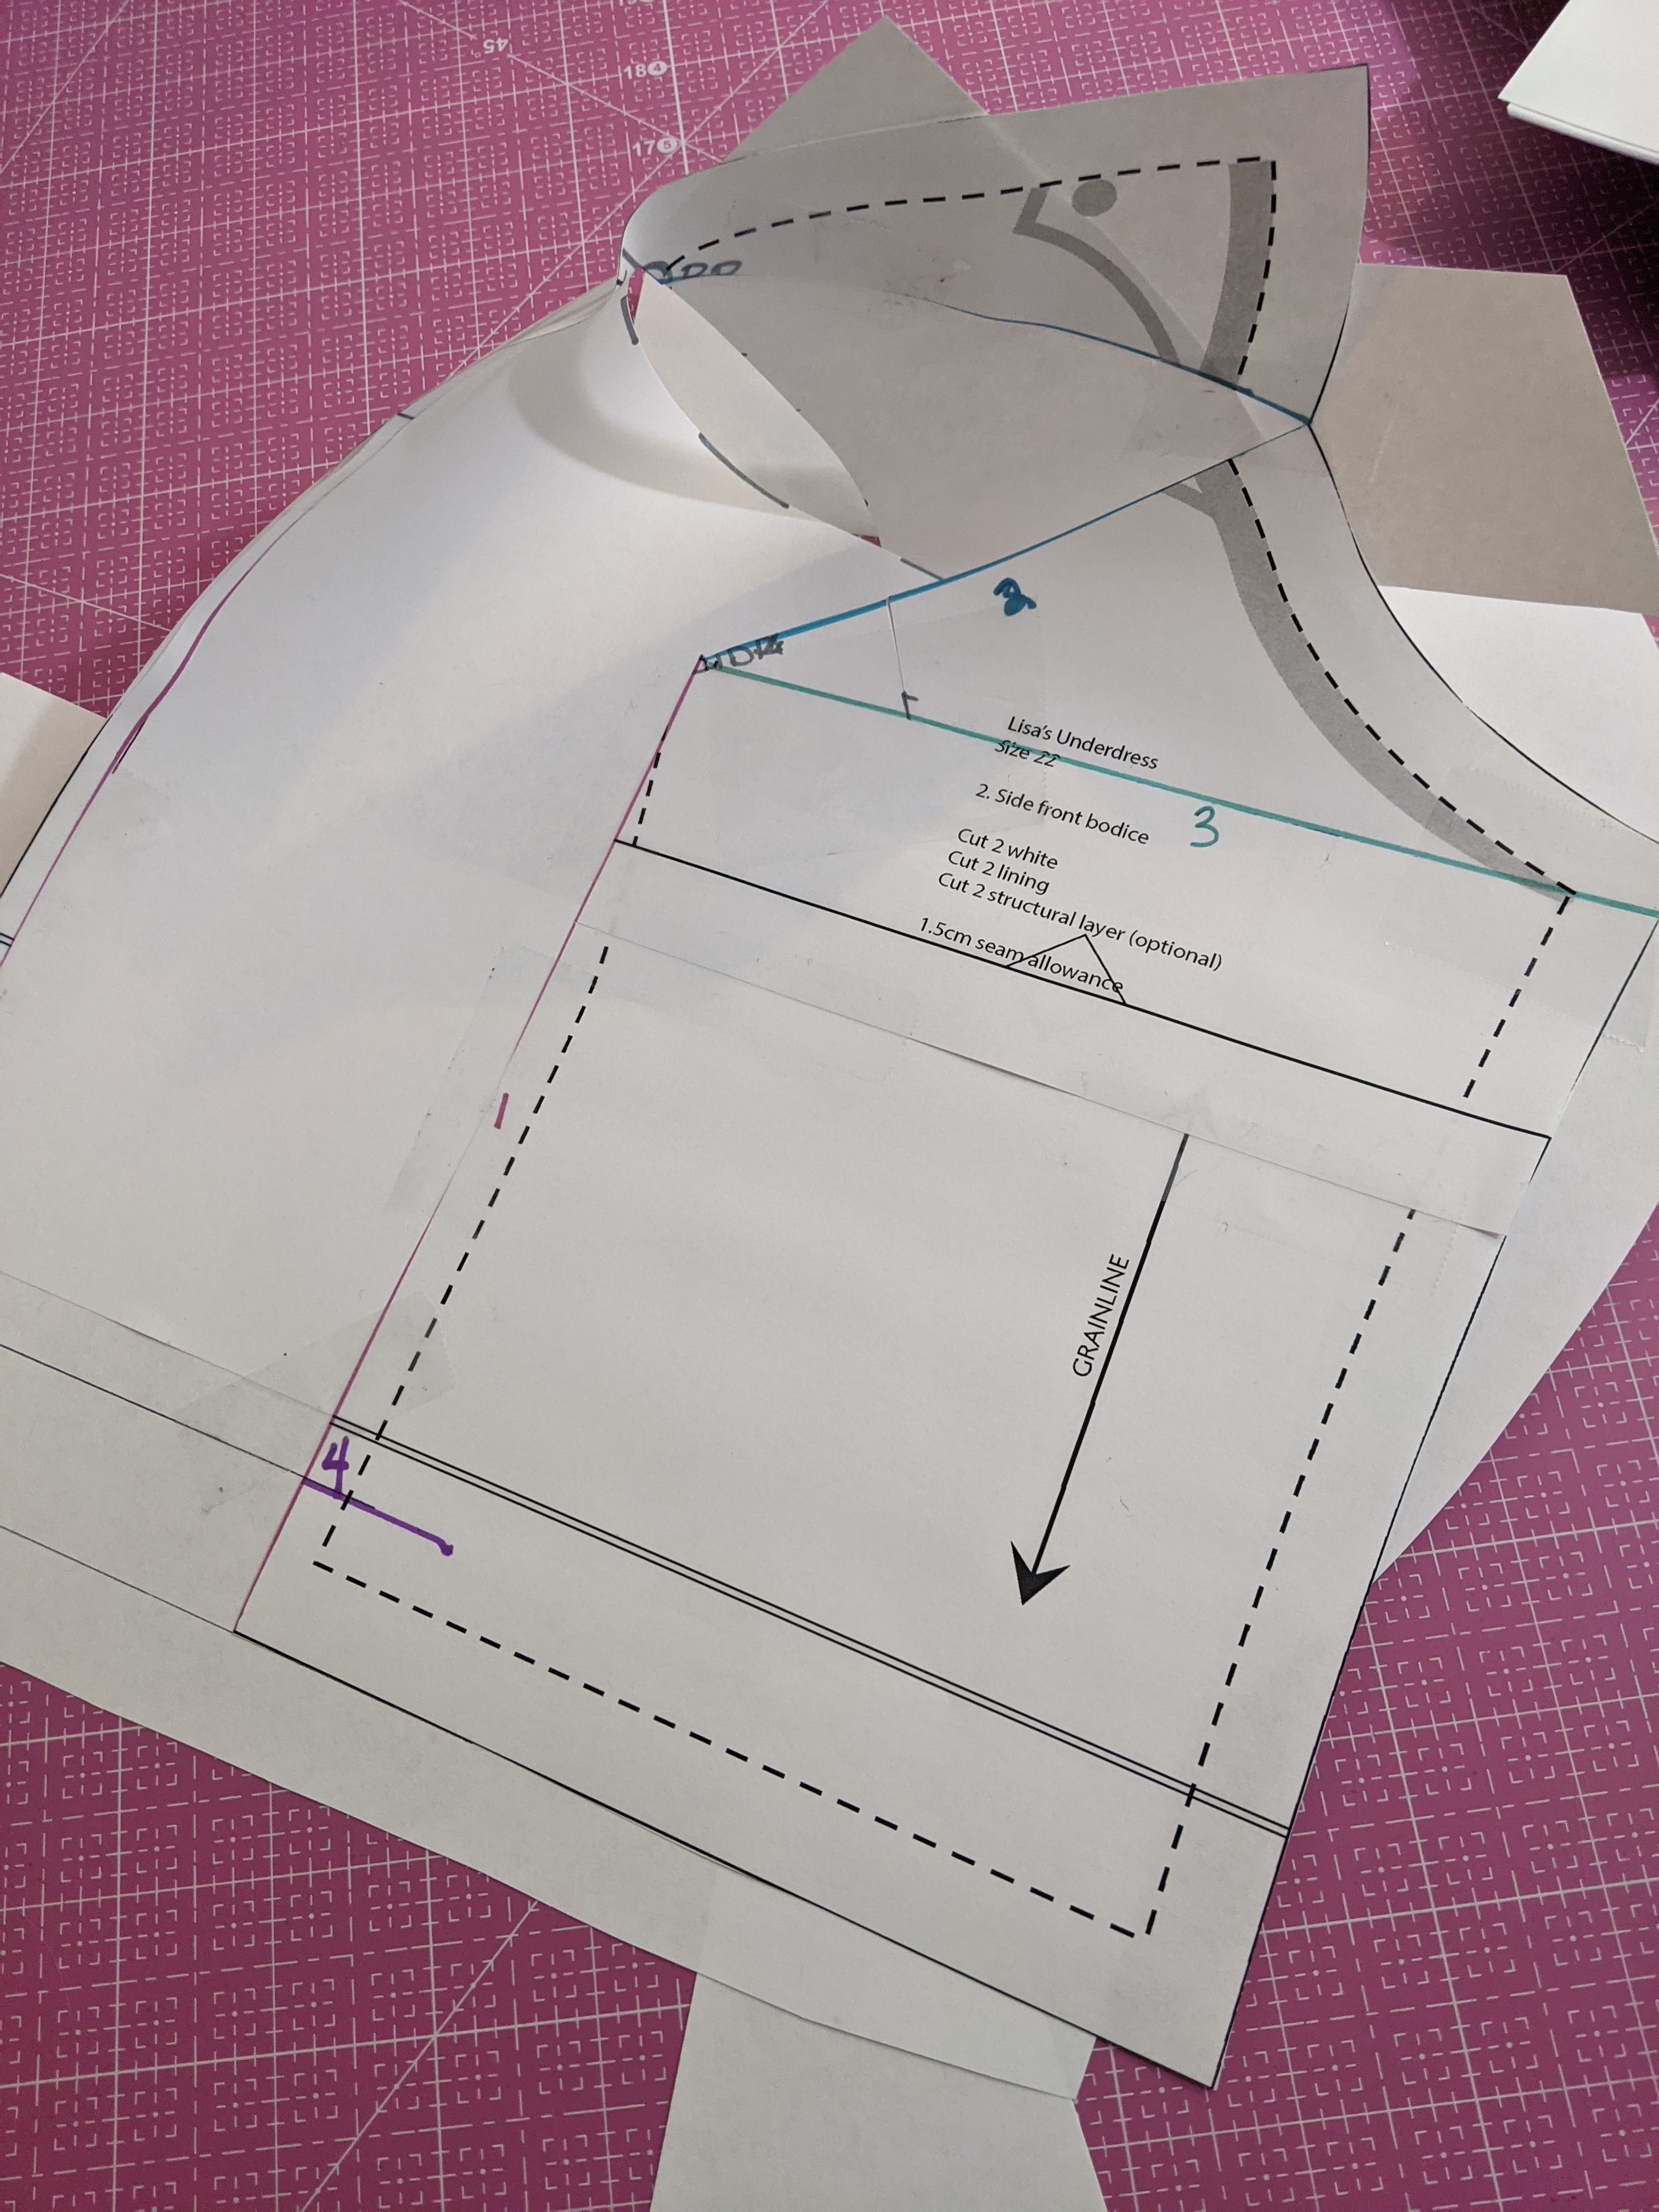
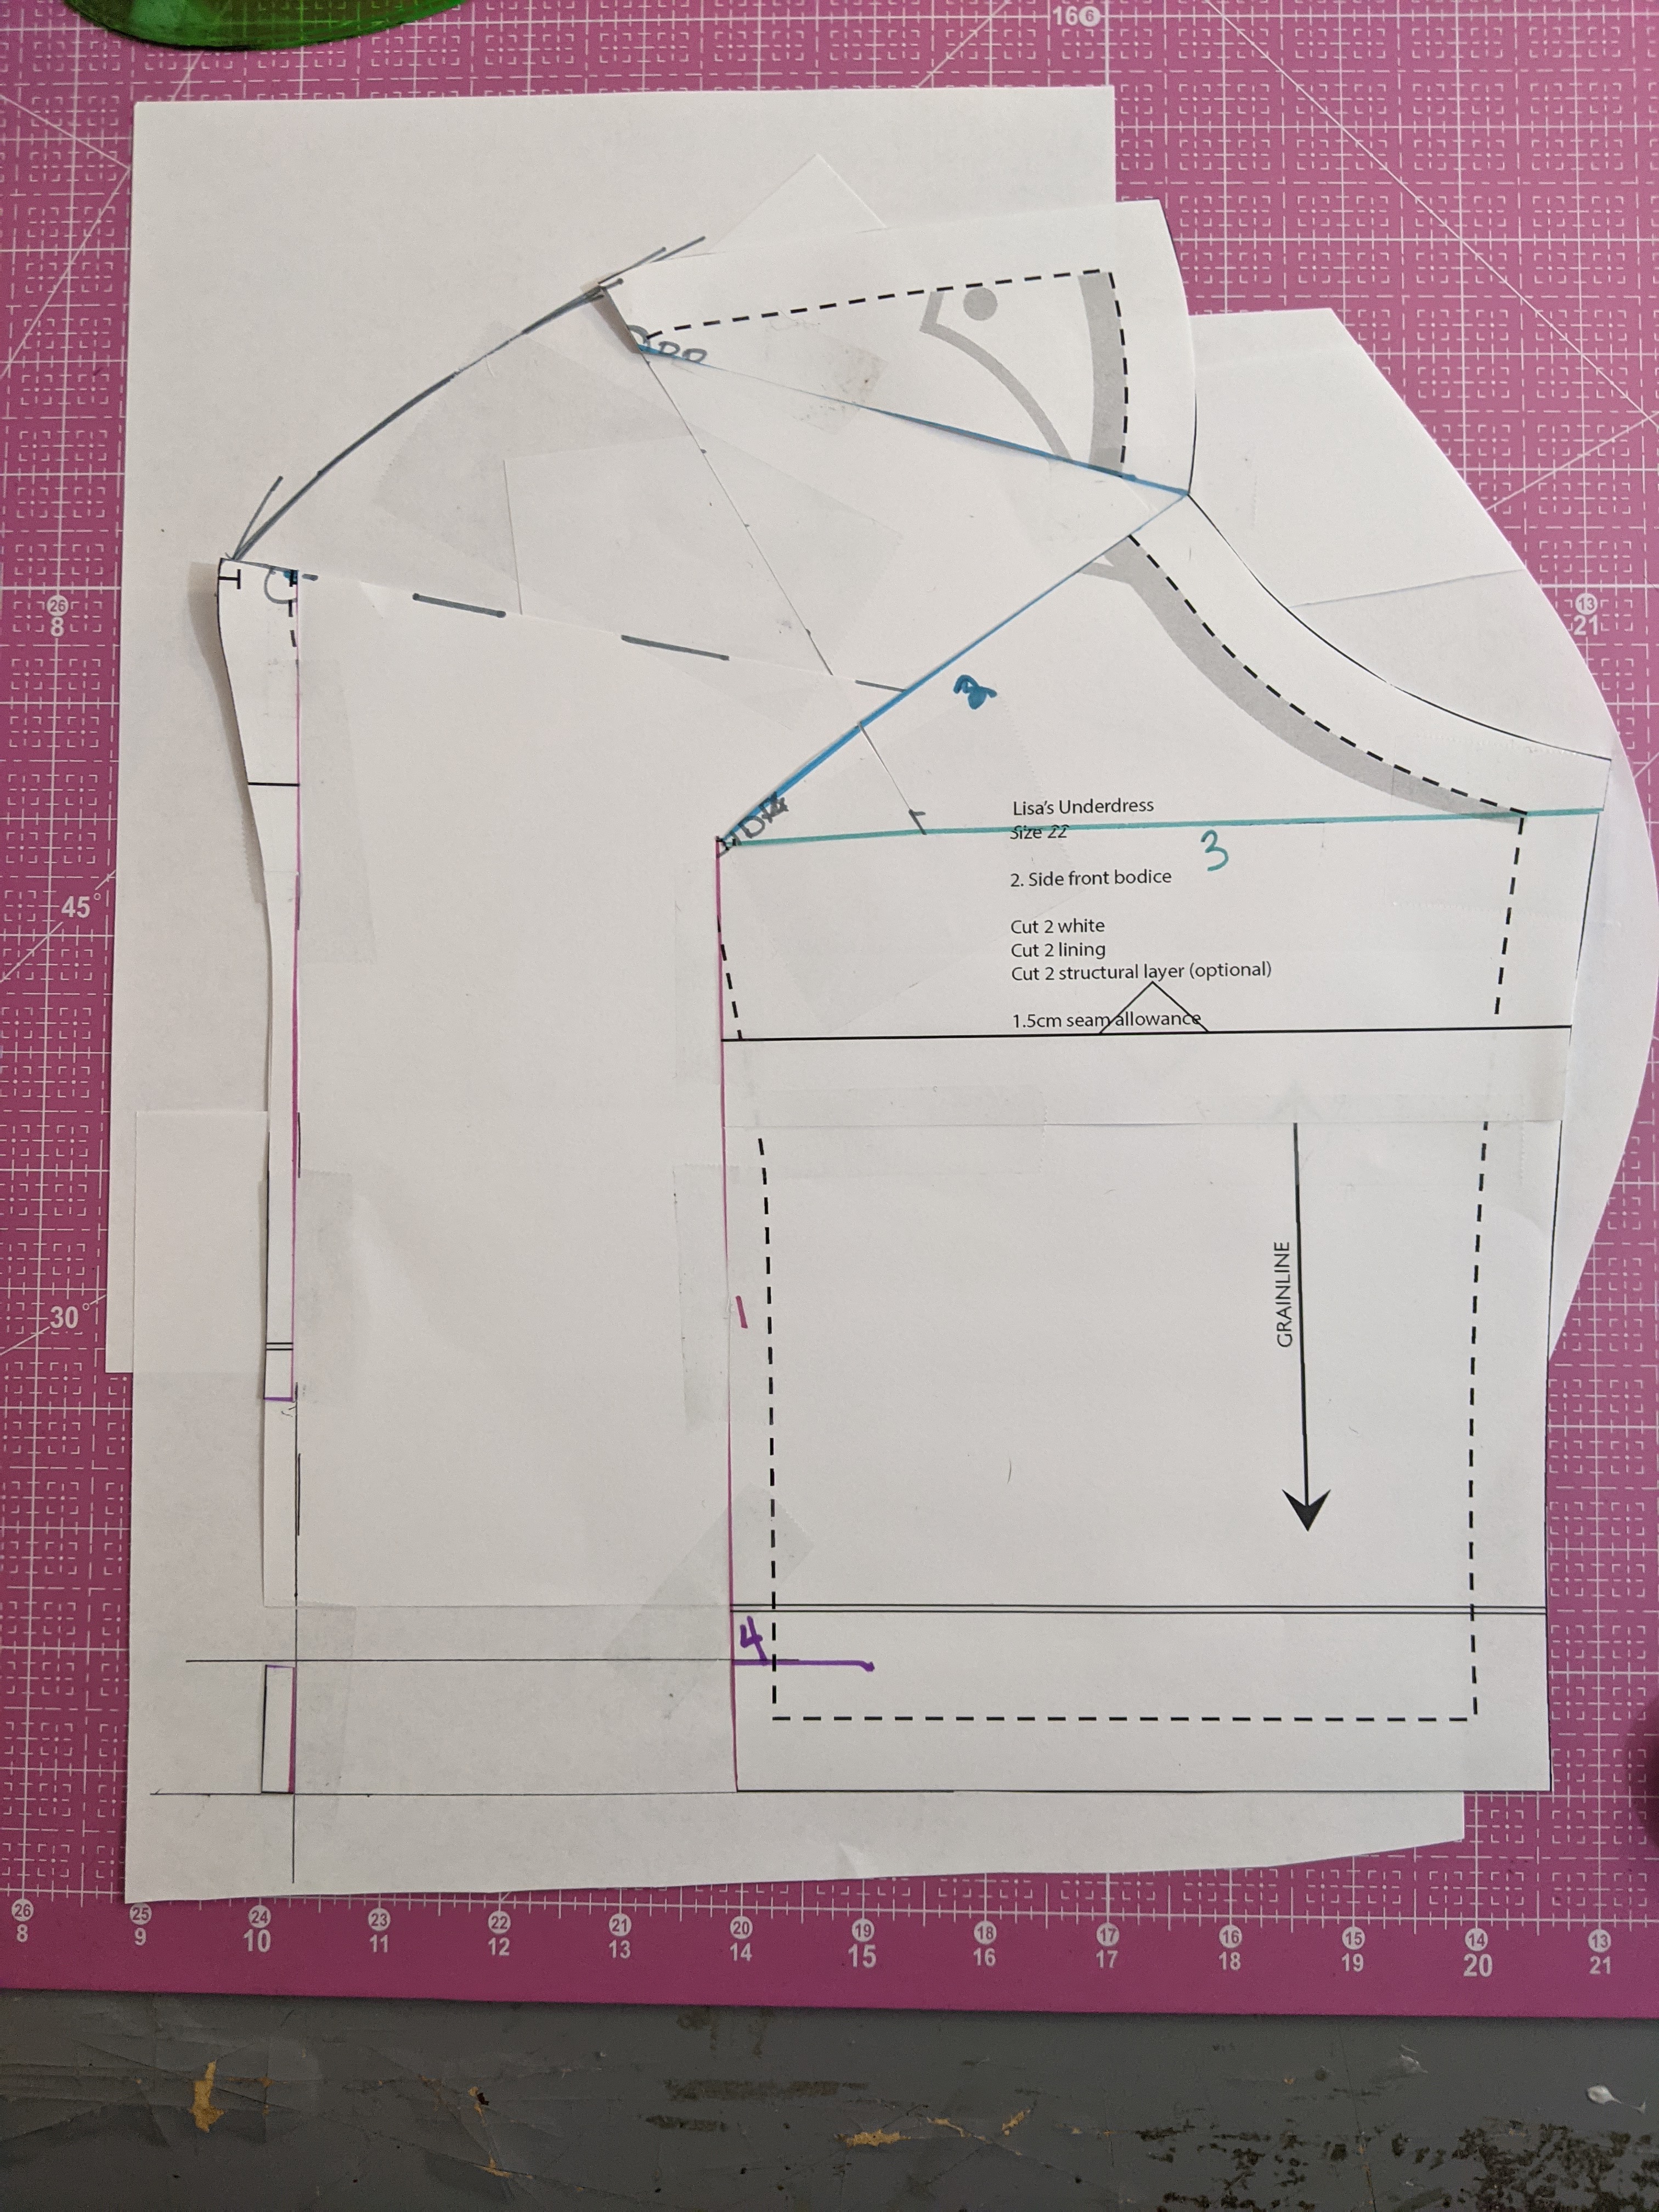
Line 2 can be a little weird with placement on a strapless bodice. I’ve overlaid this piece with another princess seam bodice from IndigoJinjo (her Garreg Mach uniform pattern) to show roughly here the armscye would go and why my line 2 is angled the way that it is.
It’s also important to note that these lines don’t have to be perfect. You will absolutely need to make a mockup to check the fit, and you can fix any issues you run across then.
Okay, this is where things start getting wild, but hold on and bear with me. Let’s cut shit up.
Starting from the waist, cut up to the apex, following line 1. Pivot at the ape and continue up line 2, stopping just at the edge of the paper. Do not cut through this hinge. It’s okay if you do, just tape it back together. But you will need that teeny hinge as we manipulate the pattern!
Next, starting at the side seam, cut along line 3 to the apex. Again, don’t cut through! We’re going to need this hinge for our alteration.

Time to add width for the bobbies! Grab some spare paper and slide it under your slashed up pattern piece. Tape down the side front seam of your pattern piece and use the paper hinges to add the fullness we calculated earlier. Again, that’s 3.5″ for this example. Once you’ve added the fullness, tape down the other side of the paper.
Now we address line 4. Cut along this line and drop the bottom of the piece so it lines up with your original waistline.
Next, we have to address that ridiculous dart that resulted at the side seam from all our slicing and dicing. Draw a new line in from the bottom of line 3 to the apex (the grey line). Add additional paper and tape as needed.
Time to close it back up! Cut from the side seam up to the apex along the new line you just drew in, again leaving a teeny bit of paper for a hinge. Close that ridiculous dart by bringing your original pattern pieces together. Tape ’em up!
To turn this paper monstrosity back into a pattern, snip into the hinge that’s left at the bust apex. Admire your Pac Man boob.
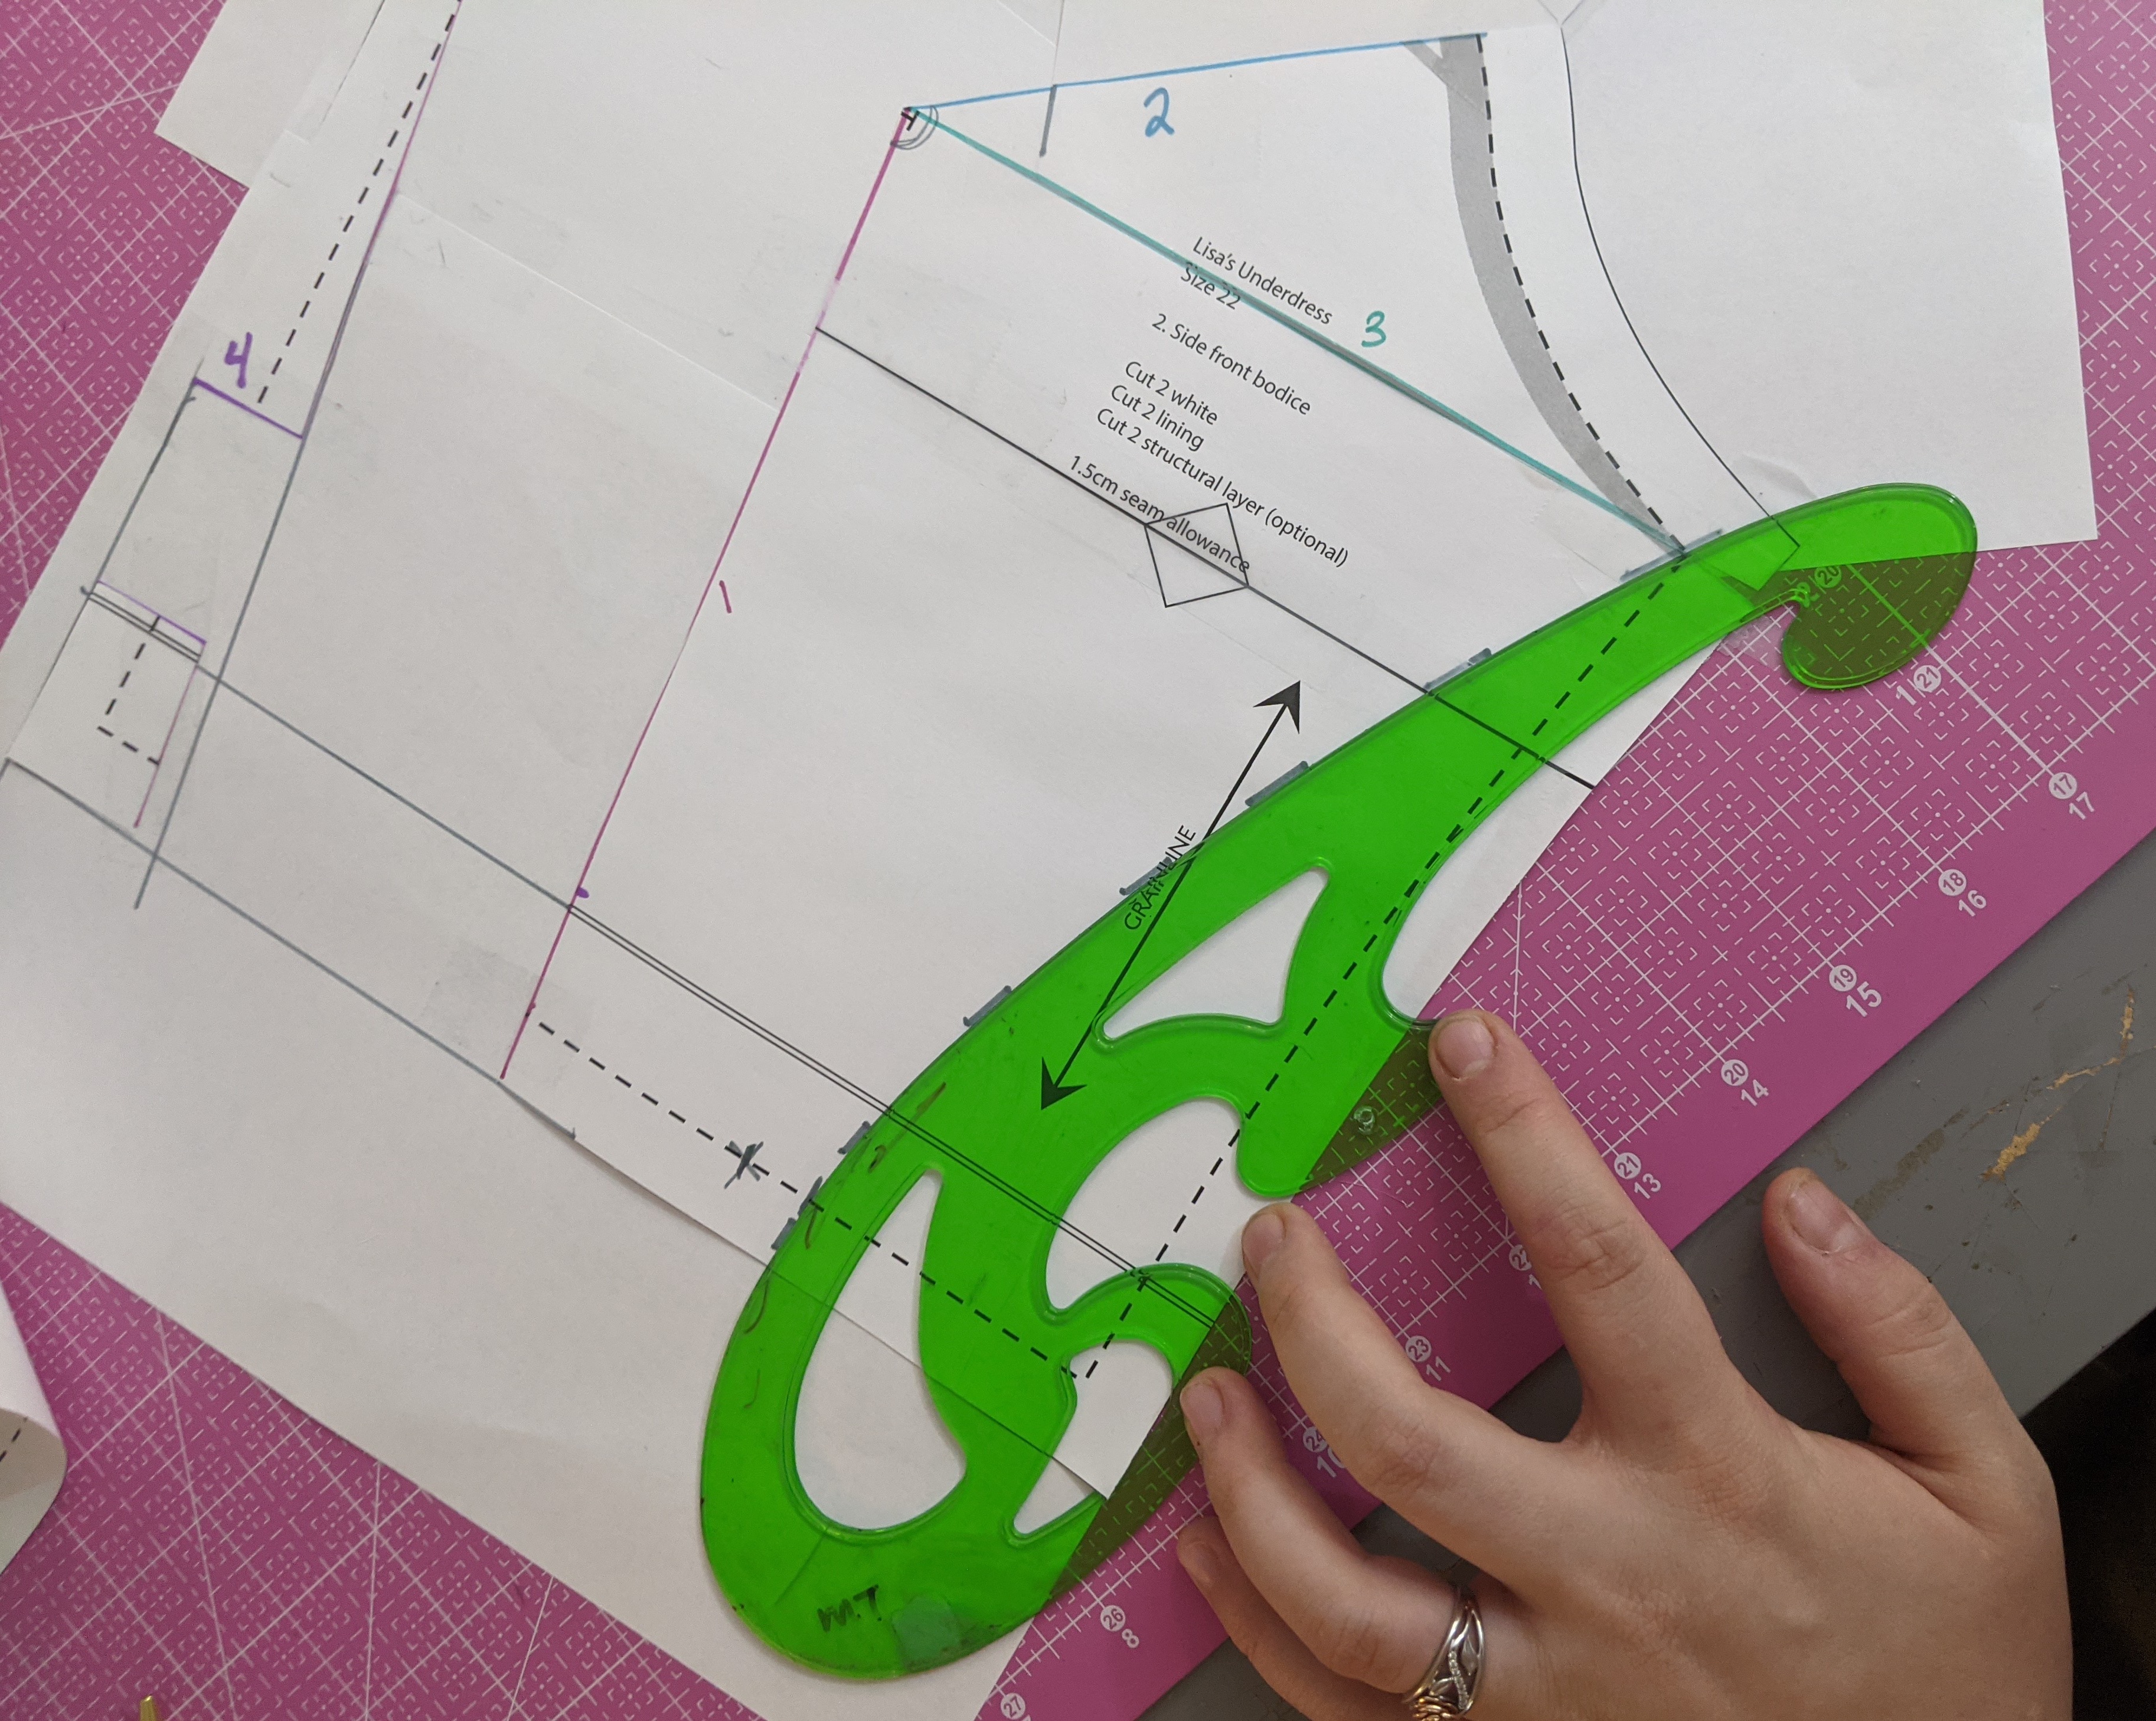
Again, slide paper under this opening. Draw in a curve to connect the top of the bust to the bottom. A curved ruler is helpful here, but it’s not strictly necessary. Again, don’t get too caught up on placement here. Mockups exist for a reason.
The hardest part is complete! Pat yourself on the back.
Next, we need to get rid of the excess width that’s been added to the waist. If your waist doesn’t align with the size you picked, now is a good time to fix that.
From the side seam, measure in the amount of fullness you added for the bust and make a mark. Again, that’s 3.5″ for me. I’m actually marking 3″ here since my waist is a little larger than the size chart and I can fix it with mock-ups if needed. Remember: it’s easier to take away than it is to add!
Using a curved tool (or freehand if you’re better at this than me), mark a line from the top of the side seam down to the mark you just made. Cut along this line and discard the excess.
Time to alter the Center Front piece! I promise, this one is MUCH easier.
The neckline curve going into the side seam is pretty different than what we started with. You can easily fix this by adding a bit more paper to the top of the neckline and smoothing the curve out. You can refine the shape in the mockup phase!
Note that this pattern piece also includes some alterations on the side front seam from my mock-up notes.
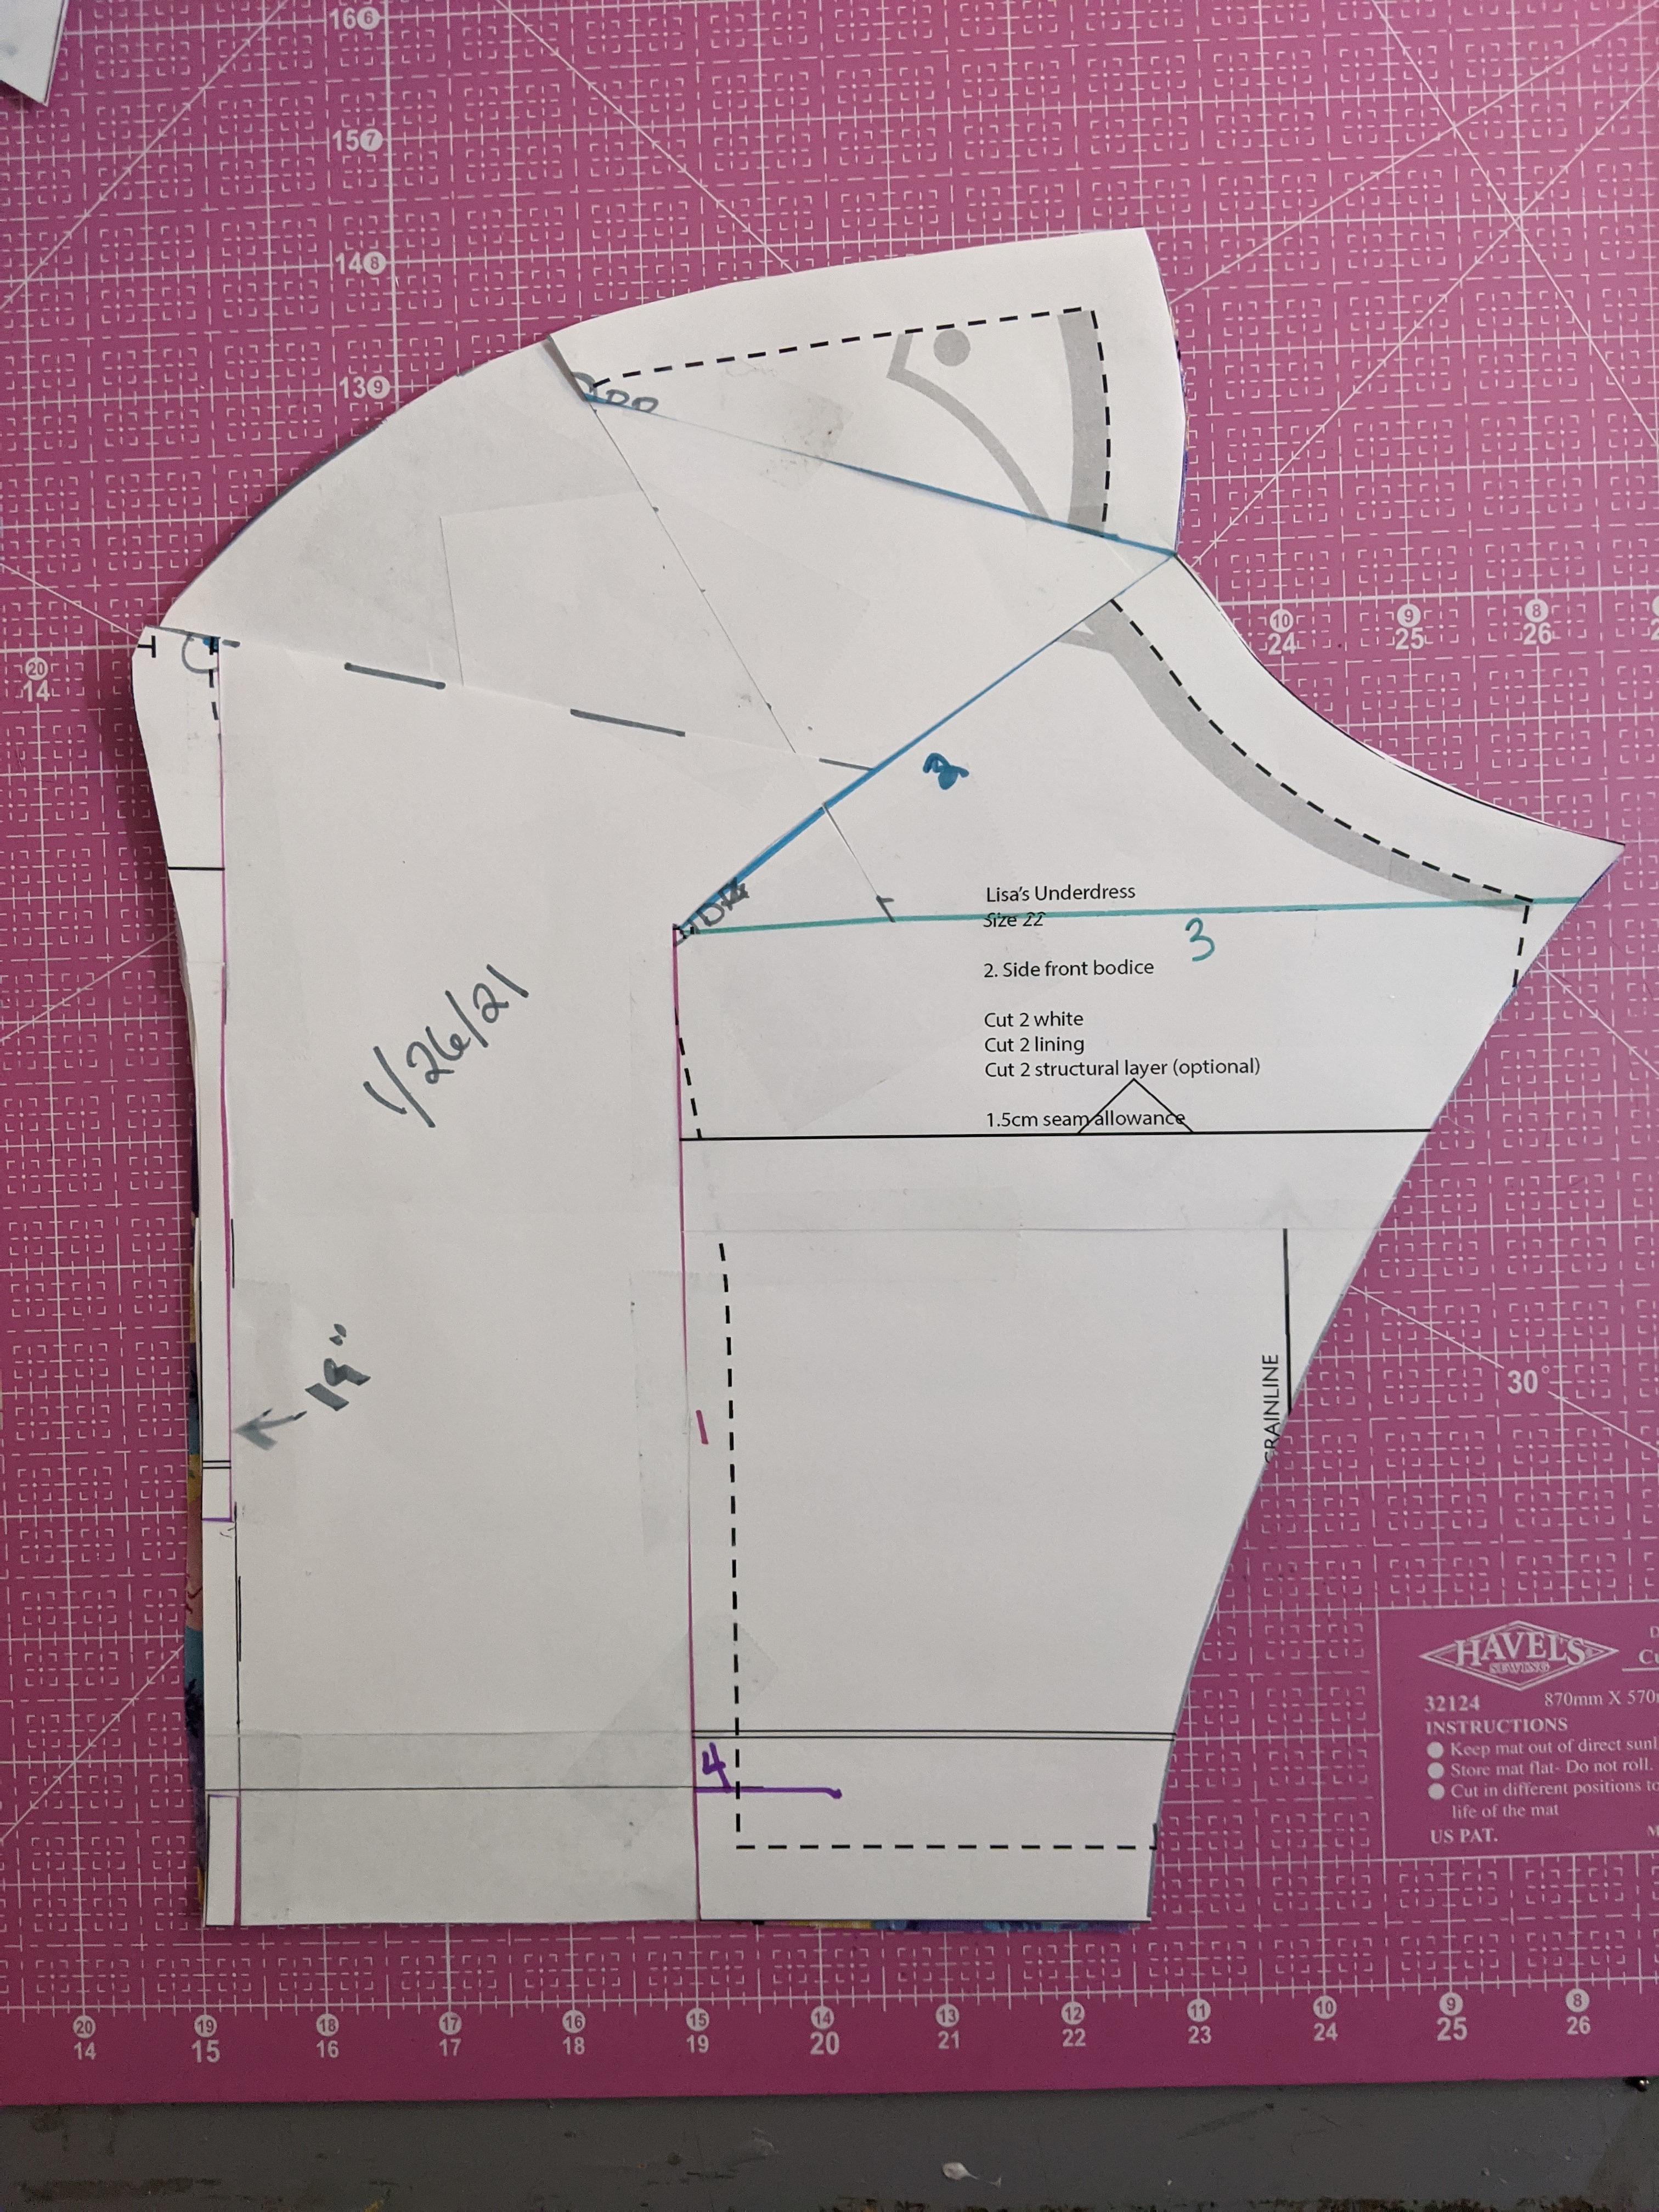
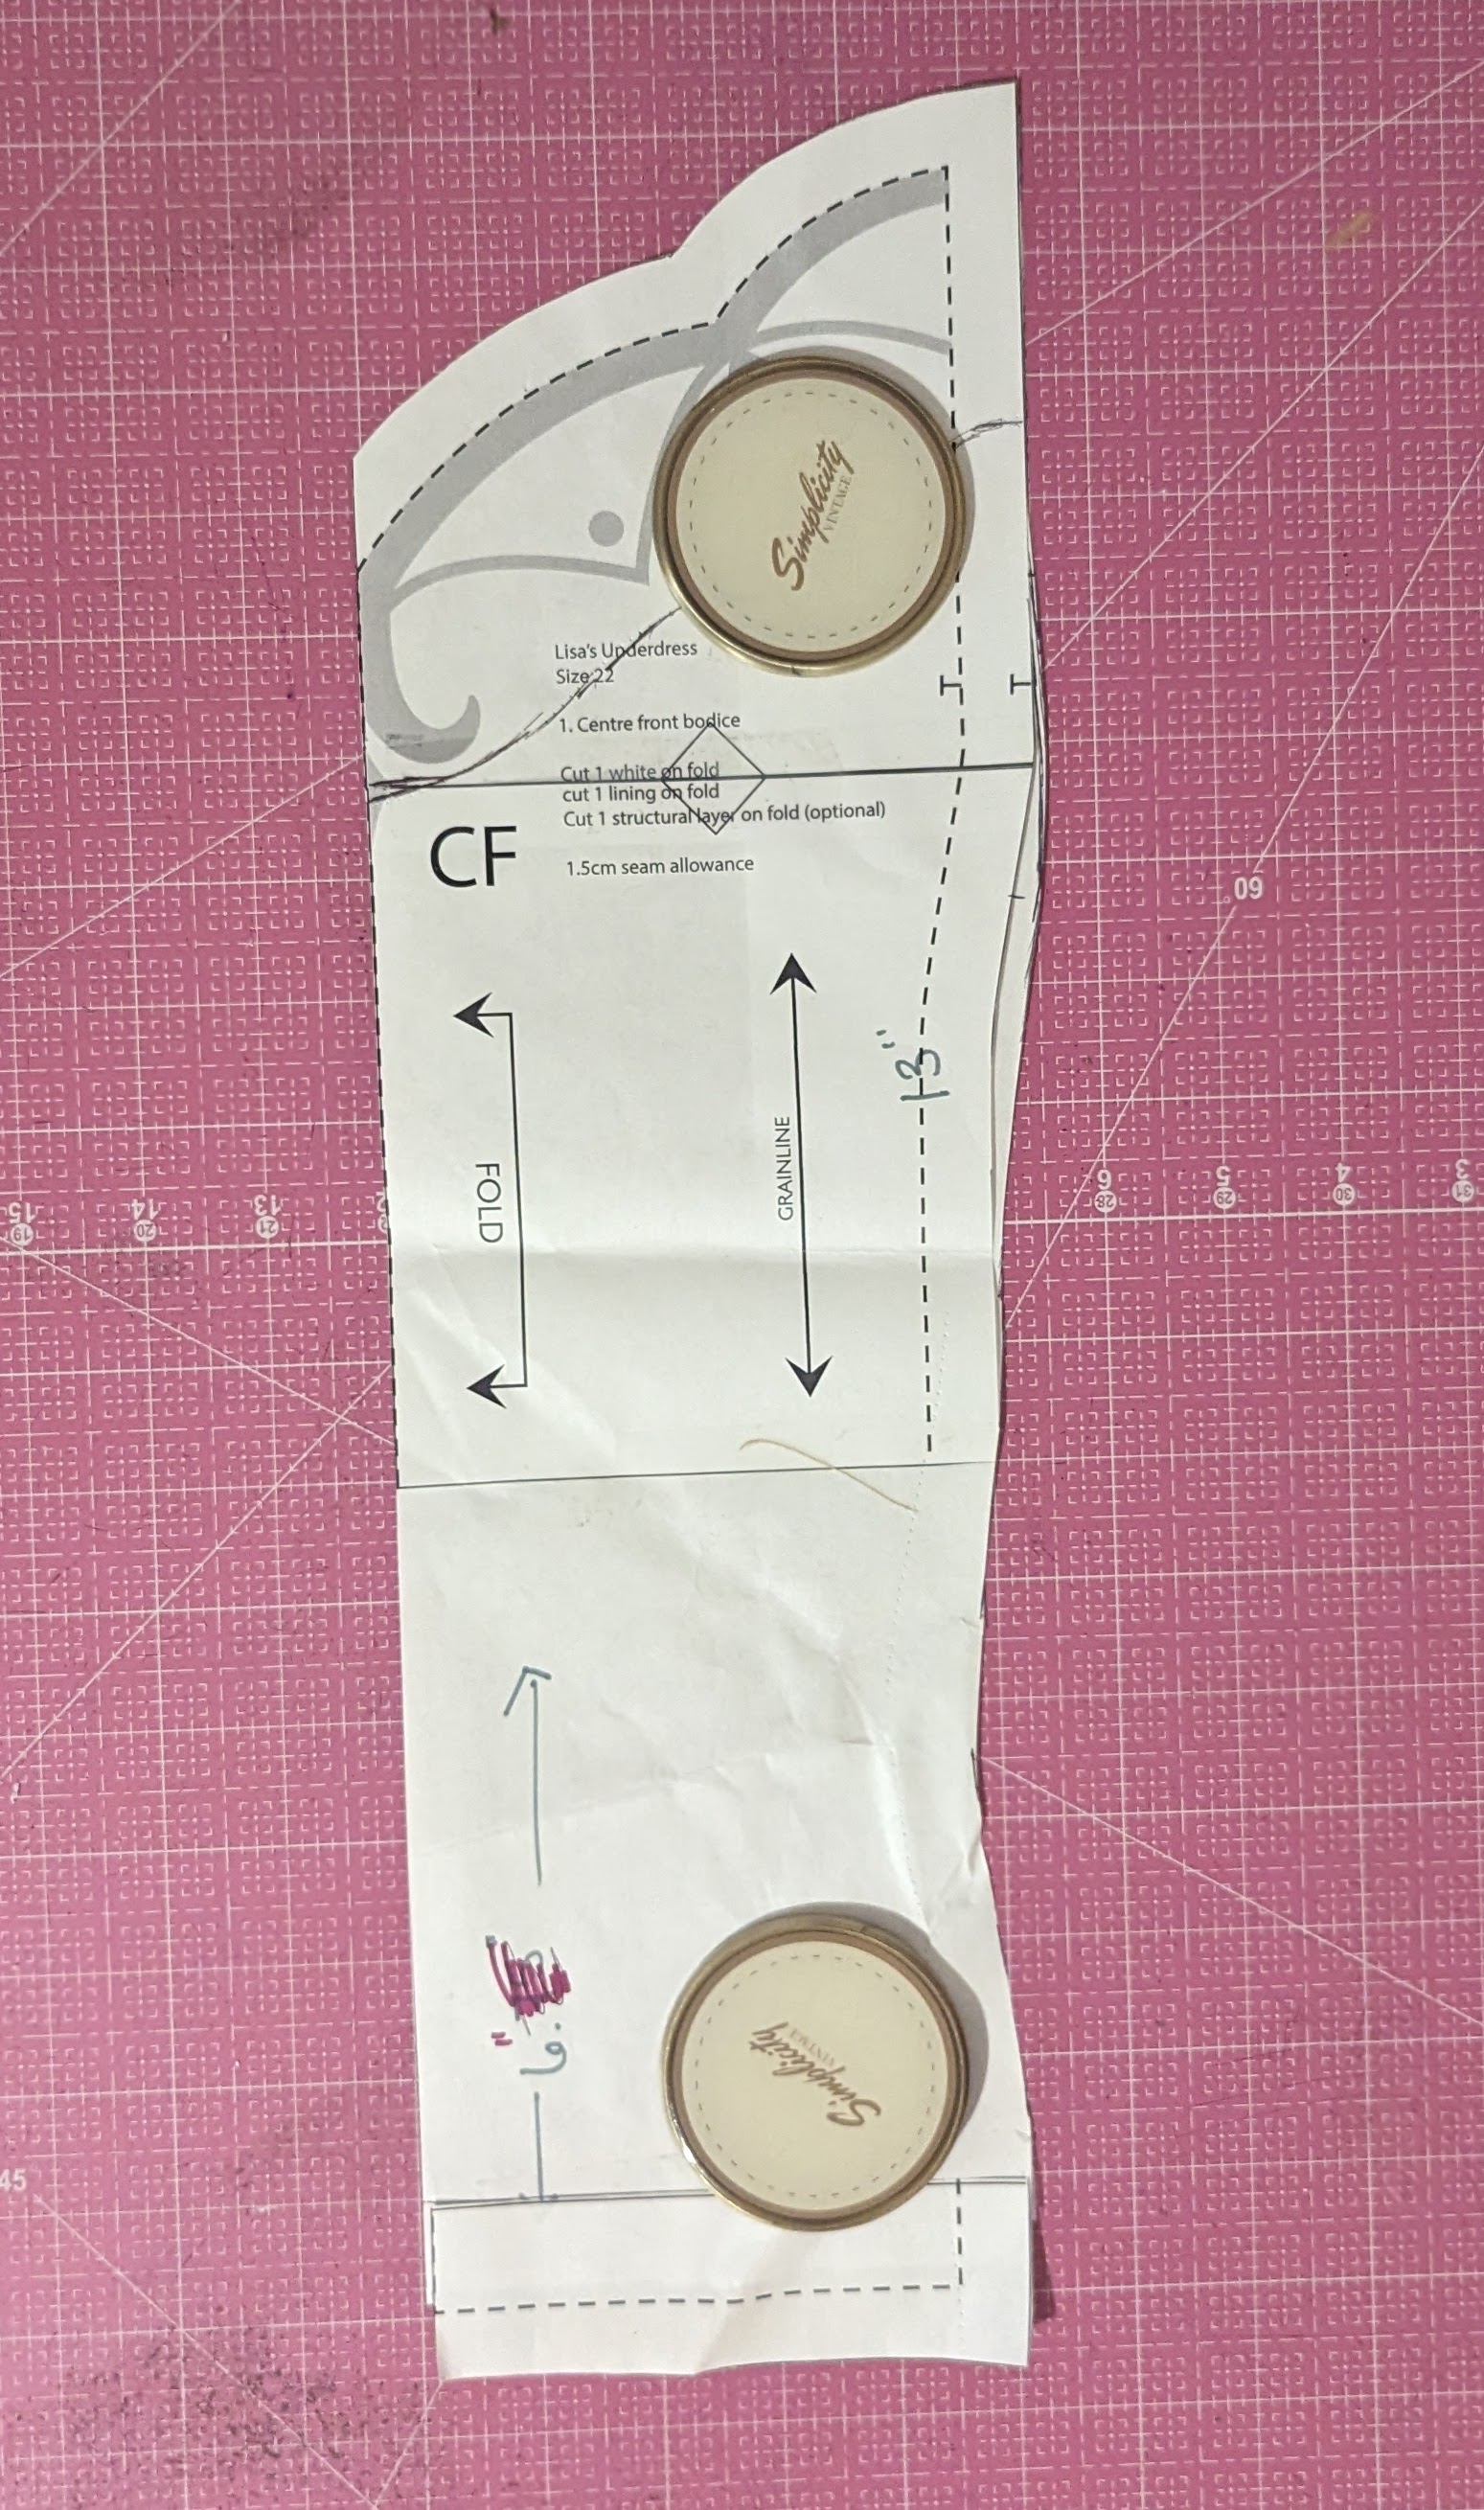
On the side front piece, measure along the side front seam with a tape measure or flexible ruler. Note your measurement. Mine is 19″. Measure along the side front seam on the center front piece as well. This one is 13″. Subtract that from the measurement on your side front piece to determine how much you need to lengthen the center front. For this example, that’s 6″.
If your center front piece has a lengthen/shorten line, cut this piece. If not, measure up 1″ from the waist and draw in your own. Slide more paper between the two cut pattern pieces and add the difference you just calculated.
Please enjoy my ridiculous mockup.
Your FBA is complete! Again, MAKE A MOCKUP and check the fit! Every time I do this process, I question my sanity and if I’ve done things right, but it has yet to fail me.
On a slightly different note, learning to tailor your garments is such a radical act of self love. At least, it has been for me. By learning to tailor for my figure, I’ve learned the parts of my body that I really like and want to highlight. It’s a very personal process and might take some trial and error, but I encourage everyone to give it a shot! You’ll be amazed at how fantastic you feel when your costumes and clothes fit you well ❤

Photo from TwinBlock Photography.
More FBA Examples and Helpful Tutorials:
- Princess Seams: An FBA for Large Busts – This was my go-to for the longest time and gave me the confidence to do my first FBA!
- How to Calculate the Size of a Full Bust Adjustment
- How to Do an FBA on a Darted or Dartless Bodice
