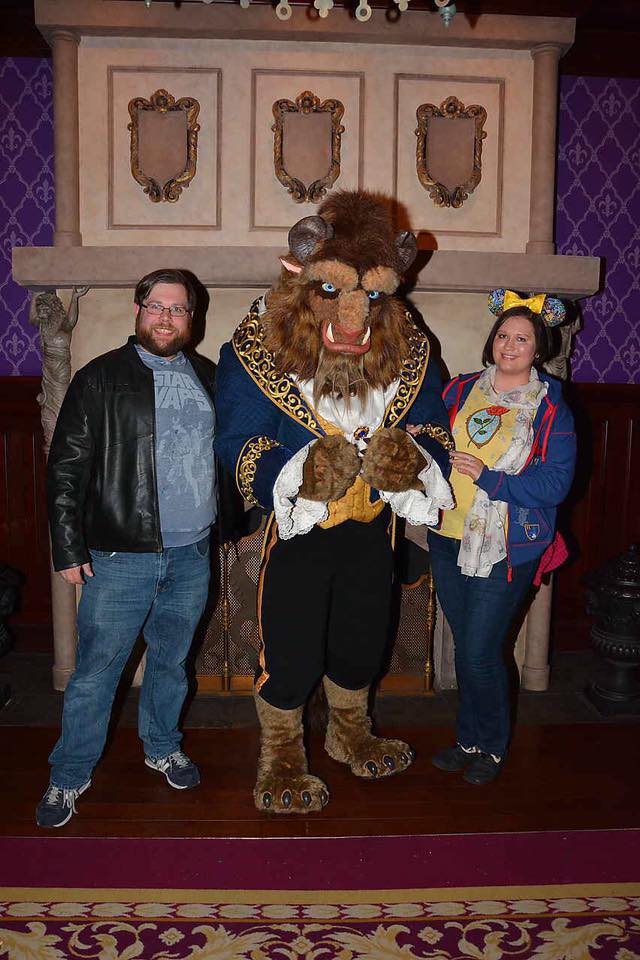
Photographer Credits: Mehreen Rizvi
Completed: April 2018
Hours Spent: 40-ish
Debuted: Dallas Fan Expo
Why This Costume: If it isn’t totally obvious yet, Belle has been my favorite Disney princess forever! As I went into this year, I knew that I needed a few simpler and, more importantly, comfortable costumes for chill con days as well as days when I judge costume contests.
I’ve wanted to remake my Provincial Town dress for years now that I have a better handle on sewing. My decision to re-maker her now was due in large part to timing: Paige O’Hara, the original VA for Belle, was announced as a guest for Fan Expo, and I was also invited to speak at the Texas Library Association Annual Conference on using Makerspaces for cosplay. My presentation for TLA was on the same day and in the same location as Fan Expo, so it was a match made in Nerd Heaven!
Purchased Pieces:
- Arda Matilda in Spanish Brown (styled by Victoria Bane)
- Character Shoes
- Beauty and the Beast book purse
Patterns Used:
- Cosmic Coterie Bow Pieces (inspired by Sparkle Pipsi’s patterns)
- Simplicity 1606
- Inseam Pocket
- McCall’s 7373
Fabrics Used:
- White Peachskin from Online Fabric Store
- Jewel Blue Polyester Satin from Mood Fabrics
- Unbleached Coutil from Richard the Thread
- Belle Cotton Fabric from Jo-Ann’s
Super Helpful Tutorials:
- Mood Circle Skirt Calculator
- Welt Seam Tutorial
- Inseam Pocket Tutorial
- Shawl Collar Tutorial
- Cambie Straight Neckline Tutorial
- Inset Corner Tutorial
- How to Wear a Lacefront Wig
How I Made it:

I took a lot of inspiration for this version of Belle from the Parks costumes I saw at Walt Disney World earlier this year. I loved the turquoise color of the parks dress, and it was a perfect match for the blue Victoria Bane used for her Sailor Mercury (which is from Mood Fabrics, btw).
I started by making the dress first. I went with the bodice of Simplicity 1606, which I used as the base for my wedding dress. Since I’d recently made this bodice, I had my alterations ready to go, with the exception of squaring up the neckline (check out the Sewaholic Cambie link above for a quick and easy way to do this).

Like my wedding dress, this is a very structured bodice: there’s an interfaced satin fashion layer, an interlining made from coutil with German plastic boning at each seam, and a lining layer made out of some fun Belle themed cotton from Jo-Ann’s (I picked it up on a whim several months ago). Once all the layers were assembled, I made some straps and stitched them in the bodice back between the fashion and lining layers, leaving gaps in the front of the bodice to slide the straps in and adjust the length before permanently stitching them down.
The skirt is a full circle skirt I drafted using Mood’s handy skirt calculator! I wanted something extra swishy and princess-y, and a full circle skirt was just the right solution. Since my skirt was so long, I had to cut it in two pieces, which gave me the perfect excuse to sew in in-seam pockets for my phone and other miscellaneous items I had on hand. Tip: make sure to press your pockets at every stage of construction or, quite frankly, they’ll look like ladies’ genitals. I finished my skirt with 1″ horsehair braid to give it a little extra body. I opted not to line the skirt since eventually I’ll get around to making a petticoat for this costume as well.


The blouse is my go-to McCall’s pattern I’ve used for basically all my princess seam tops over the last year. I used white peachskin from Online Fabric Store, which is the same stuff I used for Mami last year. This fabric is pretty sheer, so I underlined all of my pieces with the exception of the sleeves. I made my standard length adjustments, and used the View A sleeve lengthened ever so slightly to accommodate a 3/8″ elastic casing. The sleeves are still a bit shorter than I’d like, so I’m going to add a longer elastic casing for a bit of extra length before I wear this again.

To get an appropriate neckline, I drafted a shawl collar. I like this so much better than my last version of Belle! Attaching the neckline was a bit finnicky, so be sure to check out a few tutorials on this if shawl collars are new to you.


For the apron, I made a lined rectangle made of the same peachskin I used for my blouse. After flipping it inside out and topstitching the edges, I butted the unfinished edge of the rectangle in an interfaced faux-belt and topstitched the edges. The belt closes with snaps, and I made a butt-bow using our Cosmic Coterie pattern and tutorial that also snaps onto the waistband. I recently had a client request a more canon set of Supers bow tails (i.e., without jabots), so I used the same tail pattern to create these for Belle. I might make the tails a bit shorter in the future. I haven’t decided if I like these or not.
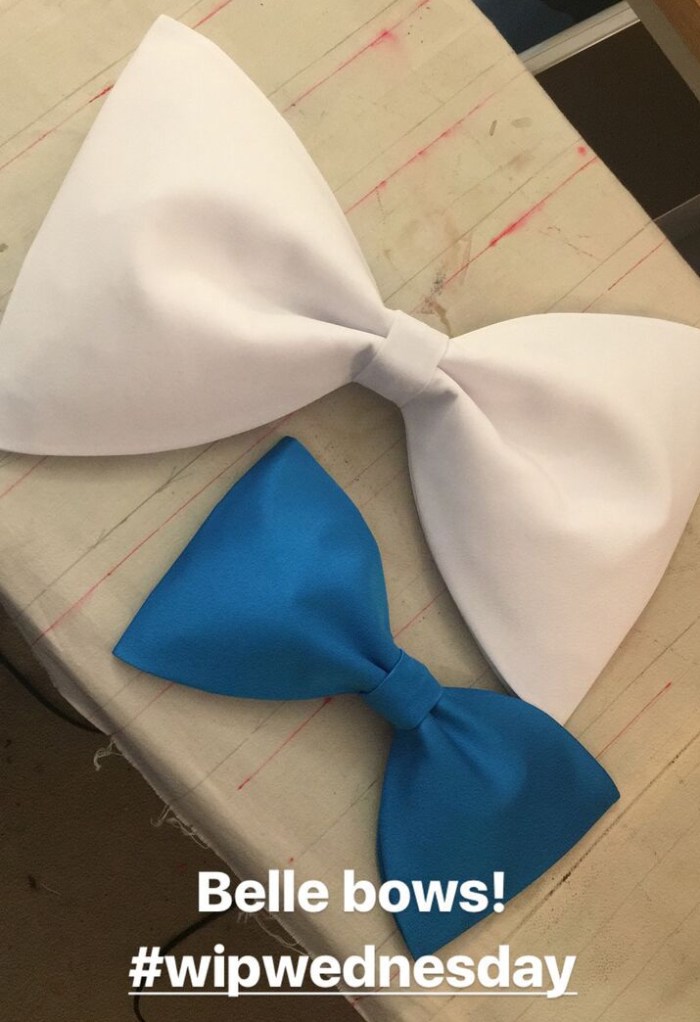


For the final touches, I made a bow using Cosmic Coterie’s Venus hair bow that snaps on a band around the ponytail.


While working on this, I also was mixing resin brooches for myself and Victoria Bane. I had a small jewelry mold, so I poured a few pieces to make some earrings for Belle. I also had a blue Beauty and the Beast book purse I picked up from Hot Topic for my WDW trip, so I used that as my prop in a few of the photos Mehreen took!
Final Thoughts:
This was such a rewarding build, even if it was a speedy one (I knocked it out in about a week and a half). Meeting Paige O’Hara was a wonderful experience, and while I do have a few things I need to revisit with this costume, I’m so happy with how it turned out!

Who’s your favorite Disney Princess?
