
Welcome back to the Spandex 101 series! If you need a refresher, check out Part 1 on supplies and Part 2 on prep. Today, we’re getting into the meat of spandex construction, and I’ll also mention a few ways that you can finish off spandex projects.
Stitches Galore
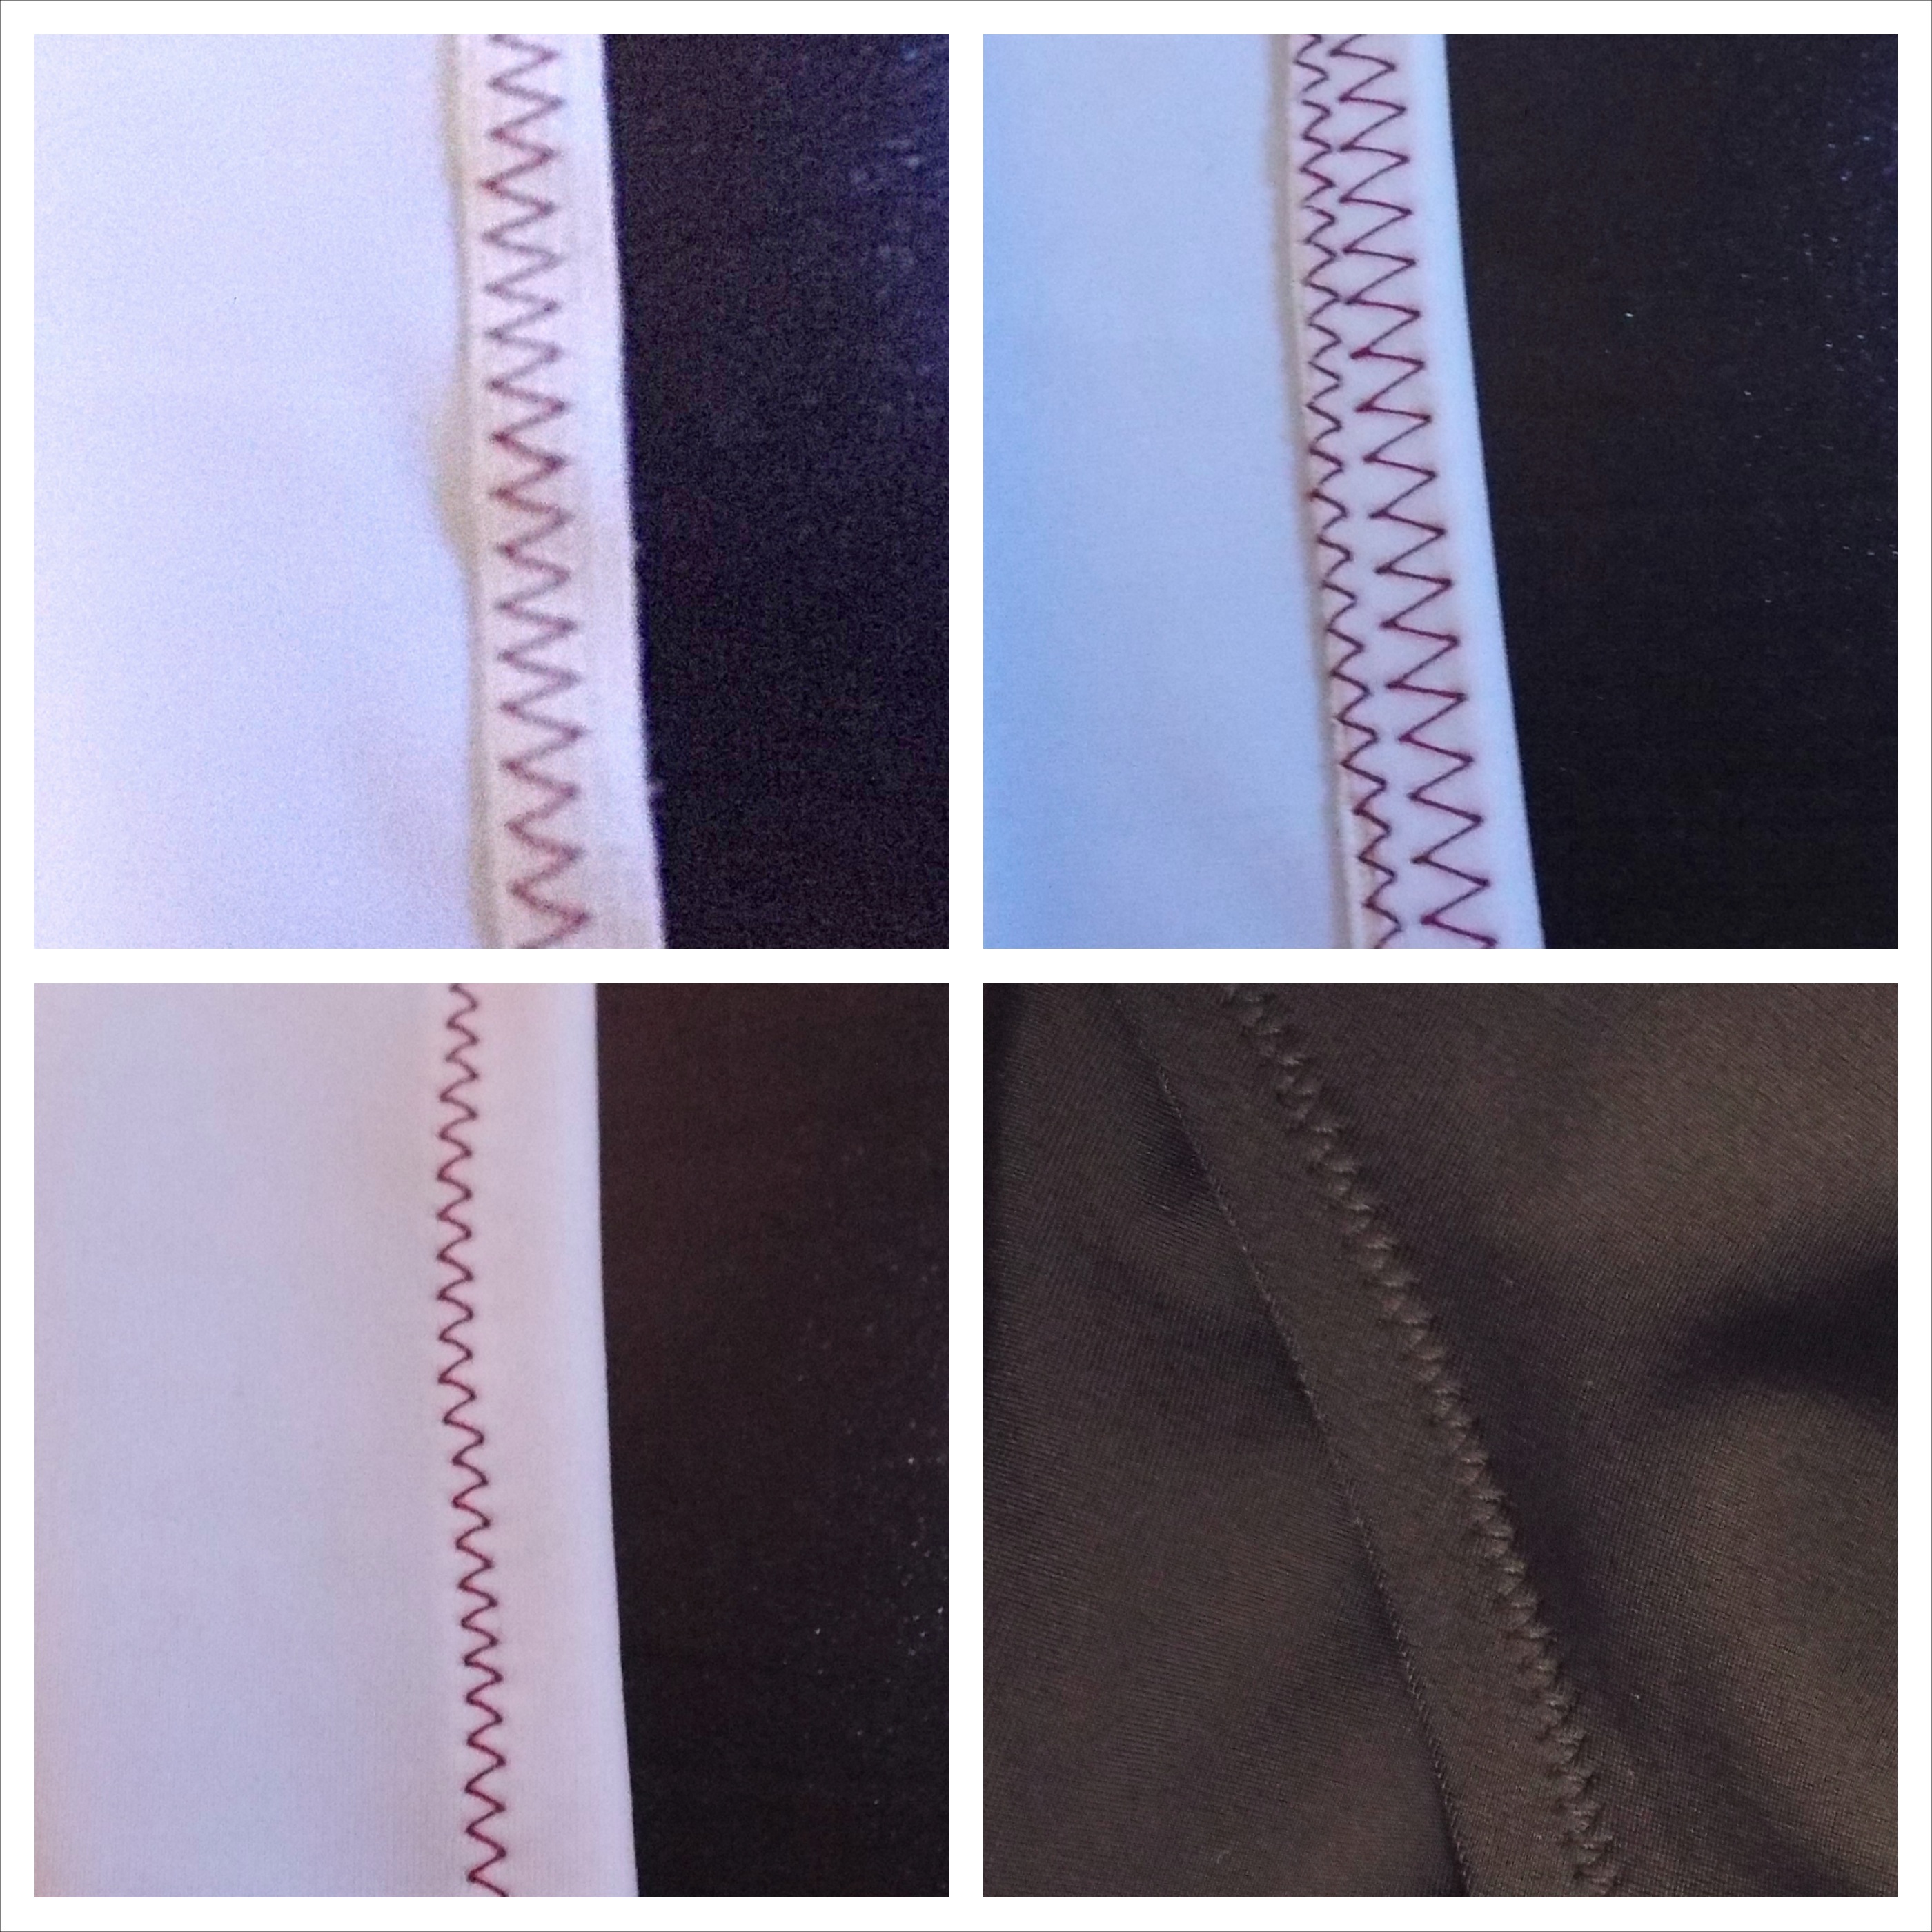
First off, let’s talk stitches on a regular sewing machine. Anytime you work with spandex, you’ll want to use a stretch stitch or a zigzag stitch. A regular old straight stitch just can’t stand handle the pull of spandex and will most likely pop (Note: there’s some disagreement on this. If you stretch fabric while sewing, it should theoretically hold, but I’ve never been a fan of that method). For standard stitching, go with a narrow zigzag (I normally set my machine to 2.5).
I also like to use a chain stitch with spandex, which is basically a stretch version of a straight stitch. Most of the time I use them with top-stitched appliques or with zippers. Your machine may or may not have this stitch. Make sure to check your manual!
You can also baste with a zigzag stitch within your seam allowance. I use basting stitches quite a bit with spandex. It’s great to match up pieces like side seams or neck bands and see how they look before committing to your final stitch.

A friendly reminder: make sure you’re using stretch needles! Ever tried sewing something even remotely stretchy and get skipped stitches? You’ve probably been using the wrong needle. Knit fabrics are structurally different from wovens in that they’re made from lots of loops, which helps give them their marvelous stretchiness. Stretch needles slide through those loops instead of slicing them like a regular needle. You can read more about all that good stuff here.
If you’re serging spandex, I’d recommend a basic 4-thread overlock. It’s super fast, secure, and stretches with your fabric. Make sure to check your manual for the type of thread and needles to use.
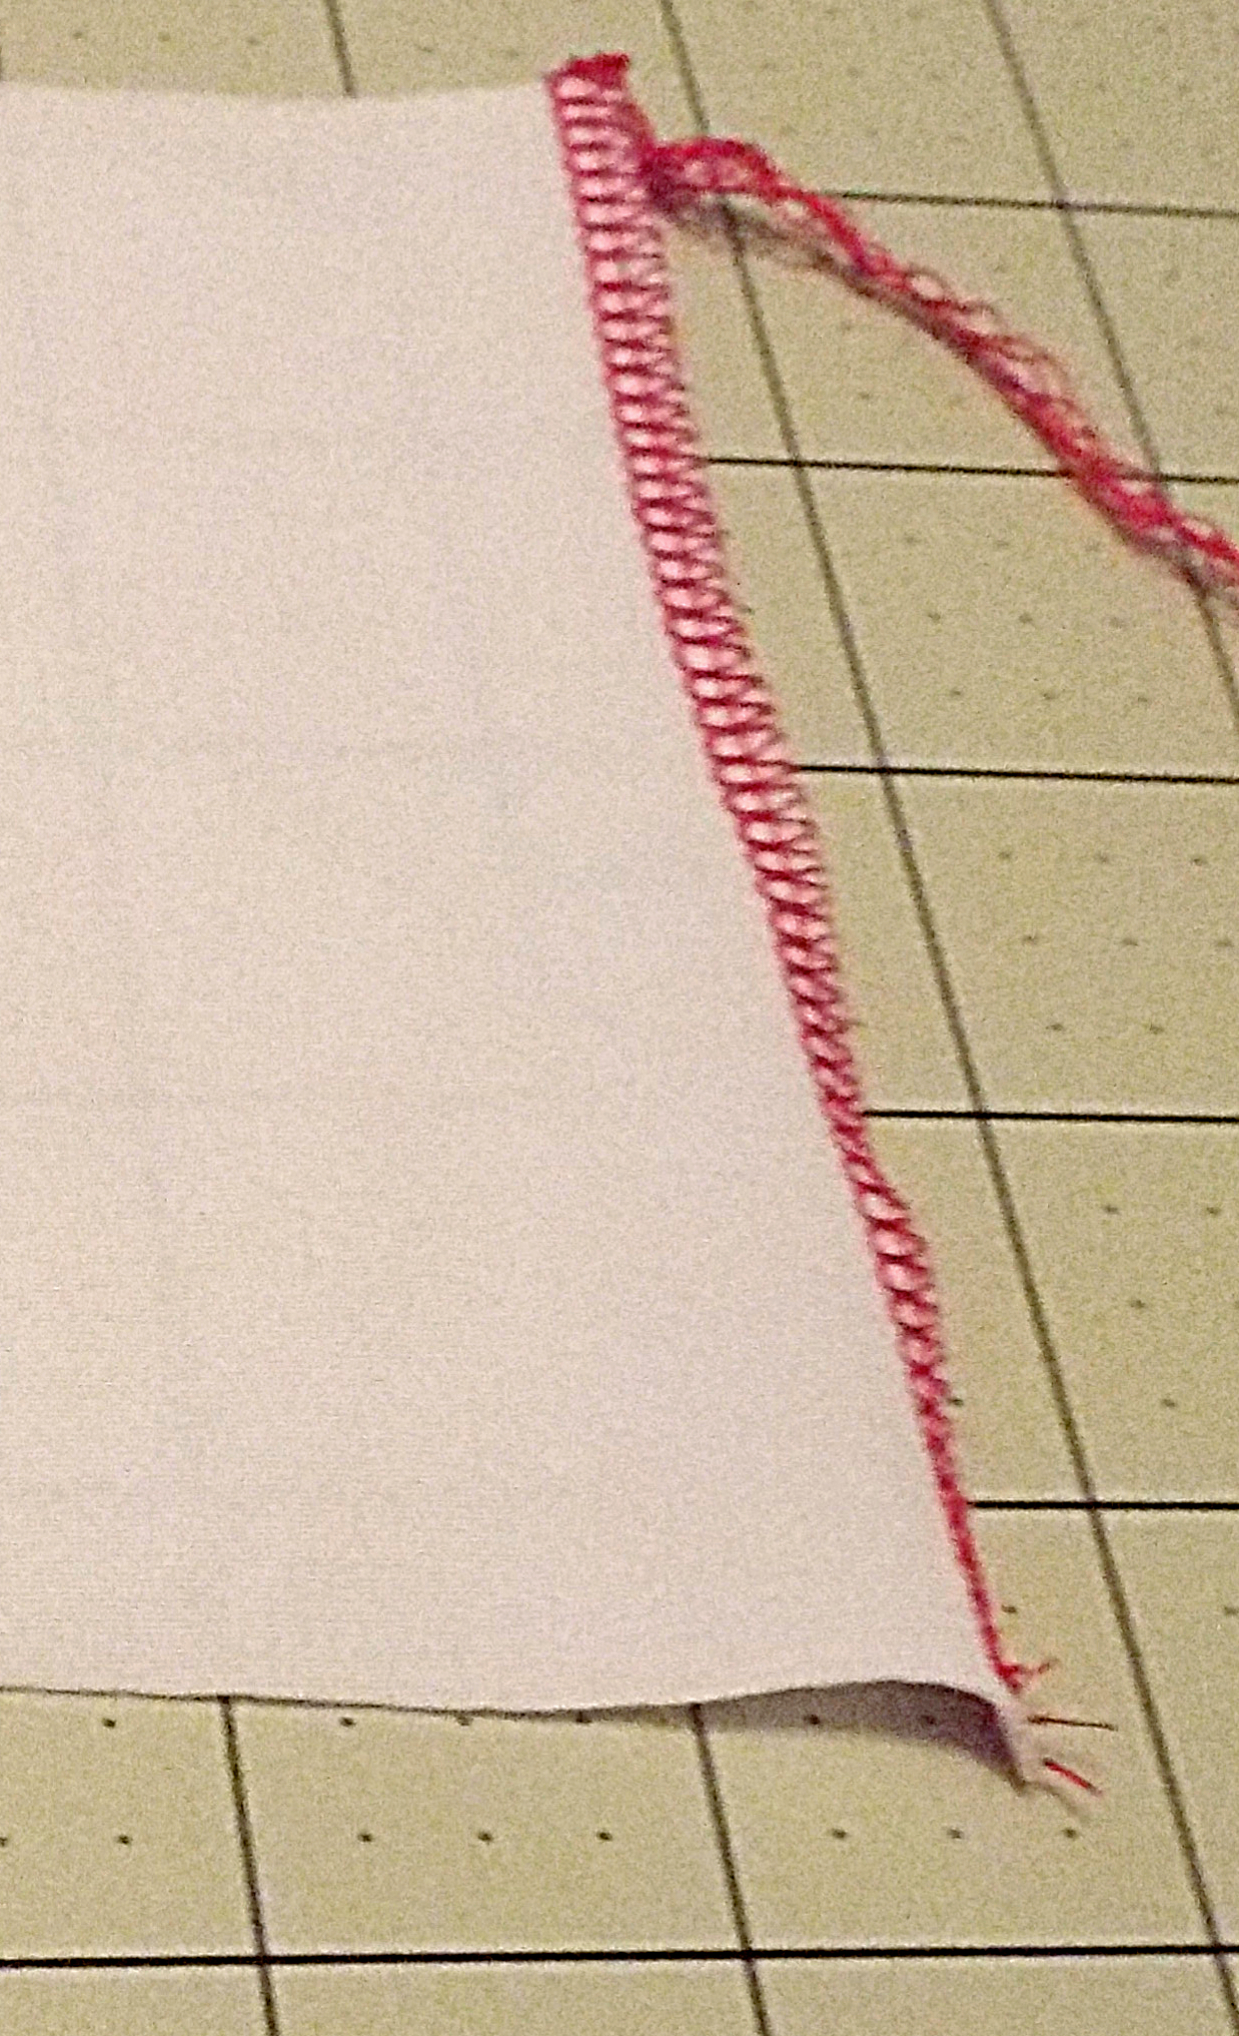
One thing to keep in mind with sergers is that you don’t want to use pins. Between the blade and the needles, they can really screw up your machine and/or potentially injure you. If you’re new to serging, I’d highly recommend basting your seams and using short zigzag stitches anywhere that your seams meet. Stretchy fabric can move around on you while sewing, so basting together those seams helps you get used to the machine instead of worrying about the fabric moving around.
Finishing hems

Spandex is one of those marvelous fabrics that you don’t technically need to finish. The edges won’t fray (but they may curl up, just FYI!), so once you’ve sewn your seam together, you can call it a day. Of course, if you want to do something more to give the seam a little extra strength, you can add an extra row of zigzag stitching in the seam allowance.
Sergers are awesome for finishing spandex, because you can sew your seam and finish it all in one move. You can also zigzag a seam and serge the edge, but I prefer to just serge. Try it out and see what works best for you!

Hems, Holes, and Everything Inbetween
So you’ve got a garment that’s sewn together, but how do you finish those pesky arm and leg holes? Well, there’s a couple of things you can do:
- As I mentioned earlier, spandex doesn’t fray, so if you’re going to be wearing boots or gloves that cover arm or leg holes, you can technically leave it unfinished and be fine. If you want a cleaner finish, a zigzag stitch is a good option. I did this with my polka dot Lady Skater hem.
- For a more RTW finish, try using a twin needle. This is a double pronged needle that stitches straight on the right side of a garment but has a zigzag-like stitch on the wrong side, which gives it a bit of flexibility. This isn’t quite as flexible as a regular zigzag stitch, so use it on areas like wrist and ankle openings or skirt hems.
- Bands are a great finish for stretch materials, especially if you’re new to sewing them. I used this approach for Supergirl when I realized that I didn’t have quite enough length for the arm. This gave me an extra few inches to work with and was a clean finish. I use my Renfrew and Lady Skater bands a lot, but you can easily make your own!

One final technique I want to discuss is elastic. Let’s say that you’ve got an sleeveless opening or have a leotard leg hole to finish. My preferred approach is to use 3/8″ elastic. To apply it, pin the elastic to the wrong side of your fabric and baste in place. You may have to stretch the elastic as you stitch (especially around curved areas like the bum), so take your time and use as many pins as you need.
Once the elastic is basted in place, fold it over and use your regular zigzag stitch to secure the elastic. This hides your basting stitch and secures everything in place. I love this approach because it’s clean and gives you a little extra security, especially for those high hip leos! Many leotard patterns have guides for how much elastic you need. I always find that they’re a little loose for my liking, so I typically take them in a bit. Make sure to hold the elastic around yourself and see what works for you!
That’s it for this week’s post! Next week, I’ll talk about extra things that you can do with spandex, including dyeing, applying appliques, and more! It will probably be the last post in my spandex series, so if you have any questions or requests, let me know!

I love that you included photos of the stitches!
I always find tutorials with stitch images helpful, so thought it’d be useful!
I really really wish I had the time and energy to learn how to do my cosplay like you do! The results are impressive 🙂
Thanks, Lindsey!
Great tutorial as usual! And thank you for showing the stitching in pictures!
Thanks! Hope it helps 🙂
Reblogged this on SteamedEggs.
We made buffs out of stretchy material. Did a flat lock seam for the side. But the edges tend to roll up. What do u suggest as an edging stitch. We are very, very new to the serger machine.
Thanks
Zig zag or a chain stitch are my go-tos.
twin needle stitching will be more stretchy if you use wooly nylon as the bobbin thread.
Good to know! Thanks for the tip !