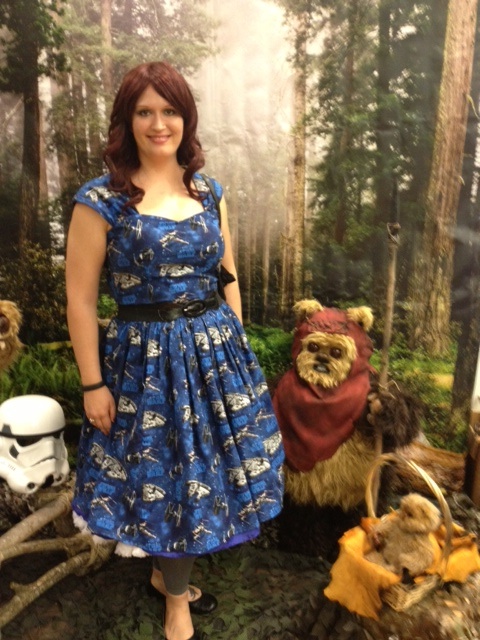
Welcome to my new ongoing series: Back to Basics! Something I’ve noticed in home-taught sewists and novice cosplayers alike is that we all have gaps in our training. Most of us learn to sew through some combination of book learning, online tutorials, and trial and error, and as a result, we might go years without learning the fundamentals we might have learned in formal classes. This series is dedicated to filling in those gaps.

Today’s topic is one that’s come up quite a bit in the last few months for me: reading patterns. I’m constantly floored when cosplayers say they’ve never used a pattern. To me drafting is so much harder! I was very fortunate when I first started sewing that my stepmom showed me a few basic ins and outs of reading patterns and supplemented my knowledge with the fantastic patterns from Colette and Sewaholic. So today, I thought I’d share a few basic things you should pay attention to when looking at a pattern envelope. I’ll share more information on reading patterns in future posts!
What’s on a Pattern Envelope?
Before I dive into the nitty gritty, I want to point out common things you will find on a pattern envelope. On the front of a pattern, you’ll typically find:
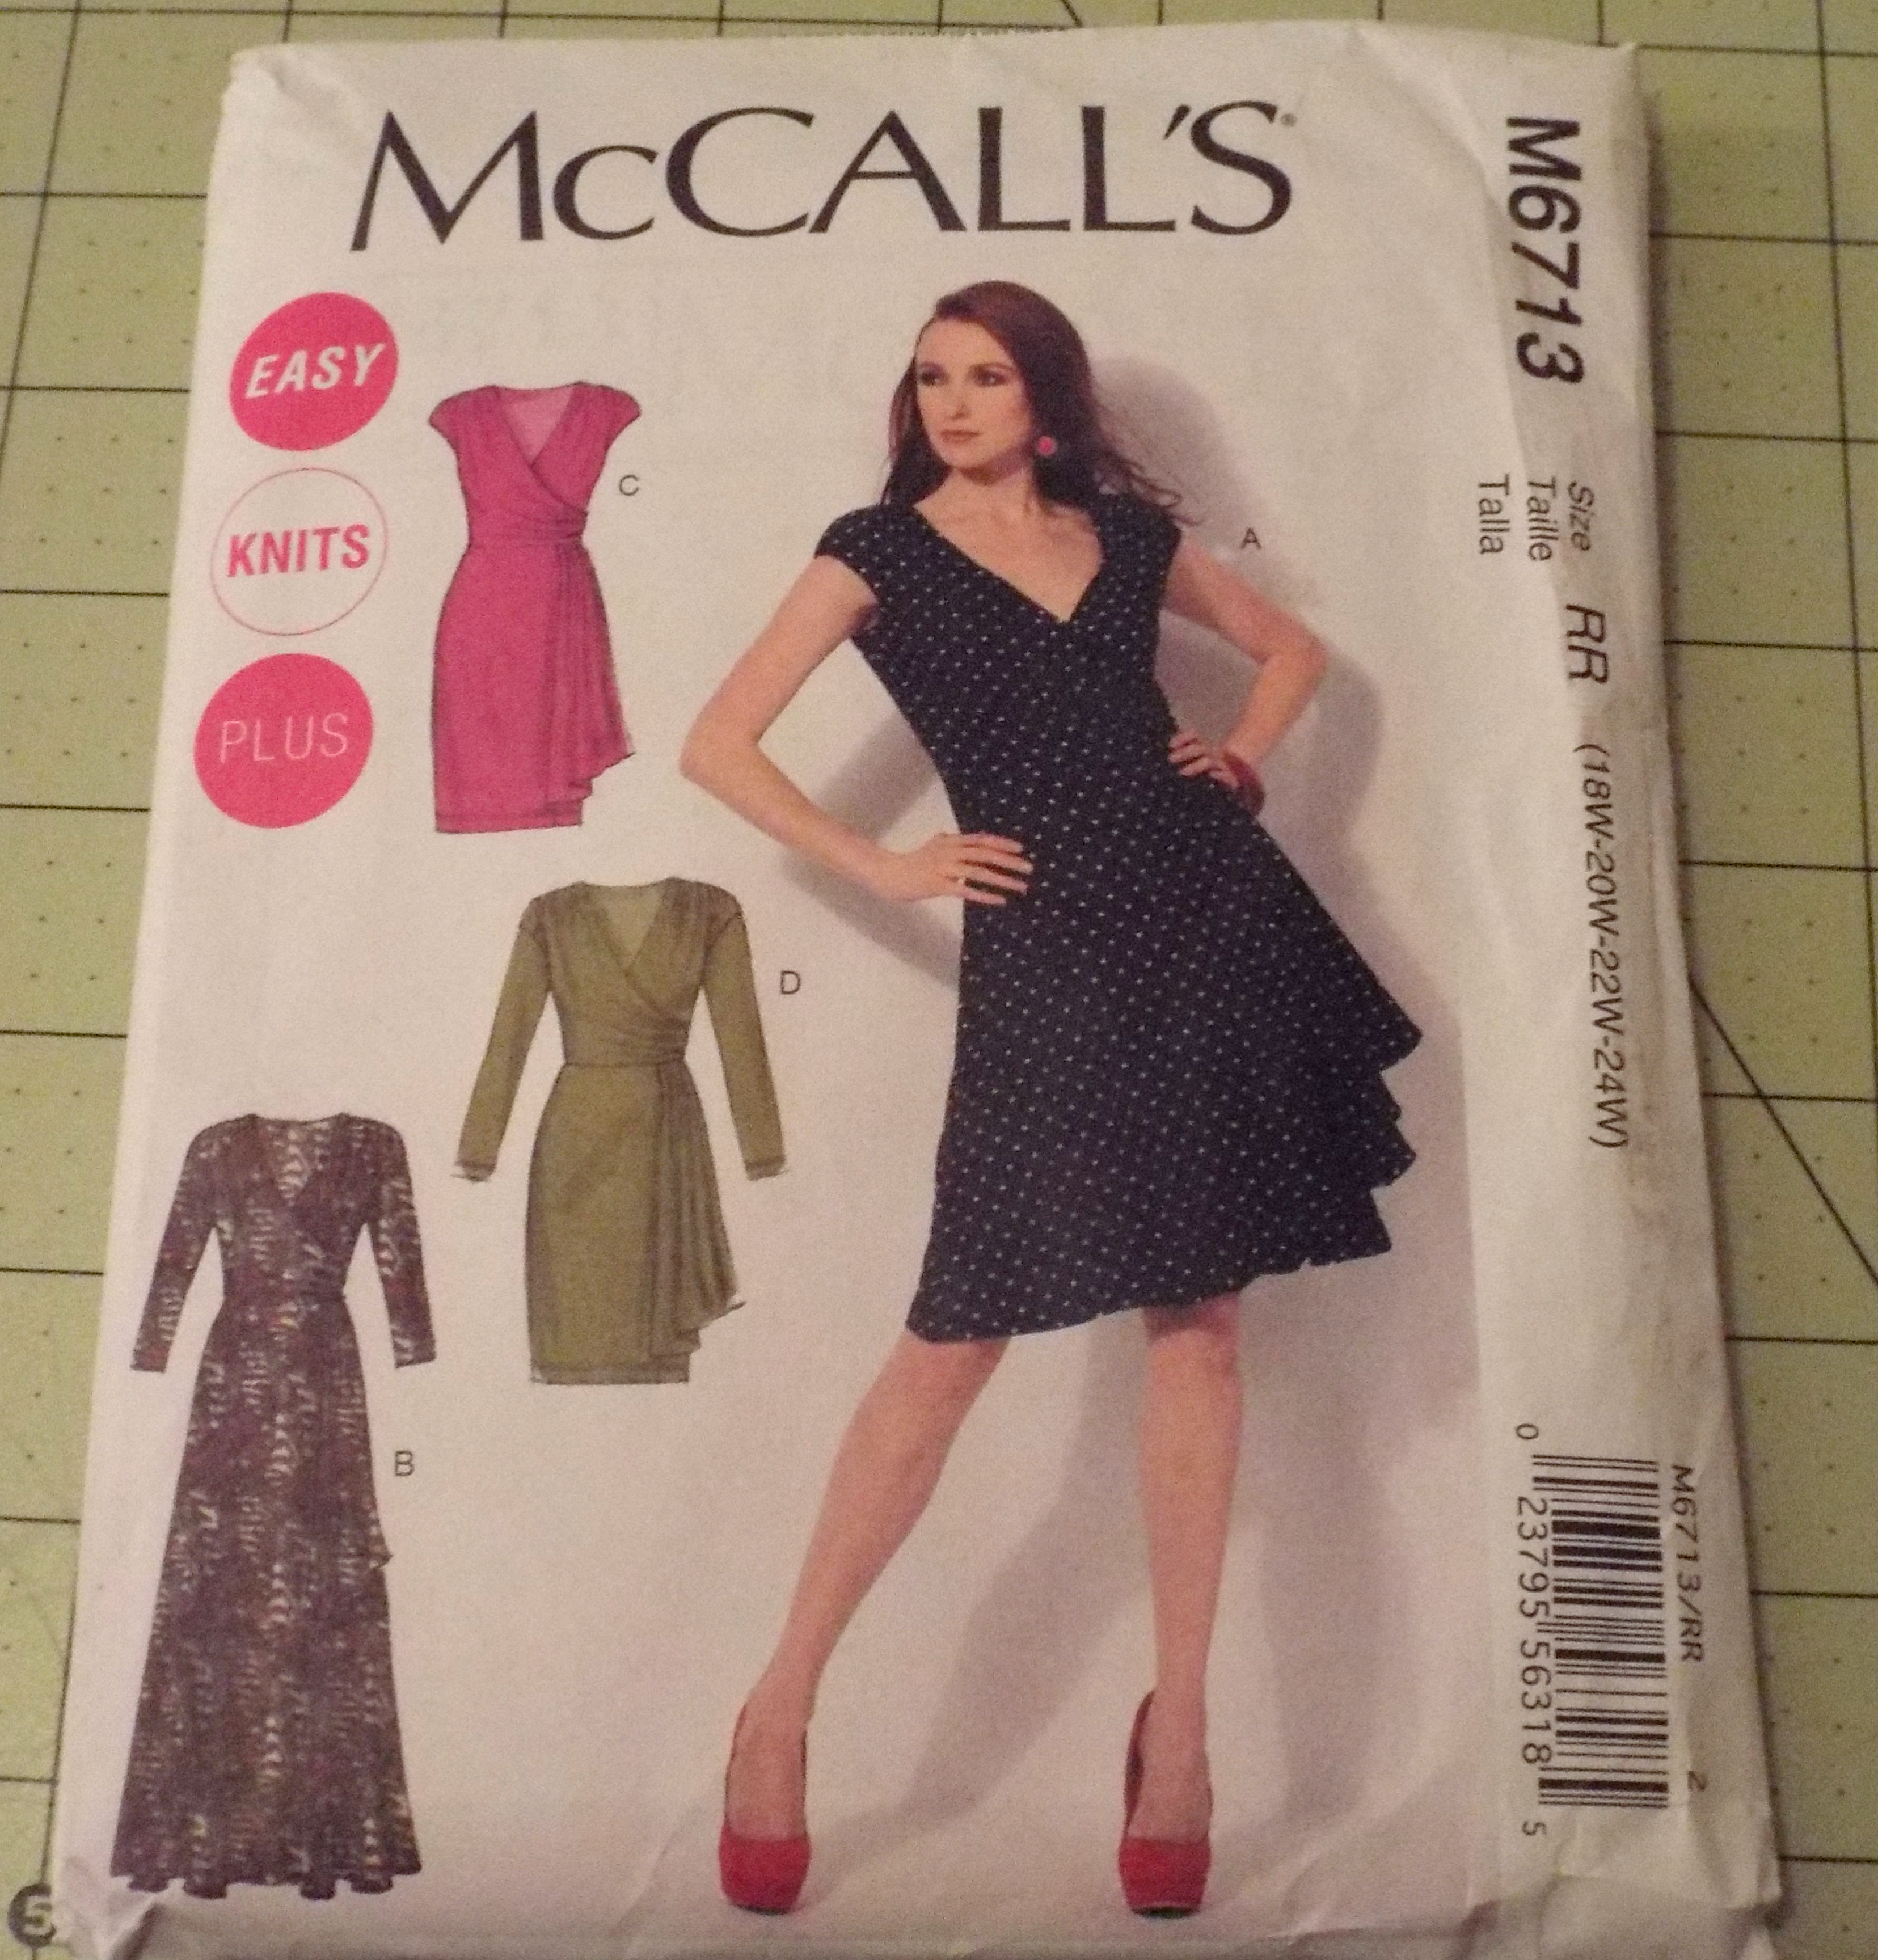
- Pattern variations
- Pattern number, which you’ll need to retrieve a pattern from the drawers in a fabric store. In this case, M6713.
- Sizes included in the pattern
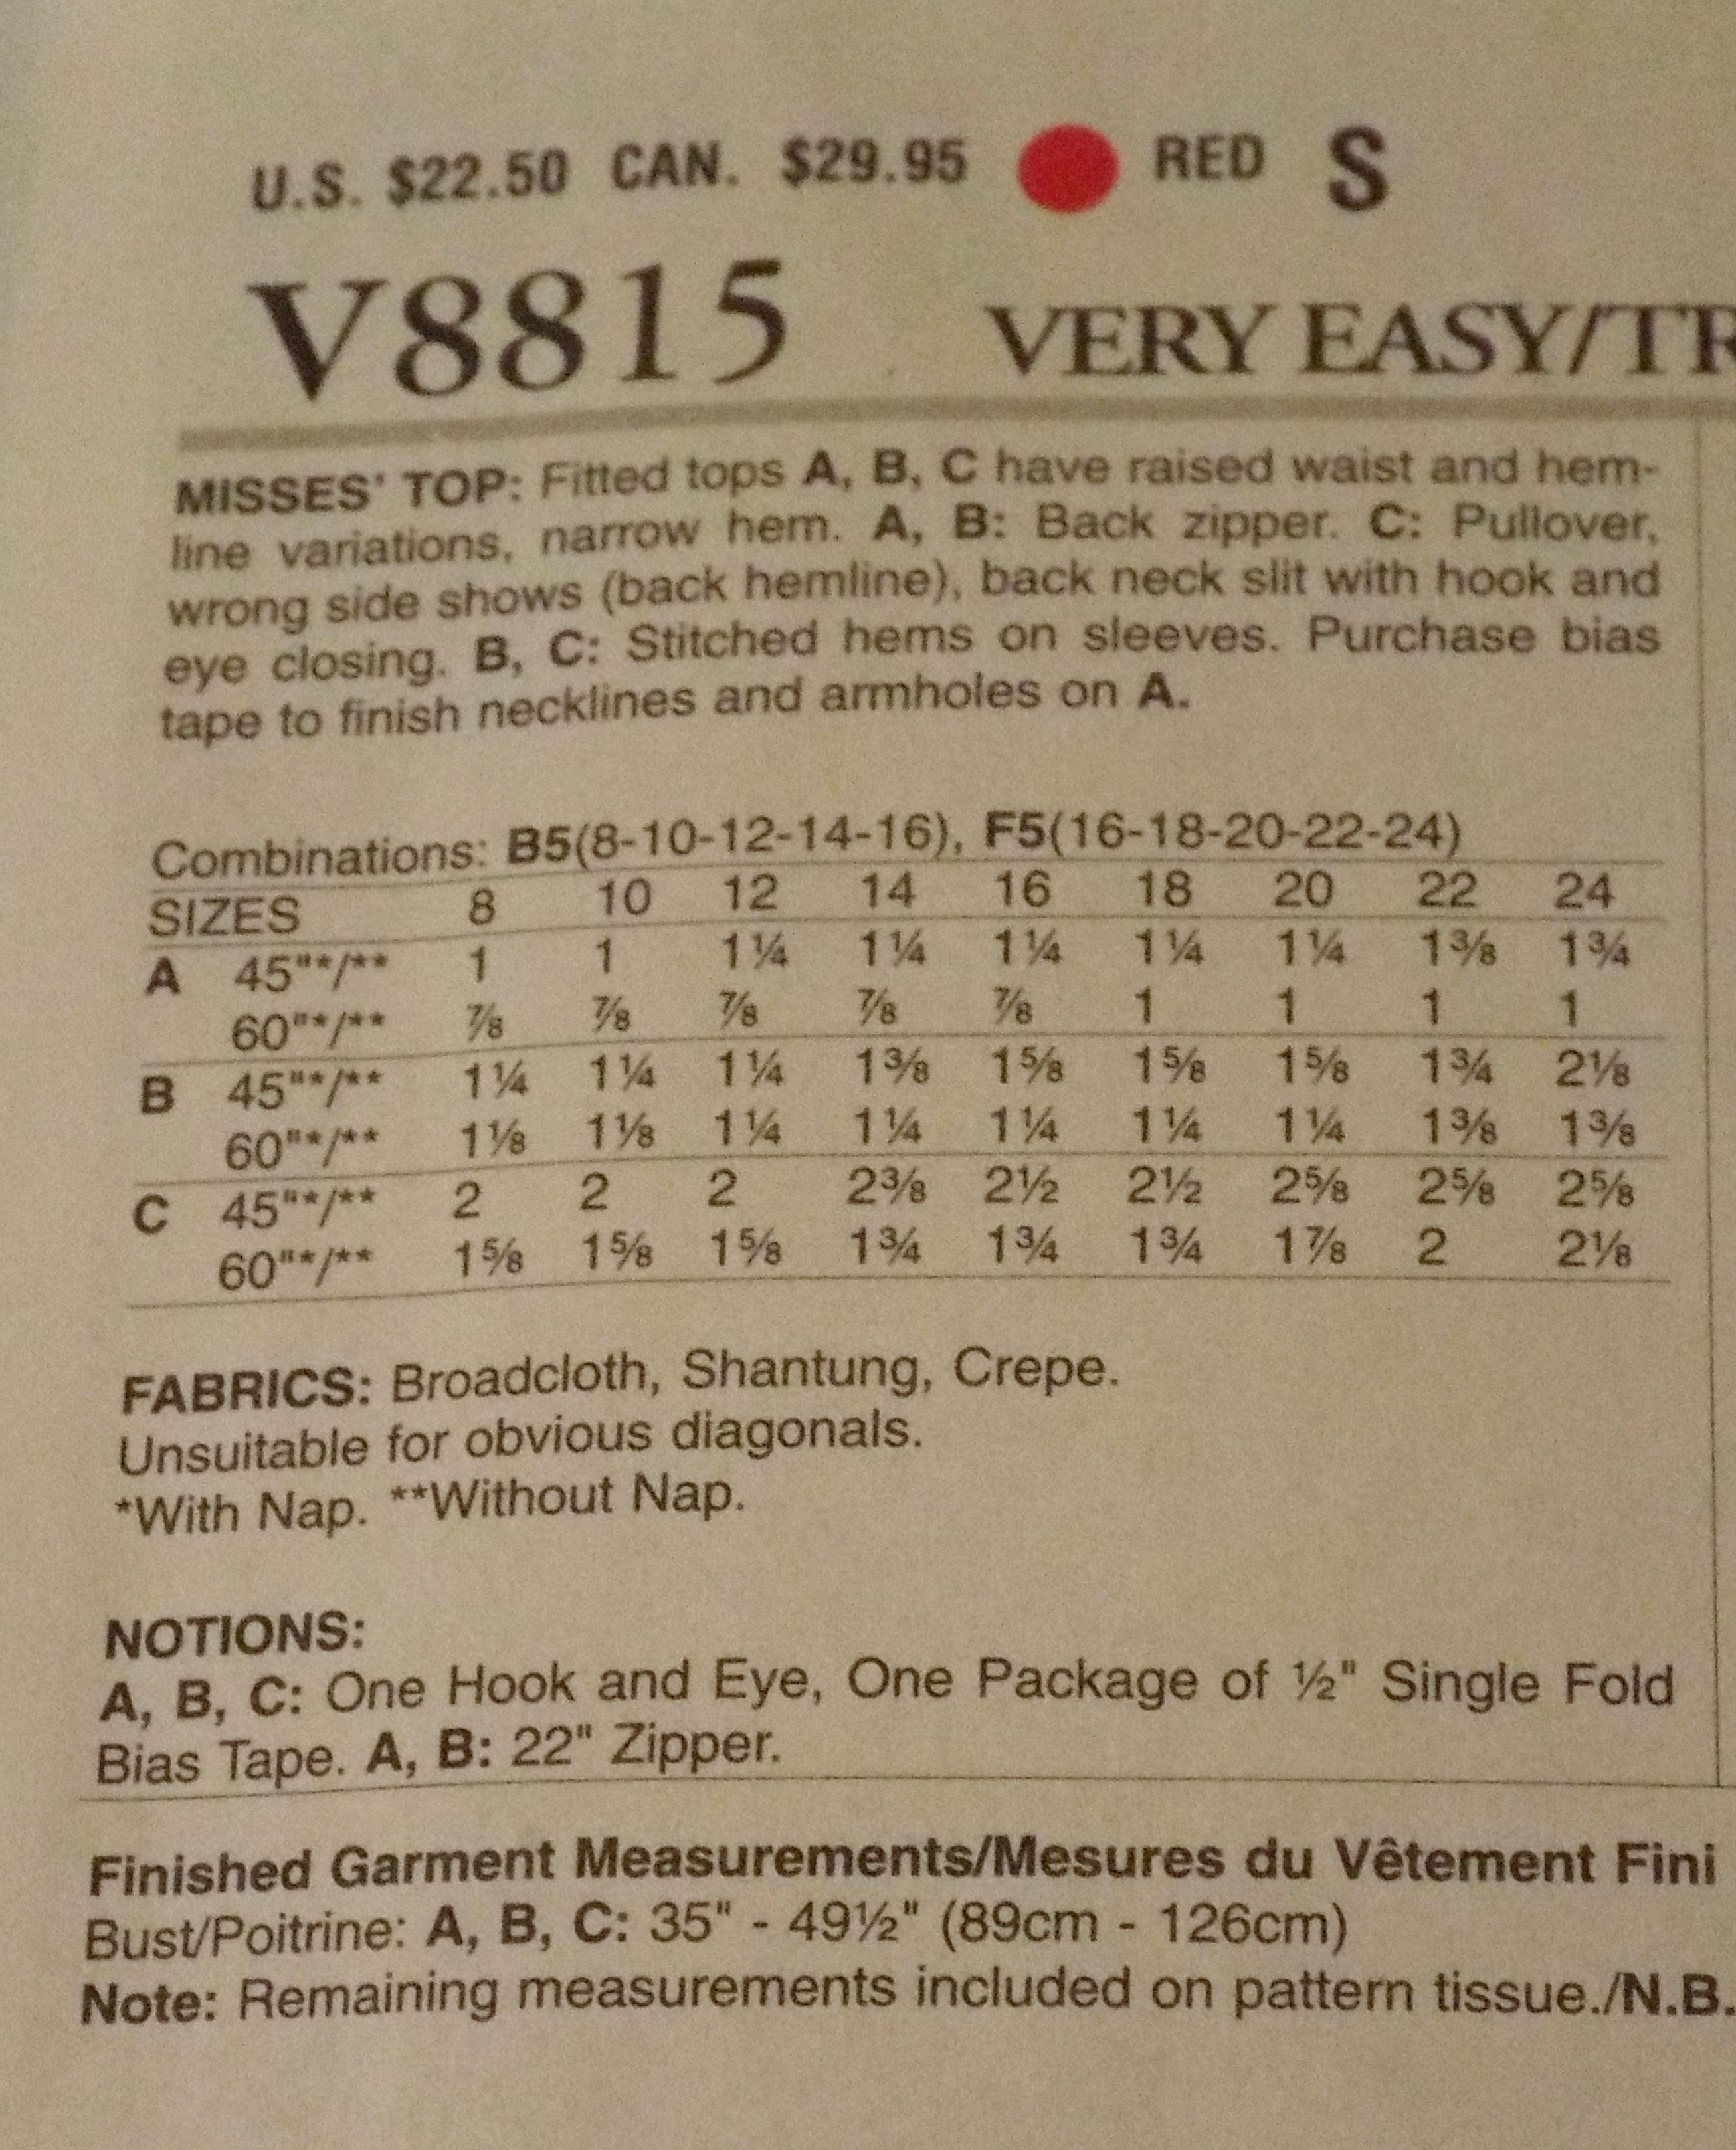
On the back, you’ll find:
- Sizing information (typically on the back flap)
- Pattern descriptions
- Fabric requirements
- Fabric suggestions
- Notions
- Finished Garment Measurements
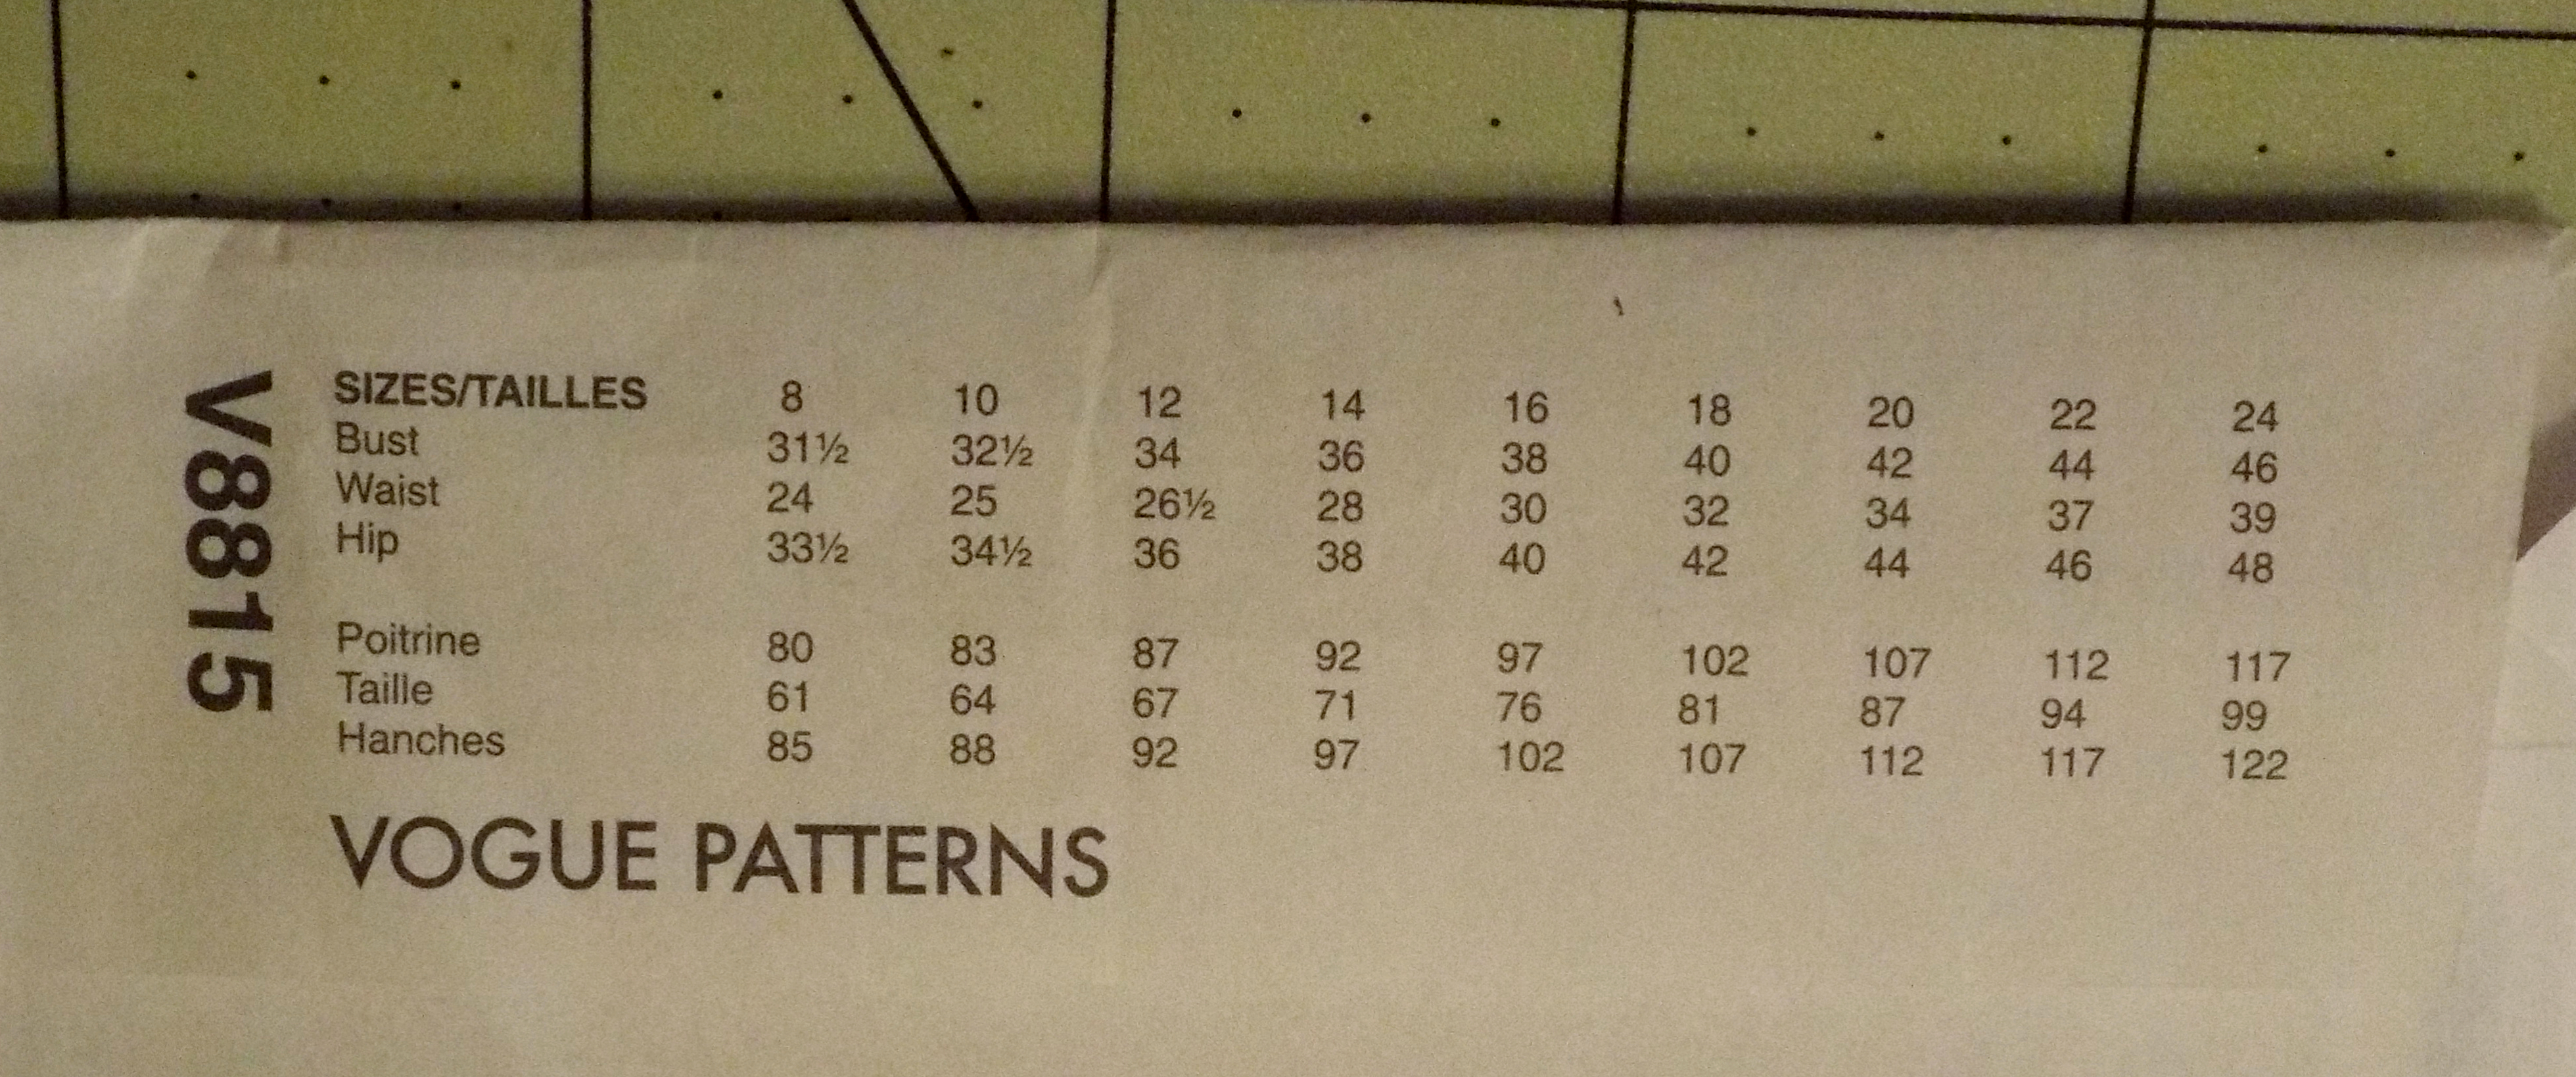
Sizing
If you’ve never used a sewing pattern before, sizing will seem alien and much likely a much larger size than you wear in RTW clothing. It’s perfectly normal. I wear a 12-14 in RTW clothing, but my sewing pattern size is closer to a 20-22, depending on the brand. Make sure you pick the pattern packet with the right size!
To choose the correct pattern for your body, you’ll need to know your bust, waist, and hip measurements. This can be a little odd. If you’re making a dress or top, go by your bust measurement. For pants and skirts, you can obviously ignore the bust measurement.
Most large pattern companies make their patterns assuming that the wearer has a B cup. If you have a larger or smaller cup size, choose your pattern based off of your high bust measurement. From there, you’ll likely need to make a full or small bust adjustment.
Suggested Fabrics
Suggested fabrics for the garment you’re making can be found on the back of the pattern envelope. You’ve often got some flexibility here. The suggested fabrics are just that: suggested. However, some designs work best with certain types of fabrics. For example, if you’re trying to make a flowing, ethereal dress, a stiff fabric like drill just won’t cut it.
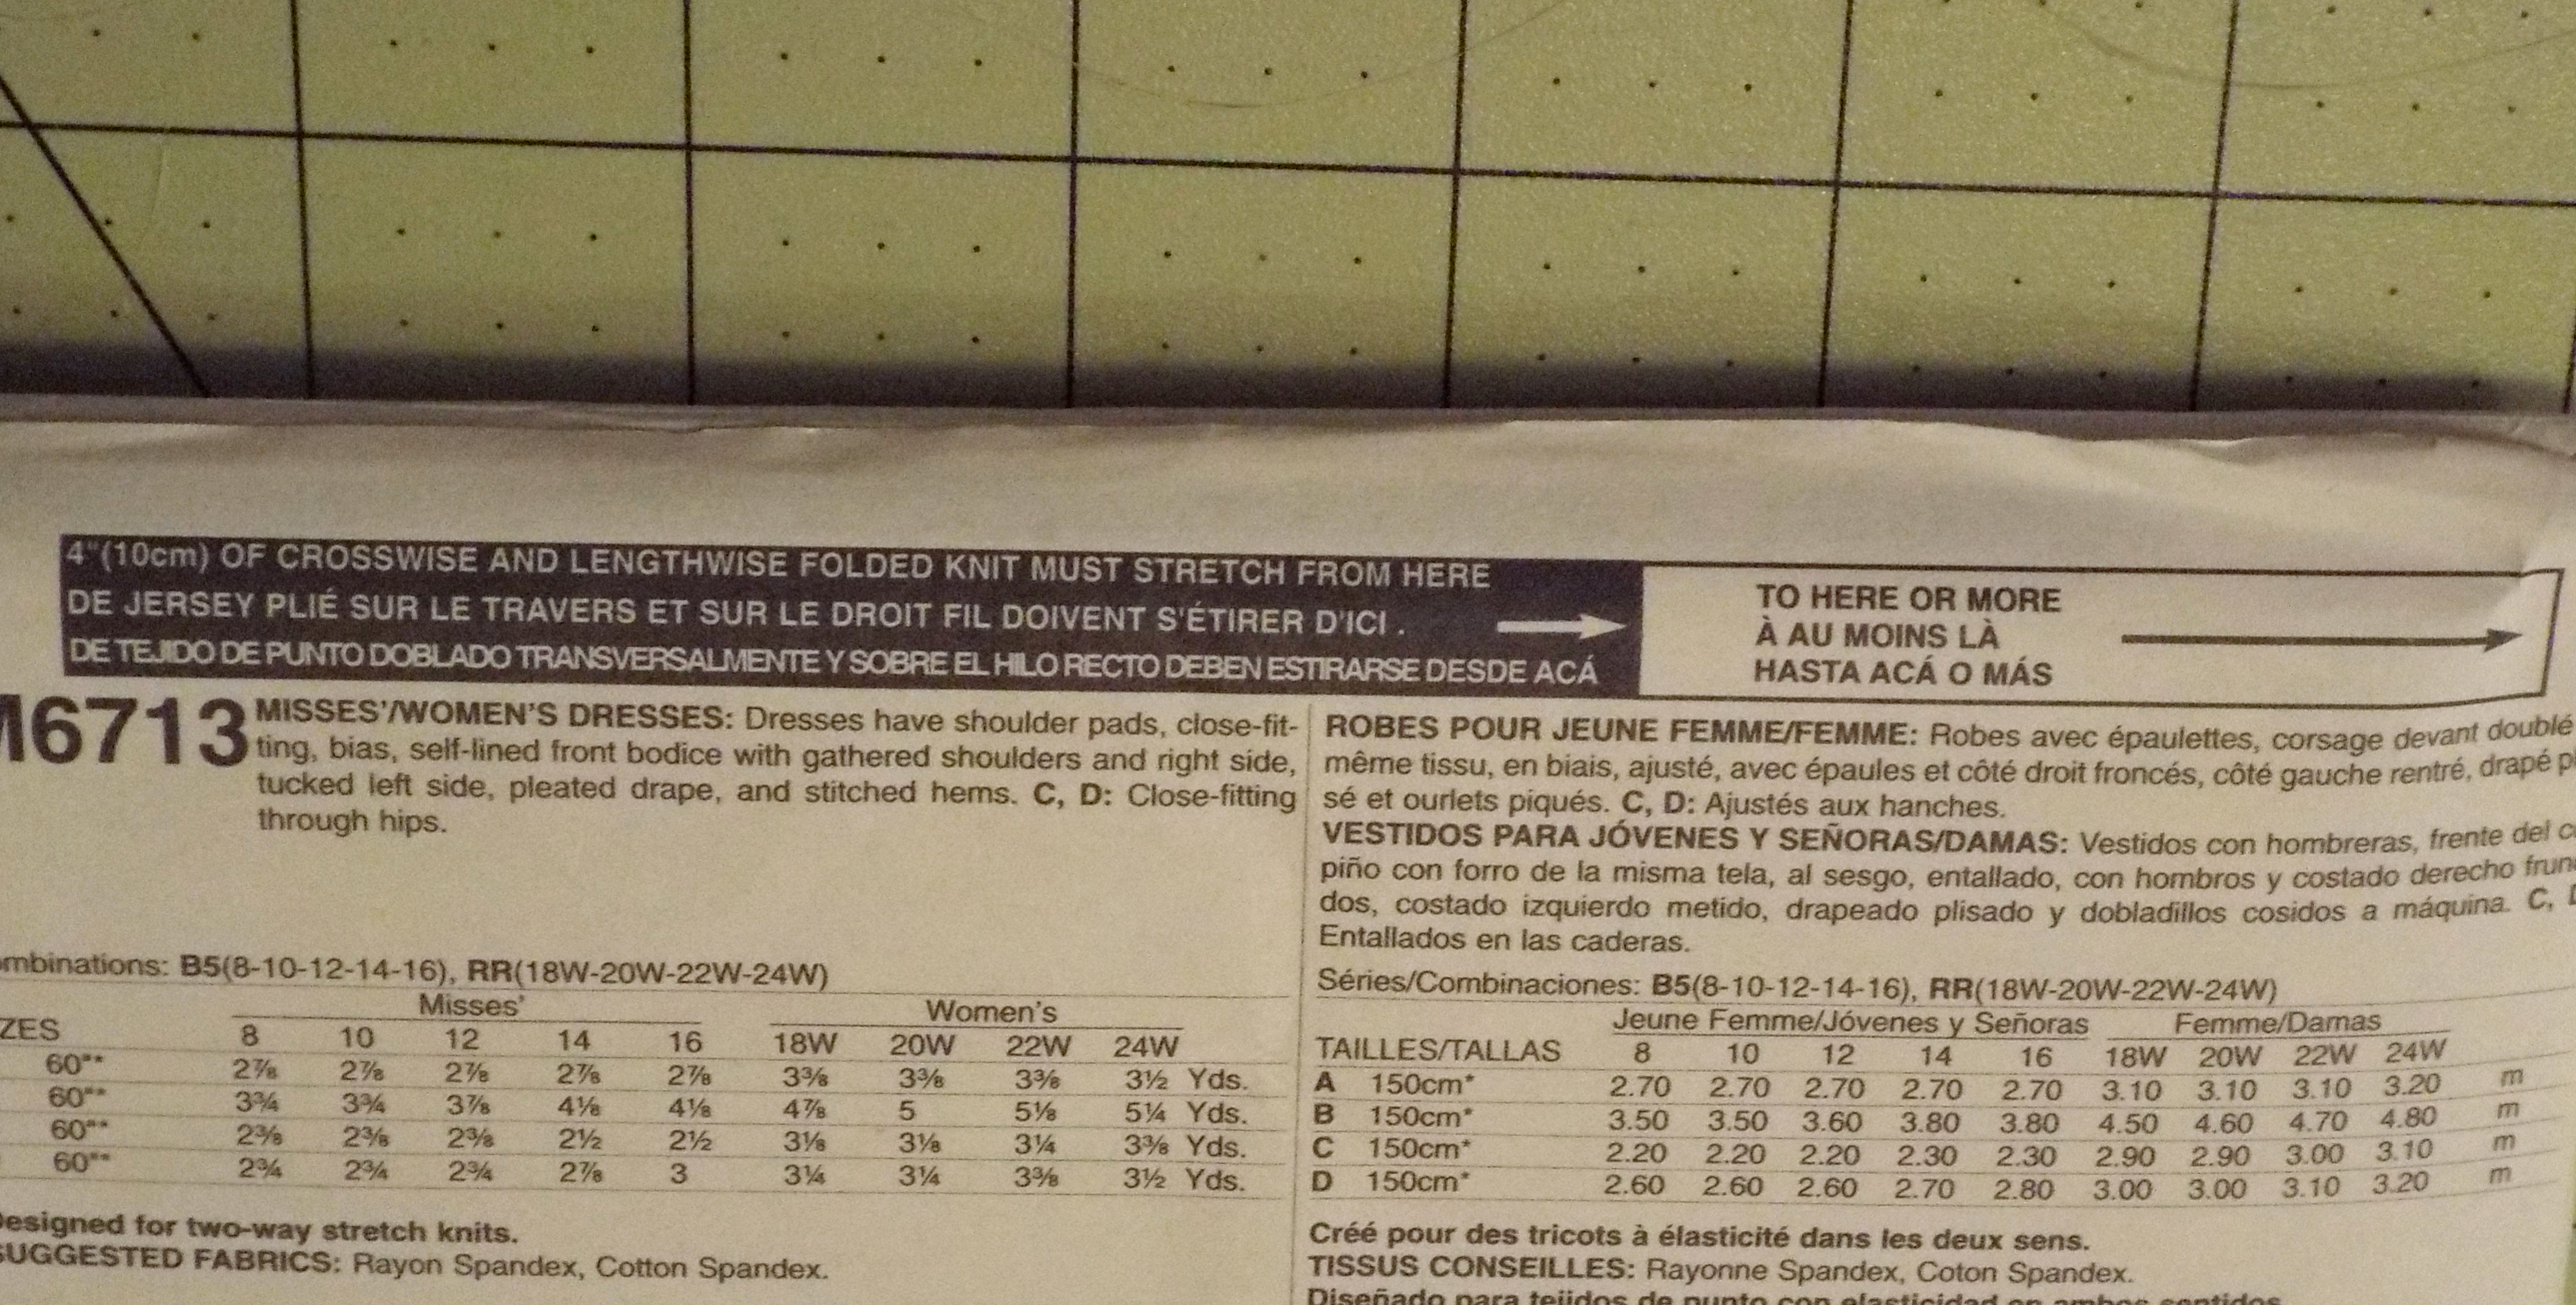
Also be mindful of whether or not your pattern is designed for knits (stretchy fabrics) or wovens (non-stretchy fabrics). Many pattern companies will mention this on the front of the envelope. Patterns designed for knits are smaller than wovens since the pattern takes the stretch of the fabric into consideration. If the pattern is designed for a knit, there will also be a stretch indicator on the back of the envelope. The basic idea is that 4″ or so of your fabric should stretch to the indicated line. If it doesn’t, then back away from the fabric, no matter how pretty it is.
(Actually, that’s a little bit of a fib. You can make some knit patterns work for wovens, but you’ll have to make a larger size. This works best for patterns without lots of pieces. Make a muslin first to check!)

Fabric Yardage
Patterns will include how much yardage you need, often in 45″ and 60″ bolt measurements. I always make sure to bring both measurements with me when I’m shopping, since you never know what fabric width you might find while shopping. If you’re working with a print such as stripes or a fabric with nap, you’ll want to get a bit of extra fabric to match your pieces.
Fabric with nap basically will look different from various angles. A good example is velvet. If you just go by regular fabric requirements, you might end up with upside down pieces! Your pattern should mention if you need extra fabric in these cases, but it’s always good to be aware. Thanks to Kara for bringing this up!
Notions
Notions are all the little extras you’ll need to make your garment. For dresses, you’ll most likely see things like zippers, buttons, and interfacing for waistbands and facings. Most fabric stores will have an entire wall or aisle dedicated to all these things. I like to pick up my notions when I choose my fabric so I can knock a project out without having to make a trek back to the fabric store.
Finished Garment Measurements/Ease
This is the main reason I decided to start this series with this topic. I’ve had multiple cosplay friends contact me in recent months concerned about why their garments don’t fit the way they should. The culprit in almost all of these situations has been ease.
Ease is the extra bit of fabric built into a garment so that you can do things like sit, eat, and, oh yeah, breathe.You can figure out the ease by subtracting the finished garment measurements from your body measurements. Most pattern envelopes will include the finished measurements of the garment (or at least part of it) somewhere on the envelope or on the pattern pieces. A snug garment (such as a fitted bodice) may only have 1-2″ of ease, while a billowy blouse might have a huge amount of ease.
Some garments may also have negative ease, which means that the final garment is actually smaller than your body’s measurements. This is most often true with spandex pieces which are designed with lots of stretch in mind and things like corsets, which should have a 2″ gap in the back for lacing.
That brings us to the end of this week’s post! I hope this helps. If you have any suggestions for future posts, please feel free to leave a comment or shoot me an e-mail!

Patterns and measurements scare the crap out of me! LOL
They can definitely be intimidating! Still, I’d rather have a good pattern than have to draft something myself 😛
#WitchWings -Calliopunk
Fly, my pretty! 😉
I’ve never used a pattern to make anything before; they’ve always seemed so intimidating! An excellent break down of how to use one, something I’ll definitely tuck away for future use. Thanks!
Glad you found it useful! I always like to think of patterns as guidelines. Sometimes instructions just don’t make sense, but they’re a nice tool if you need a little assistance!
I totally wish I had you when I started sewing! Great basics tutorial. 🙂
Haha, thanks Andie!
Thanks for writing this! I just started learning how to sew with my machine and have been thinking about picking up a few basic patterns and this is incredibly helpful in decoding the mystery that is pattern envelopes.
Glad you found it useful! If you’re looking for patterns that have a little extra guidance, I’d highly recommend Colette. They also have a separate website with sewalongs, which take you in great detail through their patterns 🙂
Great tutorial. One more thing I think should be mentioned regarding yardage is fabric with nap, i.e. if all the pattern pieces have to be cut in the same direction. This is typical for fabrics like velvet and brocade, but also some printed fabrics have a clear “up” and “down”. Doesn’t look very good if one of the panels in your skirt ends up upside down 🙂 Again most patterns will tell you if you need extra fabric with regards to nap.
Great point, Kara! I’ll add that in. Thanks for sharing!
I really love this column idea! I’m completely self-taught sewing and I know there’s gaps in my knowledge. My mom taught me how to read patterns, but I am guilty of never looking at the recommended fabrics. Many times I’ve been stumped because I used a knit instead of a non-stretch!
One of my friends asked for help with the exact same situation! Of course, I’ve made the same mistake myself on many occasions 😛