Photographer Credits: Koholint Cosplay, assistance from AdventTraitor
Completed: March 2019
Hours Spent: App. 30
Debuted: N/A
Why This Costume: A traditional bunny suit has been on my wishlist for quite a while. I was going through a stash-busting phase earlier this year when I realized I had everything on hand to make a bunny suit fit for Usagi! I was initially hoping to bust this out in time for the Bunny Hutch at All-Con (one of my local go-to conventions), but the timing didn’t quite work out as I was leaving on vacation the morning after the Hutch. Still, it was fun to pump out this build and do some in-house shooting with my bro, Koho!
Purchased Pieces: N/A, though AdventTraitor graciously allowed me to borrow her beautiful Proplicas!
Patterns Used:
Super Helpful Tutorials:
How I Made it:
Surprisingly, this was a super straight forward build. I’ve build bunny suits up in my head for so long that I didn’t really think about the fact that they’re full-body bodices. If you have experience making bodices or corsets, then the basic process is quite similar!

I followed the pattern as is for the most part, with the exception of adding a bit of length at the waist, which is normal for me. All in all, it fits normally compared to other Simplicity patterns, so that wasn’t a huge issue. One thing I will say about this pattern is that there’s more ease in the pattern than I expected. I cut a 24, which I was expecting it to be snug, but I had to take the whole thing in a full size, and it was still a touch loose on me, especially in the bust. If you want an extreme waist nip, ala old school Playboy bunnies, you’ll have to do some pattern alterations at the waist (which I plan to do for my next suit).
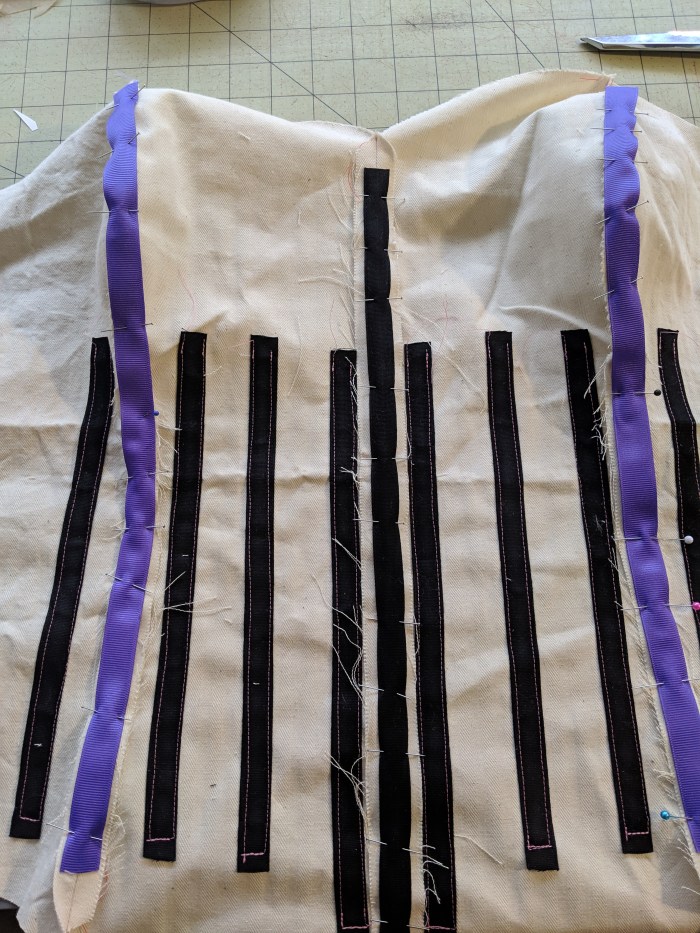
The only real deviation I made from the pattern instructions was boning placement. It wasn’t quite as structured as I would have liked, so I used Josh Hart’s guide to boning placement (linked above) to add more pieces of spiral steel boning.
The rest of the suit and accessories came together pretty quickly. The ears kept wanting to fall off my head, so in the future, I’ll definitely add some clips to help them stay in place better. I do think I want to tweak the bowtie piece as well. It’s a little small for my liking, but that’s a minor complaint.

Thoughts on this build:
For a quick speed build, this was a lot of fun! I’m already looking forward to my next suit and how I can make improvements on it.
I also really enjoyed doing in-house shooting with my friends! I have a bad habit of building lots of stuff, then forgetting to take pictures of it. I’d like to spend more time in the fall doing in-house shots with friends and trying my hand at self-photography. It’s not quite the same as working with experienced photographers, but it’s a nice way to get content up a little faster, especially when I do the bulk of my shoots at conventions and I’m going to fewer of those.
