Photographer Credits: Simply in Love Photography
Completed: December 2017
Accessories:
Hair and Makeup: Cocoa Beach Spa
Patterns Used:
- Simplicity 1606
- Sewaholic Cambie
- Cosmic Coterie bow pattern (inspired by SparklePipsi’s bows)
- Bow Clutch pattern
- Satin Reversible Stole
How I Made it:
A huge moment in any person’s life is their wedding. When my now husband proposed a little over a year ago, one of my toughest early decisions was whether or not to make my own wedding dress. I had a fairly specific vision in mind, but I also know myself and knew that I’d likely paralyze myself with indecision.
2017 was also an incredibly difficult year for me creatively, so when it came time to buckle down and really work on wedding planning, I decided to take the easier path and purchase a dress. I located a wedding dress maker on Etsy who had a design fairly similar to the dress I wanted for a rather reasonable price. I scoured her reviews and found nothing but good feedback, so I pulled the trigger, sent her my money and measurements, and let her do her thing. Or so I thought.
Around Thanksgiving 2017, I was going over my wedding checklist and realized I hadn’t heard anything from my dressmaker since I placed my order. I’ve had my fair share of experience with lackluster cosplay commissions (and fixing said situations for other people), so I reached out for a follow-up. My requested delivery date came and went with no response. I reached out again and realized that my dress hadn’t even been started. The dressmaker was apologetic and swore up and down I’d have my dress for the wedding, but I started preparing for the worst by gathering up materials and setting aside patterns. The dress I purchased arrived about two weeks before my wedding day and it was… bad. The fit was bad, there was no boning to be found, and the bodice didn’t appear to have any interfacing in it. Nearly all of my custom requests were forgotten as well. Thankfully the seller was quick to refund the money, but I found myself in a really tight spot: barely fifteen days until my wedding (even less until we had to fly out to Florida) and no wedding dress to show. So I cleared off my craft table and got to work.
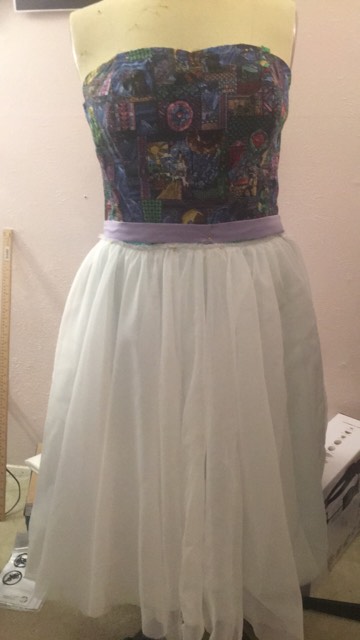
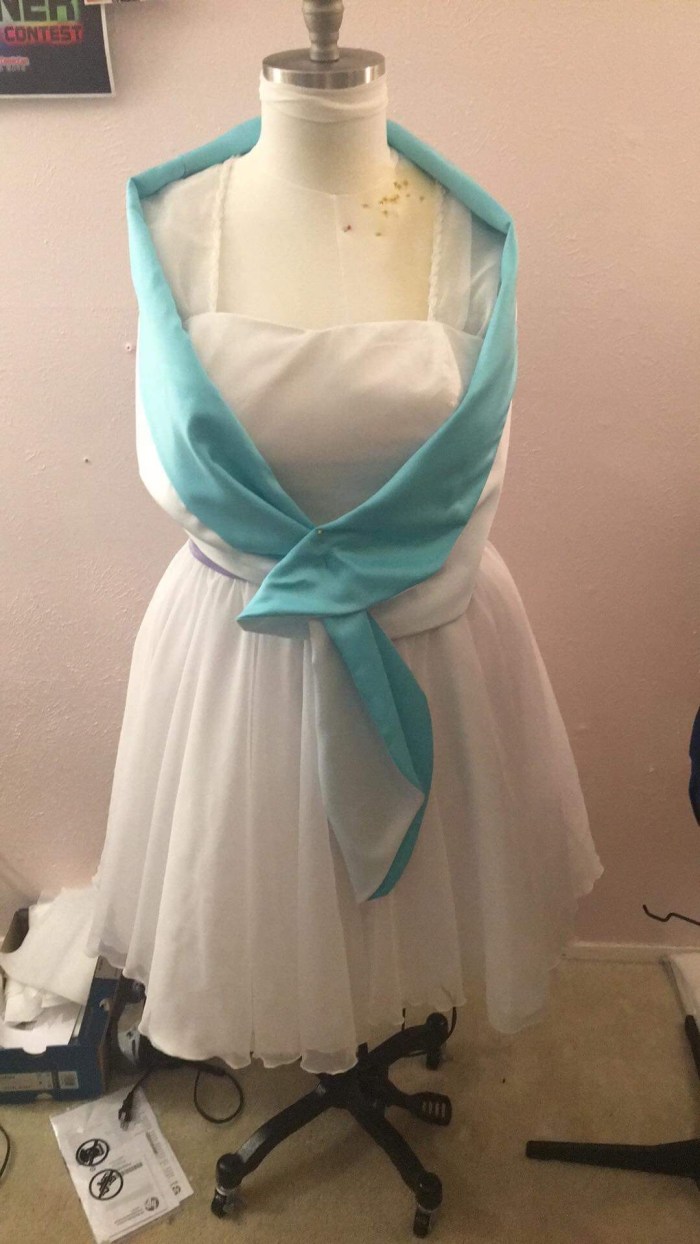
Let’s move forward to the actual construction of this dress. I didn’t have a lot of time to second guess myself with barely 2 weeks to construct the dress, so I defaulted to the design I had in mind for ages: a Cambie style bodice with a super full skirt and a chiffon overlay.
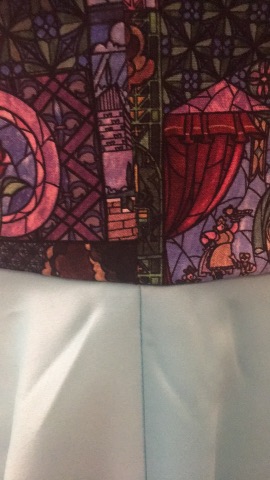
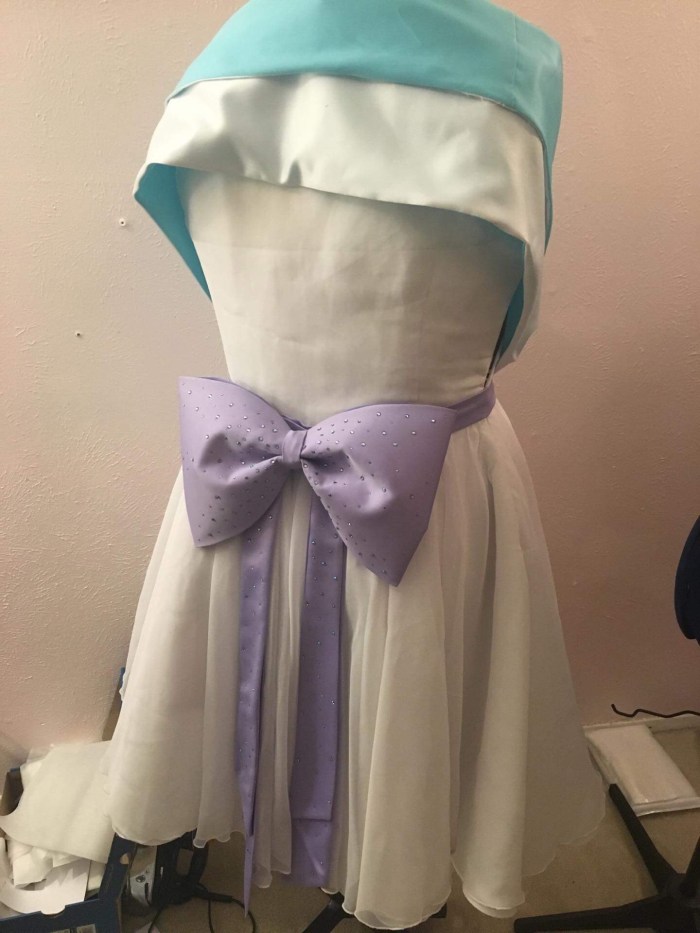
Again, since I didn’t have a lot of time to second guess myself, I went with fabric my friends offered me from their fabric stashes (I seriously have the best friends in Cosmic Coterie <3) or stuff I could find at my local Jo-Ann’s. The base fabric was white casa satin and the chiffon overlay was also white from the casa line. My interlining layer was unbleached cotton coutil I ordered from Richard the Thread for some of my corsets this year. The lining of the bodice was the stained glass fabric cotton from Jo-Ann’s, and my skirt lining was a soft lilac Casa satin.

After making a quick mock-up of the bodice using Simplicity 1606 as a guide, I dove straight into this build. The bodice came together fairly quickly. For the fashion layer, I underlined the interfaced satin pieces to the chiffon and serged all the edges prior to sewing.
The back portion of the bodice was a little trickier. The chiffon layer is free-floating, but since I still needed to finish the edges of the neckline and the sleeves, I did a double layer of chiffon with French seams all around. The back of the bodice connects to the lining at the top, and then the sides connect to the front with a standard straight seam.


This gave me a tricky challenge I didn’t initially account for: the back bodice of the Cambie wasn’t quite designed for what I had in mind, and the arm hole was about a half inch too high. to fix this situation, I carefully trimmed down the arm hole, finished it with a zig-zag stitch, and covered the edges with a cute rose and faux pearl trim I found at Jo-Ann’s. I opted to put the zipper in the side since I wanted a clean and clear view of my back for photos.
For the interlining layer, I added German plastic boning to all the seams as well as the center front and center back. To keep life somewhat simple for myself, I used some spare grosgrain ribbon I had on hand to create the boning channels.
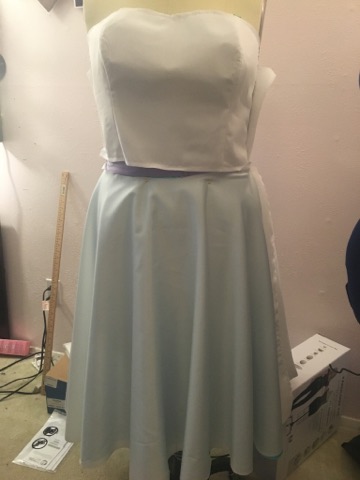
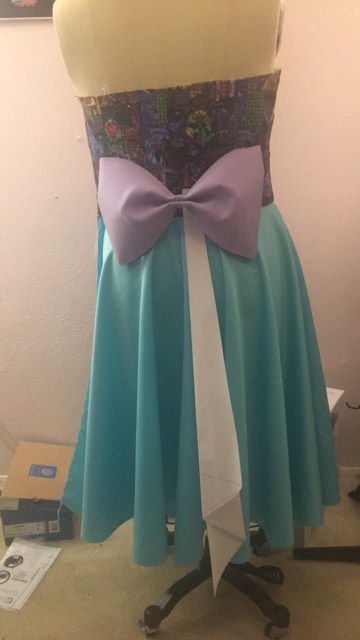
The skirts were… interesting. For the lining layer, I drafted a half circle skirt to prevent potential wardrobe malfunctions on the beach. This layer was originally an aqua blue (one of my wedding colors), but the blue was too visible under the white. I instead went with a soft lilac (my other wedding color), which was perfect.
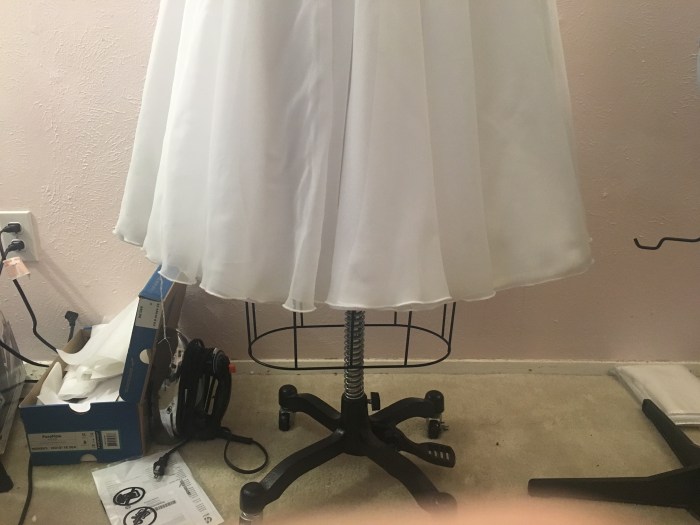
The white satin layer was a full circle skirt, and the chiffon layer was a gathered double circle skirt. I finished the lining and interlining layers with half inch horsehair braid and the chiffon layer with a rolled hem on my serger.
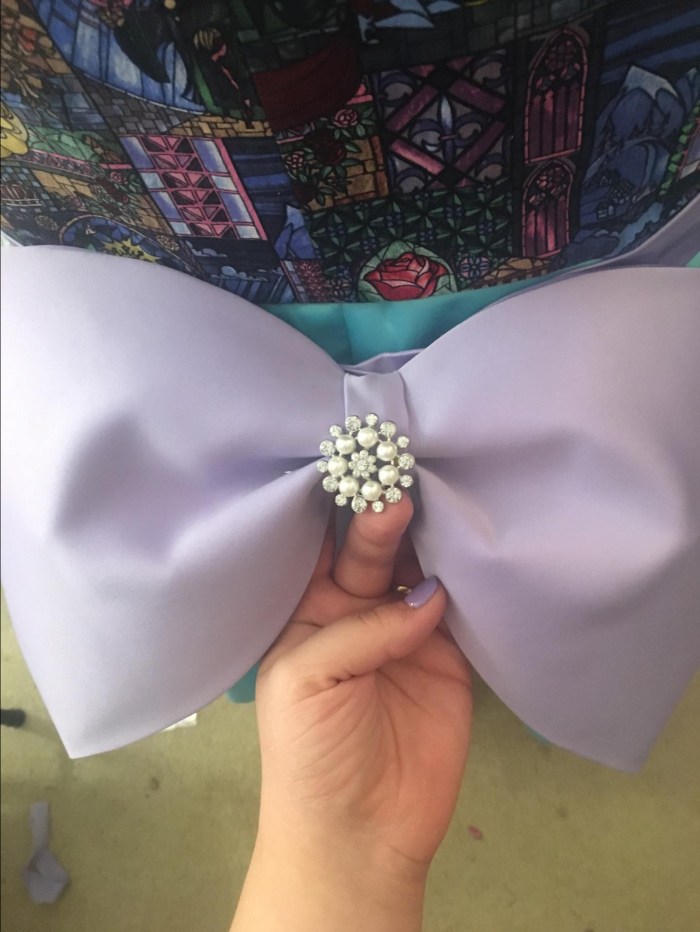
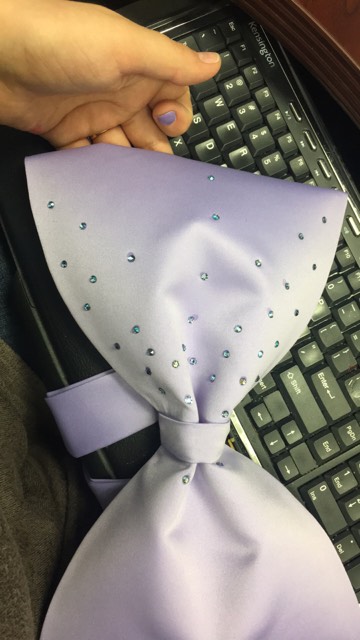
One of the final touches on my dress was a belt and butt bow. I wanted to incorporate the lovely lilac fabric Koholint gave me, and I also decided to add a butt bow at the last minute. I adore the slim jabot tails NyuNyu cosplay came up with for her Super Mercury, so I drafted up a set of my own for my dress. And because it was for my wedding, I decided to hotfix 300+ Swarovski crystals to it. Because bling.
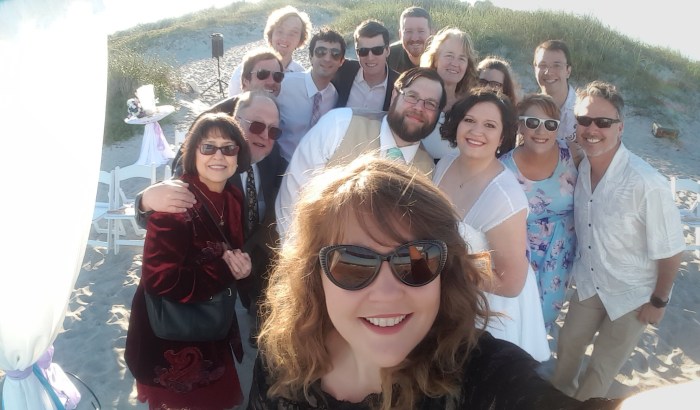
The final pieces I made to accompany my dress were a matching bow clutch (the lining is scraps from the Beauty and the Beast stained glass fabric) and a lovely satin stole made from dress remnants. While the weather during the wedding was incredible at a perfect 70 degrees, a cold front came in as soon as the sun set. I was quite grateful to have something to keep me warm!

Thoughts on this dress:
The stress of knocking out this dress two weeks before the wedding was hell. There’s absolutely no question about that. I’ll admit to several tearful breakdowns, a panic attack, and stress-induced vomiting during that time period. It wasn’t pretty.
This experience was also a great reminder for me on handling commissions. The way the whole situation was handled with my original dress was horrid, and it reaffirmed my desire to provide the best customer experience possible for my clients.
But at the end of the day, I have a sentimental story to share about this dress, and I’m far happier with it than I ever would have been about the dress I originally purchased.
Have you made your own wedding dress? What was your experience like?

Your dress looks fantastic but I can’t imagine the stress of having to pull it together in just 2 weeks! The person you found on Etsy should feel like crap.
Honestly, I just kind of laughed. We very nearly had to cancel our whole wedding in Florida due to damage from Irma, so when this happened, I was like, “At least I’m well equipped to handle this situation!”
Congrats on the dress and the wedding! I love the bow and the matching bow clutch. I’m also in awe of how you managed to make you dress is such a short amount of time.
I made my wedding dress and it took 90+ hours stretched across 6 months. I still consider myself a sewing novice (maybe apprentice level? Lol) so I’m just glad I got it done in time and how I wanted it. Definitely not perfect (and don’t have a serger) but it photographed really well.
Do you have any more pics from the wedding of the dress?
Thank you! I definitely had to keep it simple due to the time constraints, but ultimately I’m very happy with it ❤
WOW 90+ hours is super impressive! Your pictures are lovely, and the detachable skirt is such a cool idea! I love the trend of having more relaxed versions of the dress for the reception.
I do have more, but I'm waiting for just a few more edits before posting. I'll put them in the slideshow at the top of the post when I get them! 🙂
It’s beautiful! You’re beautiful! Congratulations, and I love the detail at the edges of the sleeves.
Thank you! 🙂