Happy Friday, folks! This week’s post is a little out of the ordinary for me. Lulu has been my main build for a little over a month now, and though I’m not quite finished with her yet, I wanted to go ahead and start detailing my construction process. I’m doing this for a couple of reasons: 1) To help me remember all the details of this build for craftsmanship judging; 2) Because I am way too wordy and this will be a novella otherwise; and, 3) Because it frustrates me to no end that Lulu was THE character to cosplay when FFX came out over a decade ago and yet there are only a handful of cosplayers on the web with detailed descriptions of their builds. Now that the preamble is out of the way, I’ll start by going over this costume in chronological order of construction.
Jewelry: Though I’ve been researching this costume for about three years and purchasing pieces since last November, the first real parts I worked on were Lulu’s necklaces and earrings. This was mostly a matter of scheduling. I stayed in Portland for a week in March and wanted something to work on in my down time that was easy to transport. Lulu’s jewelry fit the bill perfectly!
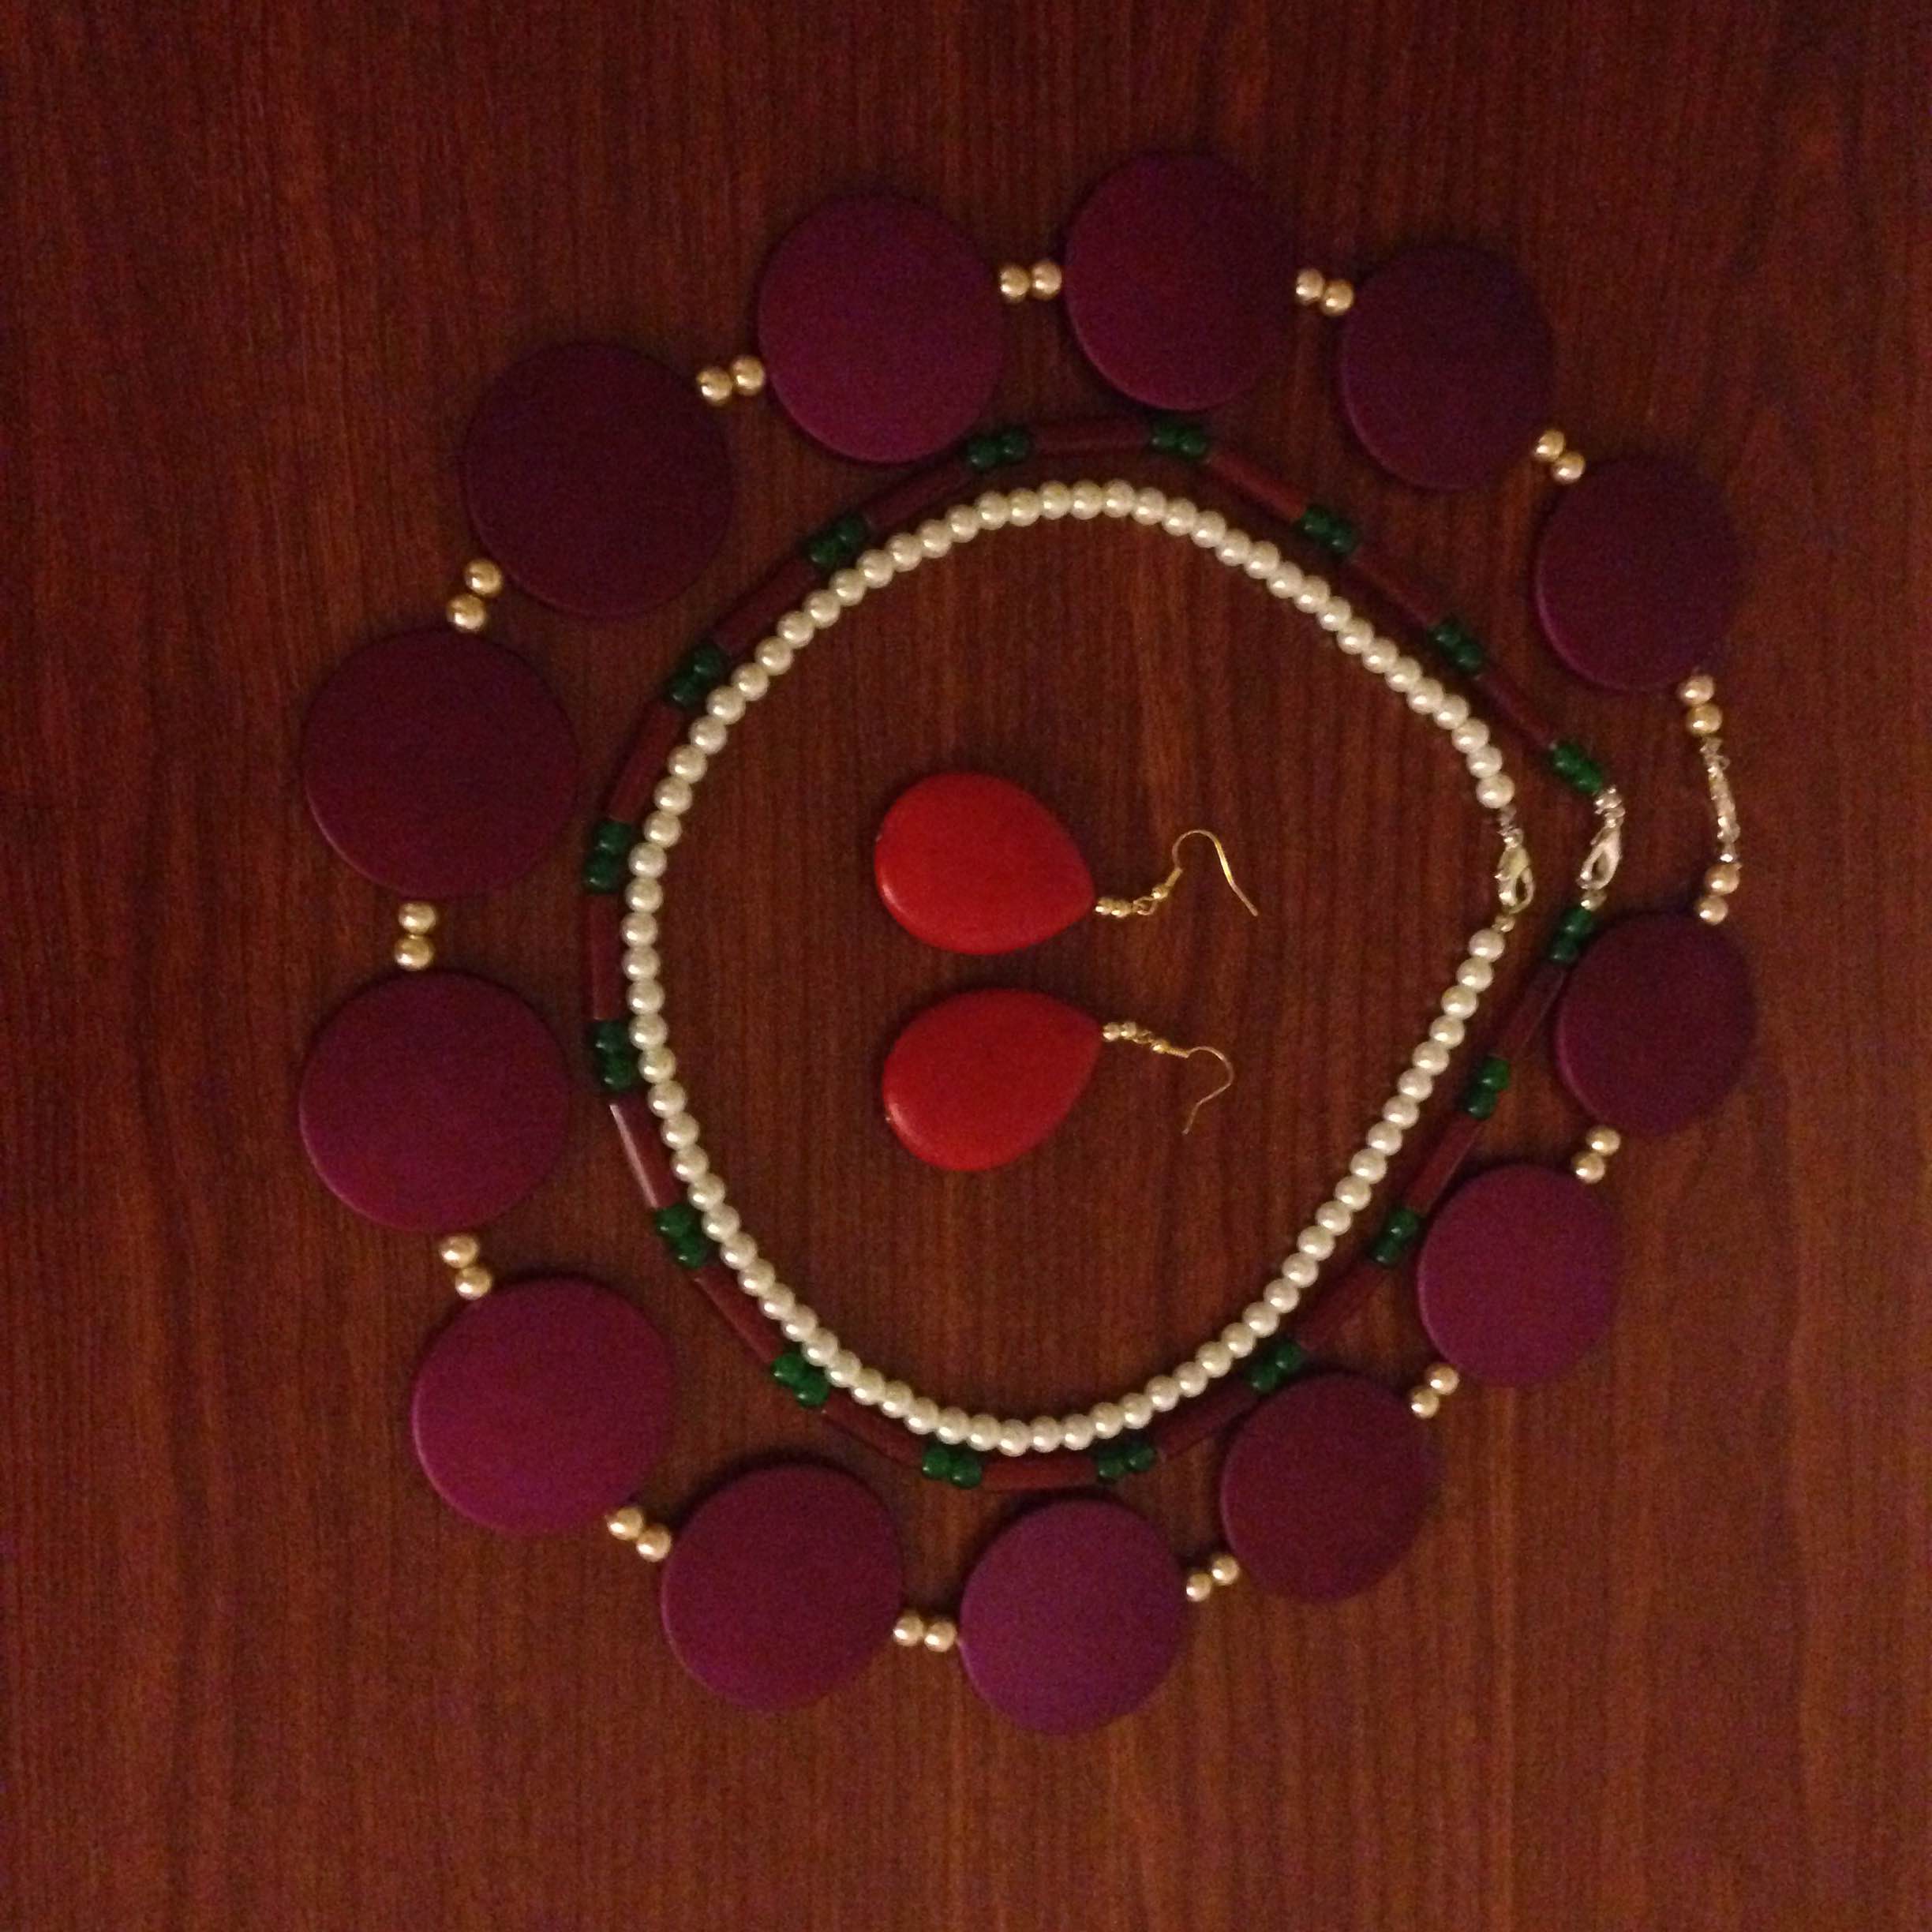
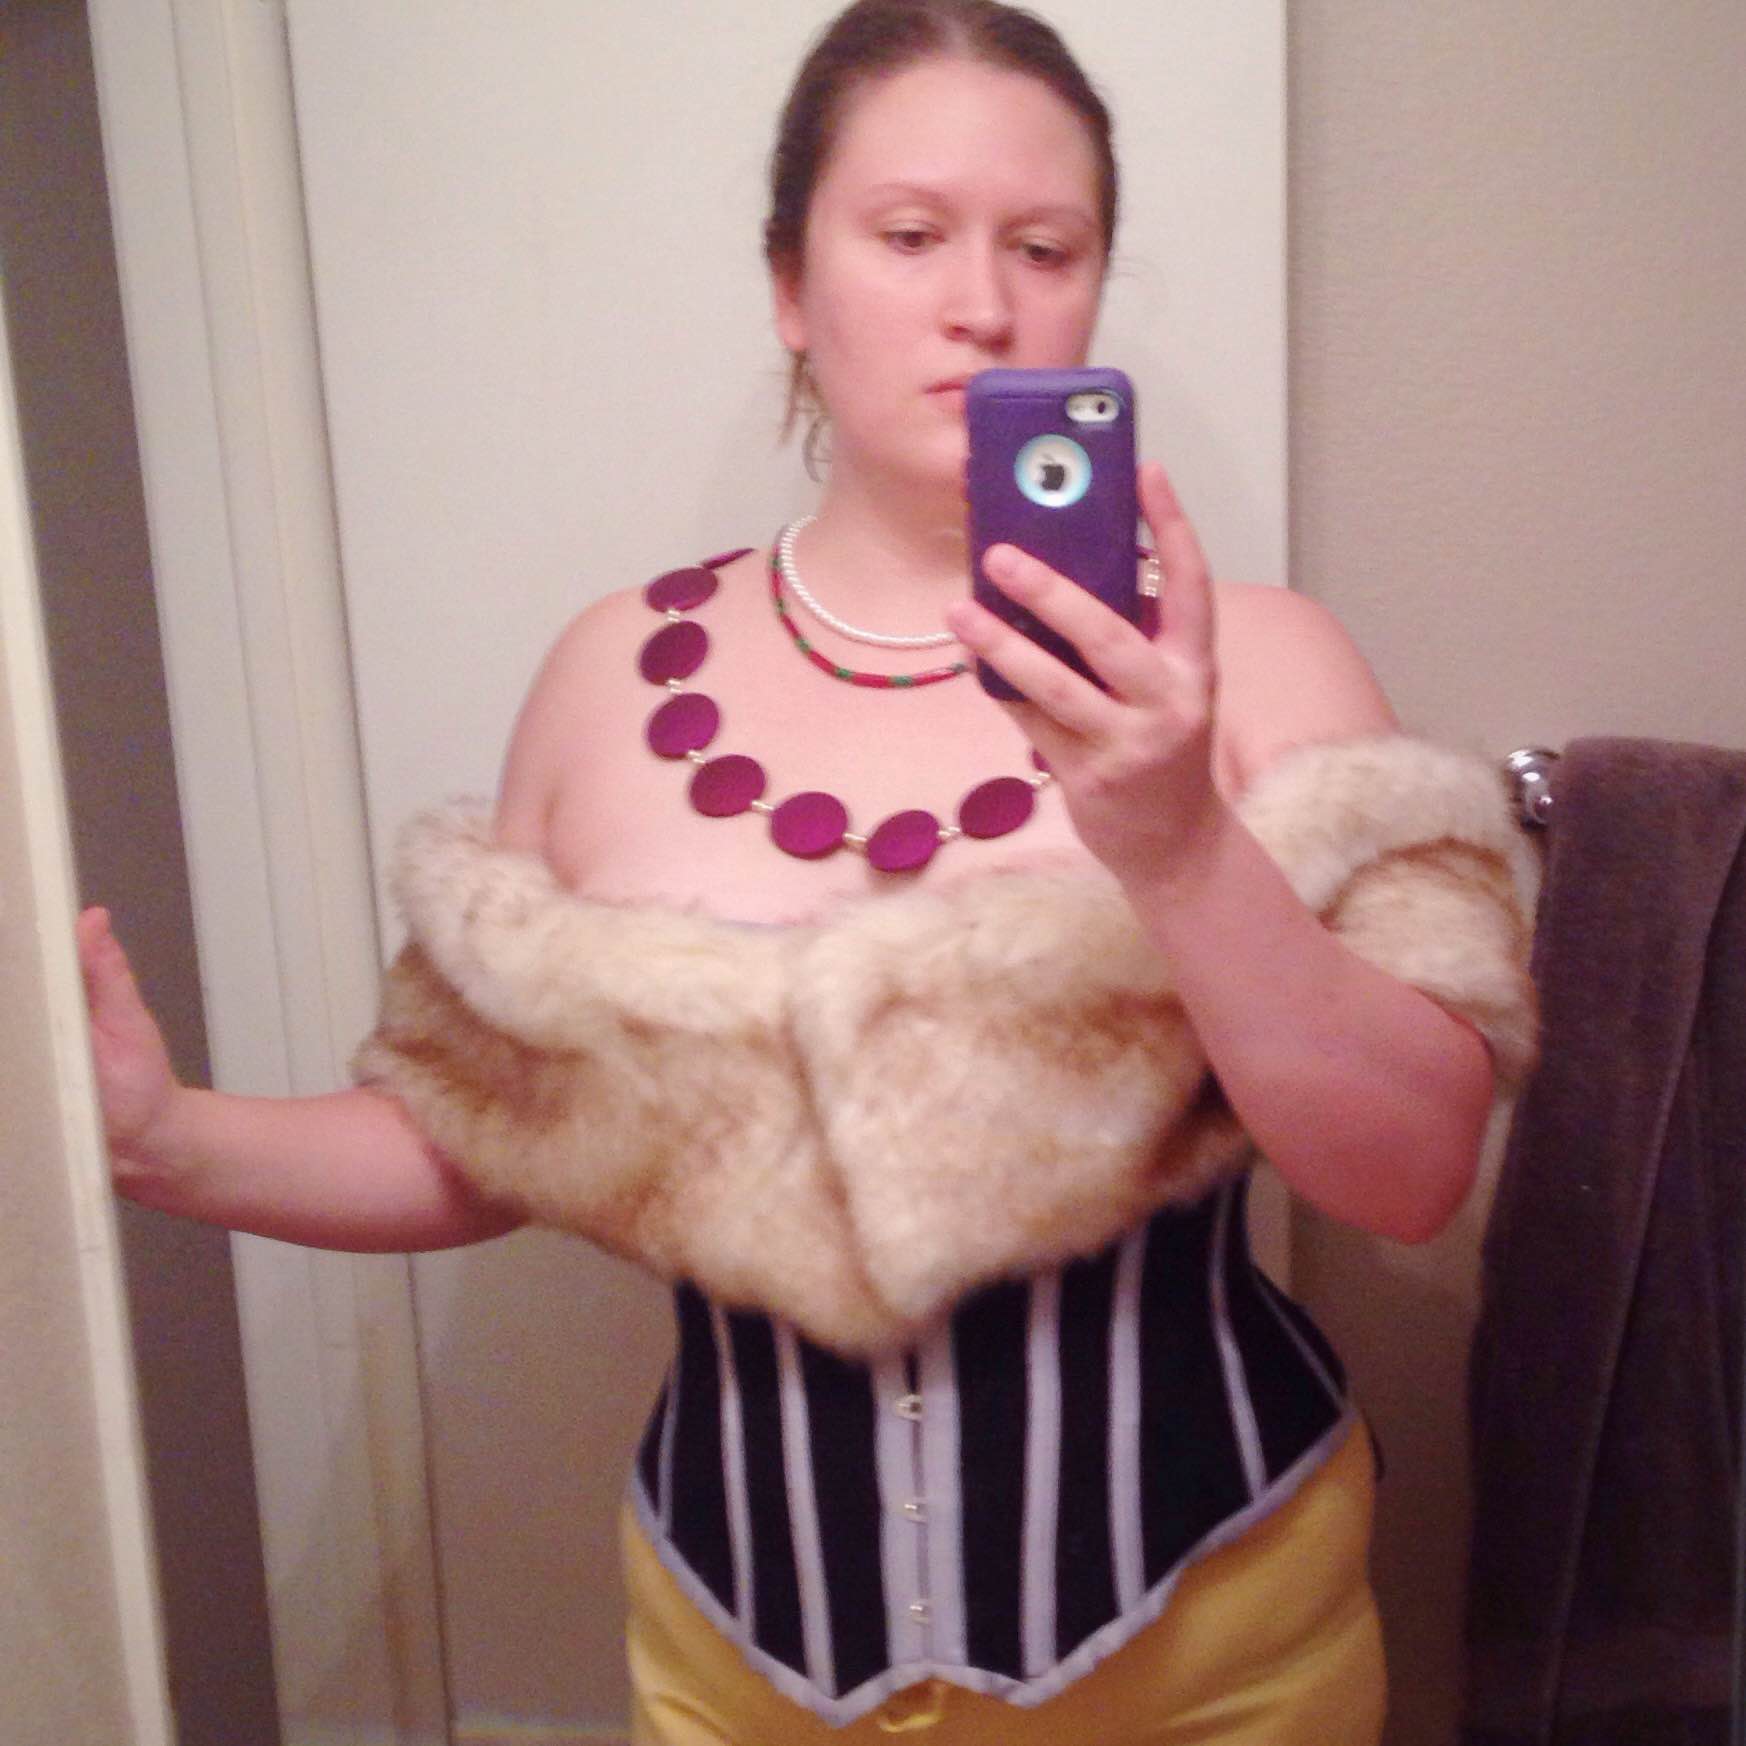
For the largest necklace, I snagged some rubber purple flat circles off of eBay. They’re separated by ivory faux pearls from Michael’s. The middle necklace is made from red jade cylinder beads and dark green jade beads I found on Etsy. The shortest necklace is made from faux pearls from Michael’s. All the necklaces close with lobster clasps.
The earrings pictured above wound up being waaaaaay too heavy, so after spending far too much money on various beads on Etsy, I finally settled on pink agate oval beads with small faux gold pearls. I’ll share updated images next week.
Helpful tutorials:
Time estimation: 10 hours

“Fur” Stole: Once I got back from Portland, I decided to tackle Lulu’s fur stole. I picked up some gorgeous faux fur from Golden D’Or early this year along with some royal purple polyester haubute. The stole is pretty simple in terms of patterning. It’s a very long rectangle, just long enough to go around my shoulders with a bit of overlap in the front, and the lining piece is about a half inch shorter on each side to account for turn of cloth. Once I had my pieces cut, I sewed them right sides together, flipped them, and hand stitched the opening gap.
Fur, whether real or fake, is a tricky beast to work with. When cutting, it’s advisable to cut your piece from the wrong side of the fabric with a box cutter, taking care not to give your fur an inadvertent hair cut. This is also something to be mindful of when sewing. You’ll want to brush the fur away from your stitching and use a comb to release any fur that gets caught when you turn everything inside out. Have a vacuum and lint brush on hand to clean up when you finish! The stole attaches to my corset via hand-sewn snaps.
Helpful tutorials:
Time estimation: 6 hours (with patterning and a do-over piece)

Crinoline: Ah, the big piece that made me go, “Oh shit, I guess I’m really doing this.” This was my big hold-up with Lulu construction. Lulu’s skirt of belts was insanely daunting to me as a nooblet. I’ve seen a lot of people take the “apron” approach, where they build a faux apron out of the belts and hold it up with a harness around the waist. I took this a step further by building a crinoline based on an 1860s design. My rationale was that if these crinolines were built to hold several pounds worth of skirts, hopefully it’d also do the same with belts (I still have to test this theory. I’ll report back after this weekend :P). Another reason I went with the crinoline approach was because I prefer artwork of Lulu with a full skirt in the back, and a crinoline is a great way to get that effect.
I won’t go into too much detail here, since I already wrote about this topic in my TV103 pattern review. My big recommendation if you take on a project like this is to prepare for a LOT of hand sewing, especially if you deviate from the pattern markings AT ALL. Had I not altered this pattern as drastically as I did, I probably could have just sewn the bulk of the crinoline on my machine and then inserted the hoops. However, my alterations required me to do a lot of eyeballing and readjustments for a well-balanced crinoline. If you’ve got a lot of weight on yours, you might also consider using a heavy-duty belt buckle.
Helpful tutorials:
Time estimation: 20 hours (mostly hand-stitching)
Corset: (One of) the main event(s)! This is what all my corset practice this year has been leading to. I knew I wanted this corset to be a major focus piece of the costume, so I went all out. I again turned to TV110 for construction. The only major pattern alteration I made was lengthening the front pieces to accommodate the points of the corset.
I made this corset using the welt seam approach. My strength layers are a cotton/viscose blend coutil with a gorgeous floral motif and duck cloth. I also made a floating liner layer out of Kona cotton. I wanted this corset to be super sturdy and able to withstand tightlacing, so I double-boned each seam with 1/4″ inch spiral steel boning.
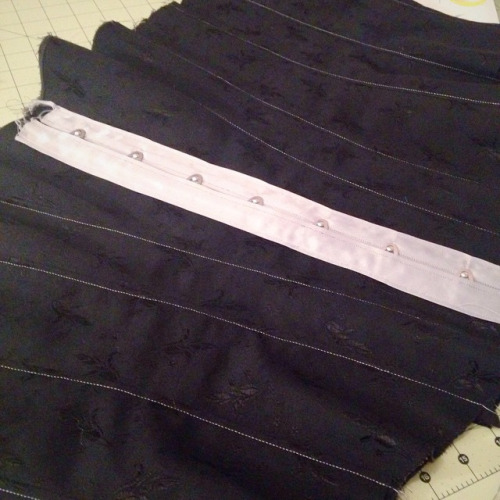
One of my bigger challenges with this corset was adding the binding around the busk. Inserting a busk requires precision, and I had to add the satin binding to my coutil layer before I could construct the busk pocket. I drew in all my seam allowances with tailor’s chalk and went VERY slowly with the whole process. Once I had my hook side inserted, I stitched it down, and then brought my binding over and stitched that down as well. Unfortunately, my initial measurement of 1″ faux boning channels was far too wide for my taste, so I had to seam rip it up and reduce it to 5/8″.
Creating the rest of the faux grey boning channels was slightly easier. I created the channels by cutting my satin blanket binding in half, then sewing the strips WRONG sides together. I then pressed the tubes using quilter’s bars and cut my excess seam allowance away to reduce bulk. Once my tubes were created, I placed them on my corset using Wundertape and edgestitched them down. This also required a LOT of precision, since I was stitching directly into my boning channels.
After my channels were sewn and boning inserted, I used my blanket binding to edge the corset. The trickiest part was getting those corners to look mitered. I kind of want to seam rip these and do them again, buuuuuut that may have to wait until after the con.
For the back of the corset, I pretty much ignored the game art entirely for a couple of reasons, the primary being that Lulu’s corset is designed with zero lacing gap. In terms of corsets, this means that the corset is too big. You should have about a 2″ gap for a properly fitted corset. Since I did create this corset with a gap in mind, I also made a floating modesty panel made from leftover coutil and black bias tape. I laced it with parachute cord.
Helpful tutorials:
- Adding faux exterior boning channels to a corset
- Planning boning channels
- How to insert a busk into a corset
Time estimation: 20 hours
That about does it for this week’s post. Next week I’ll share more details!
What’s the biggest cosplay you’ve made?

Biggest cosplays I’ve made were Madam Vastra from Doctor Who, and Emilie Autumn’s Rat Queen. Vastra involved using prosthetics, and Rat Queen involved making a corset with a busk from scratch (which I’d never done before). I’m still really pleased with both of these costumes.
Your Lulu cotume looks fantastic. The crinoline was a good idea.