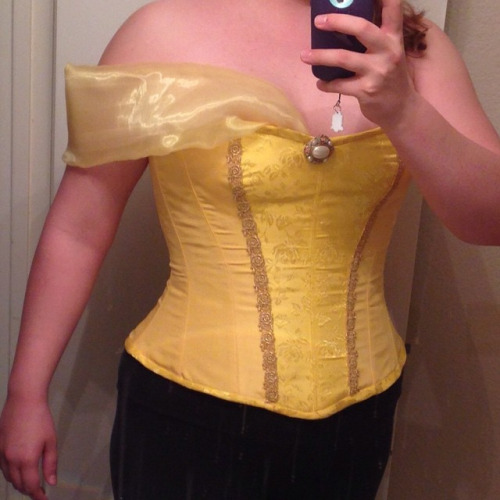
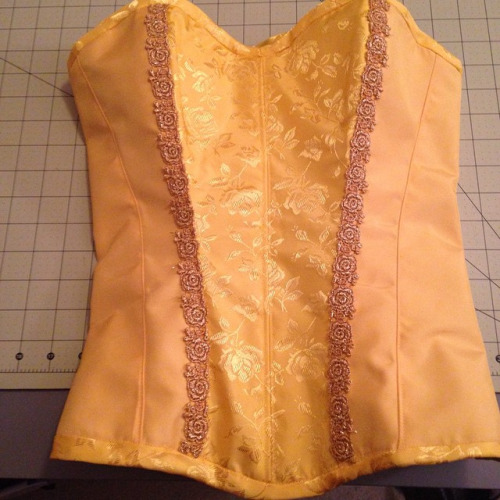
Happy Friday! I’m gearing up for All-Con this weekend, so today I thought I’d share my thoughts on TV110, which I used to make Belle’s top/corset.
The Basics:
Pattern: Truly Victorian 110
Total Hours: Around 20
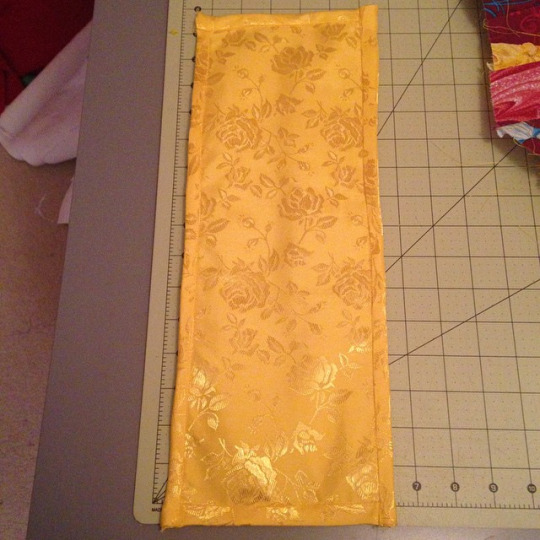
Fabric: A little less than 1 yd. of poly satin (matte side), 1/4 yd of rose print brocade (center piece), 1 yd of duck cloth, 1 yd of Disney printed cotton.
Alterations: Removed the busk and tweaked the fit over the bust.
Notions: Thread, eyelets (and all necessary tools), ribbon (for waist stay and lacing), self-made bias tape, German plastic and flat steel boning, boning casing, lace trim
Did it look like the pattern illustration?: Yup!
Were the instructions easy to follow?: To be honest, I barely looked at them, other than to evaluate fitting and troubleshoot a few things.
Make it again?: Definitely.

Other thoughts: My initial plan with this project was to go with Simplicity 5006 since I had it in my stash. However, after some digging in the corset community, I ultimately landed on TV110. It’s pretty well regarded as a solid beginner pattern, it has pieces for different cup sizes, and it’s actually meant to be made and worn as a corset. Big 4 patterns add lots of ease to their patterns, which doesn’t work for corsets if you intend to do any waist reduction (corsets are one of those garments that should have negative ease when finished to accommodate lacing and waist reduction). Everything I read on Simplicity’s corset patterns advised cutting at least 2 sizes smaller than your actual measurements. I didn’t want to deal with that kind of headache with my first corset, so TV110 was the winner (plus it’s a good shape for Lulu, so there ya go).
I opted to go with somewhat inexpensive hardware on this project since it was my first go. I opted to use duck cloth for my strength layer rather than coutil. The idea of messing up fabric that runs at $30-40/yd was terrifying. I also used German plastic boning for the majority of the corset. This boning is stronger than standard Rigeline/fabric coated stuff you can get at fabric stores (supposedly it’s as strong as spiral steel boning), but still cheaper than steel boning. Plus, it doesn’t require fancy tools to cut.
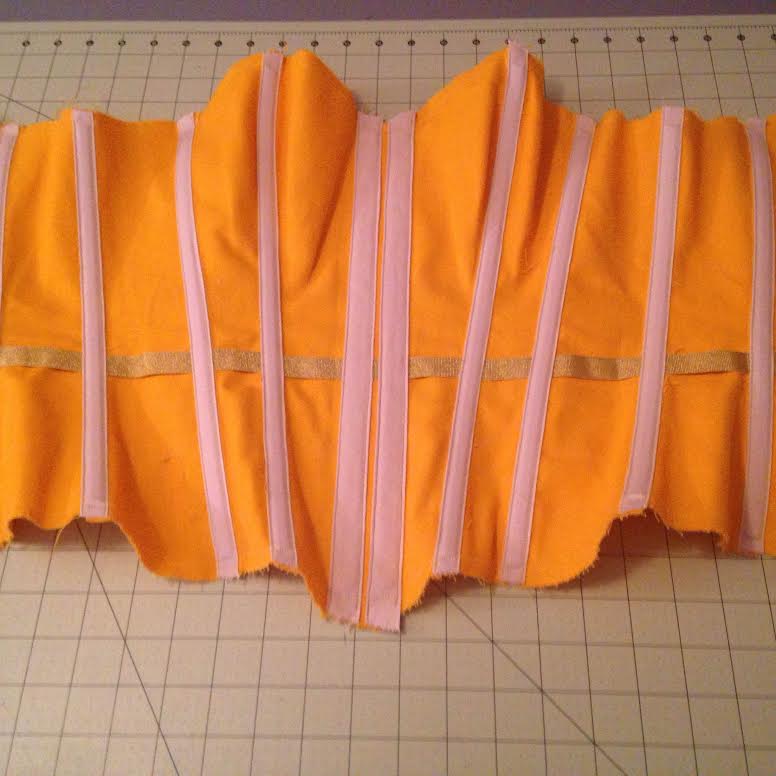
It’s really important in the early stages of planning a corset to decide *how* you are going to construct it. I knew going in that I wanted the shell to have an appearance more like a bodice than a corset, which mean that I didn’t want my boning channels to show through. For me, that meant a 3 layer corset with a floating strength layer. I used Sidney Eileen‘s fantastic post on the topic as a guide.
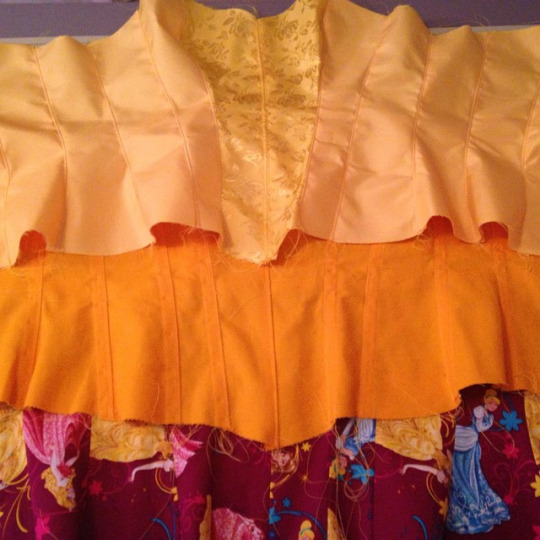
There were only a few areas where I scratched my head and wondered what the heck to do, and they mostly revolved around the eyelets/grommets in the back. First off, if you go with the floating layer approach, you have to trim off the seam allowance of the strength layer so that it can slide in the middle. Kind of a “no duh” moment, but it’s not explicitly written.
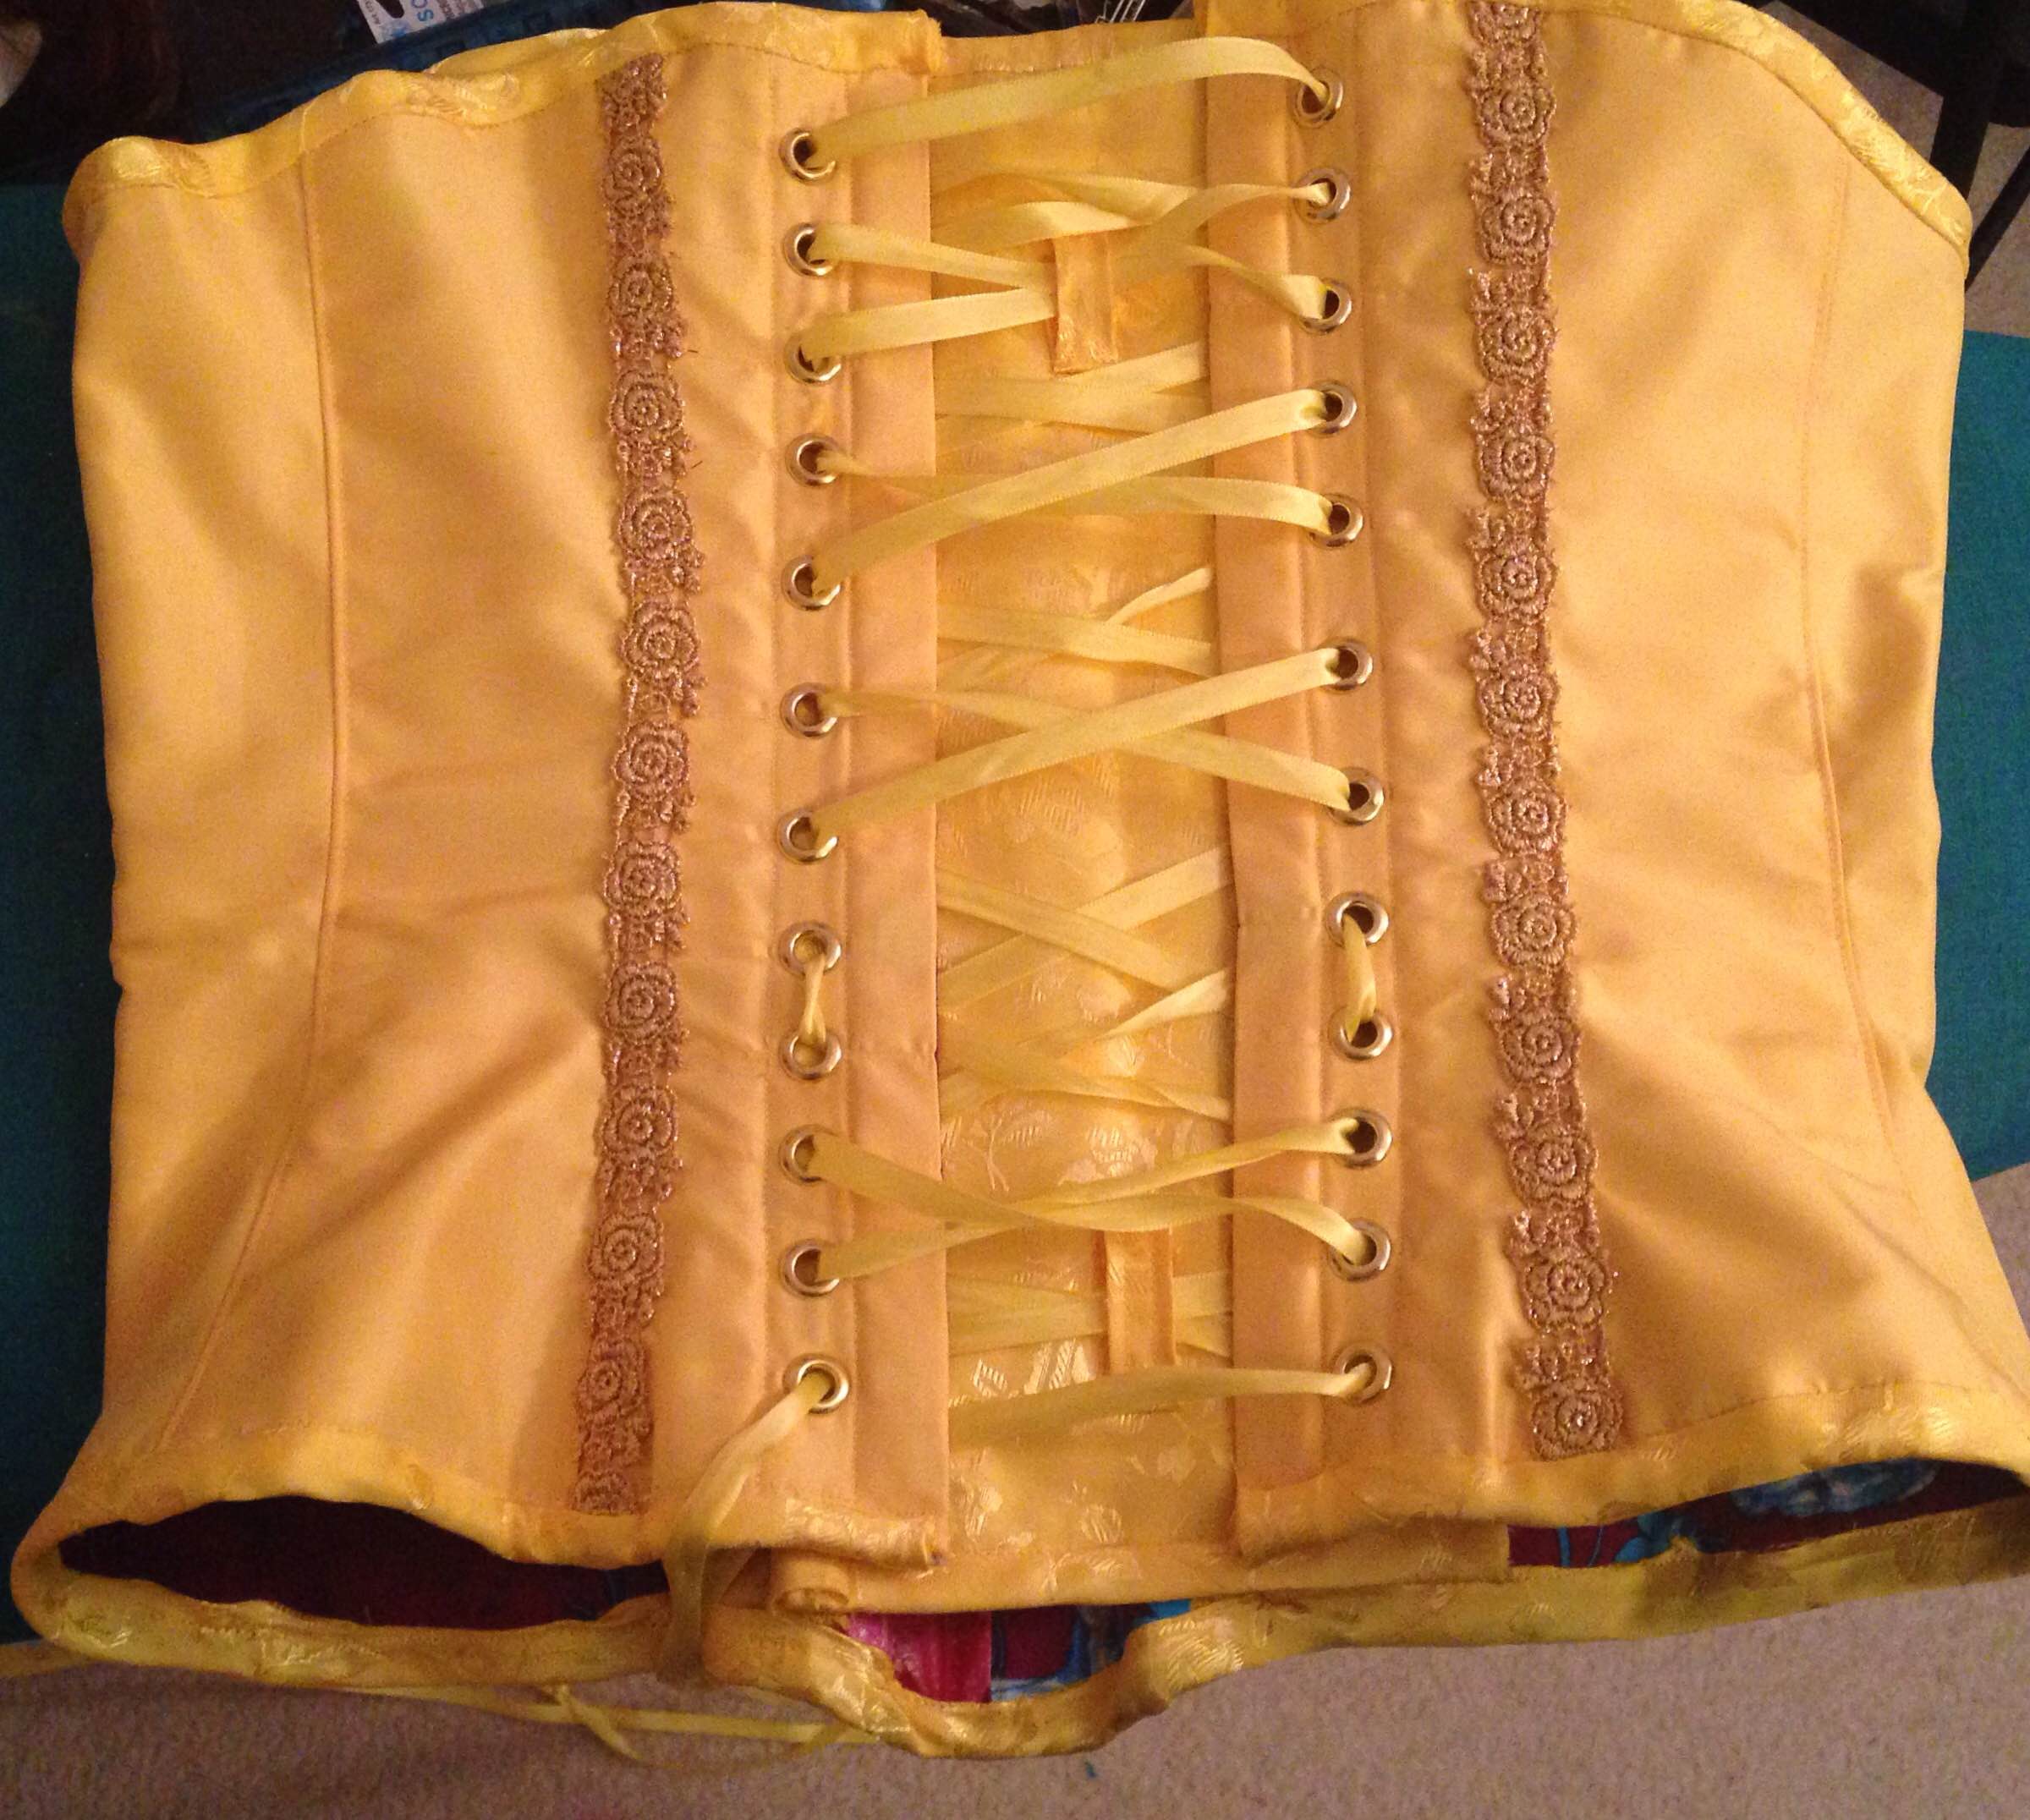
Also, I think I mucked up the boning placement in the back. Bones should be placed on both sides of your grommets in order to reduce pressure on the grommets. Either my bones (1/2″ steel) were too wide or I fudged the placement a bit. The 1/2″ bone I originally placed on the outside of the grommet channel pretty much overlapped the plastic bone I used on the seam, so I swapped it out for another plastic bone. I didn’t find much help in the instructions or the tutorials I was referring to, so I’ll need to investigate this more when I work on Lulu.
All in all, this is a very well-drafted pattern, and I’d highly recommend it for any novice corset-makers. I’m really looking forward to improving my approach to it when I get started on Lulu!
 Have you made this pattern before? What did you think of it?

Oh, this is amazing! I don’t have any sewing skills at all so I think it’s funny that you call this a novice pattern. I can’t even imagine having the skill set to make something like this. You go girl! (Also, Belle is the best Disney heroine ever!)
Haha, thanks! Corsets definitely look intimidating, but the saying “If you can sew a straight line, you can sew a corset” is pretty true! And I totally agree about Belle 🙂
This looks fantastic for your first time working a corset! I can’t wait to see the finished costume!
Thanks! It’s going to be interesting trying to walk around in that costume. The hoop skirt is huge!
This came out lovely! Thanks for the details on the floating mechanic, I think I might give that a go someday. Also never done welted seams or a waist tape, and like your approach to the modesty panel. I’ve not used duck cloth for the center layer before, but I have also never used coutil. There is a product called down proof ticking on Amazon for about $8 a yard and it serves as an excellent coutil substitute for the strengh layer, so keep that in mind for your next one!
Oh, good to know! I’ll probably spring for coutil for my Lulu corset since that’s going to be a competition costume, but that would be a fantastic solution for my other corsets!
Oh my word, that’s gorgeous!!!
Thanks! 🙂
Wow, that turned out beautifully!!! Much better than my first attempt hehe.
Haha, thanks! There’s definitely a lot I’d do differently now that I (kind of) know what I’m doing.
Absolutely beautiful corset!
Thank you! 🙂
I have just bought and traced out this pattern as i was going to use it for a class and wanted to have a sample to show people. It very rightly gets great reviews. Your corset is lovely. Great sewing and such a fab interpretation of Belle’s dress. Looking forward to seeing the full thing as this is ace. xx
Thanks! I really love this pattern. It’s such a beautiful shape. And not too bad to put together!
where did you get the pattern at?
Truly Victorian’s website: http://www.trulyvictorian.com/
This is amazing, and exactly what I want to do with my 2015 Cinderella dress! About how much German boning did you use? Thank you so much!
To be honest, I can’t remember exactly how much boning I used since it’s been a while. I want to say somewhere around 5 yards?