Completed: March 2018
Hours Spent: App. 30
Purchased Pieces:
- Base ballet flats
- Arda Wigs Jasmine in Spanish brown
Patterns Used:
Super Helpful Tutorials:
How I Made it:
I’ve honestly loved this design from the moment I saw it, so I was super happy when someone commissioned me for it! To start, I looked for a solid halter pattern. After wracking my brain for way too long, I realized that one of my favorite swimsuit patterns, The Bombshell swimsuit by Closet Case Patterns, was a perfect base. I made a mock-up of the lining for my client out of some black knit fabric I had on hand and used the mock-up to tweak the fit on her.
Once I identified where the lining needed to be modified, I set out to tweak the fashion layer of the dress. I used Yaya Han’s black stretch vinyl for the fashion layer because honestly I just love it. This pattern is fairly straightforward, even with modifying for a dress instead of the regular swimsuit, but the sew-along for this pattern really helped me out when I got stuck on a few smaller issues, like adding cups to the halter top (I used a different top version when I made this pattern for myself).
To make this costume more user-friendly, I added hook and eye tape to the crotch, much like I do with my senshi fukus. My client also has an extreme hourglass figure, so I added an invisible zipper at the center back to make it easier to get in and out of.


All of the edges are covered in strips of Yaya Han’s gold stretch vinyl, including the lining of the leotard, since that’s exposed during action shots. The most difficult part of this approach with this design was the scalloped portion at the bottom of the dress. The vinyl didn’t want to cooperate with me when I treated it as a bias tape around the edges, so I created a facing instead. It was an okay solution, but in hindsight, I think I might have preferred just doing a straight edge and sticking with the bias approach, even if it wasn’t quite as accurate.


I decided to get fancy with the appliques and use my newly purchased Cricut to help out! First, I sketched out the designs by hand. Once they were good enough, I scanned them into Photoshop for a little clean-up work and then saved them as JPGs. I then uploaded the file into Cricut Design Space and cut them out on vinyl backed with Heat’n’Bond. I had some trouble getting these to cut smoothly, and I realized in hindsight that I should have cleaned up my edges a bit with both the Refine Radius tool in Photoshop and the smoothing tool on Cricut Design Space. I ultimately cleaned these up by hand with my fabric shears. Live and learn!
Once the appliques were ready to go, I edge-stitched them to the dress with a chain stitch and my trusty Sulky Iron-On Tear-Away stabilizer.


The belt was fairy simple overall. It’s a straight rectangle with curved edges at the front. My client requested a corset-style backing, so I added some grommets and red parachute cord for lacing to tie in with the Chinese knot at the center front. The front of the belt also has grommets that connect to the gold circle in the center with excess cording from the Chinese knot. I strengthened this belt by underlining it with two layers of coutil and used small cuts of German plastic boning to keep it from collapsing on itself.
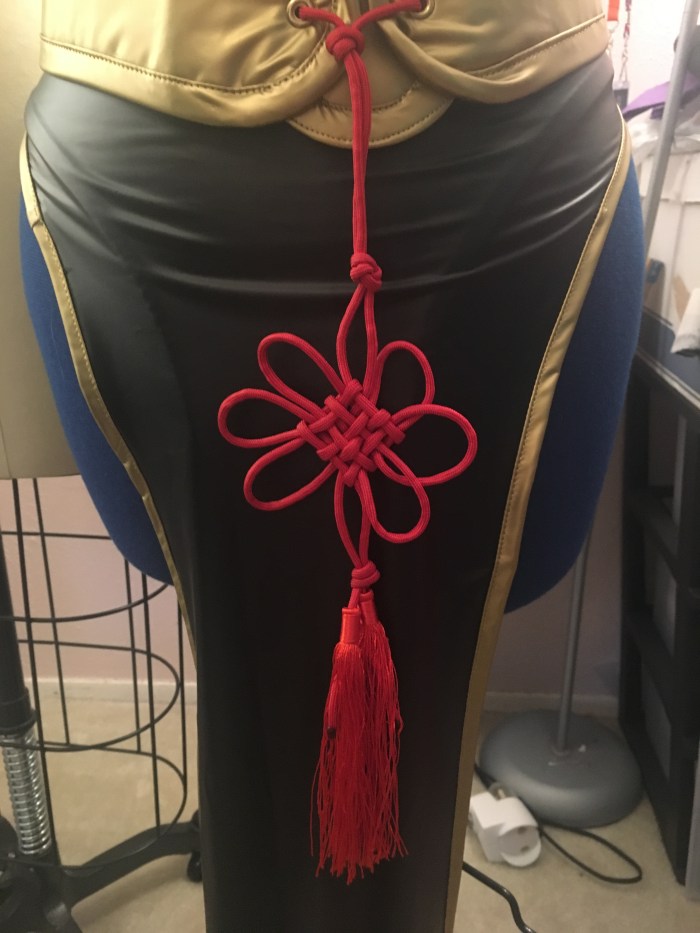
Speaking of the knot, that was an interesting challenge. Most of the knots I located online weren’t big enough or quite the right shape for this particular piece. So I looked up how to make one and fiddled with the shape until it was an appropriate size for a human being. Check out the link above if you’d like to make one for yourself!
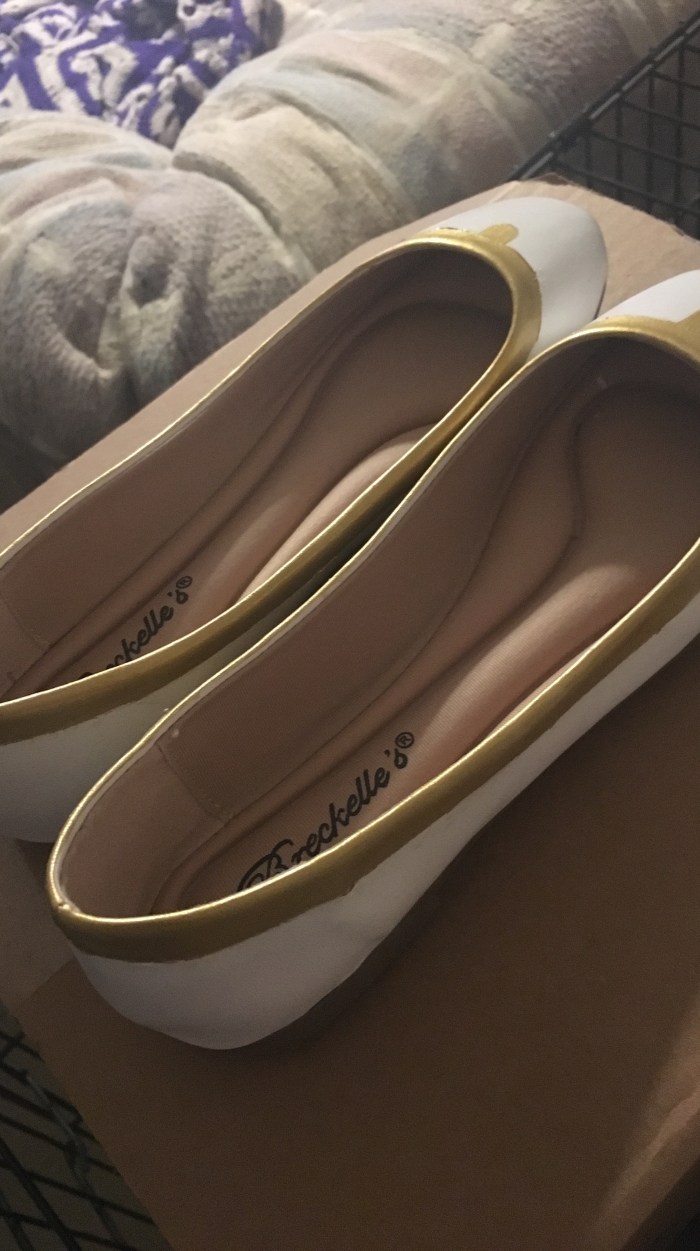
The shoes were fairly straightforward. I picked up a base pair of white ballet flats in my client’s size, then I taped off the gold design and hit it with Angelus paints. After a few layers of paint, I removed the tape, cleaned up my lines with white Angelus, and then covered my paint job with matte finisher.
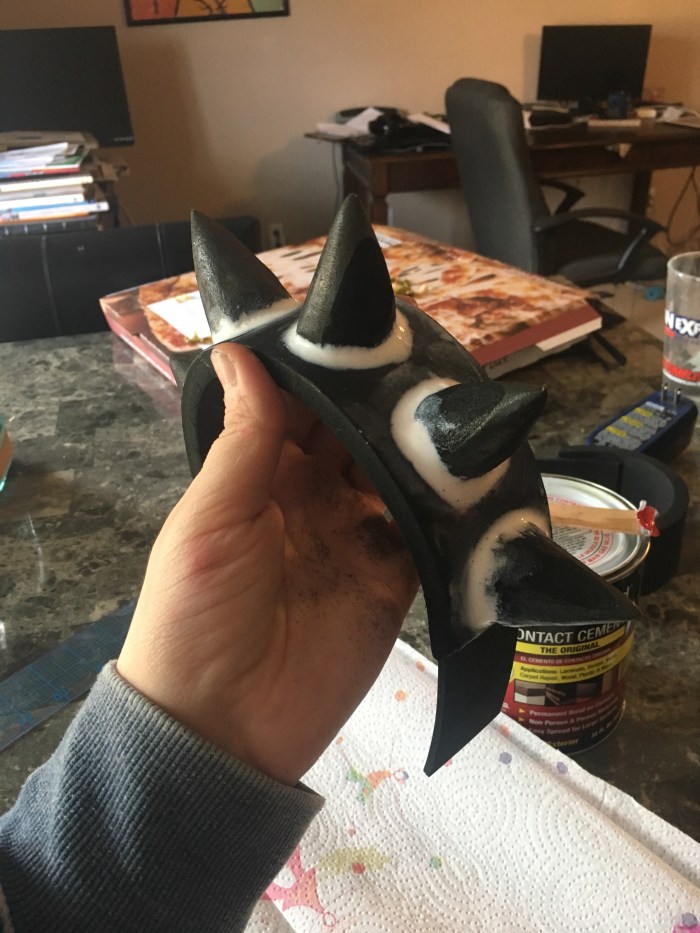
The bracelets were a little out of the box for me. My client wanted more chunky, cartoon-esque bracelets, which meant that something like faux leather and screw in spikes were out of the question. Instead, I turned to EVA foam. I used a rectangle made of 10mm foam and heat formed it to curve. Then came the tedious part: forming spikes. I glued a few sheets of foam together with contact cement and carved out rectangle spikes first, as indicated in Evil Ted’s tutorial (linked above).
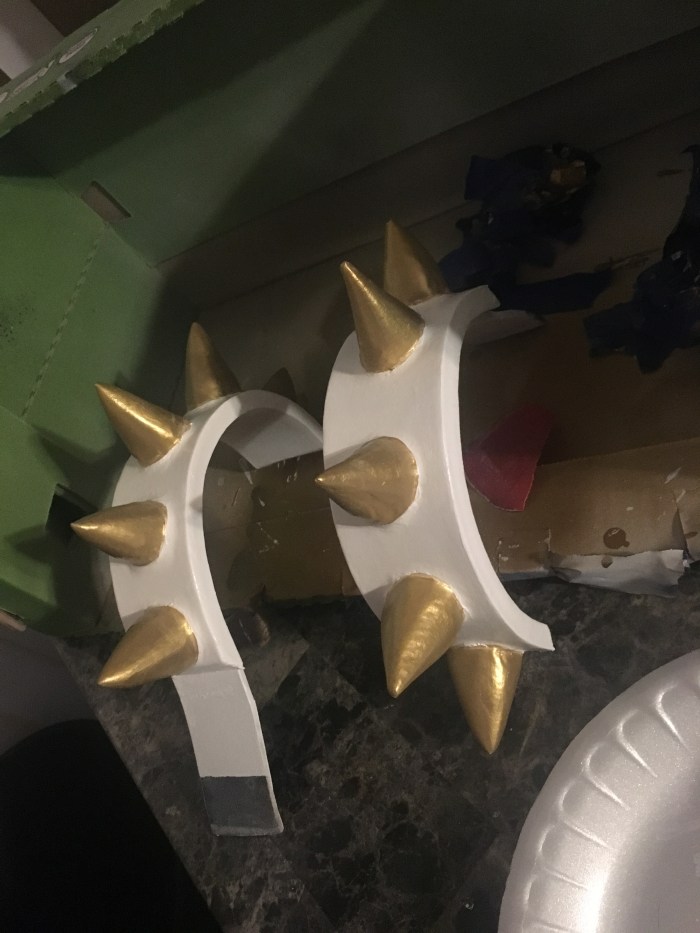
From there, I dremmeled and sanded down the edges until the spikes were more or less smooth all the way around. I filled in gaps with Kwik-Seal. Once that was complete, I attached the spikes to the base with contact cement, then used a 3mm foam sheet to attach industrial strength Velcro. To prep the bracelets, I used 3 layers of spray Plastidip, then set out to paint everything. I found that the gold Angelus paint worked wonderfully for the spikes, even if it did take forever to paint.
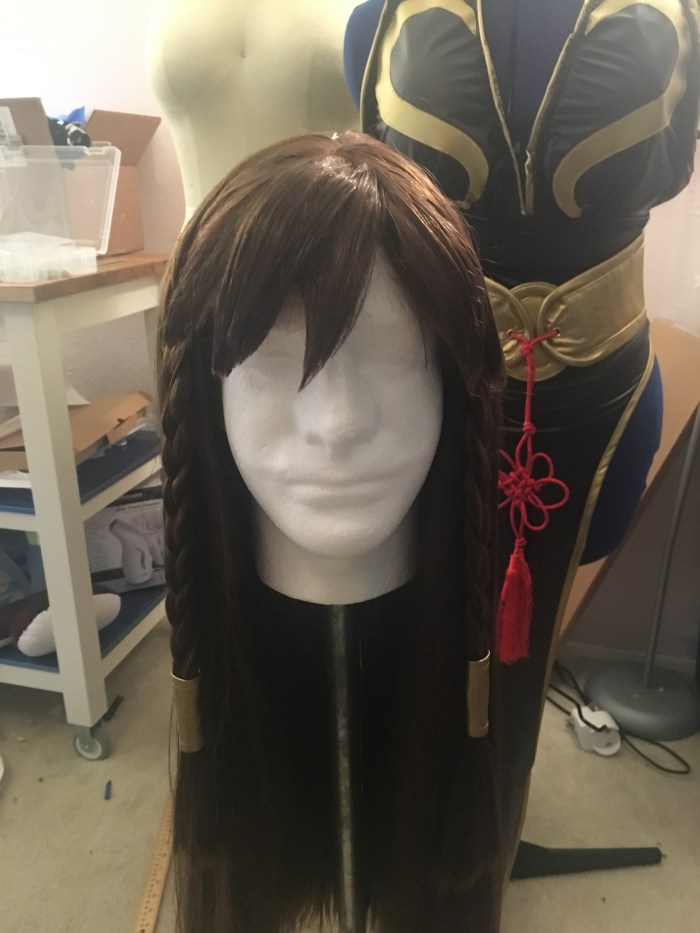
The wig was also a little outside my wheelhouse. I normally don’t offer wigs as part of commission packages, but I made an exception in this case since my client was local, had no hard deadline, and I wanted to push myself a bit outside of my comfort zone. I used a Jasmine in Spanish Brown from Arda wigs.
To start, I portioned out the side pieces as well as the bangs. I straightened out the rest of the wig and gave it a trim. From there, I braided the two side pieces and stitched up covers for the base out of leftover stretch gold vinyl. I hand stitched these closed around the base of the braids to prevent messiness while attaching them. To finish the wig, I lightly teased and heat formed the bangs, thanks to tips from my wiggy senpai Victoria Bane.
Thoughts on this Build:
I really enjoyed working on this build! Chun Li is one of my favorite Street Fighter characters, and I’m thrilled that someone finally asked me to work on her. It’s also reignited my desire to make a Chun Li for myself! I’m leaning towards classic Chun Li, but after making this one… I might have to make another for myself. One day…

Who’s your favorite Street Fighter character?

This came out fantastic! I can’t wait to see photos of your client rocking it!