Completed: February 2017
Hours Spent: About 40 hours
How I made it: I know, I know. ANOTHER FUKU. I keep promising myself/y’all that I’m going to cool it with these, but apparently they’re becoming one of my staples.
For a long time I told myself I wouldn’t take Super Moon commissions since I definitely prefer the gradient dyeing we did for Cosmic Coterie and lack an airbrush. However, my client was fine with the stripe approach from the 90s anime and I did a few other experiments with this build, which I’ll focus on today.

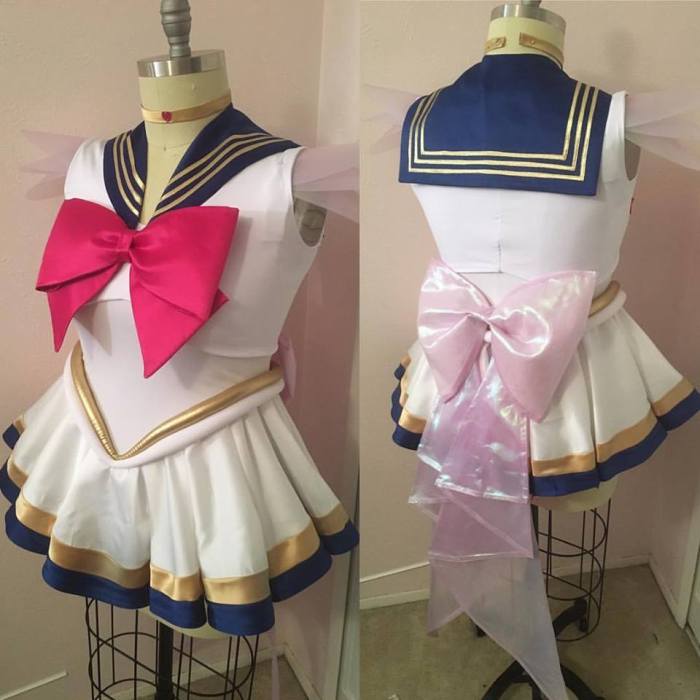
Let’s start with that pesky double hip roll again. I’ve made a couple of double hip rolls with upholstery piping, but I honestly am not in love with it. So I went back to upholstery foam and even further back to my Jupiter 1.0 days when I used Zan‘s pattern. I used her hip roll pattern piece for the front, and then tapered it down to almost 1/4 the original size. This gave me a chance to really control the depth of the taper and make it even (this is something that drove me crazy with our original group build). I know that Moon has a brooch that covers up the point of the V, but having messy work drives me batty, so I’m glad I was able to clean this up! The gold hip roll is 3/8″ smaller all around than the white one.
Both of the hip rolls are sewn into the seam. I basted the gold one about a half inch above my normal stitching line on the bodice to accommodate the clunkiness of both rolls. Once both hip rolls were in place, I then hand stitched the entire hip roll with a back stitch for durability, using my basting lines as a guide.
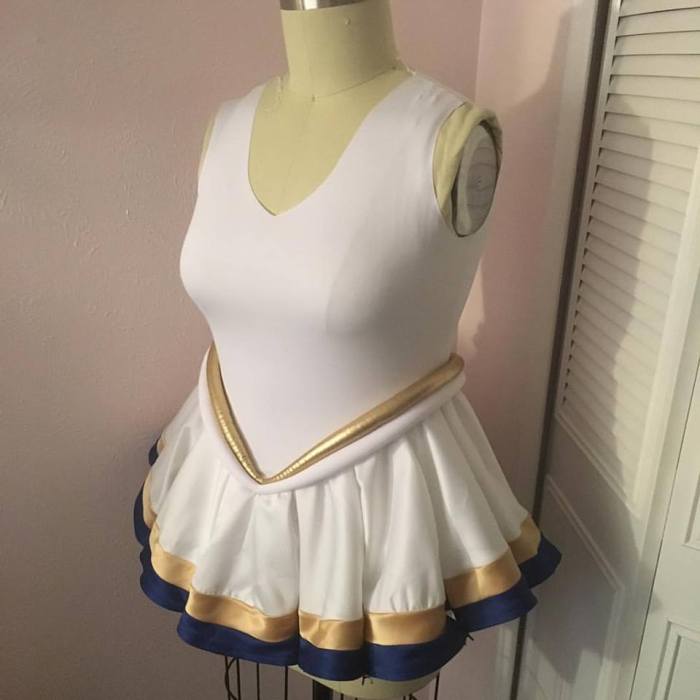
The skirt was a… special challenge. I wracked my head for weeks with this. My initial inclination was to level the skirt then cut off the portions I needed and use them as a template, but that would have required INSANE precision. Eventually I realized I was making it way too complicated and cut super long strips of fabric on the bias. I had originally ruled out continuous bias tape (so apparently this approach has a shit ton of names, because I was chatting with the girls and we realized that we were all talking about different techniques lol) because I didn’t want lots of seam lines showing, but I made sure that my seams were tucked into the folds of the pleats for the most part.

To create the sleeve petals, I cut a strip of Worbla (1″ wide X 10″ long), layered it on another strip, and heat formed it over my dress form. Once it cooled, I glued each layer of the Mylar/Organza petals one at a time with e6000. I let each layer get to the point that it was dry to touch before I added on a new layer. Once all 3 layers were attached and mostly dry, I glued a strip of Velcro on top and fleece on the bottom to make it slightly more comfortable. There’s a matching piece of Velcro on the lining of the chest armor to keep it in place. Credit for this idea goes to MASK Props. I love how he did the sleeves for PockyPants‘s Chibi Moon!

The last major change I made on this fuku was on the butt bow. I used my trusty Pellon 808 interfacing instead of vinyl and like it a lot better. I hate that the bow isn’t transparent, but it holds its shape much better with interfacing versus vinyl.
That about covers this fuku! You can find more details on my other fukus here, and tutorials on how to make a Cosmic Coterie style fuku here.
What’s your favorite version of Sailor Moon?
